Caution
Always use nitrile gloves when handling uncured resin.
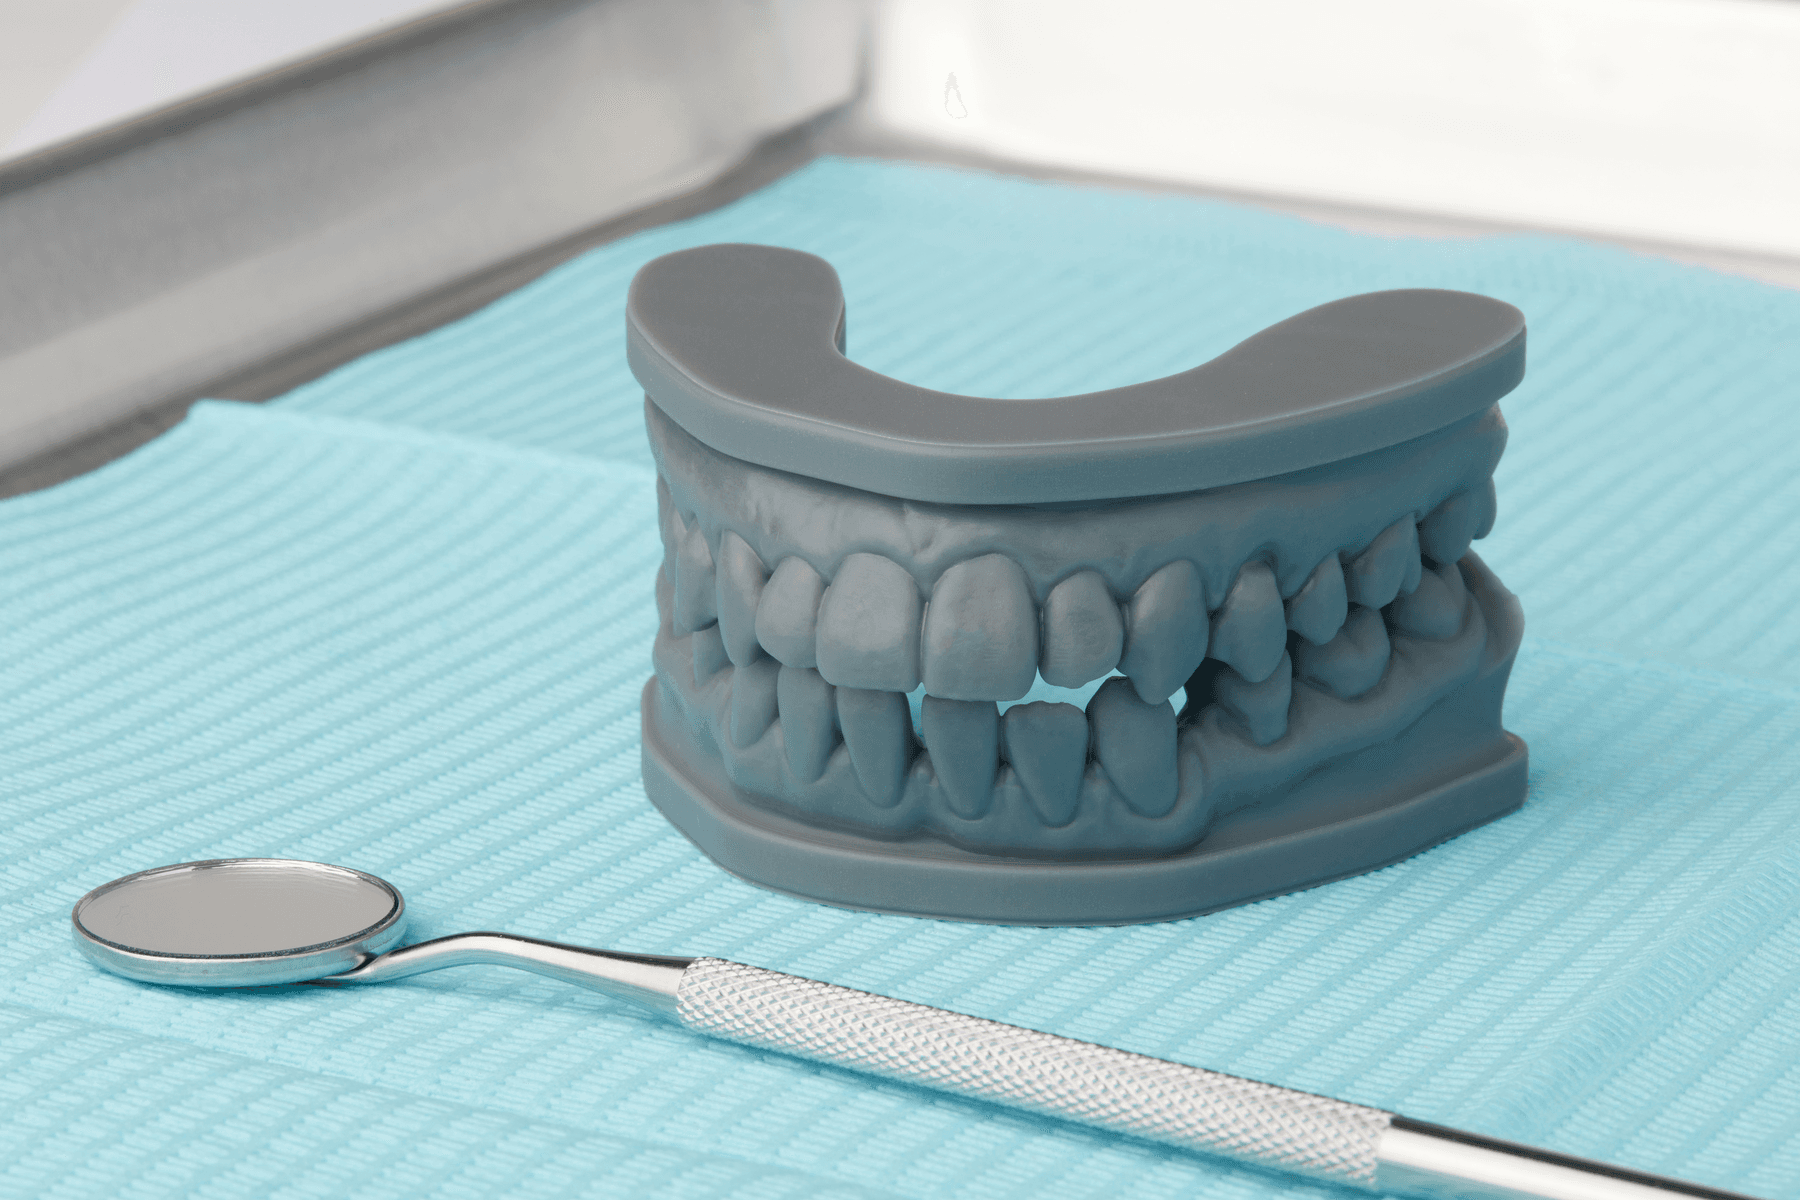
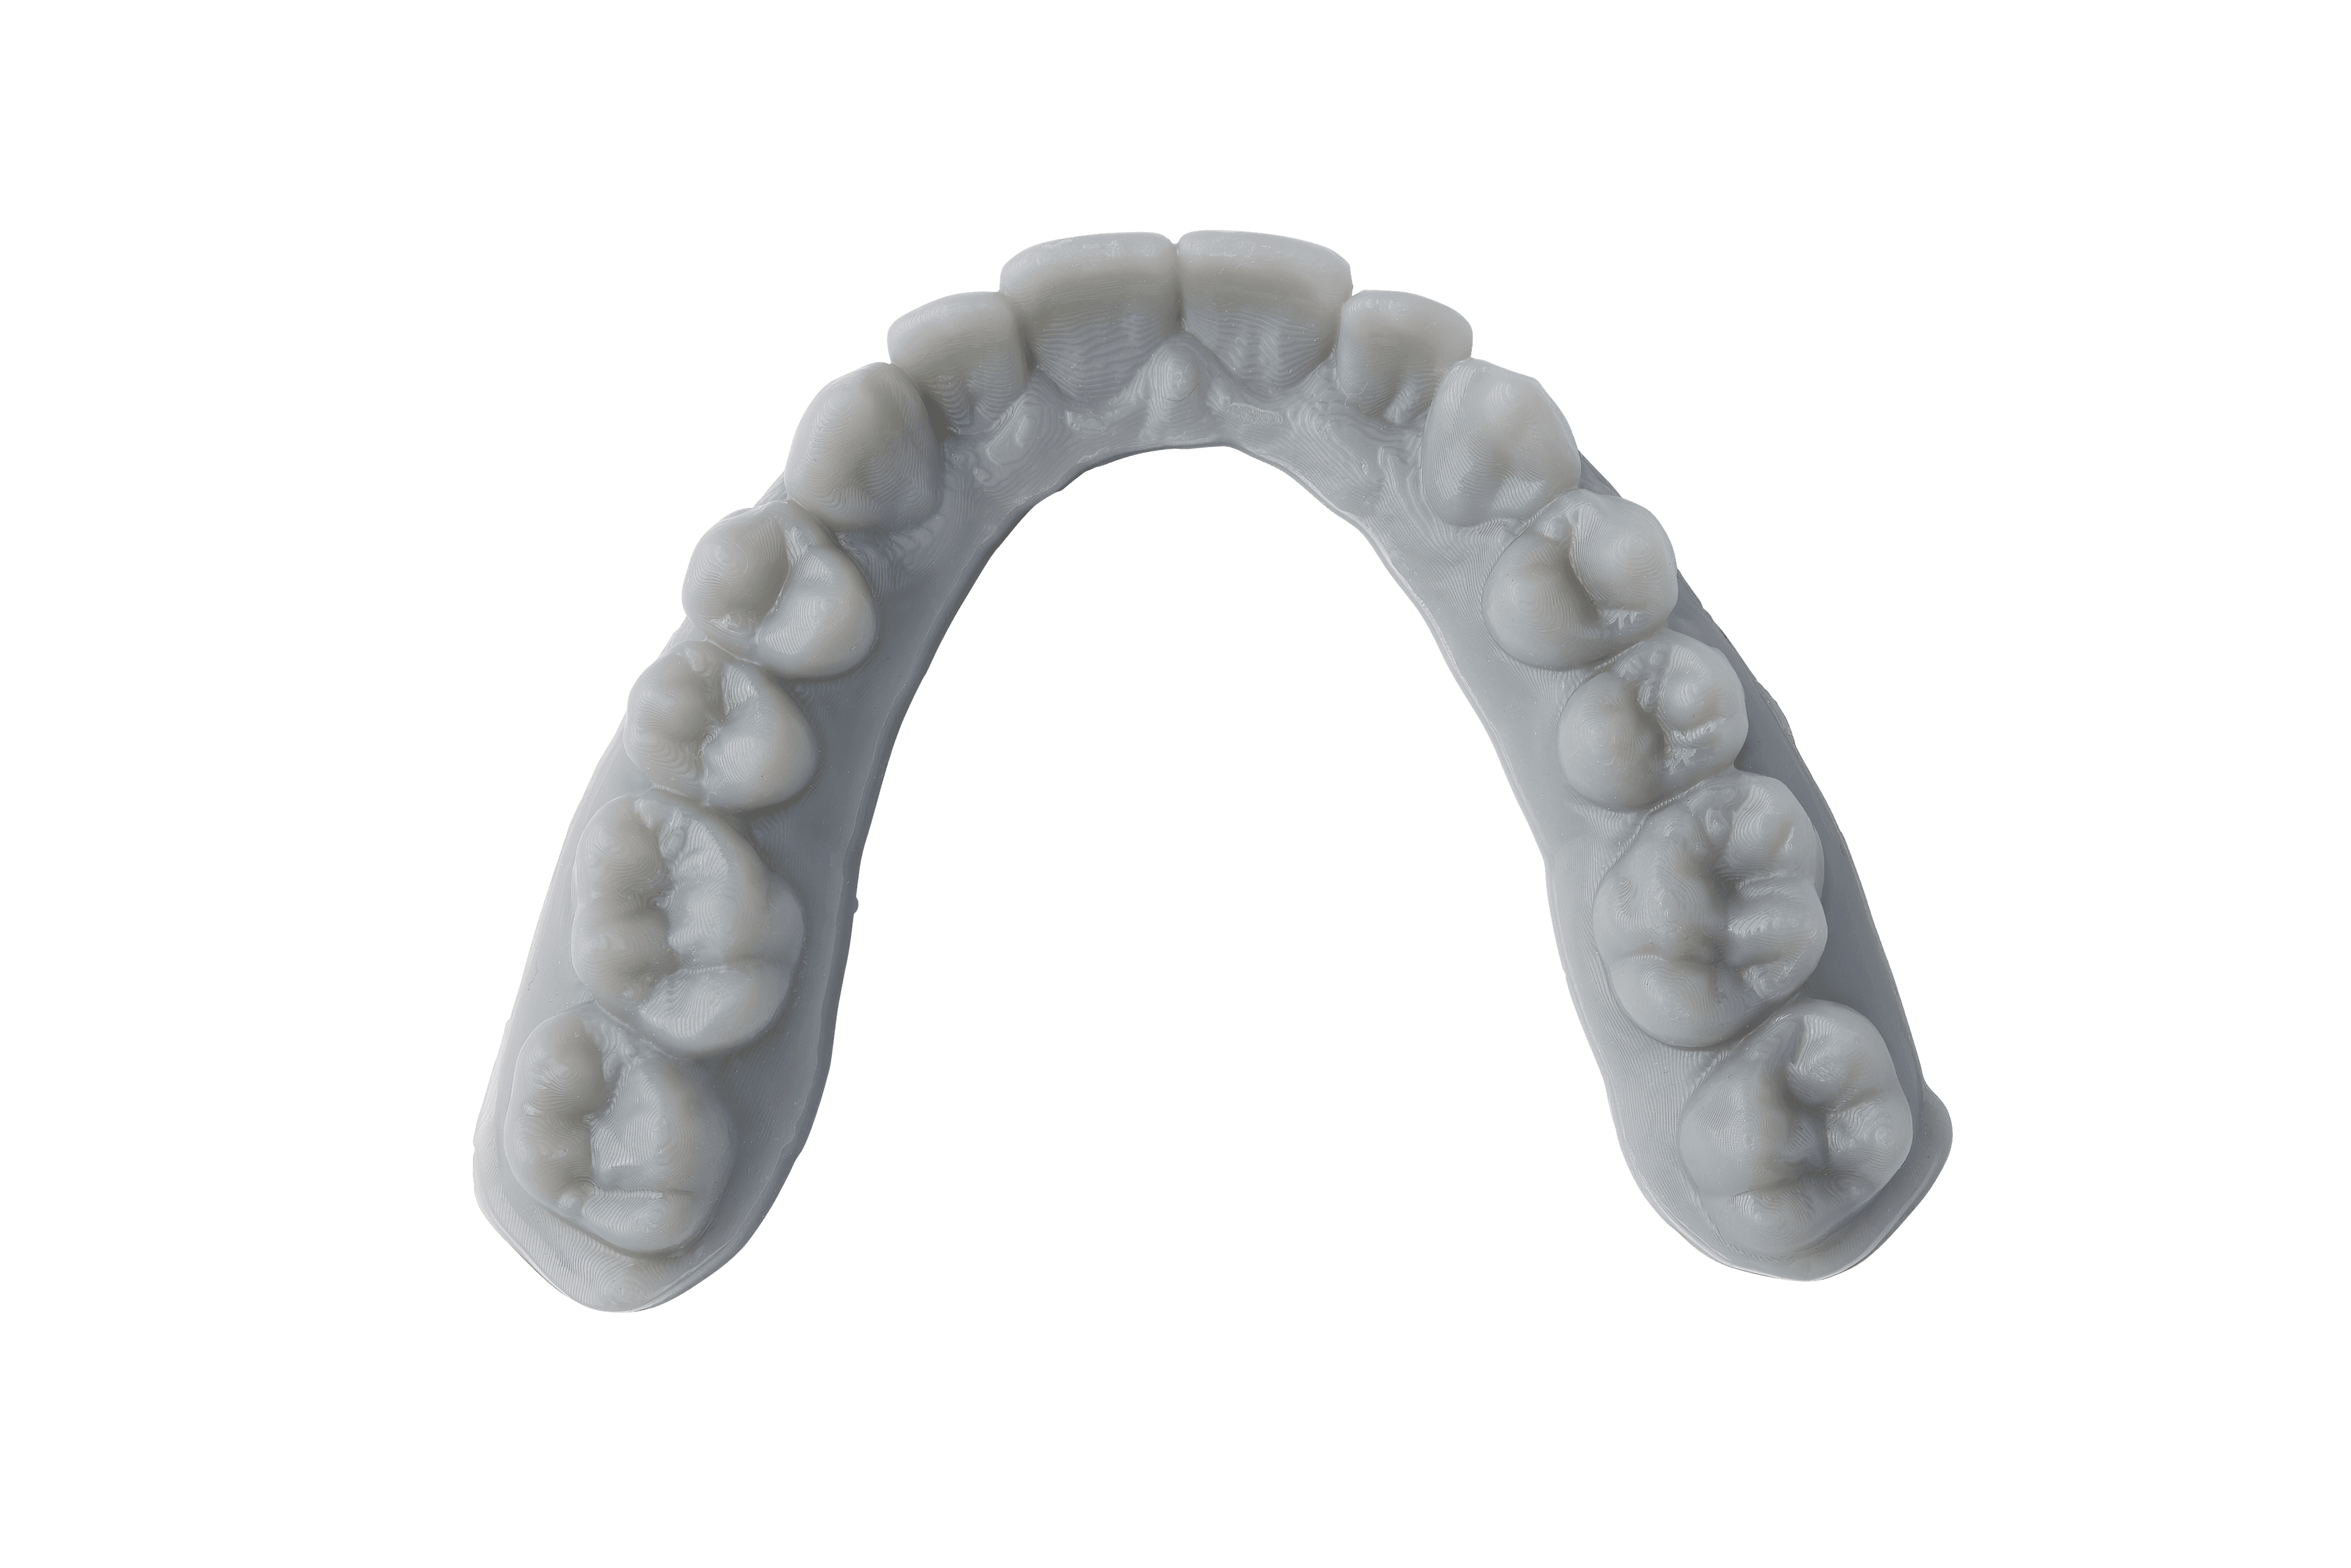
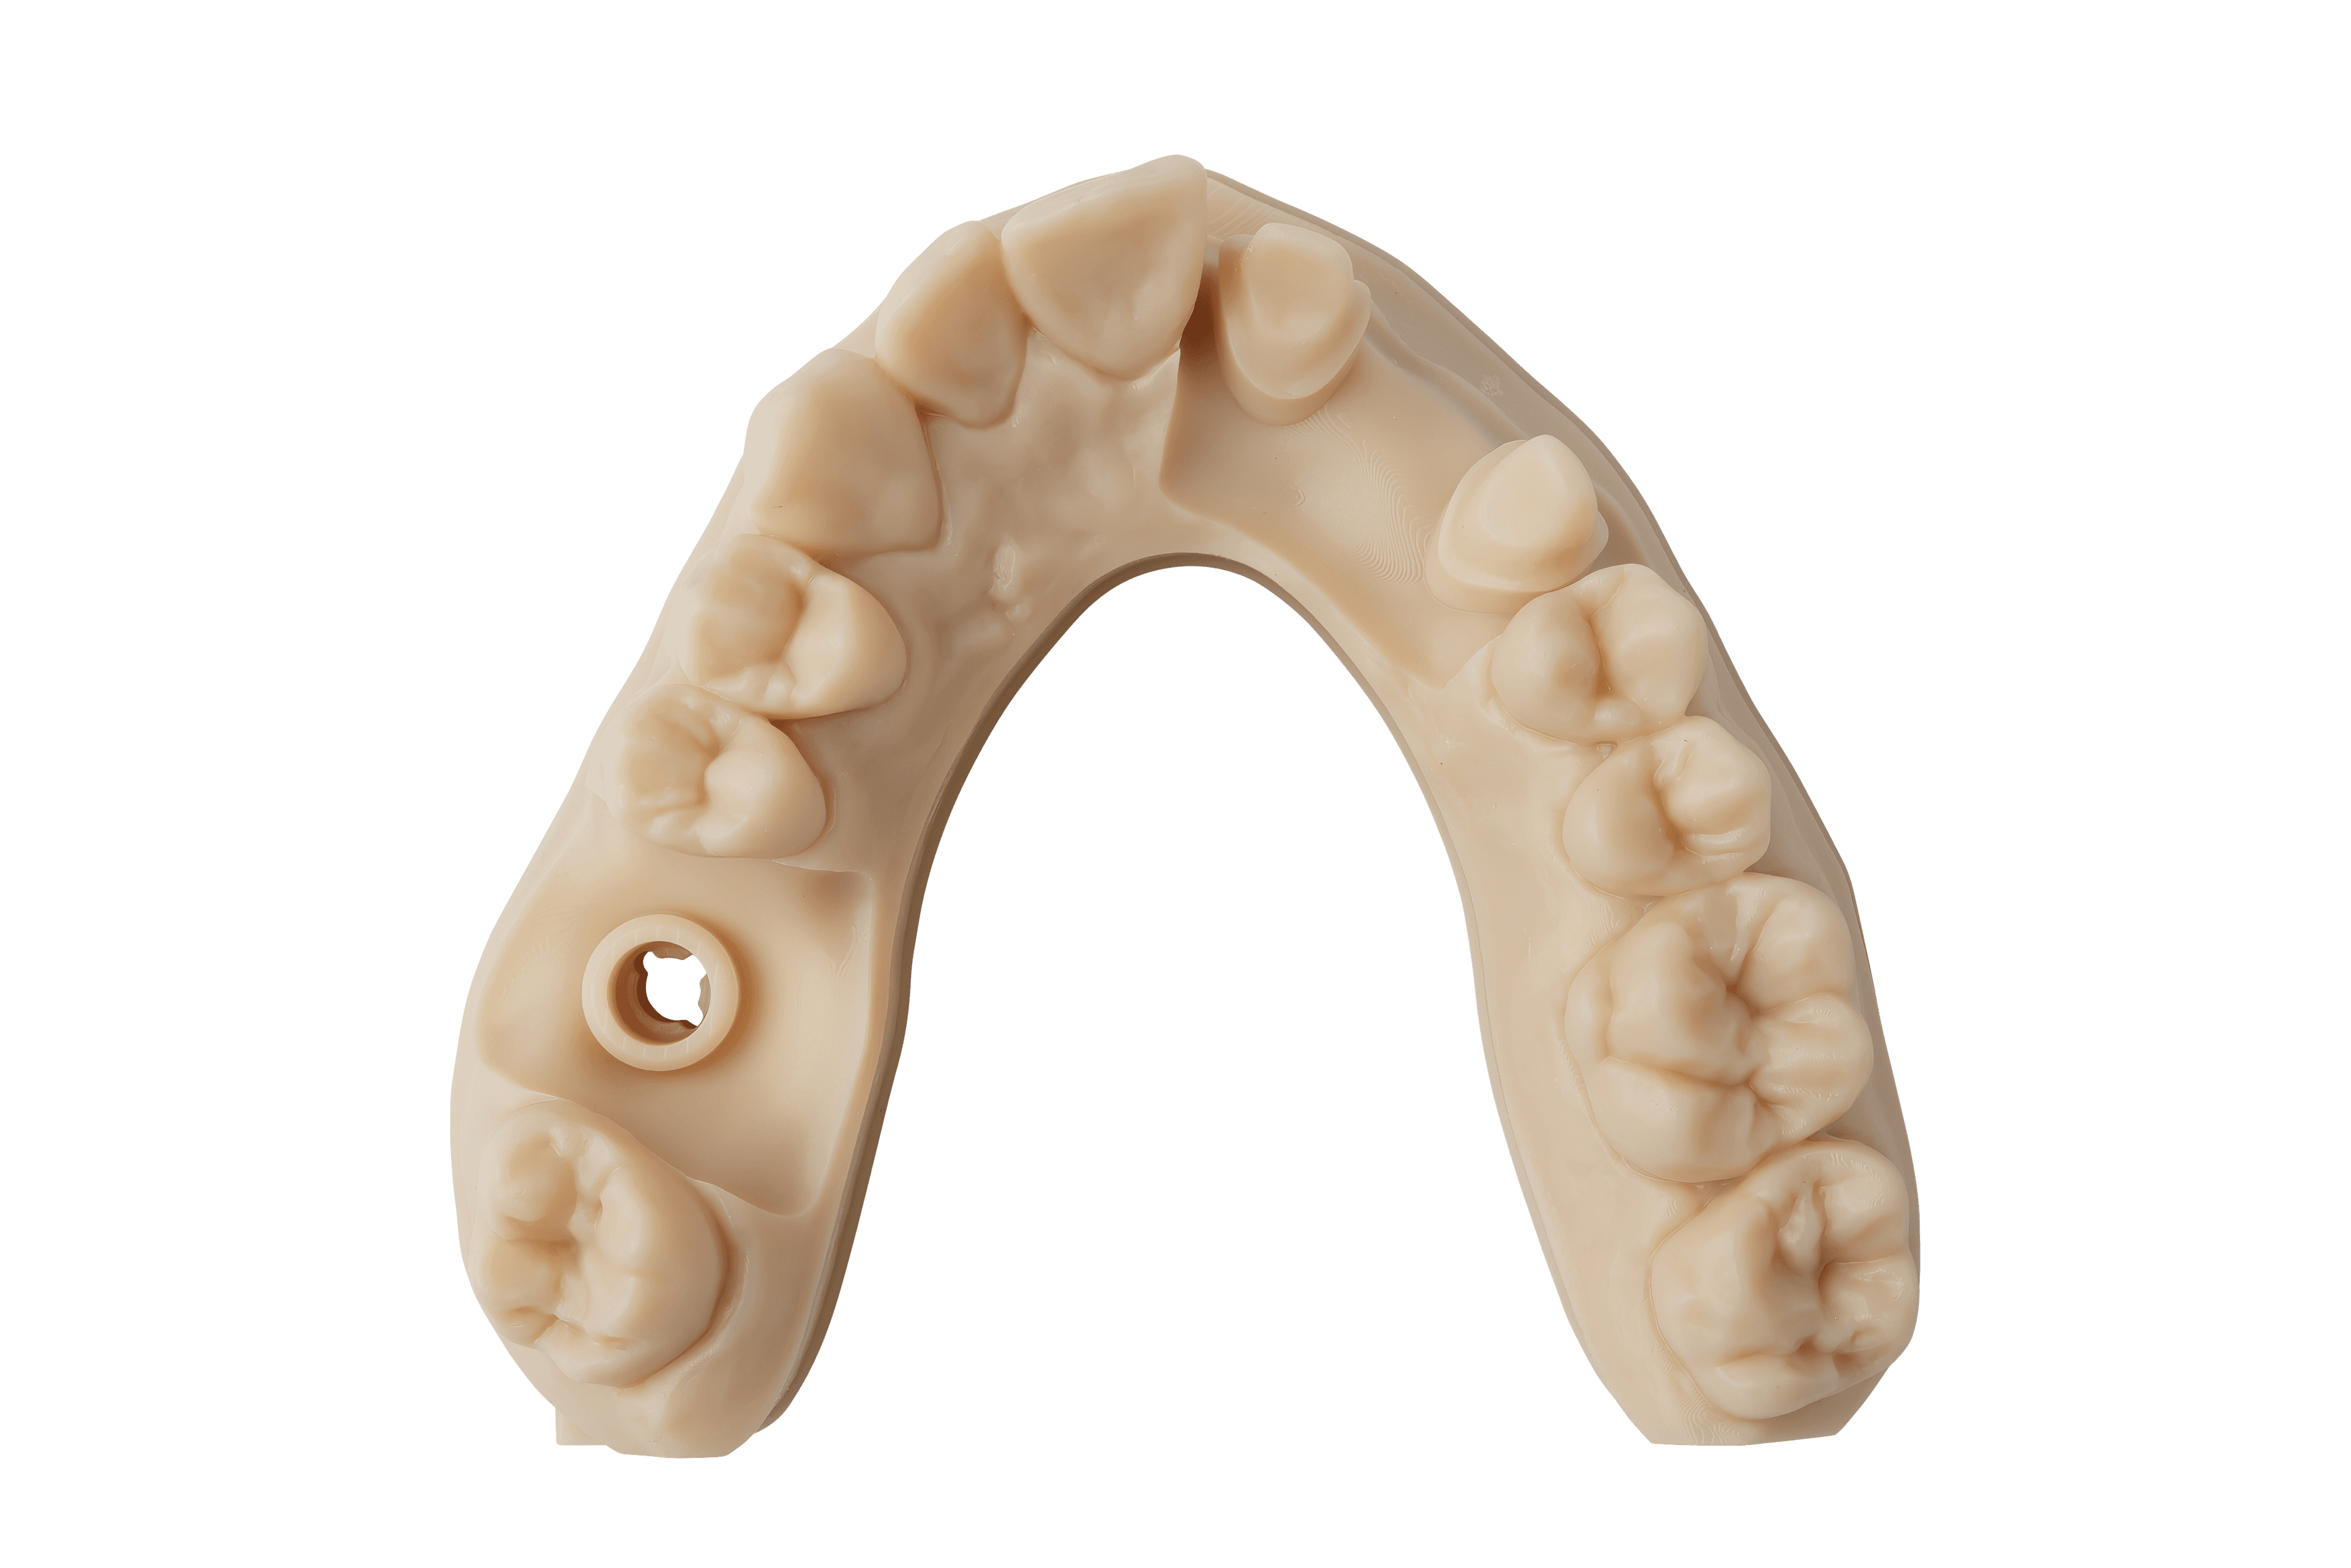
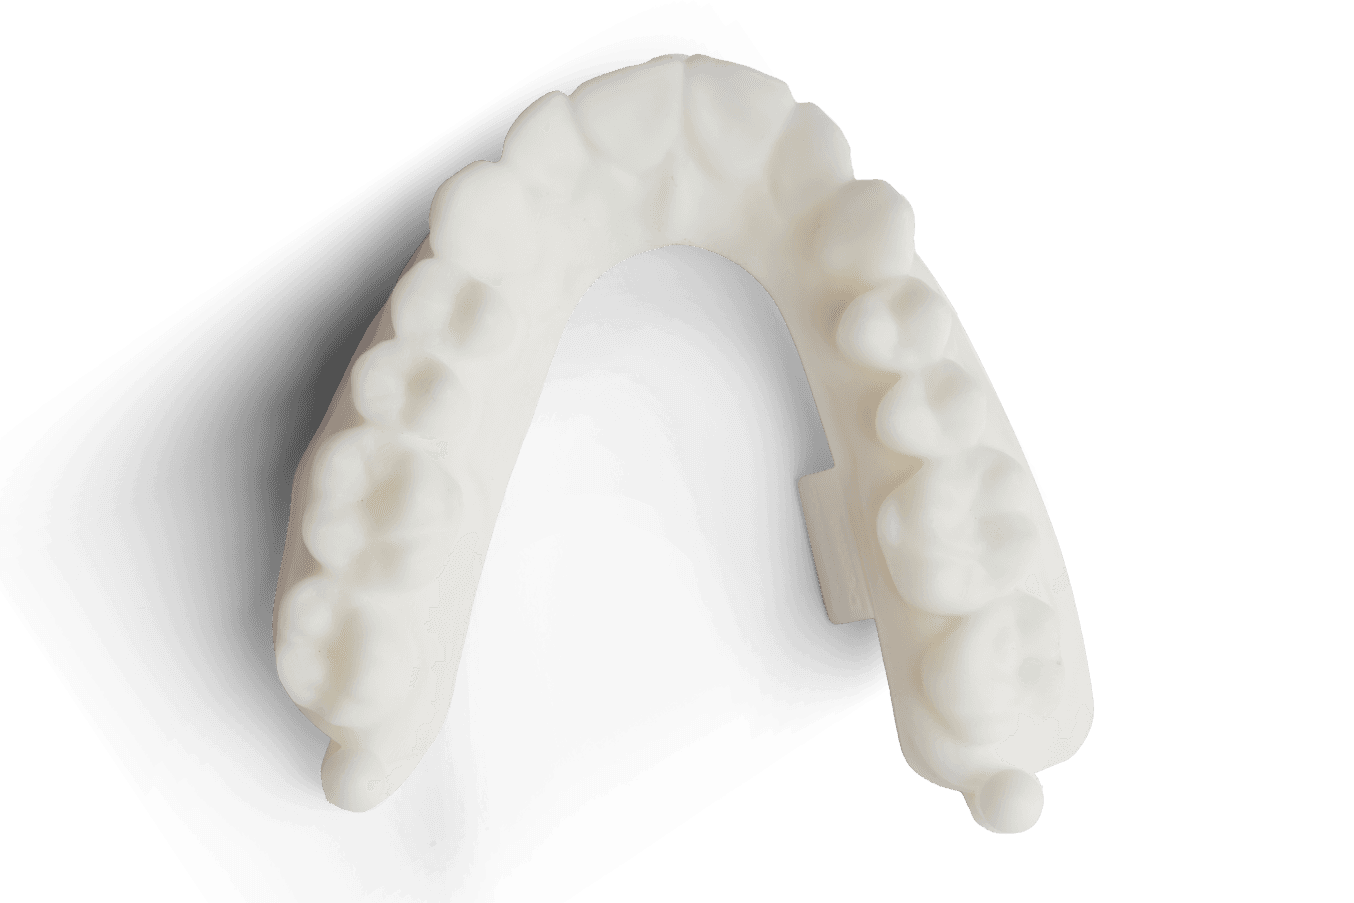
Simple diagnostic models can be used for visualizing patient anatomy, case planning, presentation, and more. With PreForm’s Scan to Model feature, there’s no need for a standalone dental design software — you can turn digital impressions directly into diagnostic models for printing on Formlabs 3D printers.
Formlabs offers multiple material options which have all been validated to produce accurate dental models. Use Fast Model Resin for fast printing, Precision Model Resin for stone-colored models, or White Resin for bright white models.
Essentials
Required Hardware and Materials
Made by Formlabs:
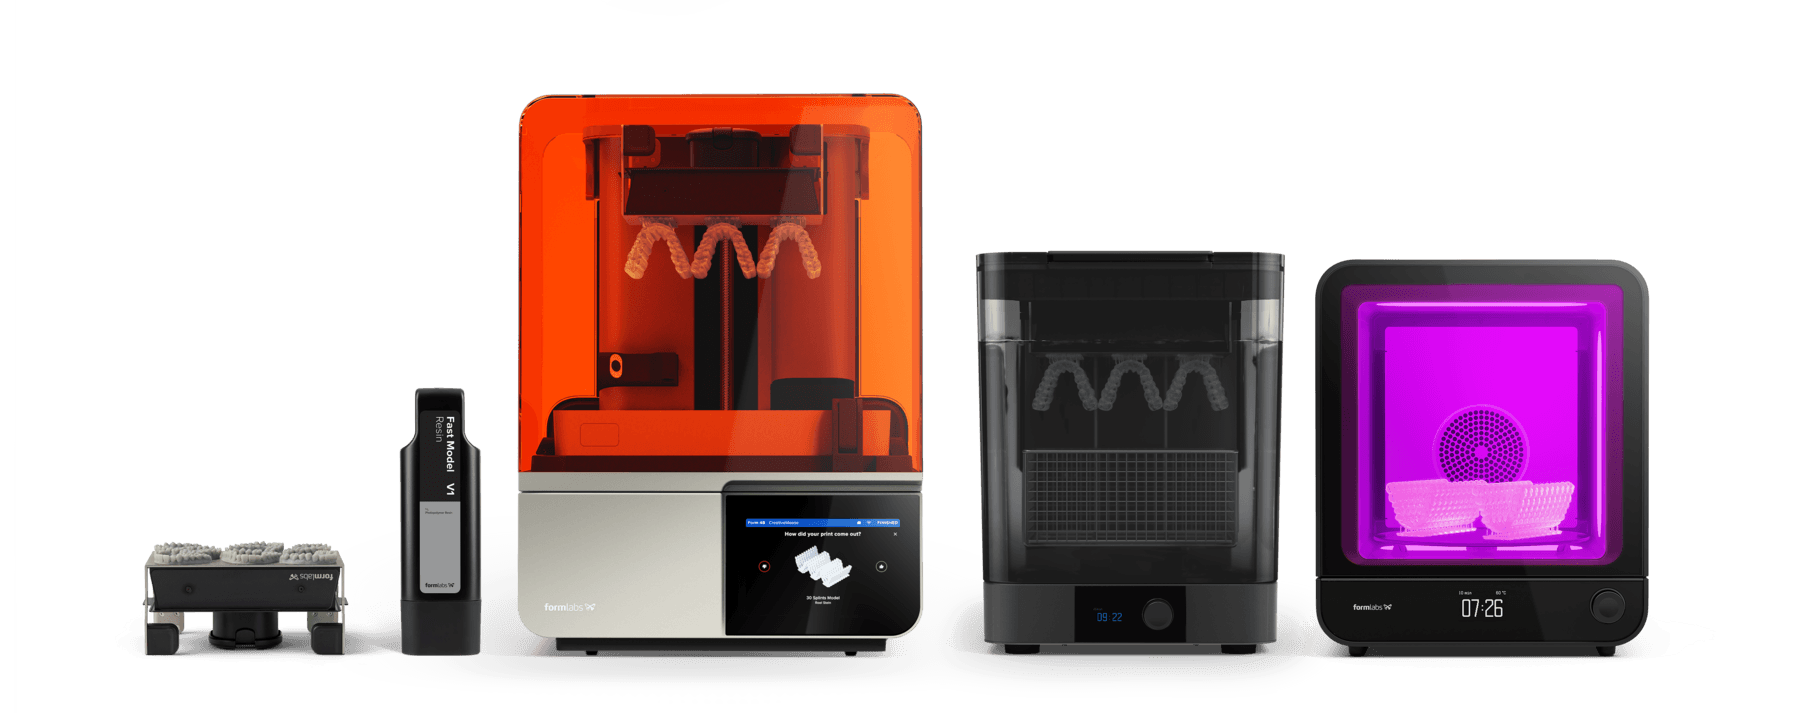
Formlabs SLA 3D printer with a compatible Resin Tank and Build Platform
Fast Model Resin, Precision Model Resin, or White Resin
Form Wash or Finish Kit
Form Cure
Made by Third Parties:
3D intraoral scanner
Isopropyl alcohol (IPA) >90% or Formlabs Resin Washing Solution
Part removal tools
Required Software
Made by Formlabs
Latest PreForm Dental and Firmware versions
1. Scan
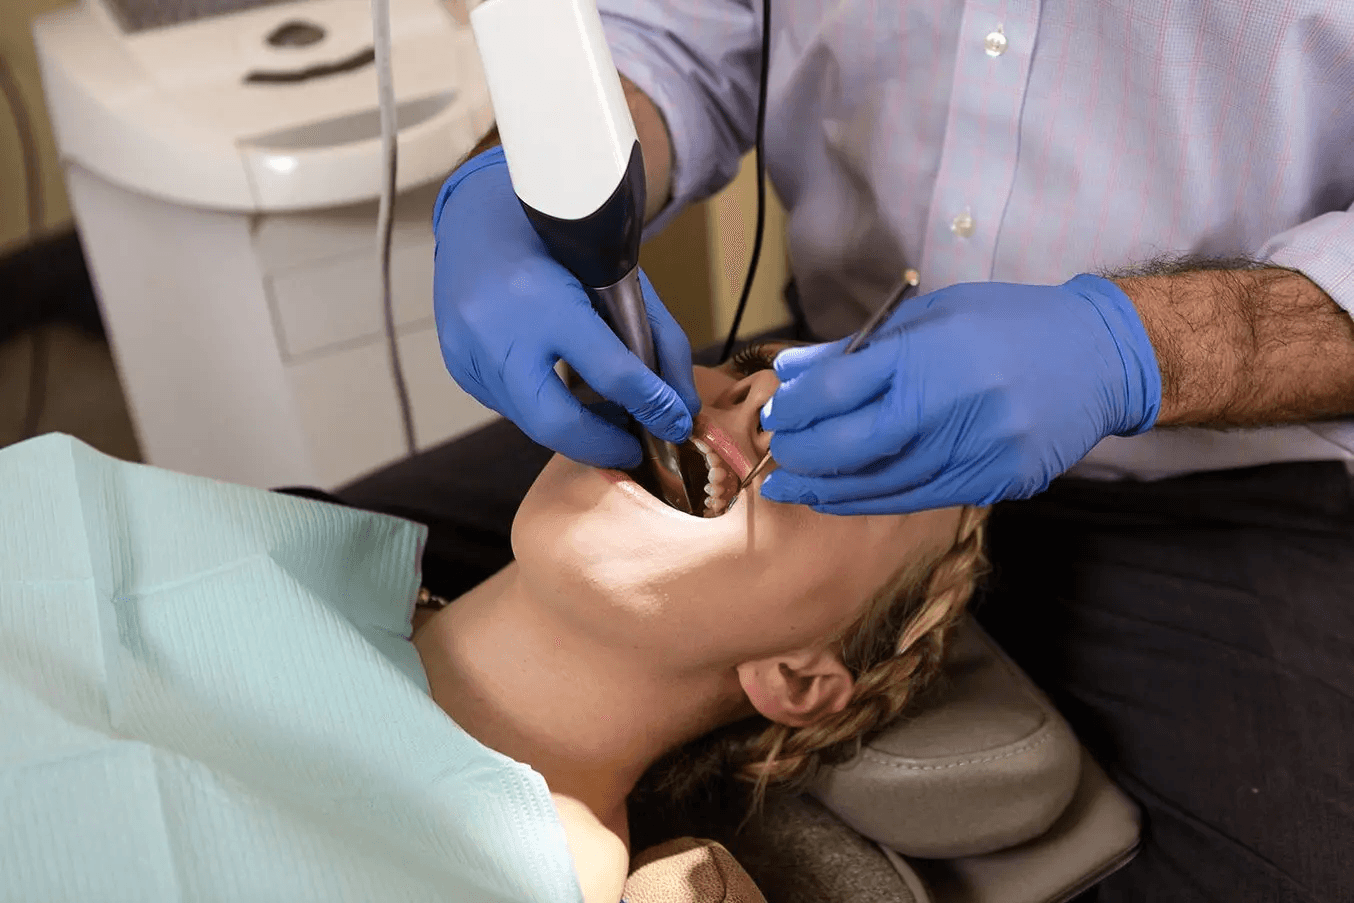
A digital impression is the starting point for every dental 3D print. The fastest and simplest method to obtain this data is by using a 3D intraoral scanner. Formlabs PreForm software is compatible with any scanner capable of exporting the scan as a STL file.
Without a 3D intraoral scanner, a physical impression or plaster model can be scanned with a desktop 3D scanner.
Regardless of the scanner type used, ensure the case scans are exported in STL or OBJ format.
2. Design
Note
If you are new to PreForm software, please refer to this playlist on our YouTube channel.
2.1 PreForm Scan to Model
PreForm Dental’s Scan to Model feature eliminates the need for separate dental design software, allowing you to design diagnostic models directly within PreForm. It is important to choose the dental workspace, since in the standard workspace you will not have access to the Scan to Model feature. Switching to the dental workspace is shown below.
Note
The Scan to Model feature is only available on printers that have been optimized for dental materials, like the Form 4B, Form 3B/+, Form 4BL, etc.
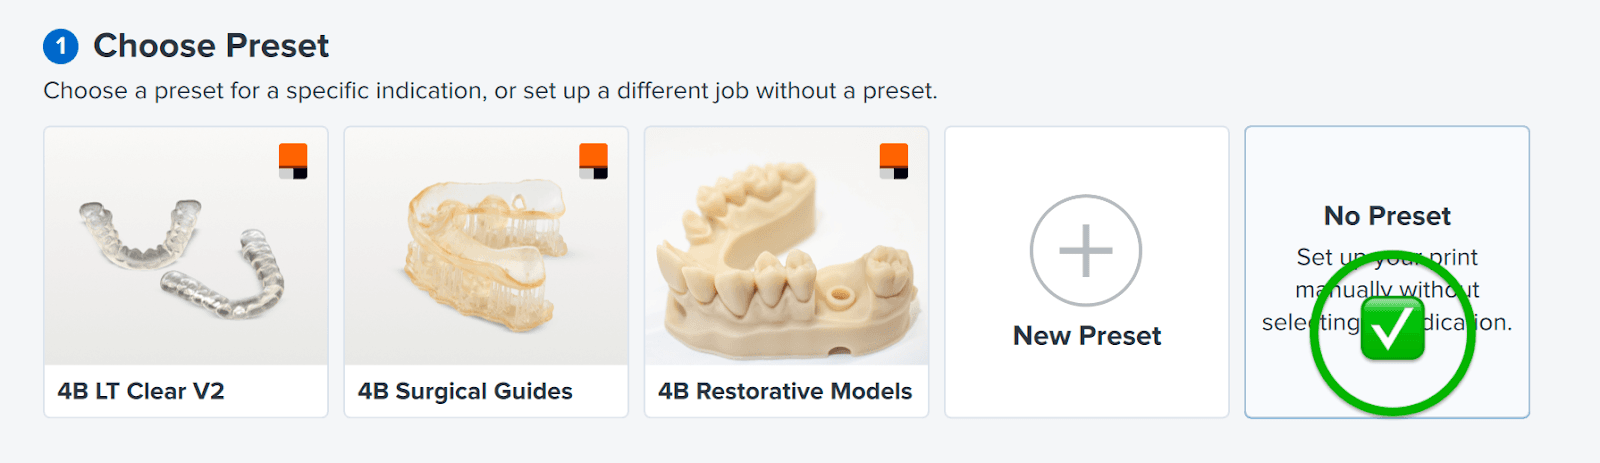
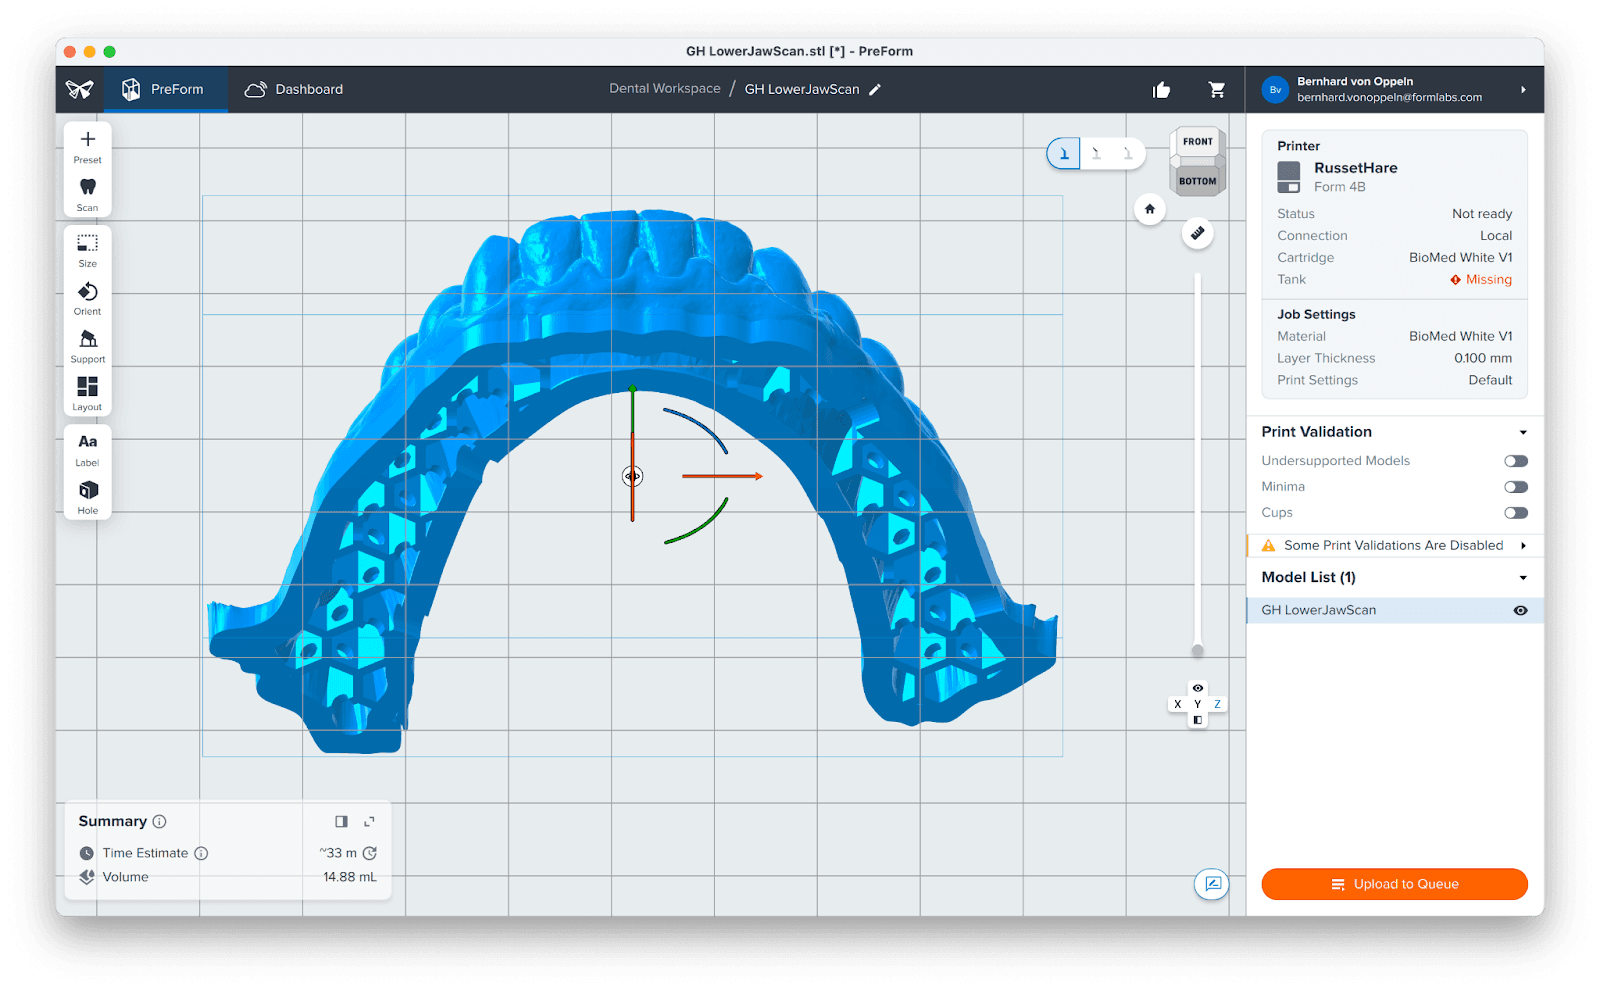
2.2 Job Setup
Open PreForm Dental and select your
Printer (1)
Material (2)
Layer height (3)
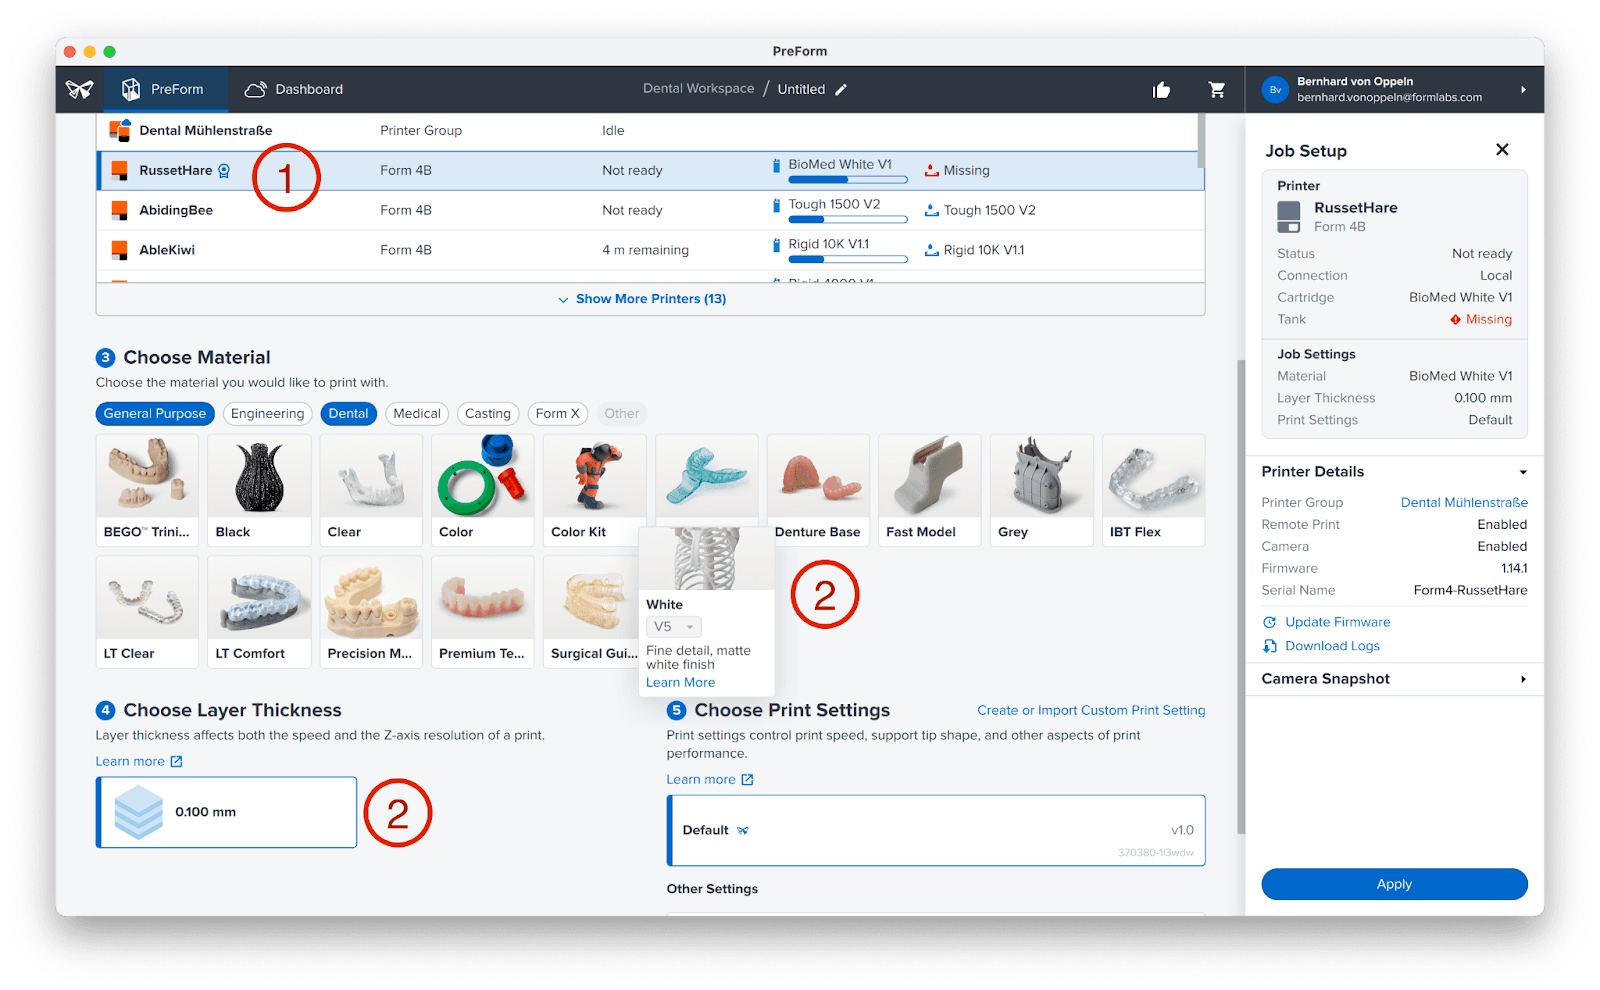
We recommend selecting a layer height that optimizes your print time and material consumption while delivering the required detail. In general, a lower layer thickness will result in models with a better surface finish, but it will increase the print time. For simple diagnostic models that are not used for any specific appliance production, 0.1 mm or higher is a good choice.
Note
Do not select a preset, as presets are not designed for raw intraoral scans.
We recommend choosing one of the following resins:
Fast Model Resin
Fast and accurate, ideal for orthodontic models
Precision Model Resin
Plaster-like high-accuracy models
White or Grey Resin
Impressive bright white or simple grey models for patient presentations
2.3 Import Scan
If using the PreForm Dental workspace with a compatible printer selected, the Scan to Model icon will be present at the left of the screen.
Click the Tooth Icon (1) in the left menu to open Scan to Model.
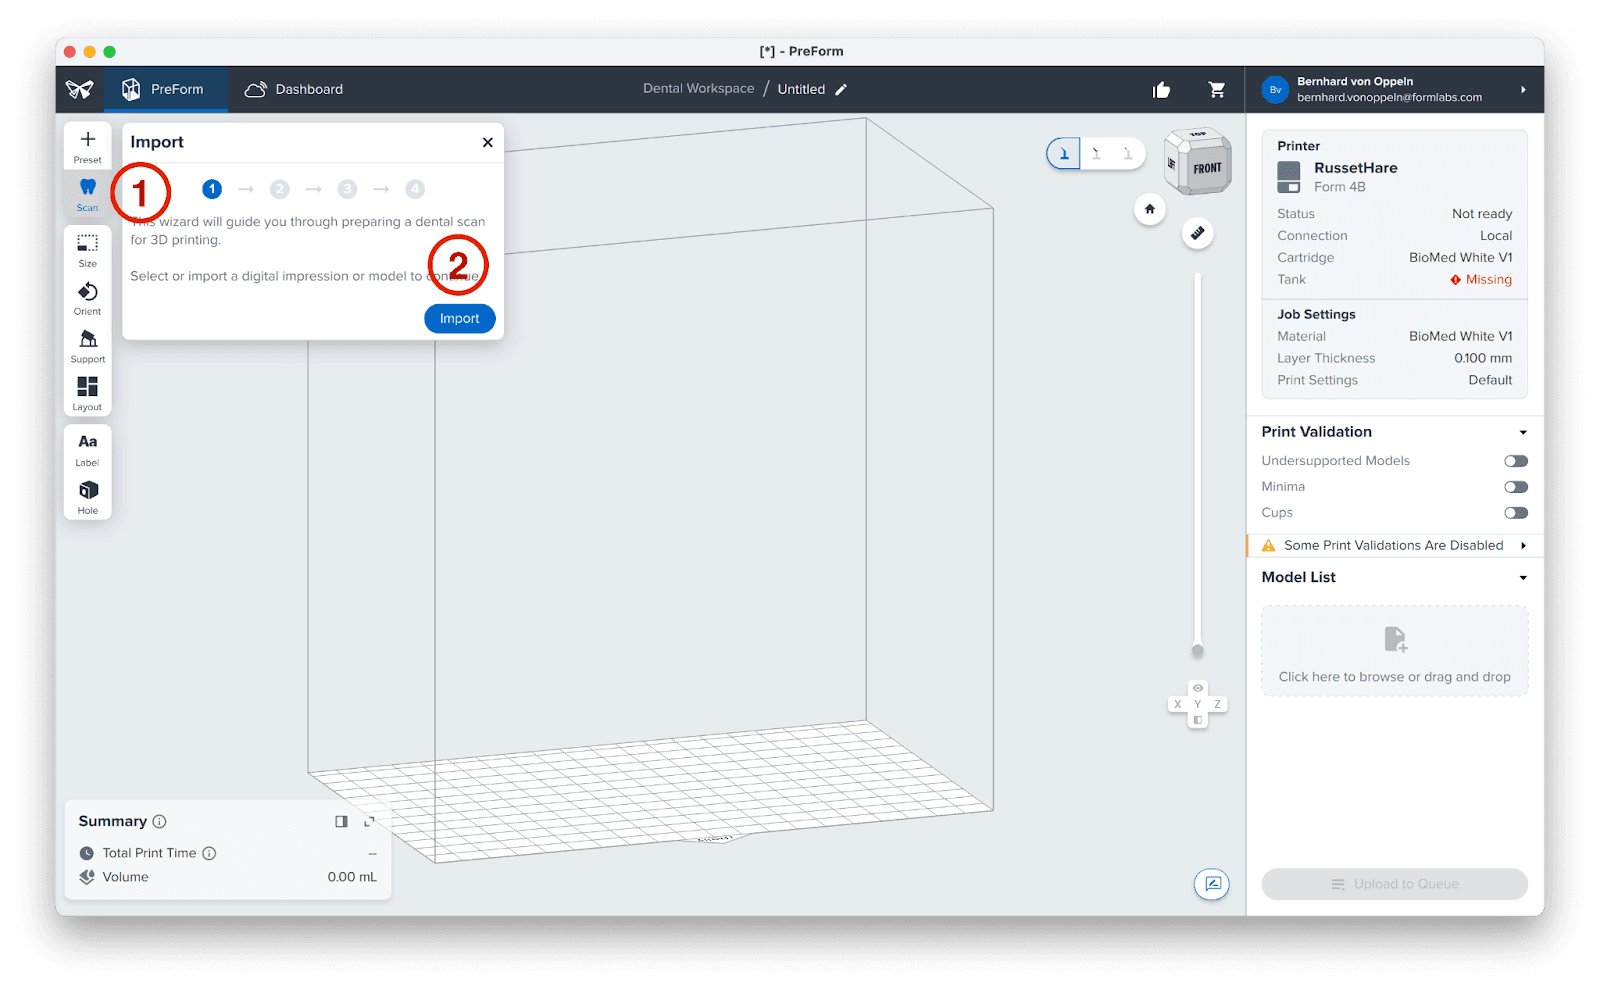
Click the Import button (2).
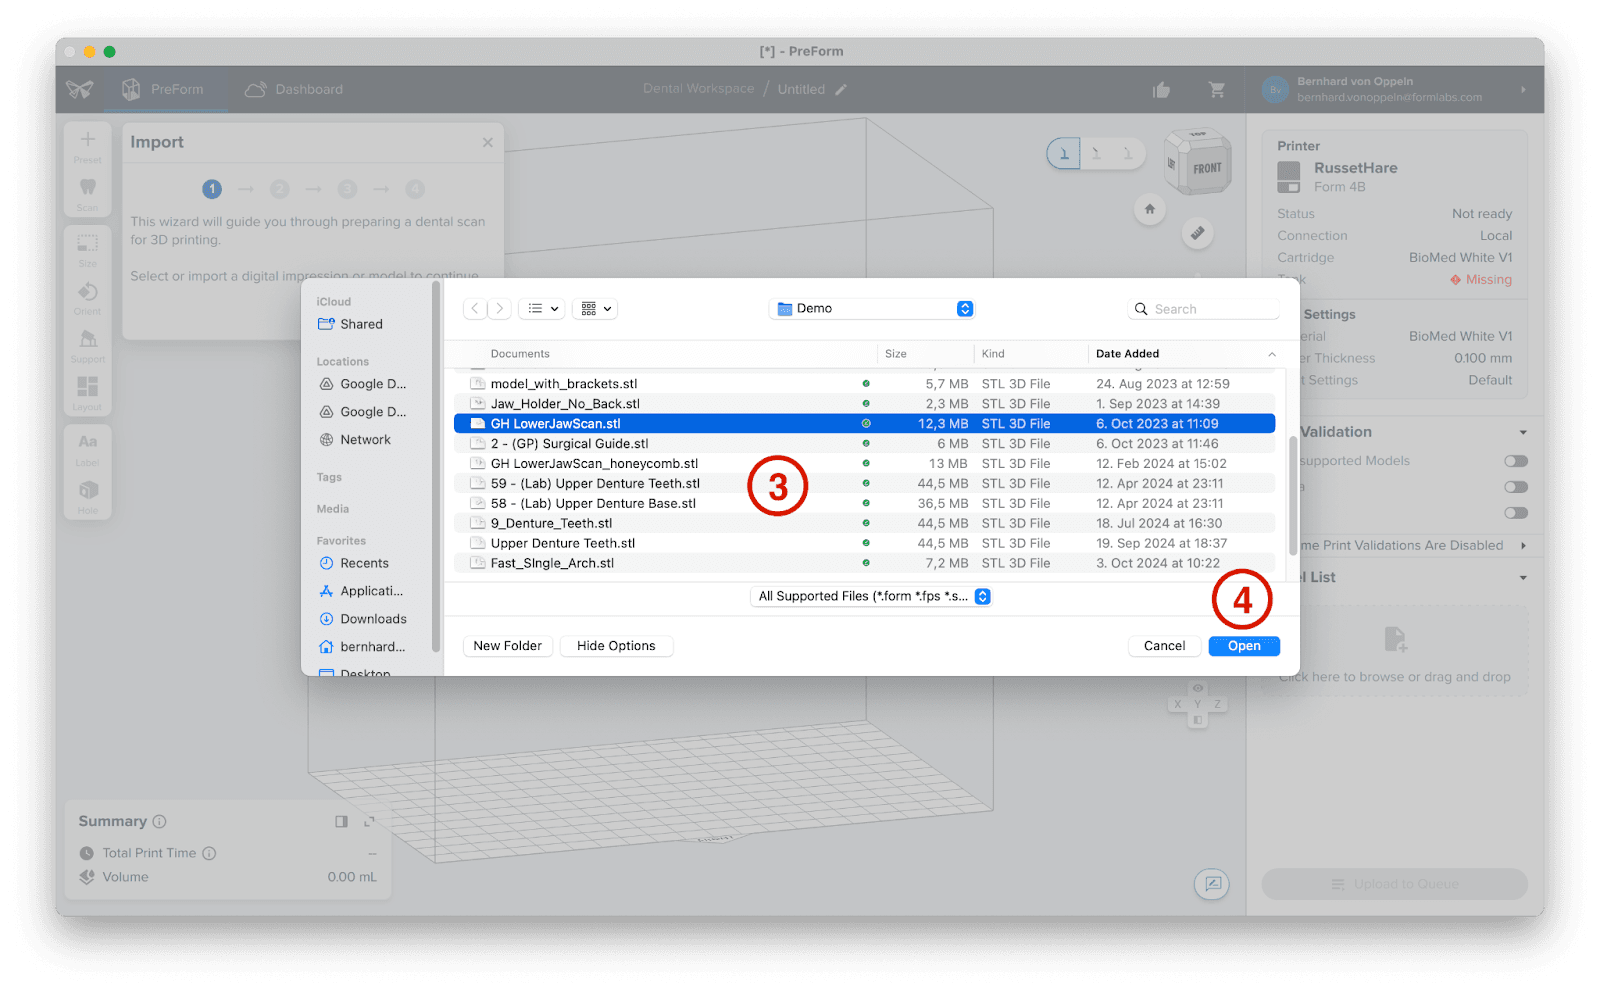
Locate the file (STL) on your computer or network (3), then click Open (4).
2.4 Scan Alignment
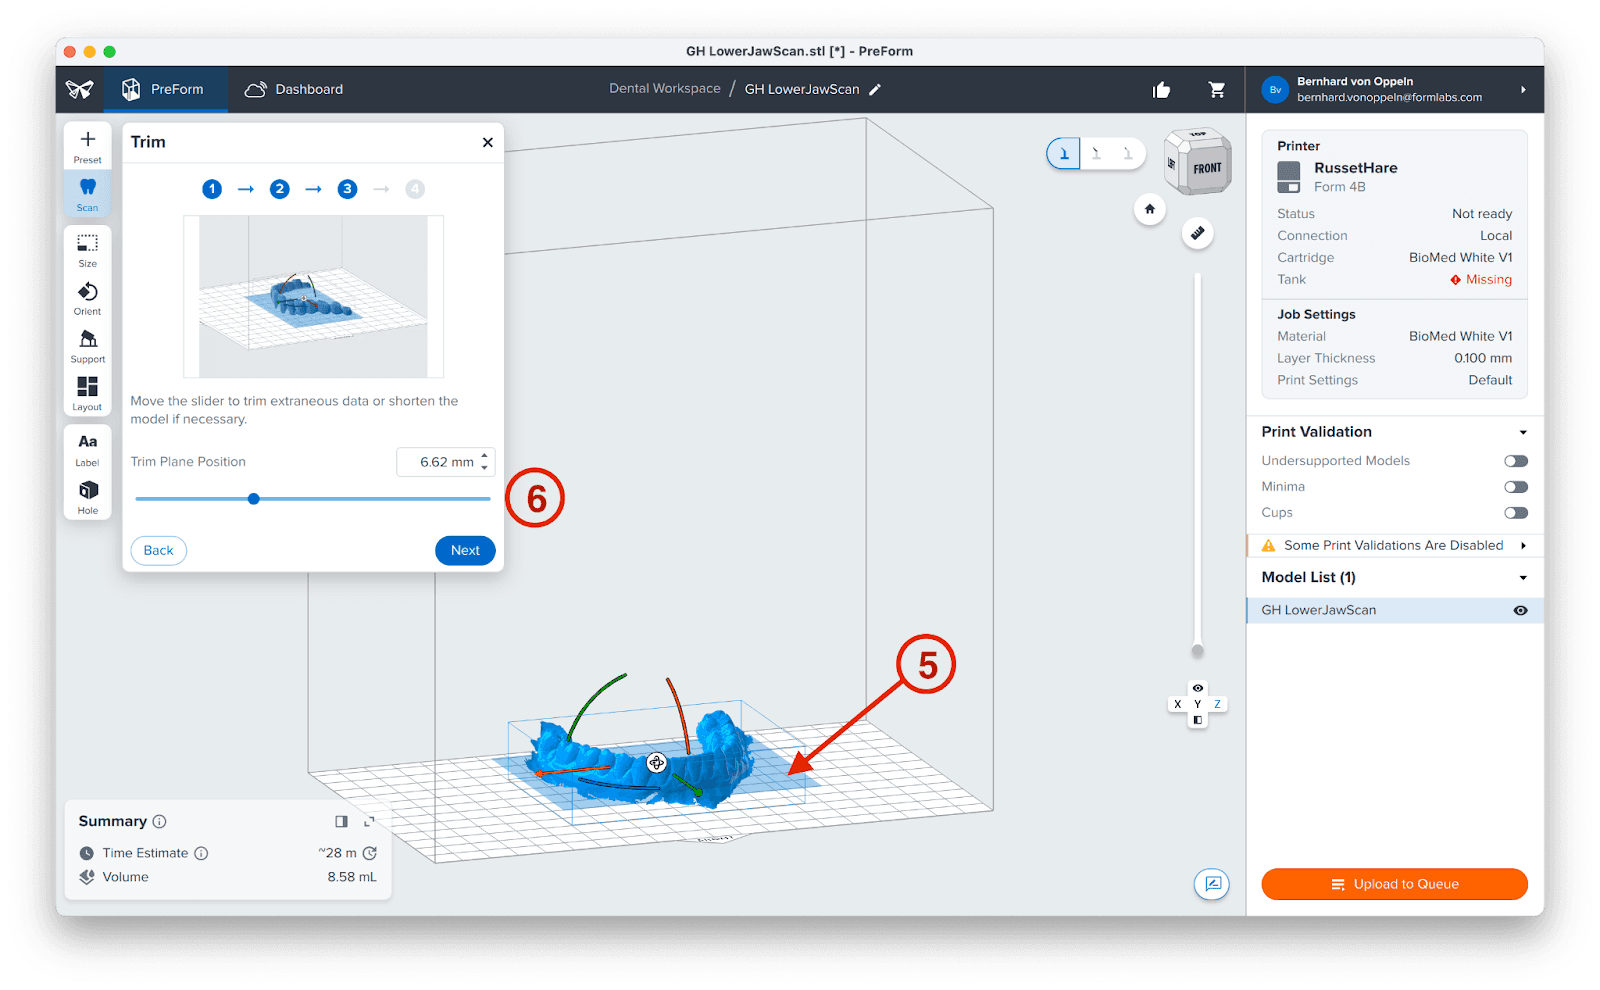
In the Scan to Model workflow, clicking Next automatically aligns the mesh to the build plate, with the teeth facing away from it. A blue cutting plane (5), initially located approximately 3 mm below the lowest point of the scanned teeth on the gingiva, will appear and can be adjusted as necessary by using the slider (6). Leave it as is and click Next.
2.5 Create Base
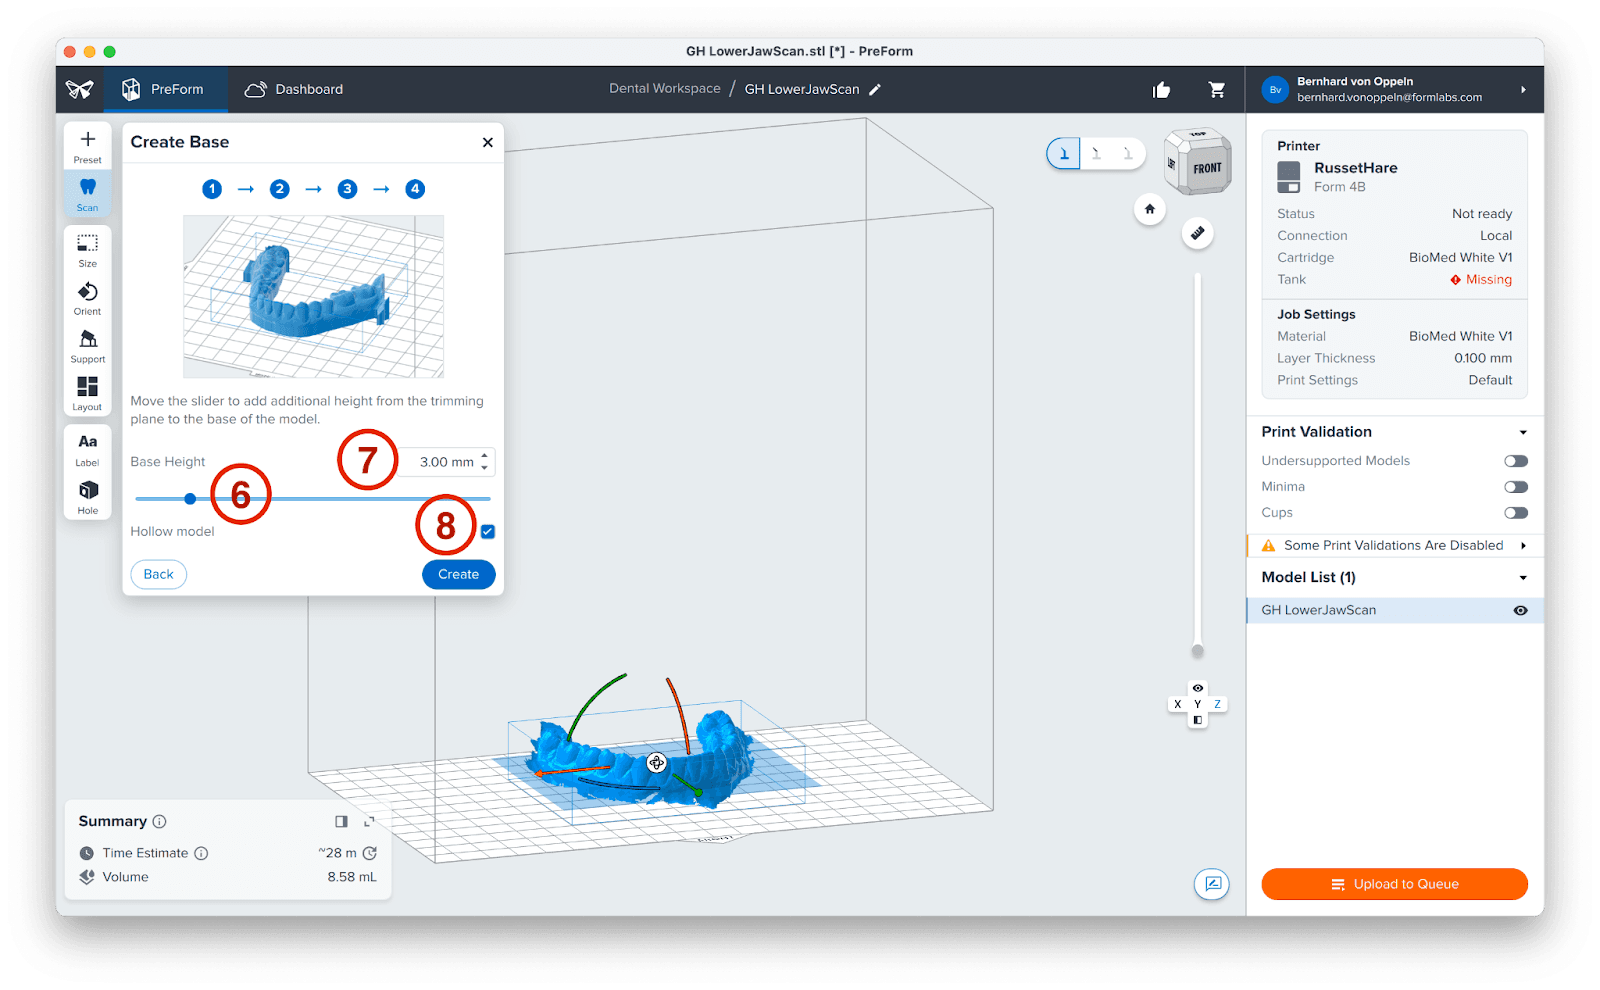
To improve stability and prevent breakage when removing models, particularly those with narrower structures like a lower jaw, from the build plate, we recommend adjusting the slider (6). Moving the slider to 3 mm (7) will add an additional 3 mm of material beneath the cutting plane, creating a more robust base for your model. If the slider position remains unchanged, all material below the cutting plane will be removed.
Optional: Additionally, you can check the box for Hollow model (8) to automatically generate a hollow model with drain holes and a honeycomb structure.
Click Create to generate the model in a few seconds. This workflow supports multiple scans simultaneously, though individual adjustment of model bases is still required.
3. Print
We recommend leaving the model flat on the build plate for stability, decreased print time, and reduced resin consumption. Then, click Print Now. If your printer is not ready to print, the button will change to Upload to Queue, and printing will start once you have prepared your printer.
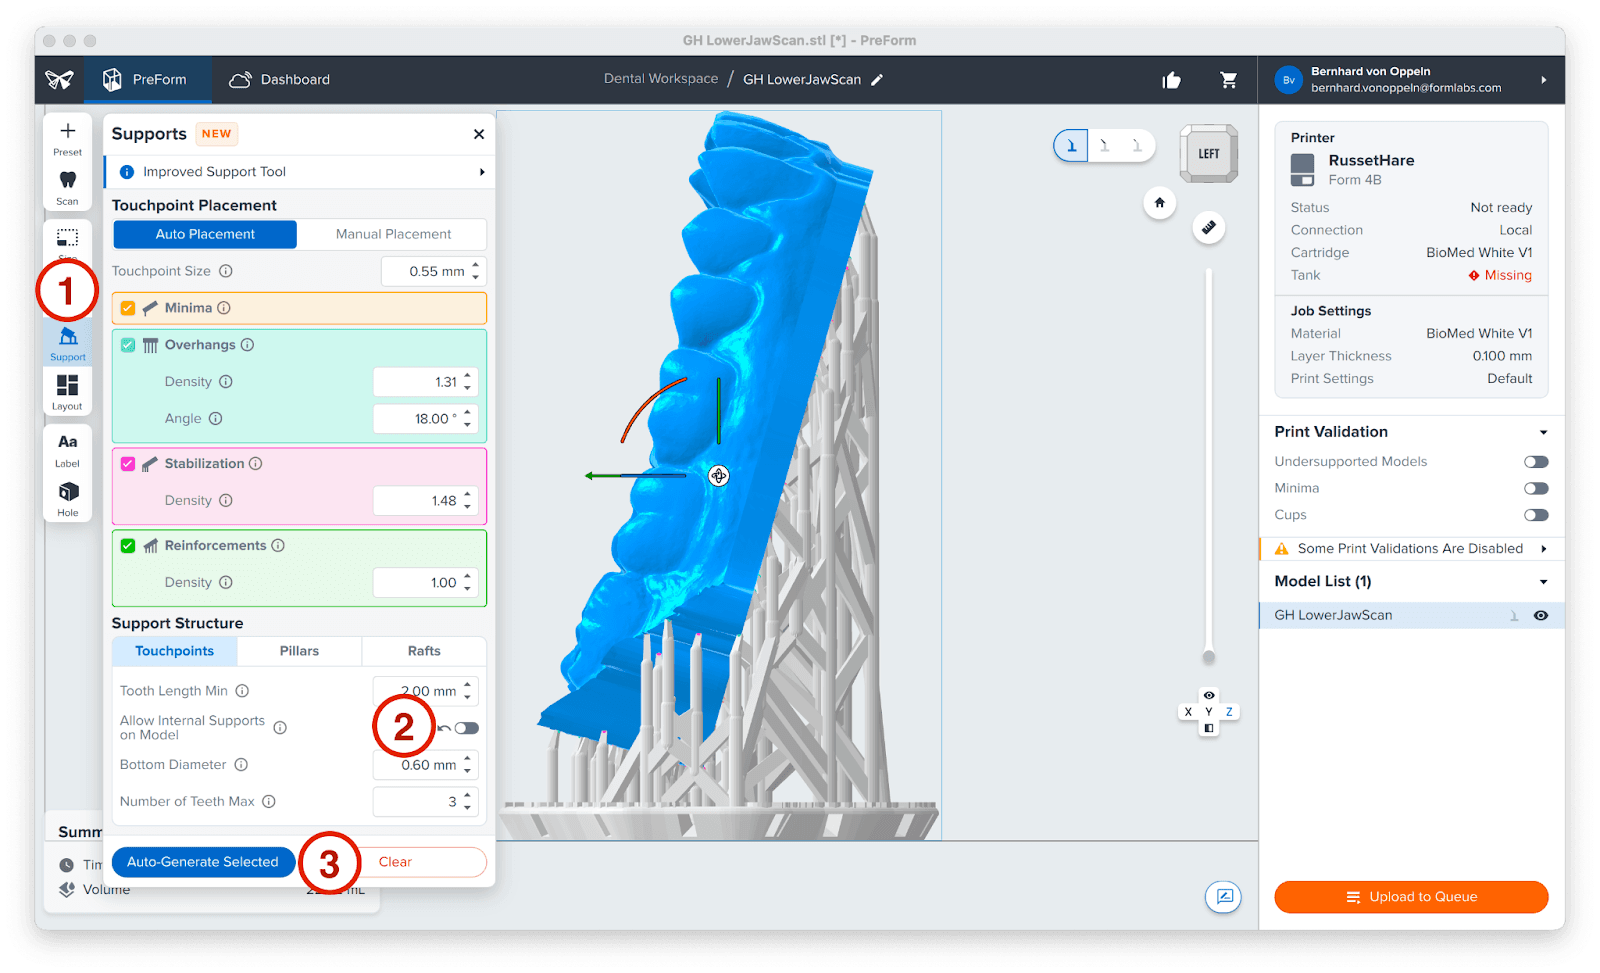
3.1 Add Supports (Optional)
Alternatively, to maximize the number of models in a single print job, you can orient them almost vertically. While this approach accommodates more models on the build plate compared to a flat orientation, it will result in longer print times and slightly reduced precision. Go to Support (1), disable internal supports to avoid unneeded supports on the hollow side (2), and click Auto-Generate Selected (3).
3.2 Start the Print
Go to your printer, shake the resin cartridge, and then insert the cartridge, a build platform, and a compatible resin tank into your Formlabs 3D printer.
Begin printing by selecting the print job from the printer’s touchscreen.
Follow any prompts or dialogs shown on the printer screen.
The printer will automatically complete the print.
Note
Please verify printer and resin compatibility on the Formlabs support site before printing.
4. Post Processing
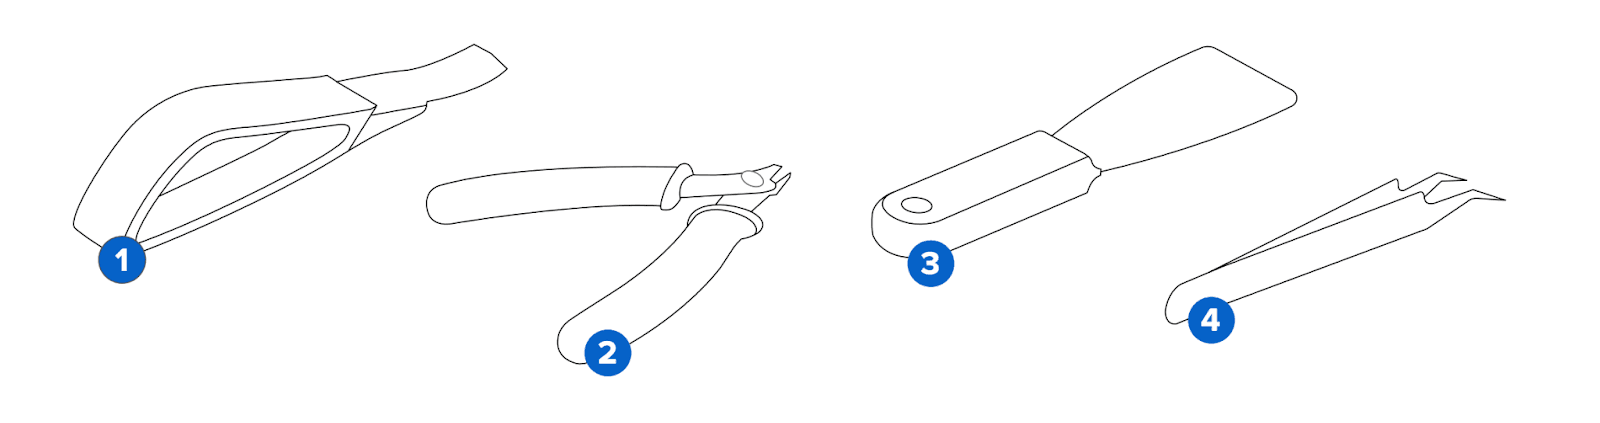
4.1 Part Removal
Caution
Always use nitrile gloves when handling uncured resin.
Remove printed parts from the build platform. If you printed on a Flex Build Platform, you just need to push the handles to pop off the model(s).
Otherwise, use a spatula (1) or the Part Removal Tool from the Finish Kit.
Caution
Never apply force to the scraping tool toward your hand or body.
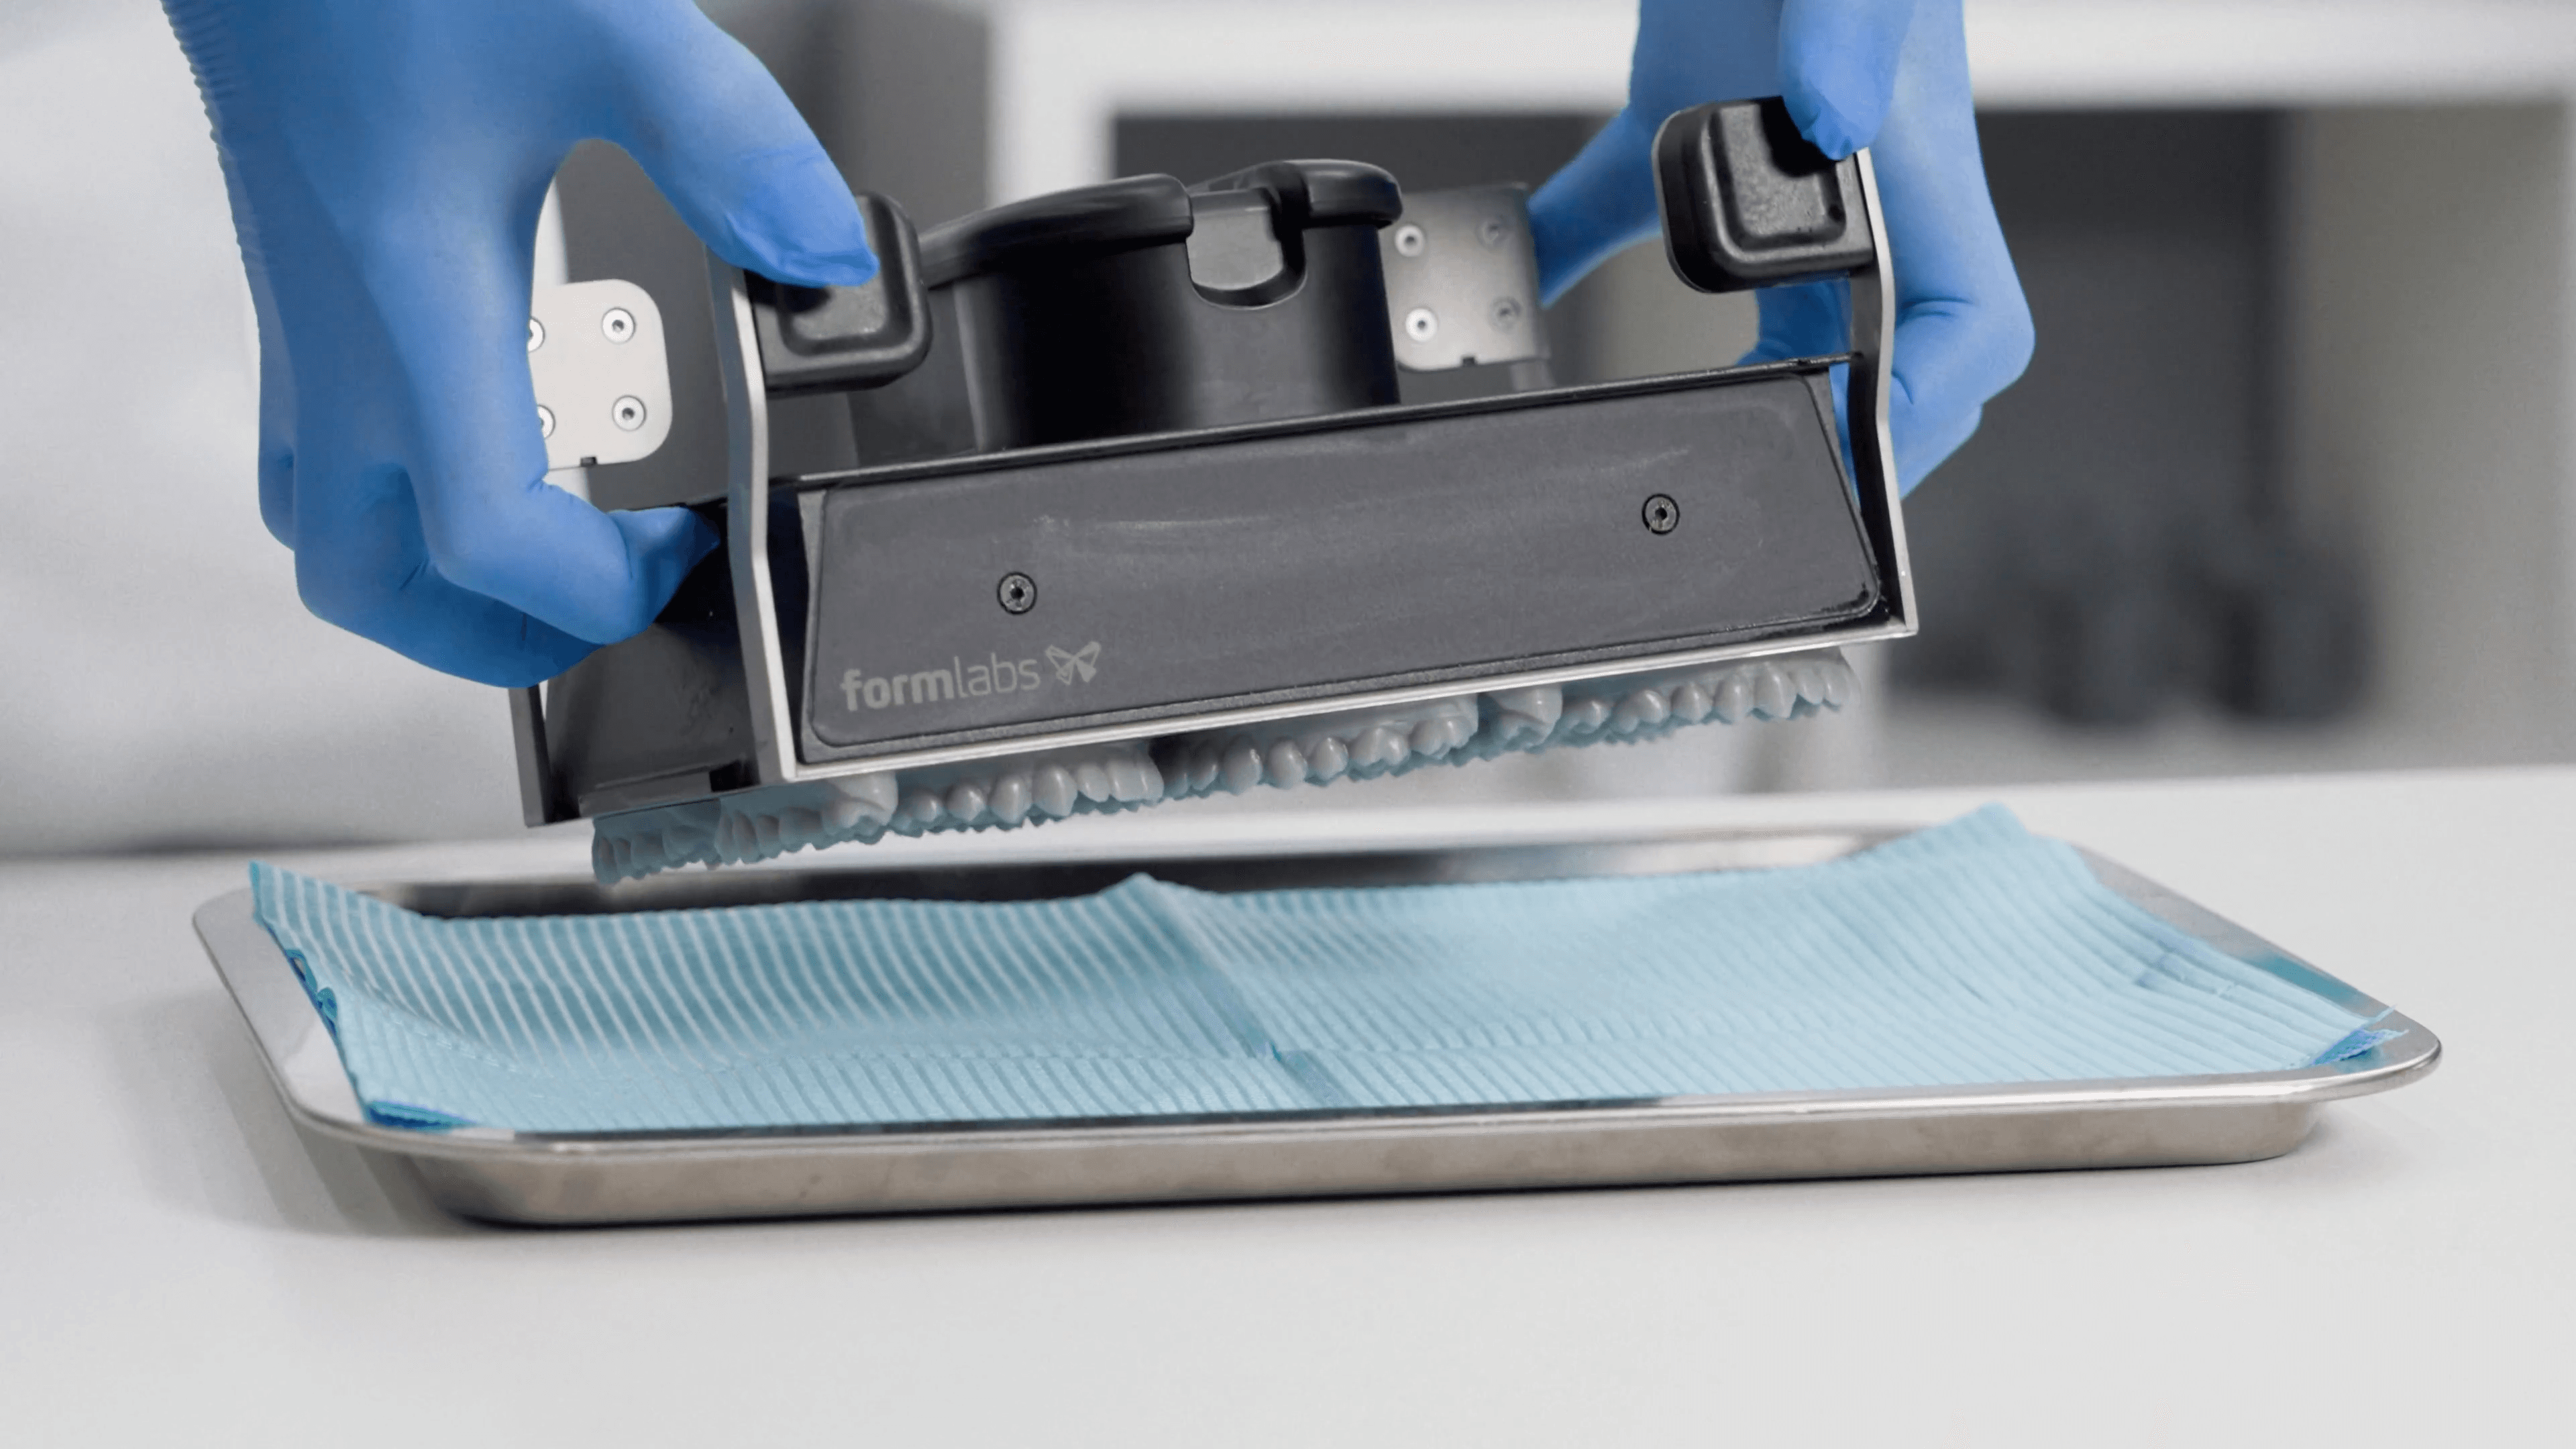
4.2 Wash
Caution
When washing the printed part with solvent, ensure a properly ventilated environment and use protective masks and gloves. Expired or unused resin shall be disposed of in accordance with local regulations.
Wash the parts in a Form Wash or using the Finish Kit buckets. Models can be washed either using IPA or the Formlabs Resin Washing Solution. Learn more about washing models in this article.
4.3 Dry and Inspect
After removing parts from the wash, allow them to air dry at room temperature in a well-ventilated area for approximately 30 minutes. The drying process can be expedited using compressed air. Ensure all IPA or Resin Washing Solution has completely evaporated before proceeding.
After printing and washing, thoroughly inspect parts to ensure they are clean and dry. No residual alcohol, excess liquid resin, or residue particles should remain on the surface before proceeding. If wet, uncured resin is still present after drying, submerge the part in clean IPA for approximately one minute, or use a squeeze bottle, then re-dry the parts as previously described.
4.4 Post-Cure
After washing and drying, place the models into the Form Cure. Select the appropriate preset on the Form Cure, and start the curing process
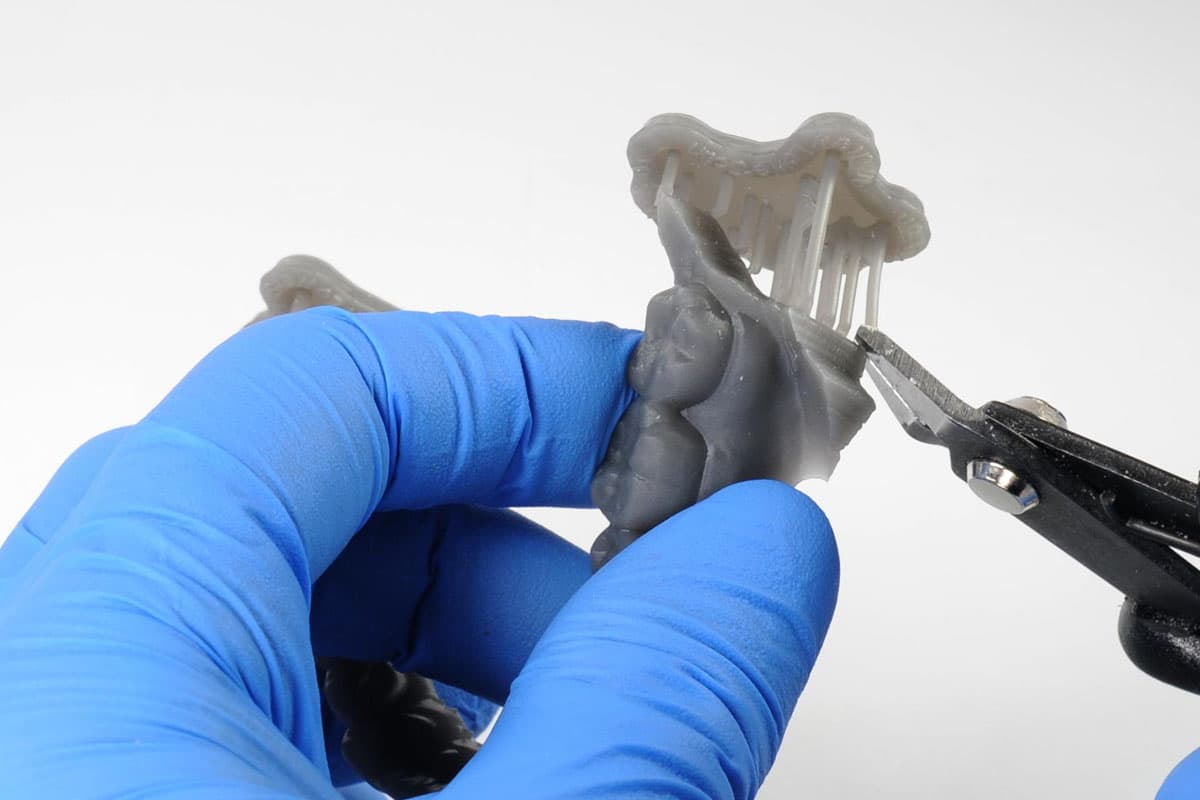
4.5 Support Removal (optional)
Formlabs SLA printers produce parts with support structures that have minimal touchpoints, enabling easy removal.
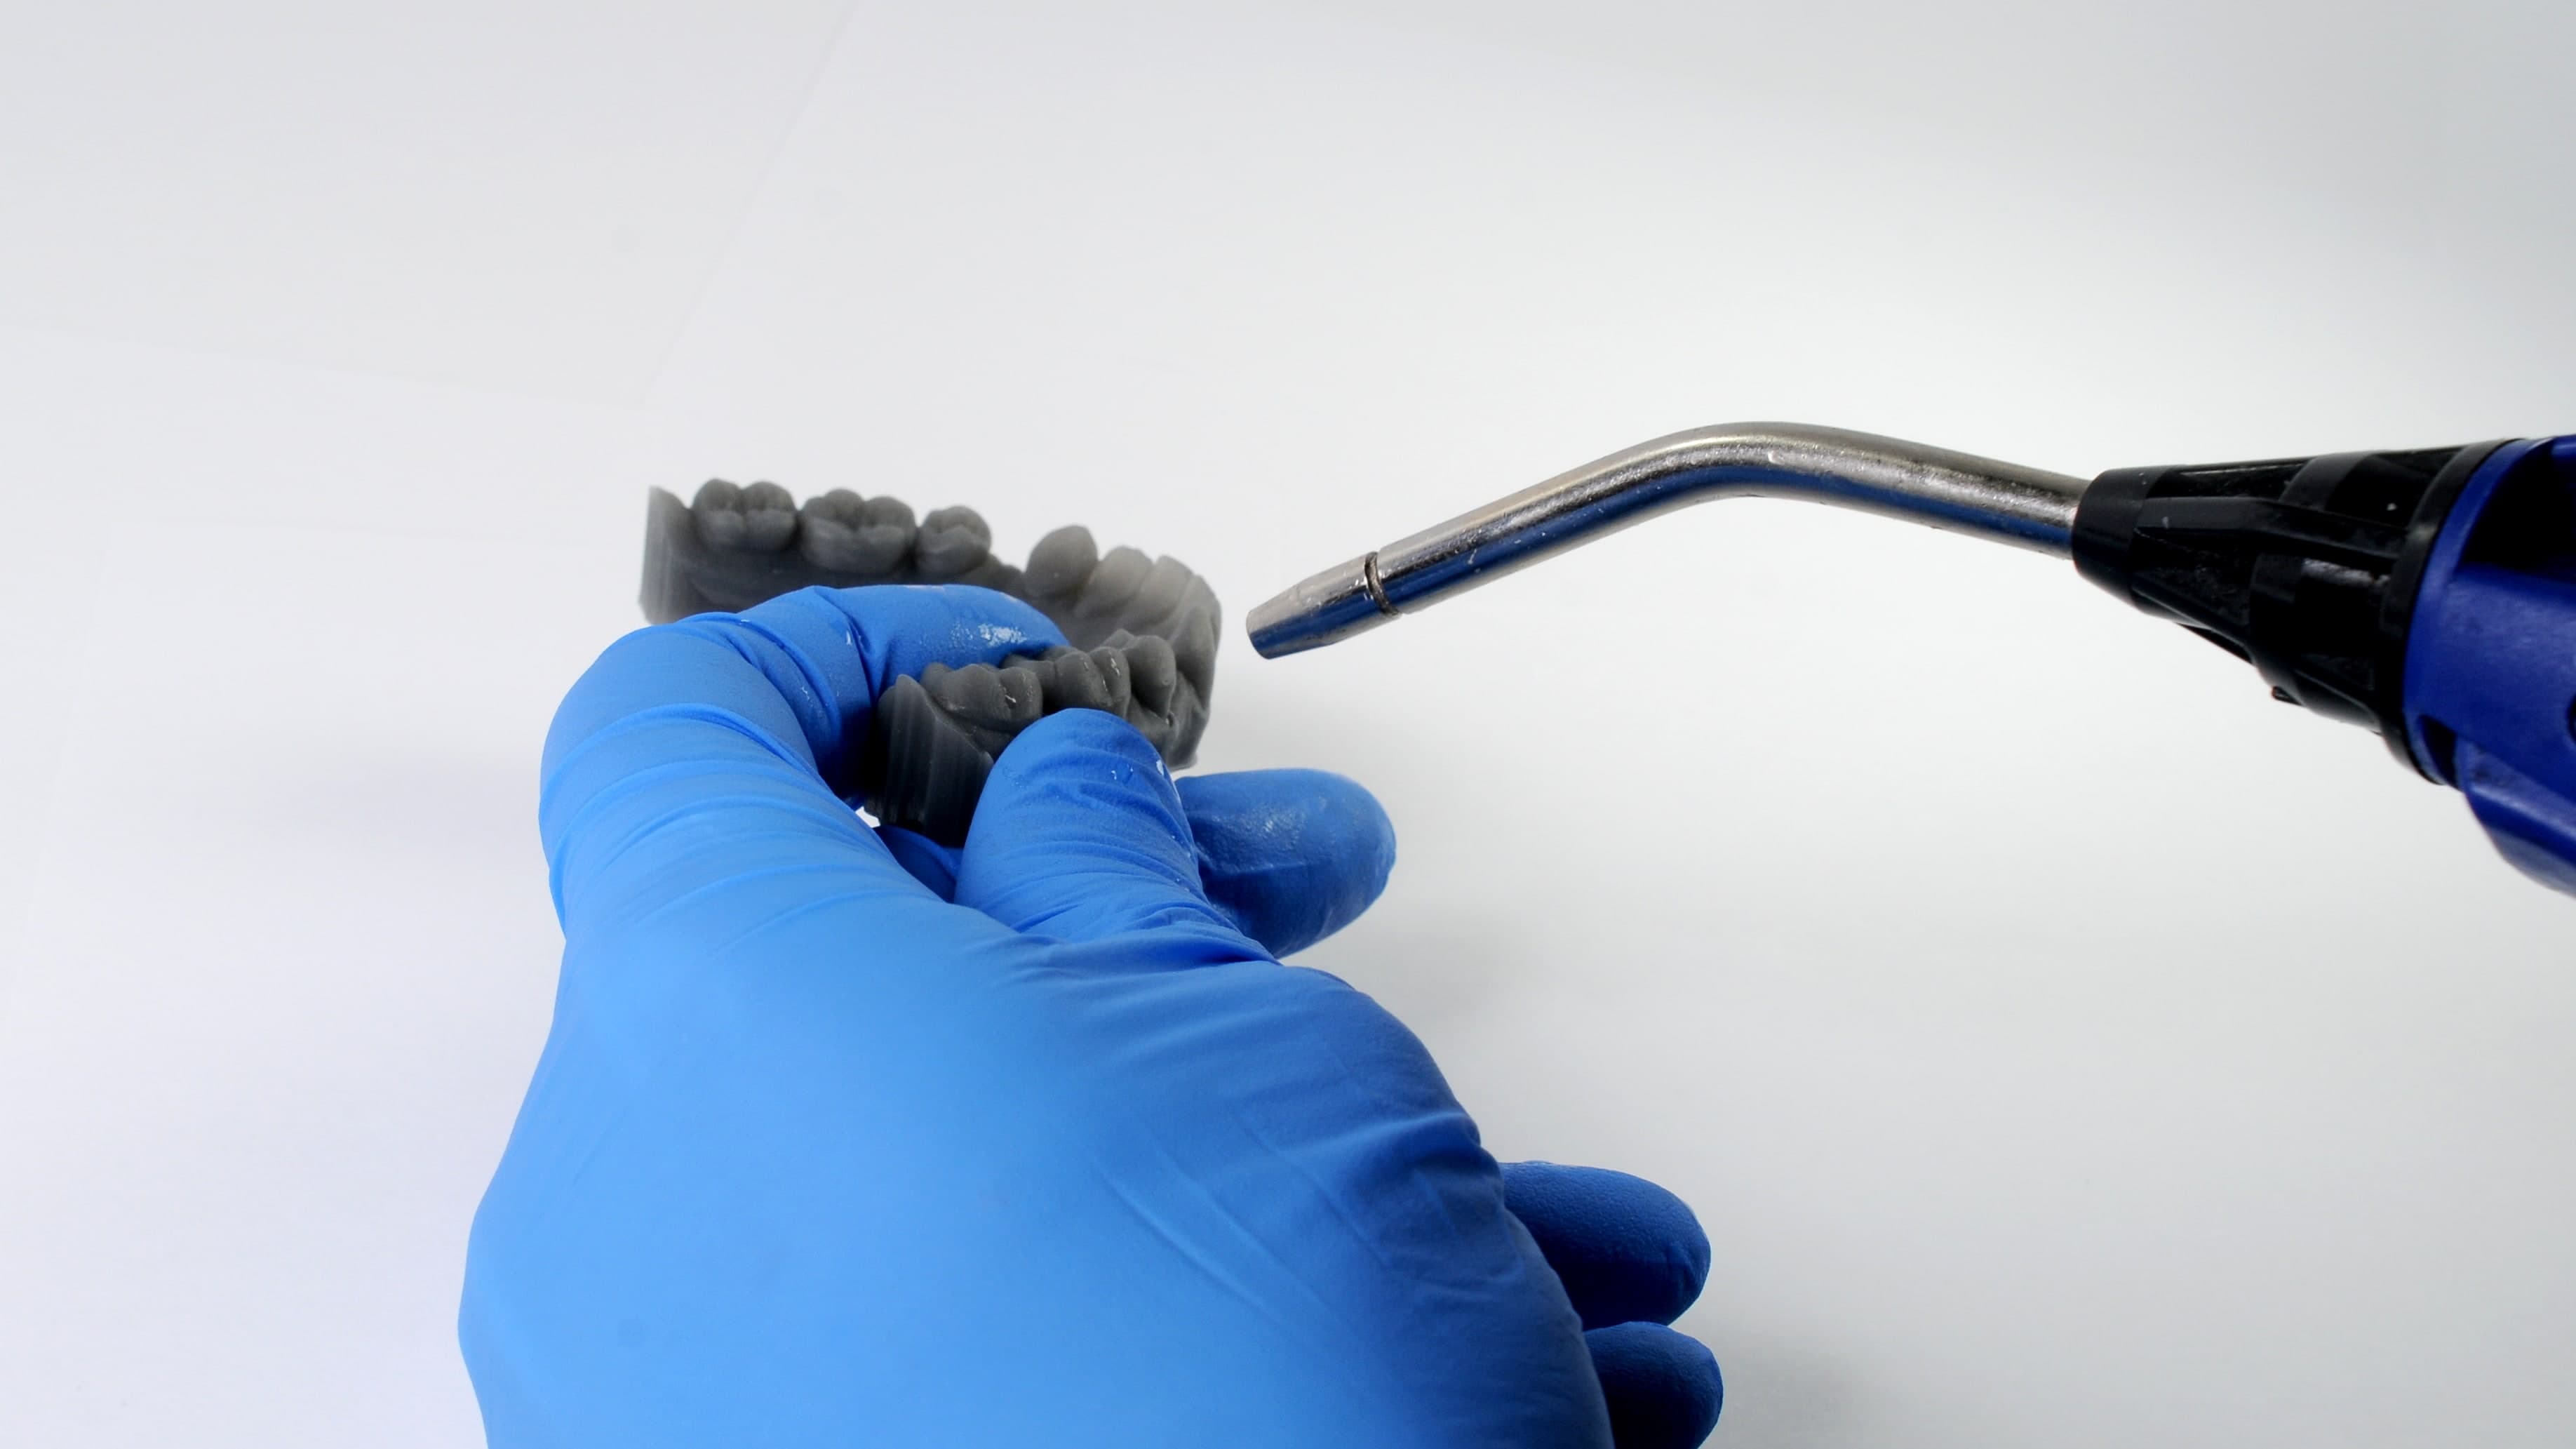
Though ripping supports from a part may be quicker, it can damage the model or leave divots. Therefore, we recommend individually cutting supports connected to critical anatomy using the tweezers from your Finish Kit, or a cutting disc with a dental handpiece.
Disposal
1. Any cured resin is non-hazardous and may be disposed of as regular waste. Follow facility protocols for waste that may be considered biohazardous.
2. Liquid resin should be disposed of in accordance with government regulations (community, regional, and national).
Contact a licensed professional waste disposal service to dispose of liquid resin.
Do not allow waste to enter storm or sewer drainage systems.
Avoid release into the environment.
Contaminated packaging should be disposed of as an unused product.
5. Formlabs 3D Printer and Resin Compatibility
Diagnostic models can be printed using the following Formlabs SLA printers and materials.
| Printers | Resins |
|
Form 4B Form 4BL |
Fast Model Resin Precision Model Resin White Resin |
|
Form 3B/+ Form 3BL Form 2 |
Draft Resin Model Resin White Resin |
Additional Resources
Explore Formlabs dental resources for in-depth guides. step-by-step tutorials, white papers, webinars, and more.
Dentistry Made Easier
Form 4B is a blazing fast dental 3D printer that offers the most diverse materials library for dentistry and orthodontics. Create high-quality dental models and biocompatible appliances fast, with easy workflows, leading reliability, and stunning part quality using the Form 4B ecosystem.