
Professional 3D printers are some of the most versatile tools found today in dental labs and practices, and the key to their versatility is dedicated materials. Different dental applications have different requirements–some have to be sturdy and durable, others need to be biocompatible to be used in surgery, and some require a transparent look for aesthetics.
With each new material, the same 3D printer becomes capable of manufacturing an increasing range of dental products, which previously required manual labor or expensive machinery like CNC mills. In spring 2016, Formlabs released Dental SG, our first biocompatible dental material, and by the end of 2017, we’re on track to offer six dedicated materials for dentistry.
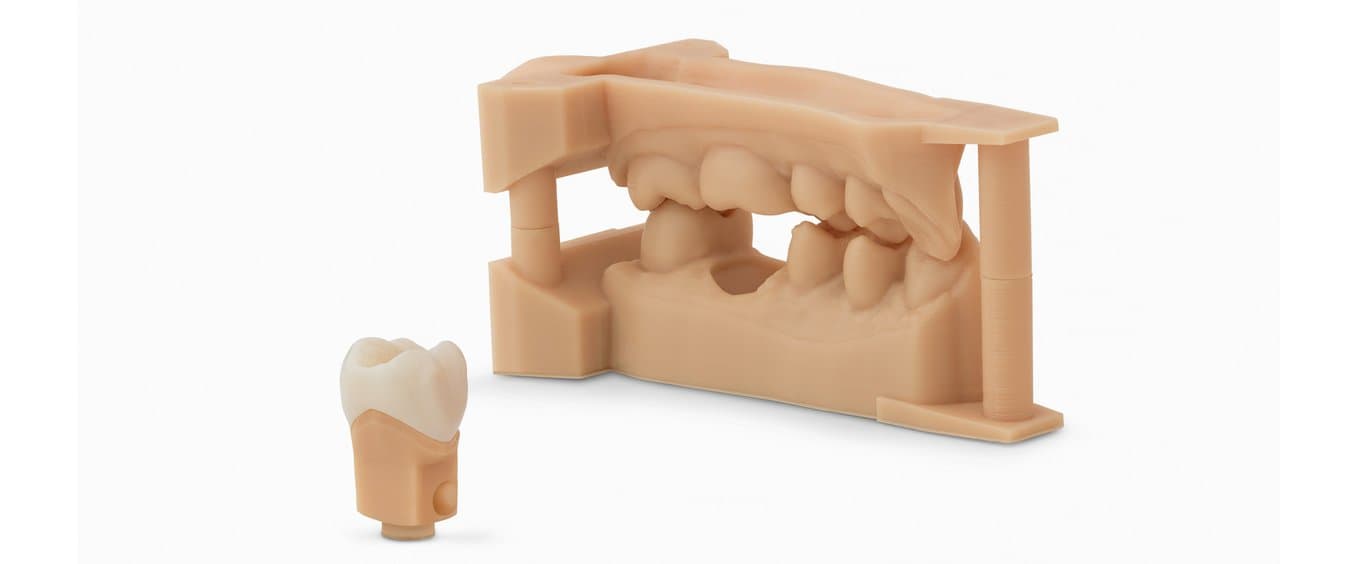
One of the most requested materials by our dental customers has been a resin for dental models. Highly accurate crown and bridge models of patient dentition are used to check final restorations before a procedure. Traditional gypsum dental models are based on an analog impression from the patient and require a labor-intensive manual process to create. Producing these models digitally from a 3D scan can simplify the workflow, speed up the process, and lower costs.
Developing a Model Resin for the Form 2 was a formidable challenge. Crown and bridge model printing is one of the most demanding dental applications, requiring accuracy below +/- 50 microns at margins and contact points, and +/- 100 microns across the full arch. Expressed as a proportion, this represents only +/- 0.17 percent deviation over a 60 mm arch.
Learn more about Formlabs’ new dental materials, and integration with 3Shape.
Finding Just the Right Ingredients: Formulating Model
The first step in the formulation process is the initial exploration and research.
“We talked to dental labs and dental practitioners to understand the most important properties required for their application. We looked at traditional gypsum models and discussed how we could improve them. The development itself is an iterative process. We’d work on new formulations, churn out new prints, get feedback from dentists and dental technicians, and return to our lab to continue improving the material,” said Rachel Davis, the Formlabs materials scientist who led Model’s development.

One of the main requirements for crown and bridge models is accuracy. When checking the fit of final restorations before a procedure, any deviation may mean the restorations won’t fit on the model, or worse, the failure will be found only during or after the procedure.
To achieve this high level of accuracy, finding the optimal resin formulation is critical.
Photopolymer resins consist of various components. Short plastic chains (monomers, oligomers) make up the core, photoinitiators trigger the reaction, and various additives adjust color, mechanical properties, or opacity.
“We had to find a narrow window where the process reaches the highest level of accuracy. If the photopolymerization reaction goes through too rapidly, the laser will hit the resin and cure a larger area, not just the outline of the model. If the reaction is not triggered or the energy is too low, the resin will remain in a liquid state.”
The goal was to create a material just as capable as the traditional gypsum models that dental professionals have been using for decades. “We needed a formulation that’s strong, but at the same time not too brittle, because users are going to be doing a lot of hand work with the models. Also, you want the material to have a little bit of friction to make it feel similar to gypsum.”
Once we got the basic formulation right, it was time to experiment with color and opacity. Gypsum models have a matte surface that shows details very well. By going a little darker with our formulation and adjusting the opacity and finish with additives, we could create parts that showed detail even better.

We ended up printing hundreds of models just to determine the color. Some had a grey tint, others had a hint of orange, some were more pink. We were striving to find a formulation that felt just as natural to practitioners as traditional stone models. “For over a month, I was cranking out prints and bringing them to dental labs for feedback.”
Perfecting the Recipe: Optimizing Settings and Testing
Resin development doesn’t stop with the formulation; fine-tuning settings is crucial to providing the highest accuracy and a reliable printing experience.
It is a common misconception that there’s a direct relationship between the specifications of a 3D printer–such as resolution, layer height, laser spot size, or pixel size–and the accuracy of final parts. At Formlabs, we develop our stereolithography (SLA) 3D printer, software, and materials in-house, to ensure that these individual building blocks are well-integrated. The machine provides the basis, we formulate the resins to work best with the specific hardware, and our team develops settings for every single material formulation to make sure they print accurately and reliably.
One example is adjusting the general accuracy depending on the size of the parts. “When you're developing settings, you're interpolating so that they work for a wide range of part sizes, from the smallest features to large solid parts.” For Model, we optimized the settings just right for dental applications, considering their smaller size and tight margins.
“When we were scanning parts, we noticed that negative features were not appearing as clearly as the positive ones. This is an important criterion for dentistry, since dental models have a lot of crevices and negative features. By implementing a new software feature that changed how the layers are drawn, we were able to get the negative features to come out correctly.”
With Model, our goal was to make it easy to print directly on the build platform, saving printing time, as well as material and valuable labor during post-processing.

Because dental models tend to have a flat bottom and rarely include any overhangs, in most cases they can be printed directly on the build platform without using any supports. This saves print time, material, and valuable labor during post-processing.
“By adjusting parameters, we managed to optimize the adhesion to the build platform just strongly enough so that the model would stick every single time, but not so much that you’d need a chisel to take it off, which could break it in the process.”
When we were confident in our formulation and settings, it was time for reliability testing. We sent out a larger batch of sample cartridges to a set of 10 dental labs who were printing with the new material day and night. We conducted lifetime and stability testing, using a centrifuge to imitate a person leaving a cartridge on the shelf for 40 days and then not following the instructions correctly.
Evaluating Accuracy
During the development process, we set out to evaluate the accuracy and precision of 3D printed crown and bridge models with removable dies with the help of Dr. Michael Scherer, DMD, MS, an assistant clinical professor at Loma Linda University, and clinical instructor at University of Nevada Las Vegas.
A total of 148 parts—a variety of die and arch models—were printed directly on the build platform, using six Form 2 printers to allow us to comment on the overall precision. After printing, each part was removed from the build platform, cleaned with isopropyl alcohol (IPA), post-cured, and optically scanned using a desktop scanner. Each model scan was compared to its original .STL file.
Margin and global accuracy results
| Reference Object | Clinically Relevant Aim | 80th Percentile Results | |||
|---|---|---|---|---|---|
| 100 Micron Print Settings Results (+/-μm) | 50 Micron Print Settings Results (+/-μm) | 25 Micron Print Settings Results (+/-μm) | |||
| Margin Accuracy | Removable Die | +/- 50 μm | +/- 64.2 μm | +/- 44.7 μm | +/- 30.5 μm |
| Global Accuracy | Full Arch Model | +/- 100 μm | +/- 149.6 μm | +/- 104 μm | +/- 67.9 μm |

The results of the study provided strong evidence that printing at 50 micron or 25 micron settings would yield clinically accurate models, with both margin and global accuracy within our predefined clinically relevant aim. Printing at 50 micron layer thicknesses achieved accurate enough models for crown and bridge models, while the most accurate 25 micron setting yielded results far beyond the initially defined aims.
Find out more about accuracy and precision in 3D printing, as well as the test results and methodology in our free white paper.
Model Resin: Now Available
Formlabs’ new Model Resin is now shipping. Order directly from our online store, or get a free Model sample to experience the material firsthand.