Formlabs Application Guide

3D Printing Temporary Crowns and Bridges with Formlabs SLA 3D Printers

Temporary CB Resin is a tooth-colored resin for 3D printing of temporary crown and bridge restorations, inlays, onlays and veneers. Indicated for up to seven-unit bridges and available in 4 VITA shades, this highly filled material provides excellent marginal adaptation, strength, and aesthetics. Use traditional temporary cements to attach restorations produced with Temporary CB Resin for up to 12 months. 

This application guide demonstrates each step for making 3D printed temporary crown and bridge restorations on Formlabs SLA 3D printers. Use the following workflow to ensure precise results.


PDF Download

3D Printing Temporary Crowns and Bridges with Formlabs SLA 3D Printers

Would you like to save this guide, print it, or share it with colleagues? Download it as a PDF.


Essentials

Needed From the Dentist

  • A physical or digital impression of the patient's dentition

Required Hardware and Materials

Made by Formlabs:
  • Form 2 or Form 3B+ SLA 3D Printer
  • Form 2 Resin Tank LT or Form 3 Resin Tank V2 or higher
  • Temporary CB Resin
  • Form Wash
  • Form Cure
  • Stainless Steel Build Platform (Temporary CB Resin only) 
  • Finishing kit or secondary wash station
Made by Third Parties:
  • Desktop scanner (if physical impression or model)
  • Low speed dental handpiece with cutting and finishing wheels
  • Sandblaster
  • Polishing or glazing equipment and materials
  • Glass bead blasting material (BEGO Perlablast® recommended)
  • Isopropyl alcohol (IPA) ≥99%

Required Software

Made by Formlabs:
Made by Third Parties:
  • Dental design software or outsourcing to a dental design provider


Note

For full compliance and biocompatibility, Temporary CB Resin requires a dedicated resin tank, Stainless Steel Build Platform, Form Wash, and finishing kit which should not be mixed with any other resins.


1. Scan


Dental design software requires a digital impression of the patient’s anatomy in order to design a temporary prosthetic. To acquire this data, scan the patient directly with a 3D intraoral scanner or scan a physical impression or a poured model with a desktop 3D scanner.


2. Design


2.1 Design the Appliance

There are several dental software options for digitally designing temporary crown and bridge restorations. In this application guide, we will be outlining parameters for 3Shape Dental System and ExoCAD. 

There are also outsourced dental CAD providers where you can send a digitized impression for creating the design.

General construction requirementsRecommended values
Minimum thickness (crowns, inlays, onlays, veneers)1.0 mm
Minimum thickness (bridges)1.0mm (anterior) - 1.5mm (posterior)
3Shape Settings
Cement Spaces
Cement gap0.01 mm
Extra cement gap0.04 mm
Overlay
Margin line offset0.15 mm
Drill compensationOff

Download the Formlabs Dental 3Shape materials library and watch our video to learn how to install 3Shape materials files.

ExoCAD Settings
Gap
No Cement Gapzero from margin 1 mm
Gap0.07 mm
Boarder
Horizontal0.15 mm
Undercuts
Anticipate MillingOff
2.2 Export the STL File

Once the case has been designed to specification manufacturing can begin. The majority of dental design software generates a manufacturing file in .stl format. Locate the file and move it into the print preparation software, PreForm.


3. Print


Note

Use PreForm version 3.6.1 or higher and firmware 1.7.3 or higher.

3.1 Import the File(s)

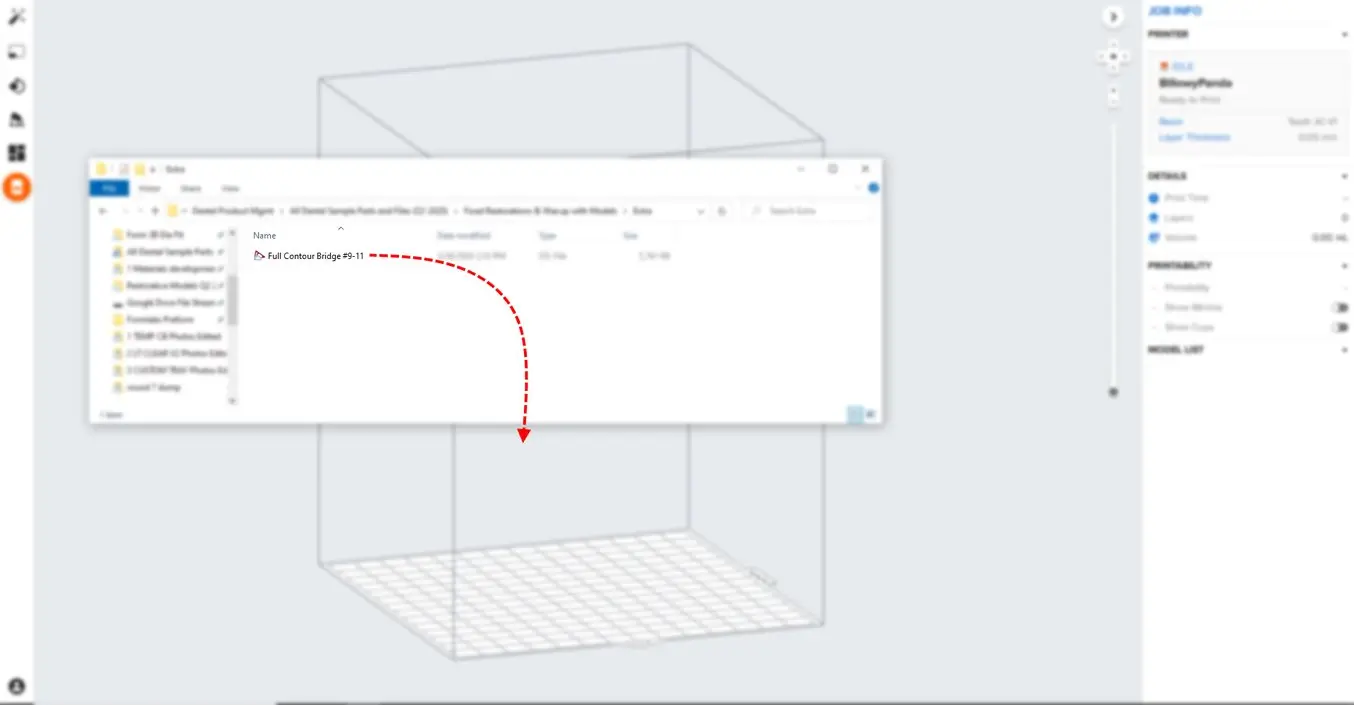
Import or open the design file(s) by dragging them into Preform or opening them using the “File” menu and locating them on your computer or network.

3.2 Material Selection

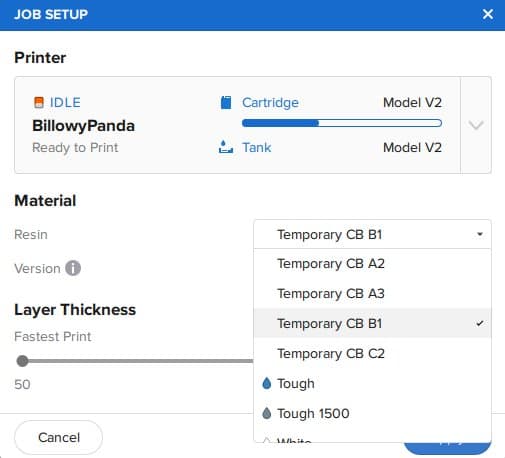
Select the material for printing by clicking the printer box in the “Job Info” menu on the right hand side.

Locate Temporary CB in the material pull down and select the appropriate shade (A2, A3, B1, C2).

3.3 Orientation

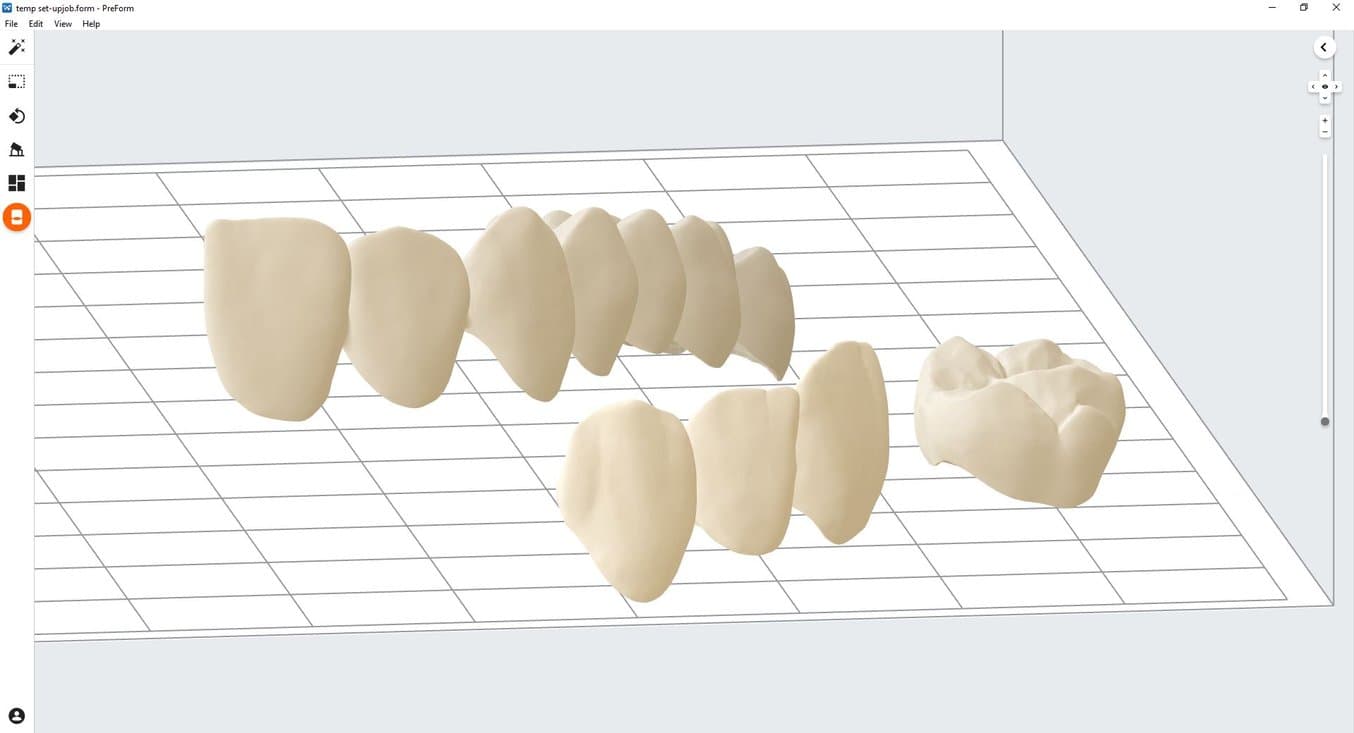
Proper part orientation is critical to ensure part accuracy and fitment.

Always position the restoration(s) horizontal to the build platform with the occlusal plane facing the build platform.

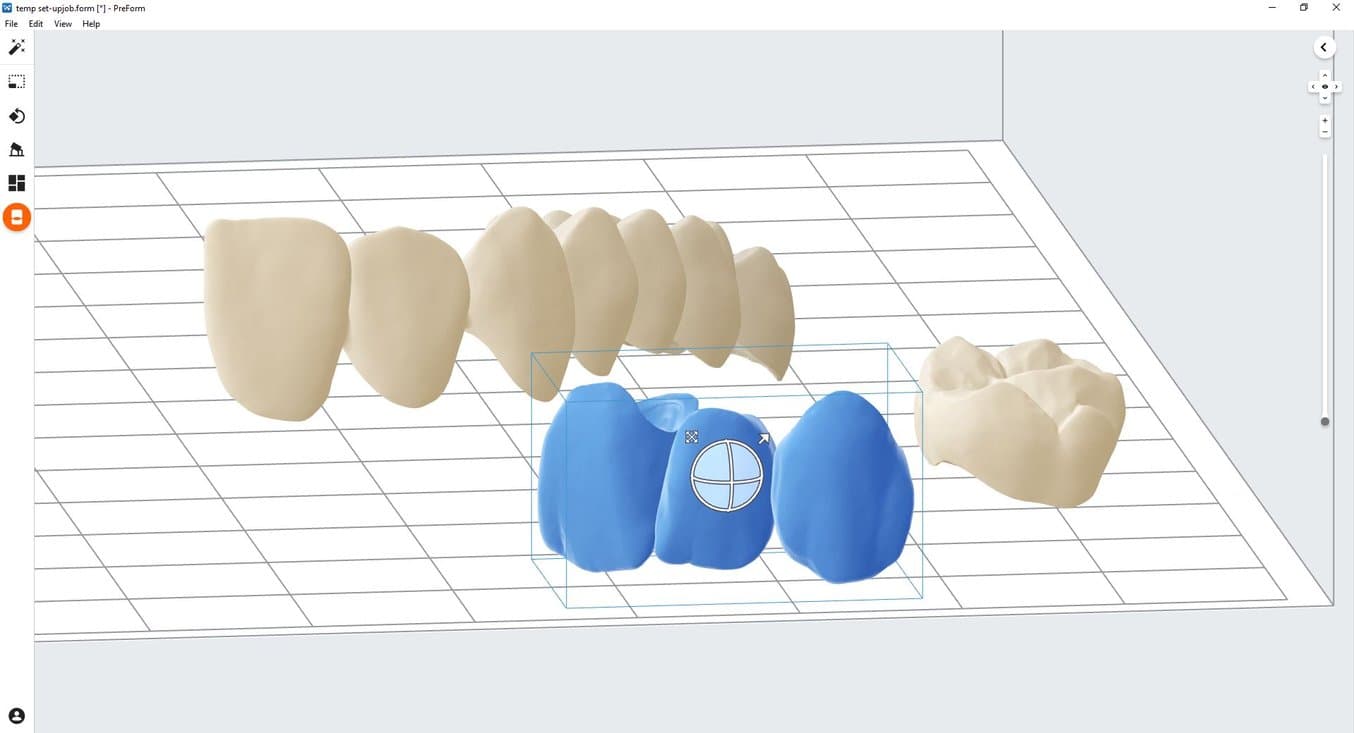
To rotate a restoration, click on the part and “click and drag” the sphere.

3.4 Generate Supports

3.4.1 Automatic Support Generation

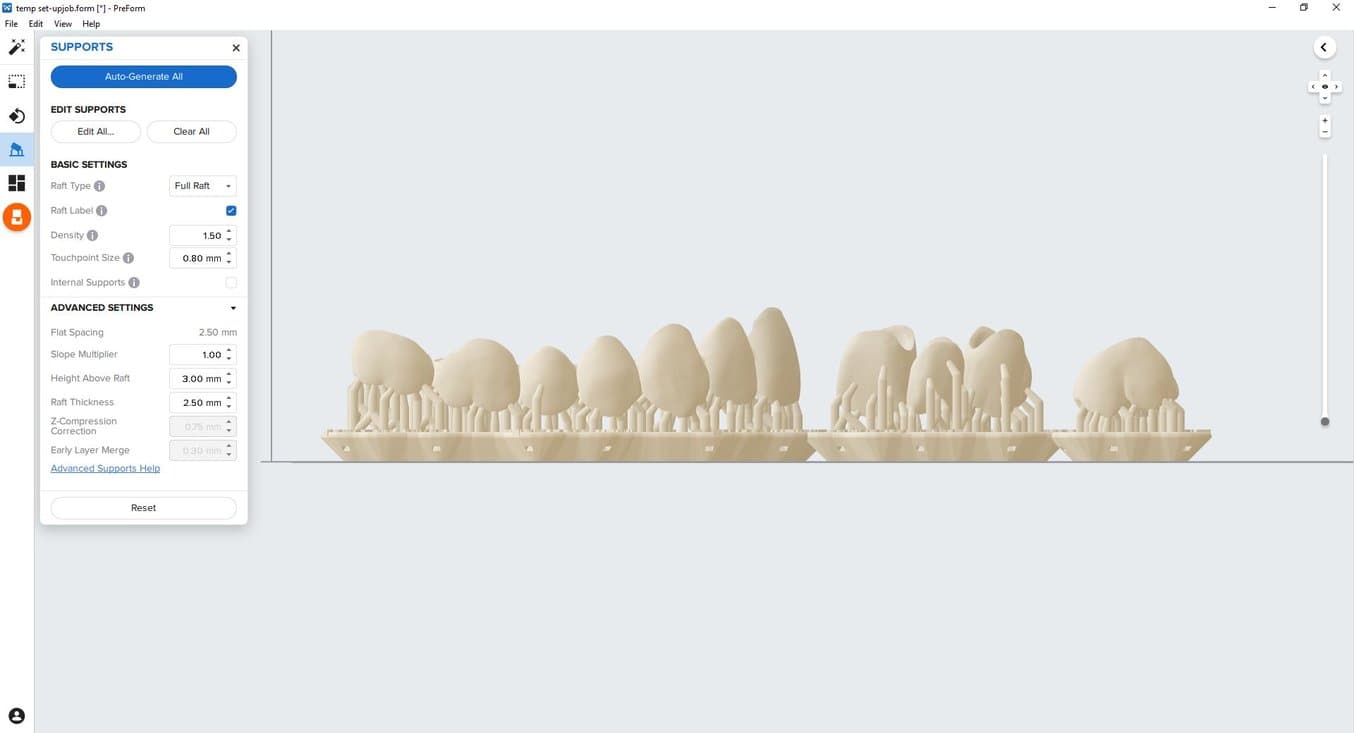
Click the “Supports” button on the left side of PreForm and click the  “Auto Generate Selected” or “Auto Generate All” button.

Note: The default support settings were developed to include optimal fit of complex large span bridges. For less elaborate cases, support density and touchpoint sizes may be lowered if needed.

3.4.2 Manual Support Editing

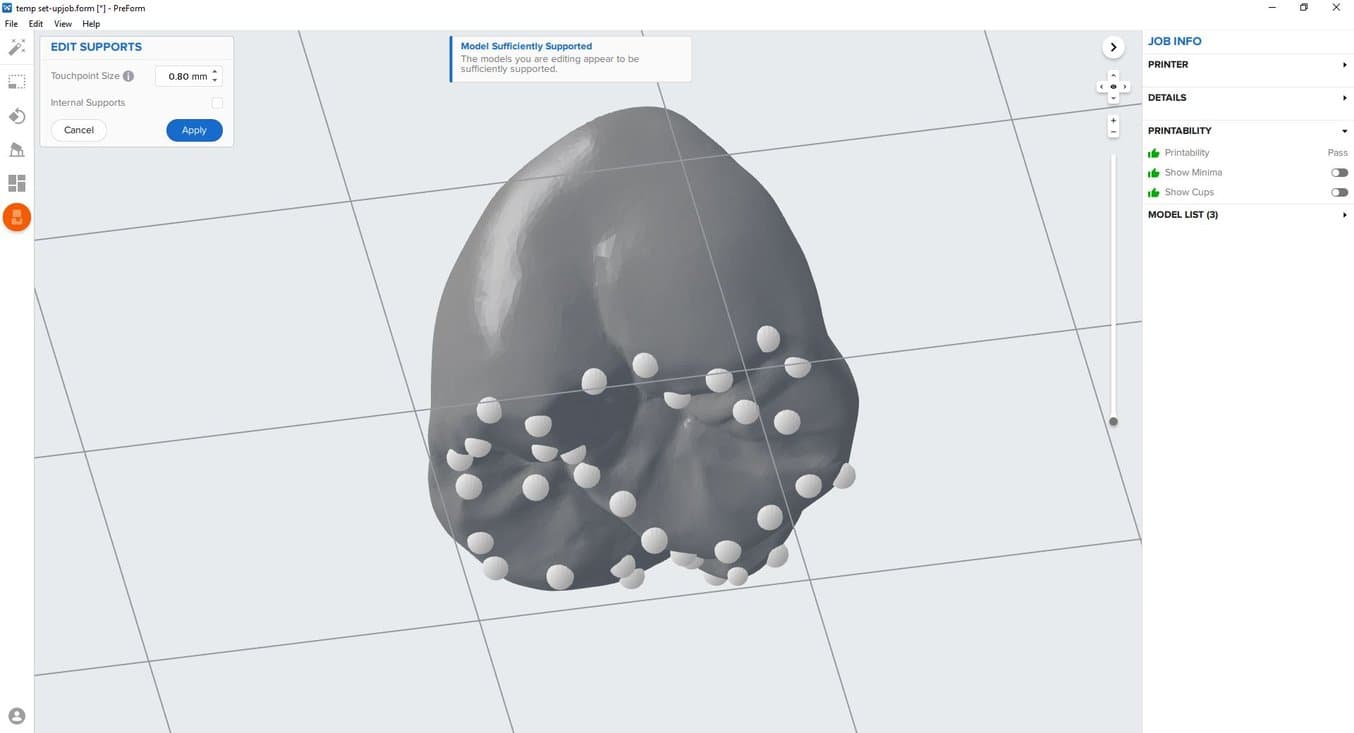
If a support point is not in an ideal location, it can be moved after automatic generation by clicking the “Edit…” button in the Supports menu.

Always properly support the parts of the anatomy closest to the build platform.

PreForm will indicate in red what areas might require additional support.

Confirm under the “Job Info” menu bar on the right side of the program that “Printability” has green thumbs-up.

3.5 Printing Layout

Standard Printing

For most jobs it is best to place parts toward the middle of the build platform.

Tip: When printing multiple cases, overlapping rafts can optimize the use of the build volume and save material.

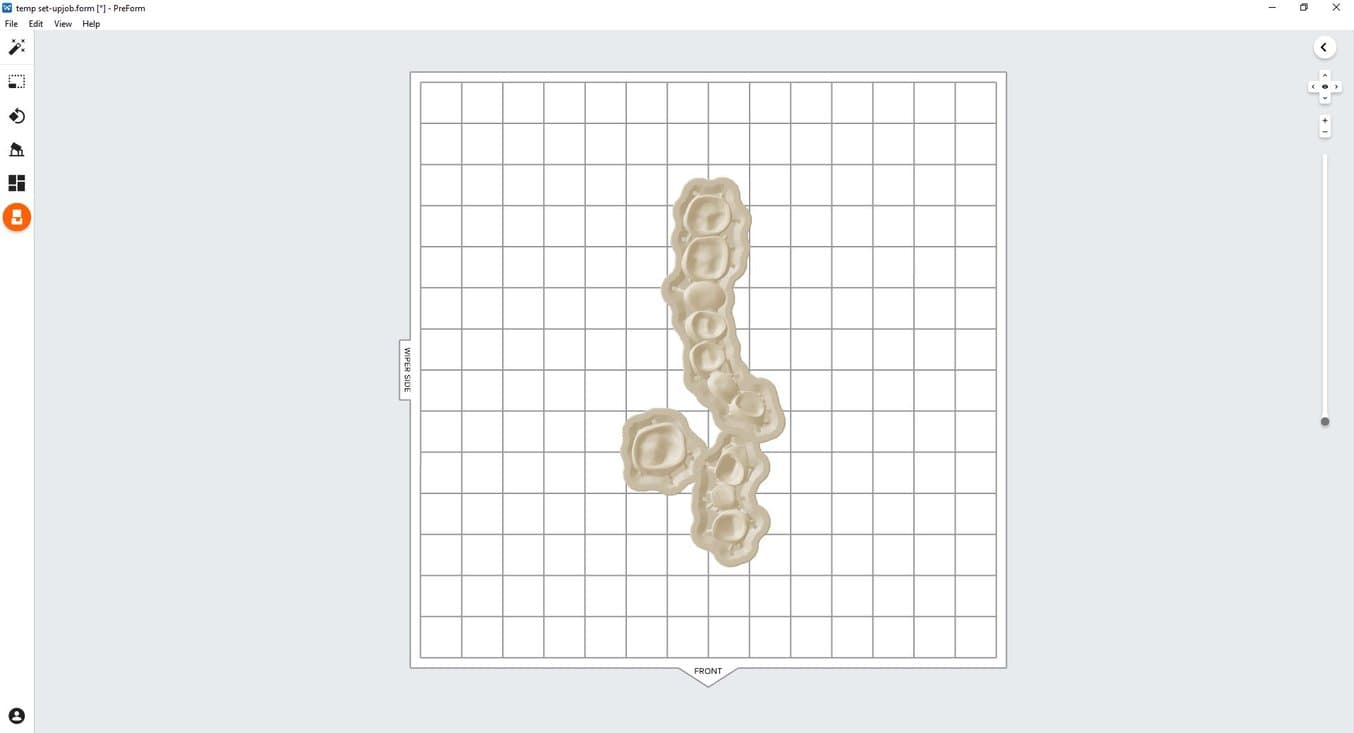
Fastest Printing on the Form 2

If the fastest print time is needed, move the parts toward the wiper side of the build platform indicated in PreForm.

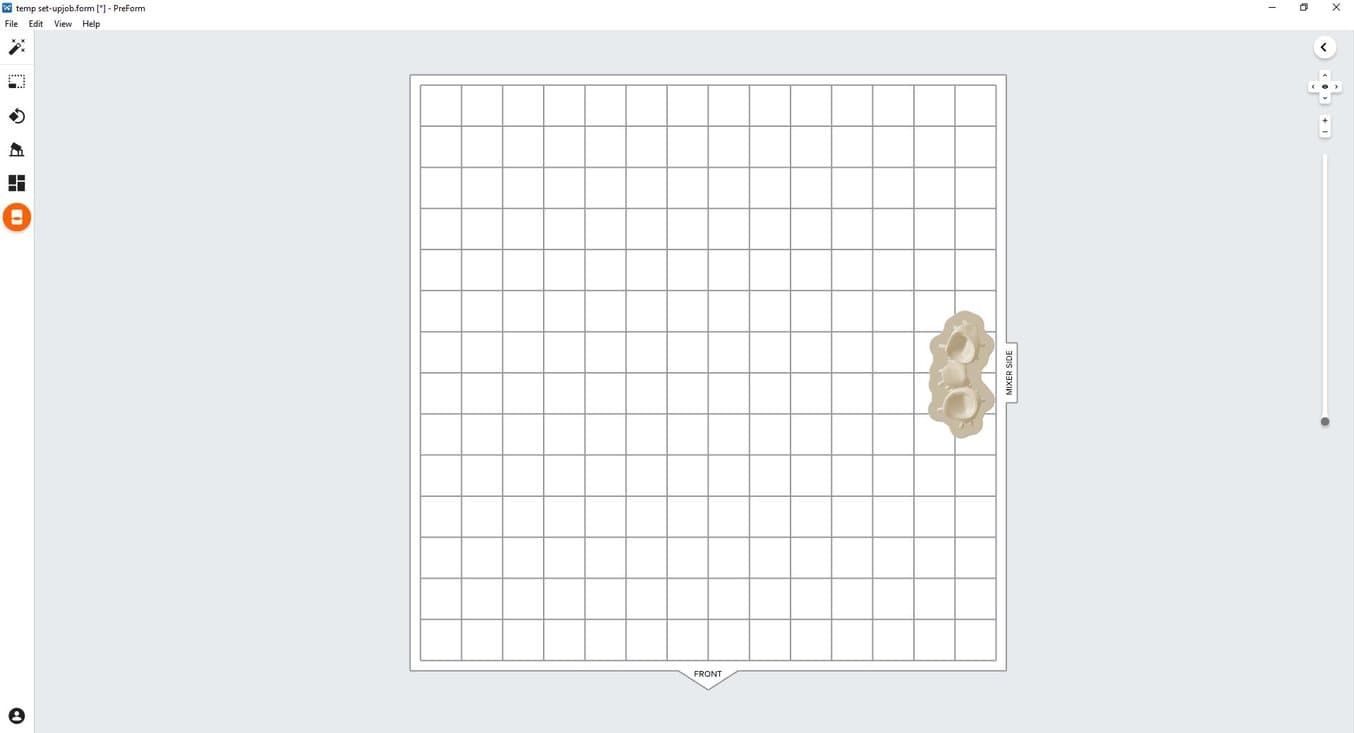
Fastest Printing on the Form 3B

If the fastest print time is needed, move the parts toward the mixer side of the build platform indicated in PreForm.

3.6 Transferring Job to the Printer

Send the job to the printer by clicking the orange printer icon on the left.

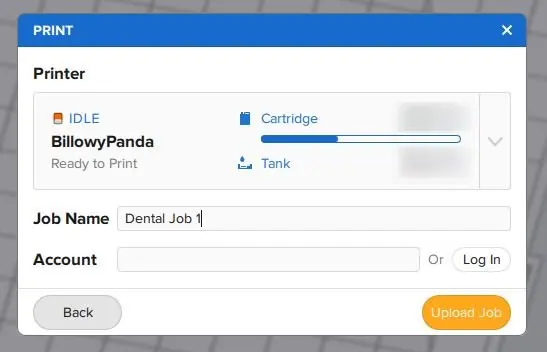
The “Print” dialog box will open to select the printer.

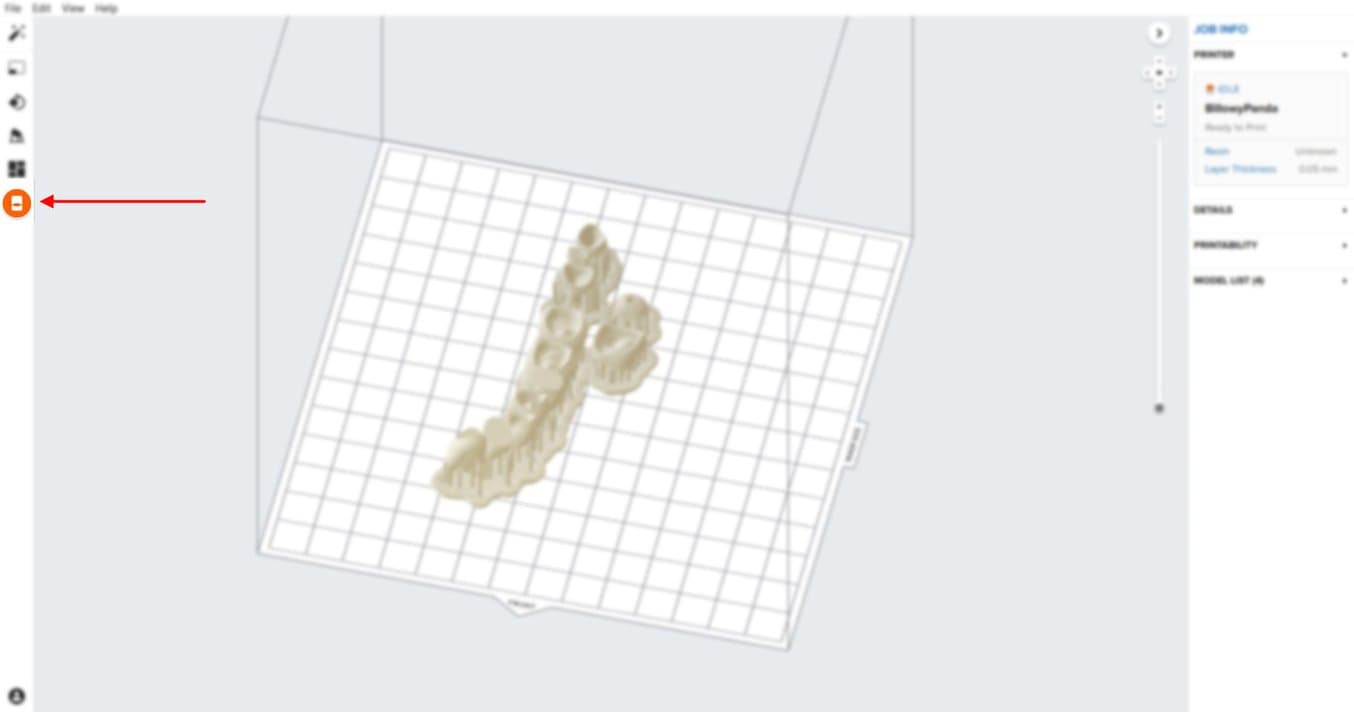
Click the orange “Upload Job” button to begin the transfer of the job to the printer.

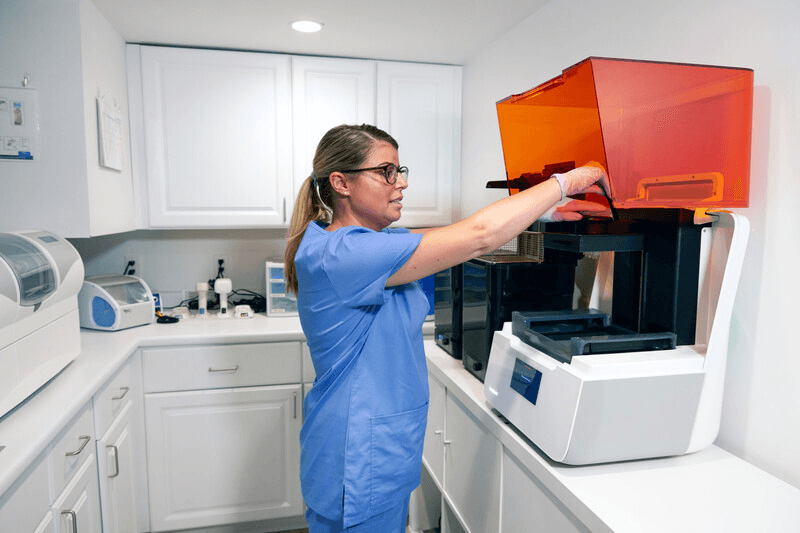
3.7 Set up the Printer

Shake the Temporary CB Resin cartridge and then insert the cartridge, a Stainless Steel Build Platform, and a compatible resin tank into the Form 2 or Form 3B printer.

  • Begin printing by selecting the print job from the printer’s touch screen
  • Follow any prompts or dialogs shown on the printer screen
  • The printer will automatically complete the print
     

Note

To ensure the correct build platform is being used, check the top of the build platform. The Stainless Steel Build Platform includes a white CB mark laser etched by the Formlabs logo on the build platform handle. Temporary CB Resin has only been validated with the Stainless Steel Build Platform. Deviating from recommended instructions may adversely affect performance, biocompatibility, and aesthetics of the printed provisionals.

Attention

For full compliance and biocompatibility, Temporary CB Resin requires a dedicated resin tank, Stainless Steel Build Platform. Only use the Form Wash with other Formlabs biocompatible resins, such as Surgical Guide Resin.


4. Post Processing

Always use gloves when handling uncured resin and parts.


4.1 Part Removal

Remove printed parts from the build platform by wedging the part removal or scraping tool under the part raft and rotating the tool.

4.2 Washing

Precautions

  • When washing the printed part with solvent, it should be in a properly ventilated environment with proper protective masks and gloves.
  • Expired or unused Temporary CB Resin shall be disposed in accordance with local regulations.
  • IPA shall be disposed of in accordance with local regulations.

Place the restorations in a Form Wash filled with isopropyl alcohol (IPA, ≥99%) and wash them for 3 minutes.

Make sure the parts are fully submerged in IPA when washing.

Exceeding wash duration may affect dimensional accuracy and performance of printed parts over time.

Use a brush or pipe cleaner to remove excess resin and reduce the amount of post processing needed later.

4.3 Drying

Leave parts to air dry for at least 30 minutes in a well-ventilated area.

The dried parts will have a white, powdery coating on the print surfaces.

Compressed air can also be used to dry parts.

If any wet, uncured resin is still present after drying, use a squeeze bottle with fresh IPA to remove uncured resin and then air dry the parts again.

4.4 Post Curing and Support Removal

To maintain dimensional accuracy and biocompatibility, post curing must be done in two steps.

4.4.1 Post Curing Step One

With the raft and supports still intact, place printed parts in the Form Cure with the raft side down.

Post cure the parts in a Form Cure at 60°C (140°F) for 20 minutes.

4.4.2 Support Removal

Remove parts from Form Cure and use a handpiece with a cutting disc to separate supports and the raft from printed parts.

Carefully sandblast the printed part surfaces to remove the white, powdery coating using a sandblaster with glass bead blasting material, such as Perlablast® Micro (REF 46092/54302) sandblasting medium at a maximum blasting pressure of 1.5 bar

Check printed part fit and finish, and contour parts as needed using a dental handpiece and carbide rotary burs.

4.4.3 Post Curing Step Two

Place finished parts in the Form Cure and post cure again at 60°C (140°F) for an additional 20 minutes, with the occlusal plane facing upwards.

For best results and full compliance, printed parts must be post cured twice as recommended.

Any deviations from this protocol, may lead to unsatisfactory fit and affect biocompatibility.

Inspect the restoration. Discard and reprint it if any cracks or damage are detected.

4.5 Finishing and Polishing

Post-cured parts must be polished using pumice stone and polishing compound prior to use.

If rough marks are left behind after support removal, use a carbide or other rotary before polishing surfaces to improve patient comfort.

A high gloss shine can be achieved with traditional polishing tools and materials used for acrylics and composites.

Note: Robinson brushes and rubberized spiral wheels are ideal for polishing occlusal anatomy. Refert Opal-L works very well as a polishing material.

Avoid overheating the parts during polishing.

Inspect the restoration again. Discard and reprint it if any cracks or damage are detected.

Light-cured glaze and characterization can be also used like GC OPTIGLAZE™.

Follow the instructions from the material manufacturer.


5. Delivery and Treatment


The finished restoration can be attached to a patient’s tooth using conventional temporary cements such as Temp Bond NE. If the subsequent permanent restoration will be attached with methacrylate-based composite cement, then eugenol-free temporary cements are recommended for use. 

Follow the instructions for use provided by the luting agent manufacturer.