Important
For full compliance and biocompatibility, Formlabs Denture Base Resin V2 and Premium Teeth Resin each require a dedicated resin tank, build platform, and Finish Kit or Form Wash.
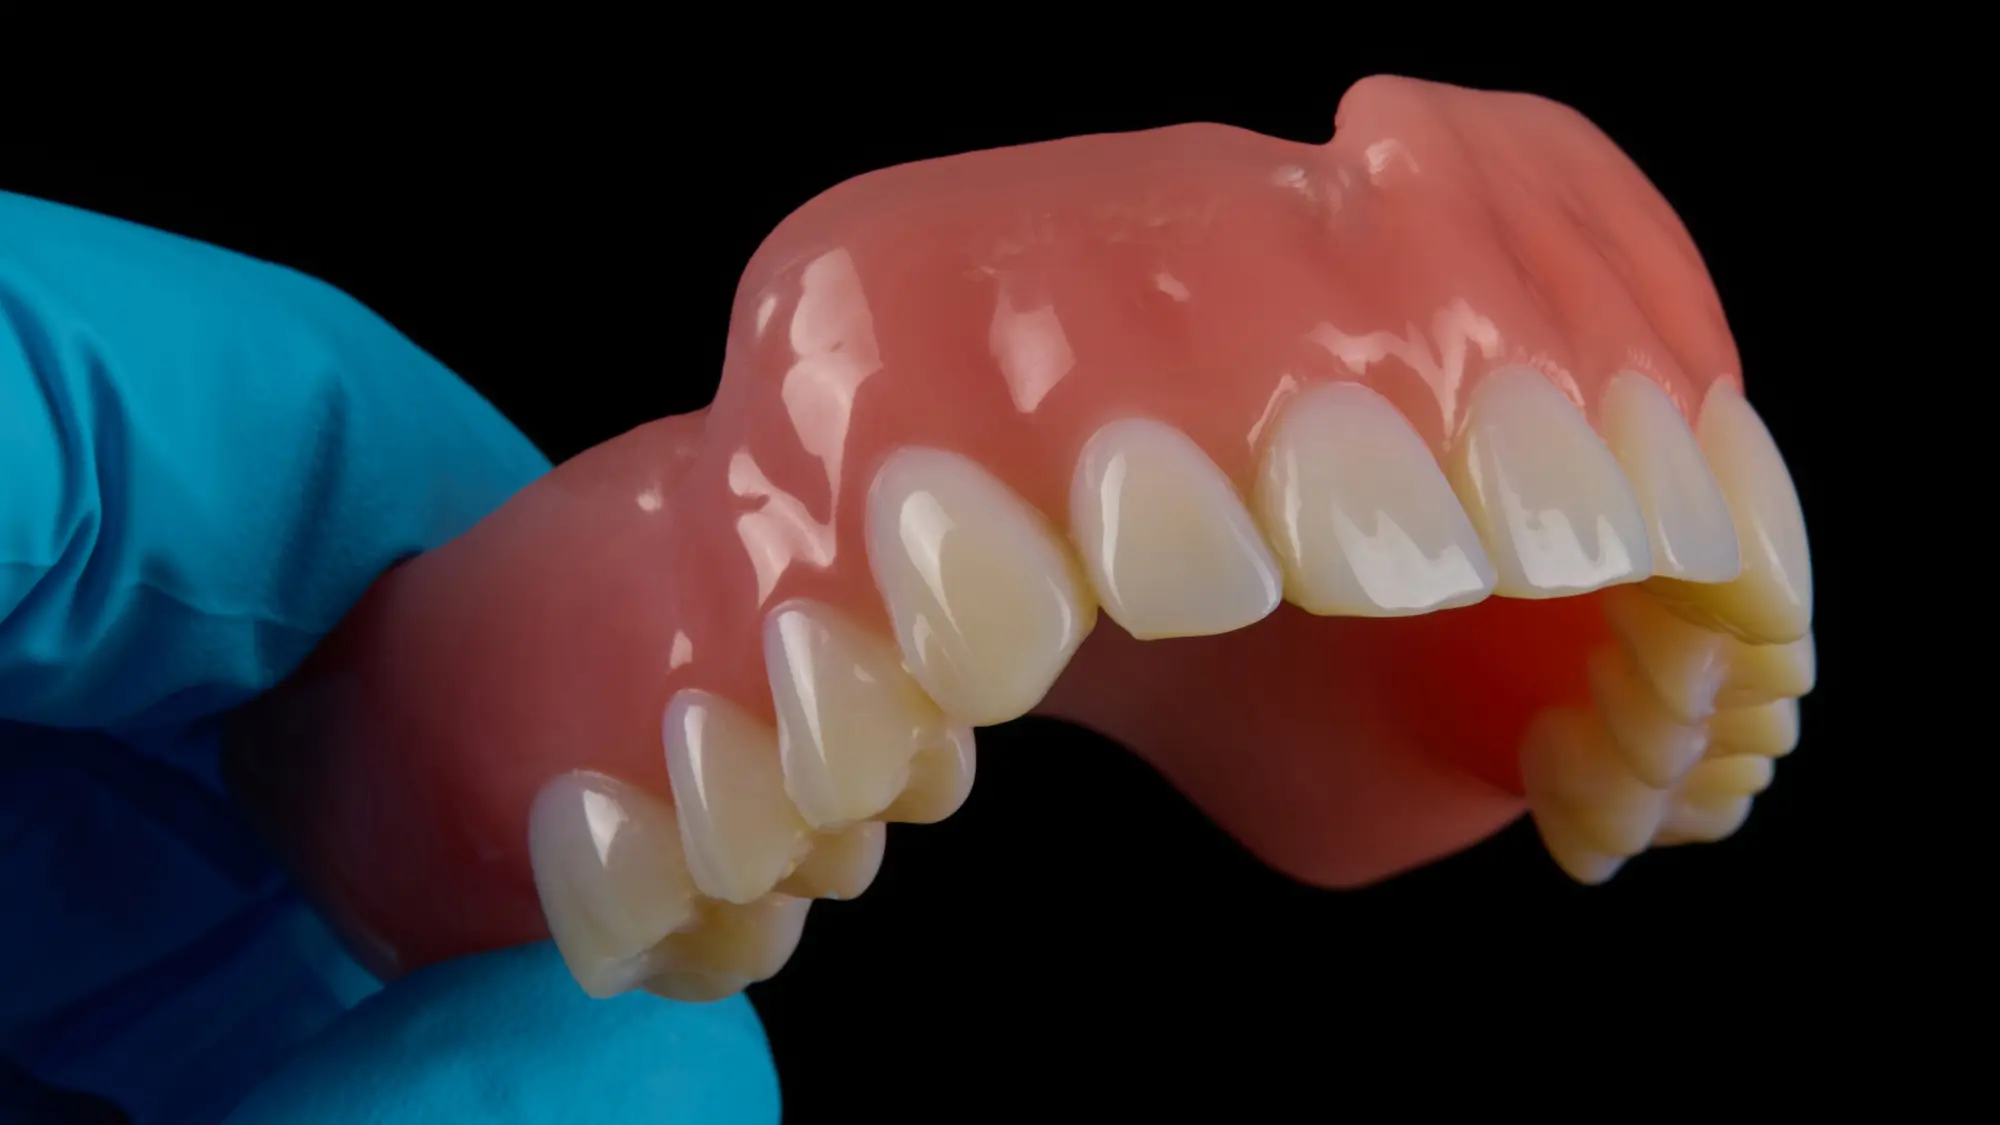

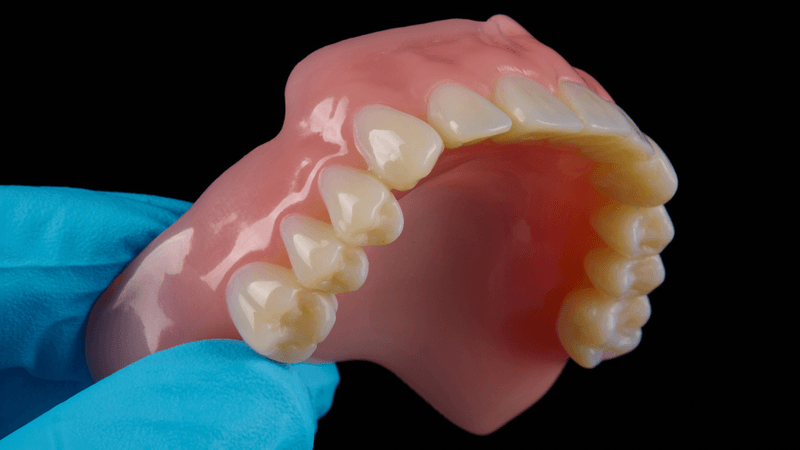
Formlabs Digital Dentures offer an easier and more affordable way to produce full dentures using 3D printing. With our new high-impact Class II biocompatible Denture Base Resin V2 and Premium Teeth Resin, you can reliably create accurate, long-lasting dentures.
While the steps to make a digital denture are different from the traditional lab process, the workflow for the dentist and patient stays very similar.
This application guide walks you through the key steps to go from a digital patient scan to a finished 3D printed denture using the Form 4B or Form 4BL dental 3D printers and Formlabs post-processing tools.
For detailed instructions, please refer to the official Instructions for Use.
Formlabs Digital Dentures offer an easier and more affordable way to produce full dentures using 3D printing. With our new high-impact Class II biocompatible Denture Base Resin V2 and Premium Teeth Resin, you can reliably create accurate, long-lasting dentures.
While the steps to make a digital denture are different from the traditional lab process, the workflow for the dentist and patient stays very similar.
This application guide walks you through the key steps to go from a digital patient scan to a finished 3D printed denture using the Form 4B or Form 4BL dental 3D printers and Formlabs post-processing tools.
For detailed instructions, please refer to the official Instructions for Use.
Provided by the Dentist
A final functional impression of the mucous tissue of the jaws.
A bite rim with all necessary information, such as: lip line, midline, canine position, and occlusal plane.
Prescription with desired tooth shape, shade, and other clinical considerations.
Made by Formlabs
|
3D Printer |
||
|
Resin Tank for each resin |
||
|
Mixer for each resin |
||
|
Build Platform |
||
|
Resin |
Formlabs Denture Base Resin V2 and Premium Teeth Resin |
|
|
Washing Equipment |
||
|
Curing Equipment |
Form Cure or Form Cure V2 |
|
Made by Third Parties
A dental handpiece and tools for acrylics
Handheld UV light cure unit (must be between 365nm - 405nm)
Optional:
Steam cleaner
Ultrasonic bath
Silicone tongs
Pumice and polishing compound
Third-party bond kit
Sandblast media
Made by Formlabs
Latest PreForm Dental software and printer firmware
Made by Third Parties
Denture design software
This may include:
|
Purchased CAD |
Pay-per-Case CAD |
Design Service |
|
|
|
1. Scan and Design
1.1 Scan
Digital denture design software requires a digitized model or an intraoral scan of the patient’s oral anatomy in order to design the removable prosthetic.
The best available method for creating a digital file for edentulous patients is to scan the fully articulated, poured, or printed model and wax rim with a desktop laboratory scanner.
To optimize the accuracy of the bite, use a desktop scanner that can scan the bite of the fully articulated model without unmounting it.
Alternatively, an intraoral digital impression can be used. This prevents any soft tissue compression during the impression, but makes it harder to identify lines between moveable and fixed soft tissue for a fully functional denture.
1.2 Design
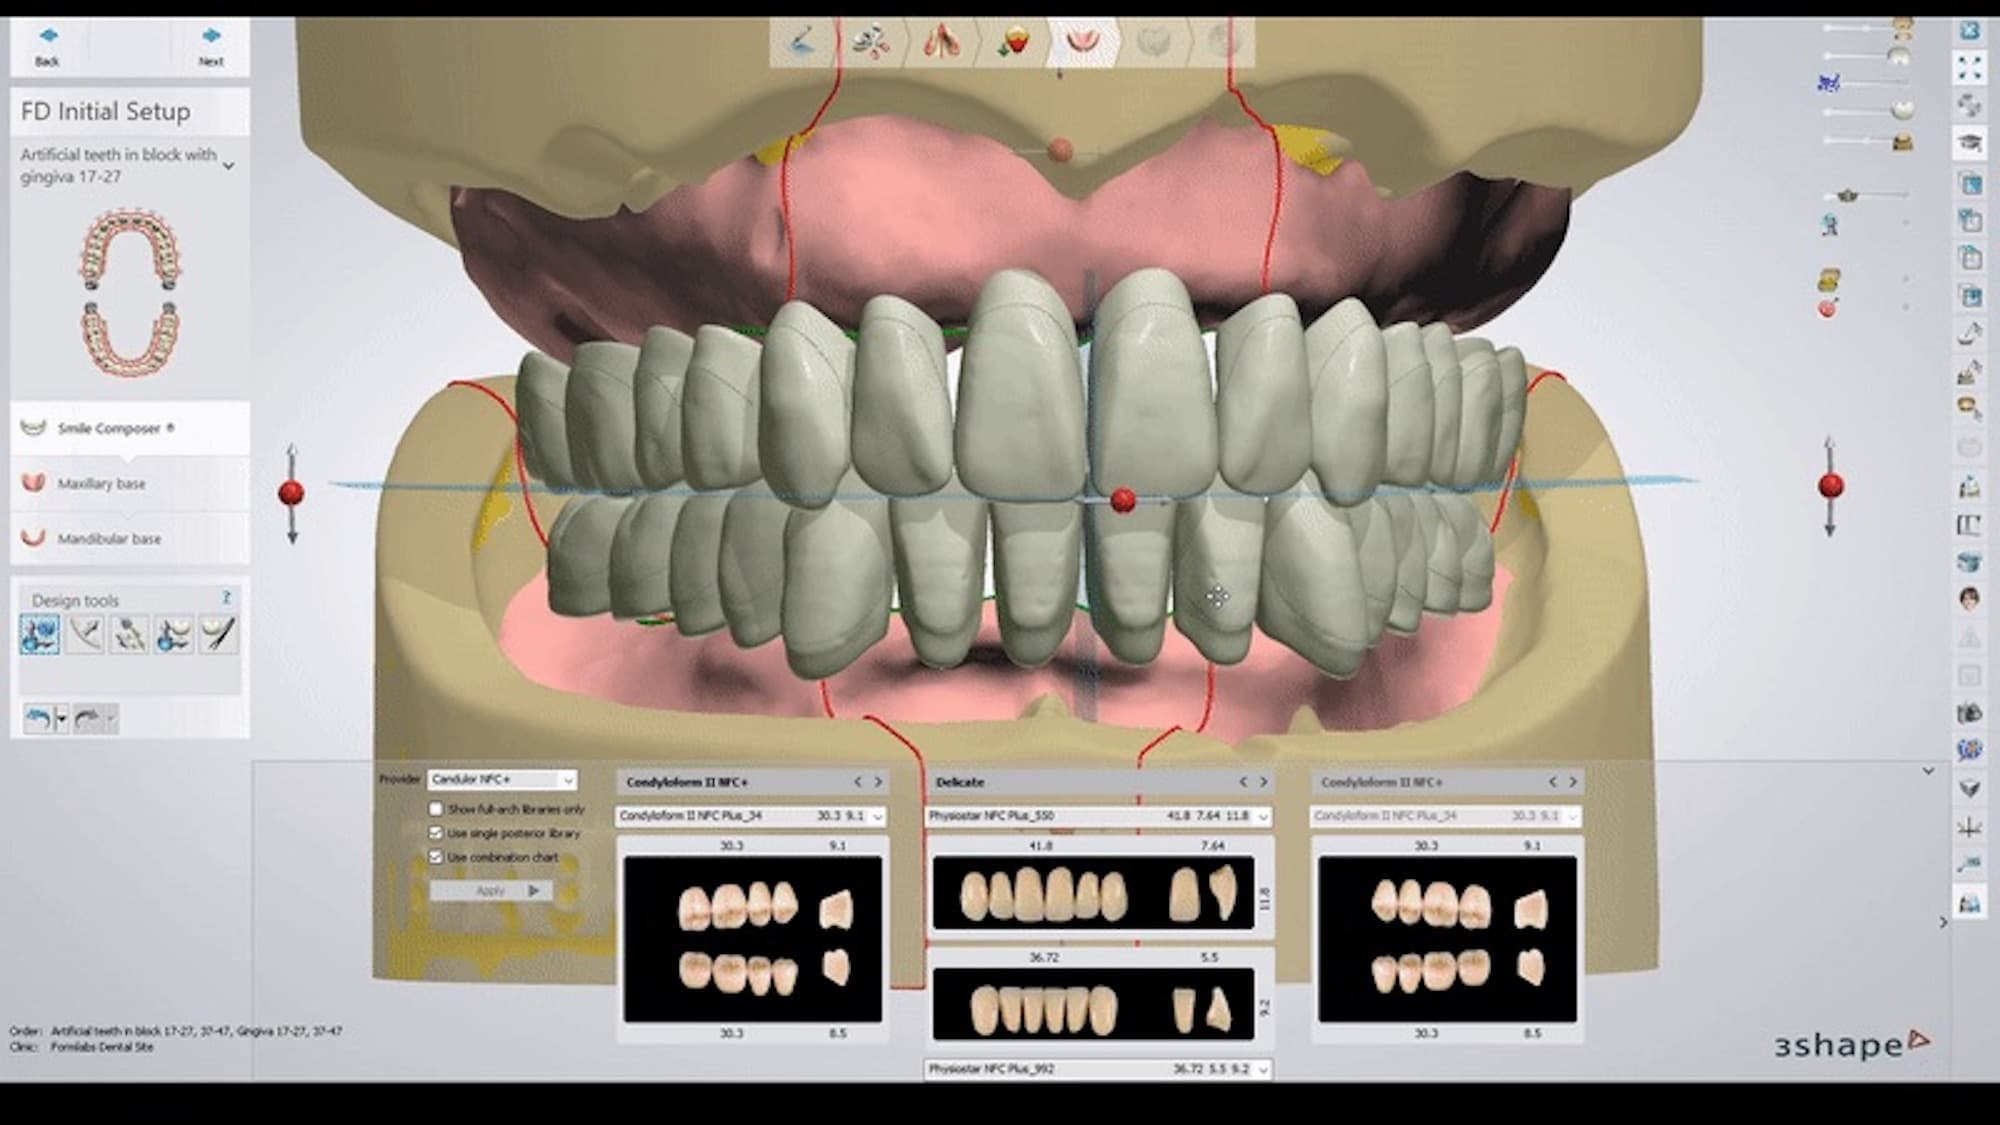
Denture Design Software
Adjust your workflow according to the software you use.
Install the material libraries provided by Formlabs:
> Download our 3Shape materials library (DME).
> Install the exocad materials library using exocad dentalshare.
Use the following tips while designing the denture.
General design recommendations:
Base thickness: > 2.0 mm (add a 0.1–0.2 mm buffer for polishing). A thicker base ensures a stronger 3D printed denture.
Retention elements requiring high deflection during seating (such as traditional C-clasps) may lead to premature fracture and should not be printed with Denture Base Resin V2.
It’s recommended to disable drill compensation, as it isn’t relevant for 3D printing and can negatively affect the fit of the denture base.
Formlabs libraries include a predefined coupling setting. If you’re using software other than exocad or 3Shape, set the offset between the base and teeth to 0.1 mm or less to ensure a proper gluing gap.
Denture Base Resin V2 is more translucent than traditional acrylics, so it’s best to use tooth libraries without roots, with only short root portions, or trim the root in CAD if the software allows. This helps maintain a natural-looking result.
If you wish to use pre-manufactured teeth, consider selecting options designed for digital workflows such as VITA VIONIC VIGO, Dentsply Sirona IPN 3D, or Kulzer Artic Digital. These teeth feature a significantly reduced root portion, which enhances aesthetics when used with our semi-translucent base material and minimizes the need for basal adjustments.
2. STL File Output
Denture teeth or CAD libraries are an important part of the digital denture process. Library compatibility varies by software. For example, some open libraries restrict output, while other libraries generate the denture teeth splinted, but not individually.
3Shape
> Open the Download Center in the 3Shape Dental Manager Control Panel to download new libraries. See 3Shape’s documentation for details.
Exocad
> Install teeth libraries following the instructions for exocad dentalshare.
Note
Denture teeth library availability and outputs will likely change as the industry evolves. Follow your digital denture design software provider’s guidelines for the most up-to-date information.
3. Prepare for Printing
3.1 Import Files Into PreForm
Once you export the STL files from the denture design software, import the files into PreForm Dental to prepare them for printing. You may need to manually set up your files in the PreForm Dental Workspace. To select the Dental Workspace, go to the View dropdown menu and select Choose Workspace.
Select the material for printing: Premium Teeth or Denture Base V2.
Note
For the best results, use the latest version of PreForm and printer firmware.
3.2 Orientation and Supports
Note
Proper part orientation is critical to ensure accuracy and reduce post-processing after printing.
Denture Base
Orientation:
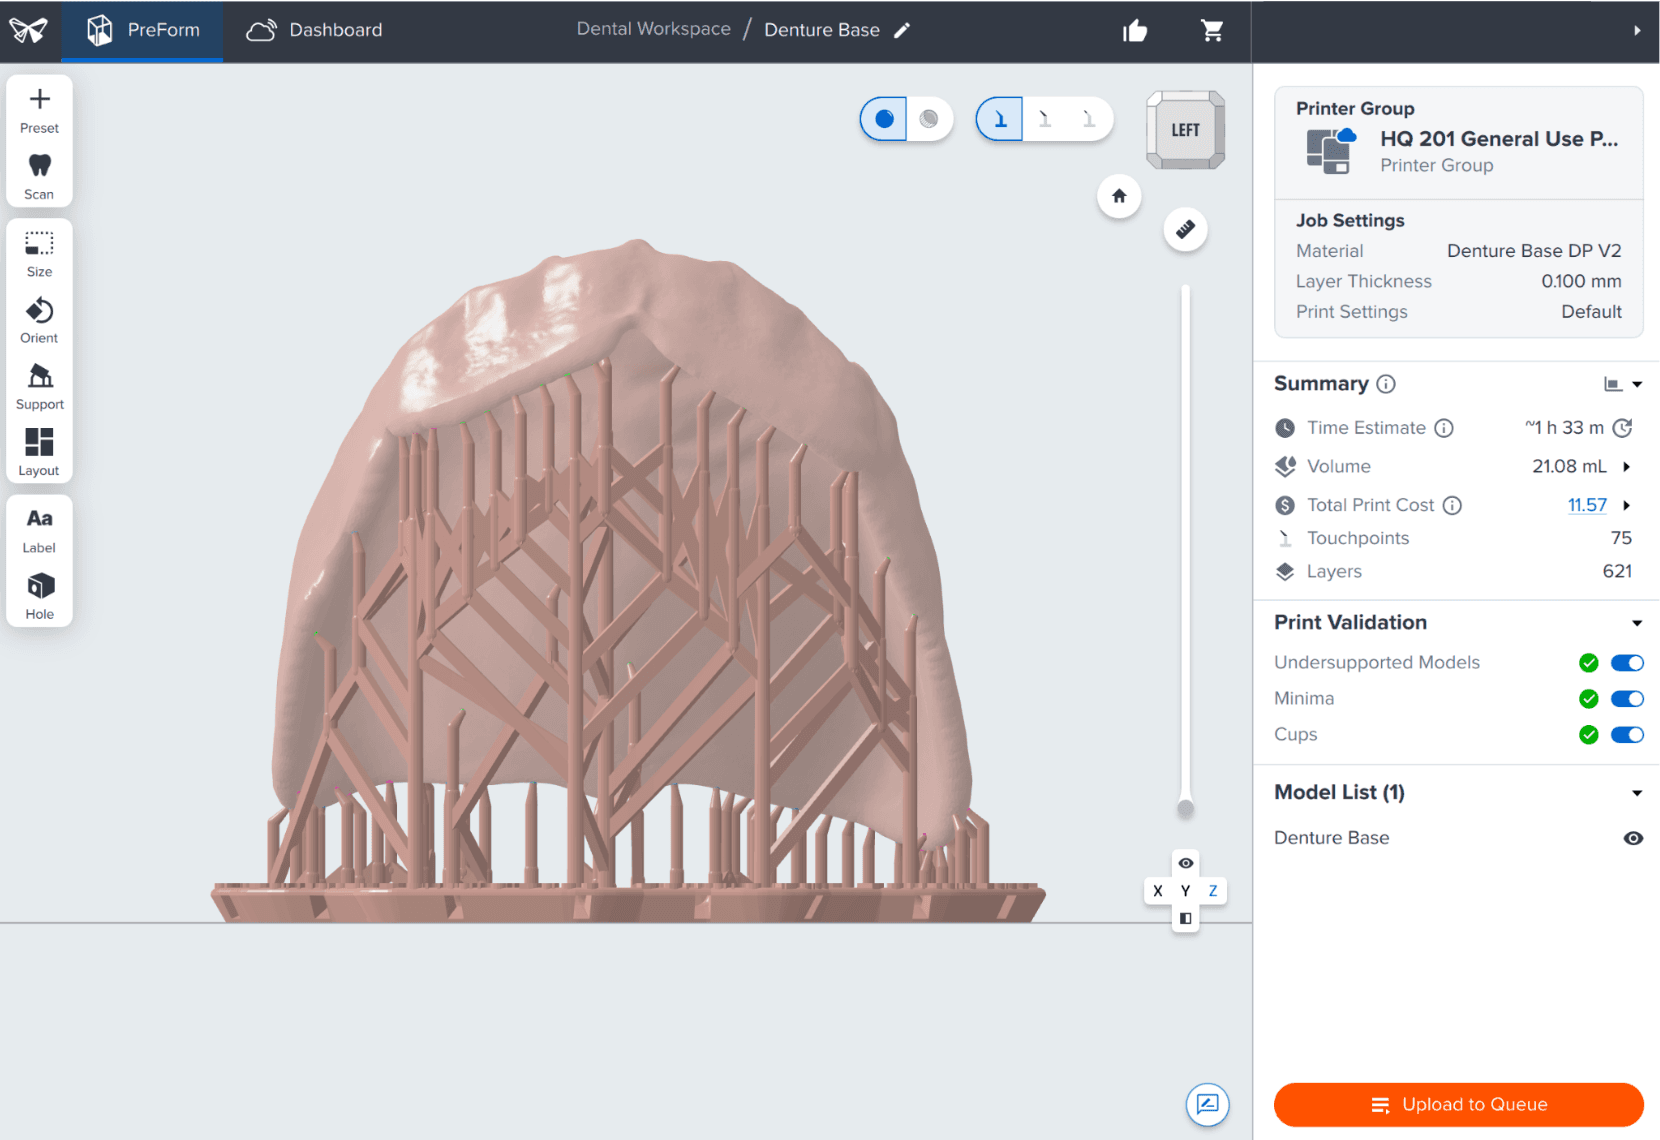
Users may print at any angle, but fit may be suboptimal at angles steeper than 70 degrees. An angle of 60 degrees is recommended since it results in excellent part accuracy while still being very space-efficient with the build platform area. The anterior buccal part can face towards or away from the build platform. We recommend placing the supports on the intaglio face of the denture base.
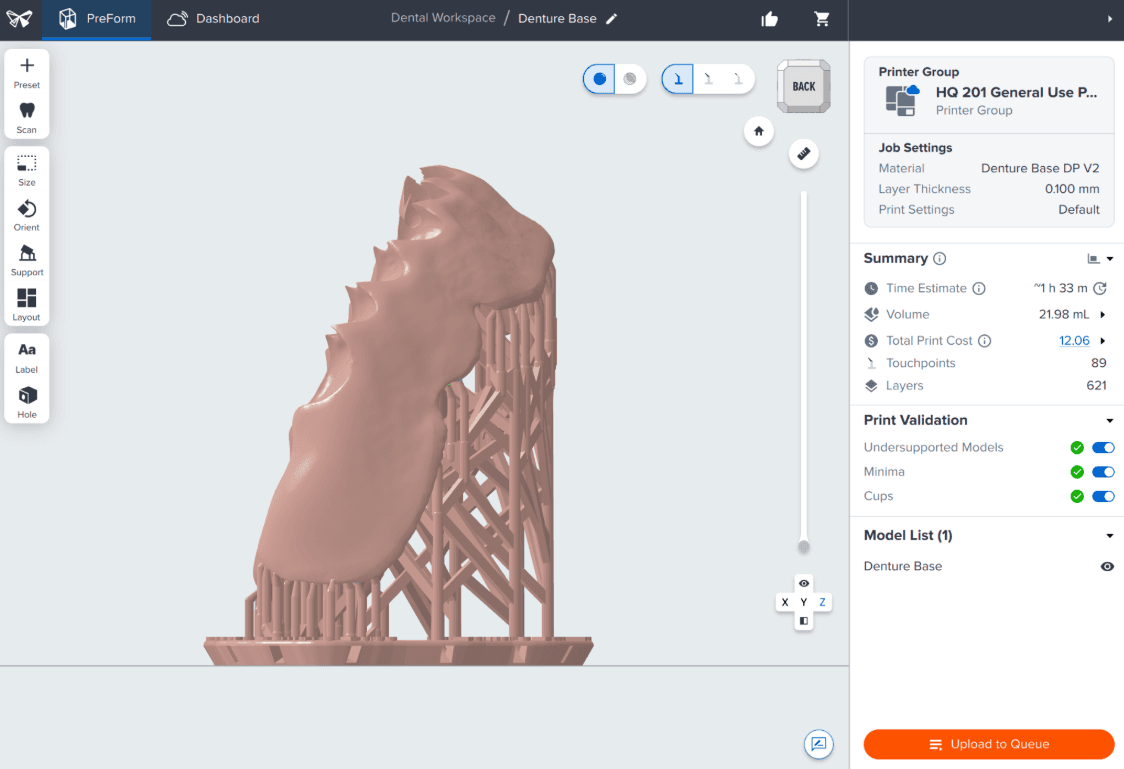
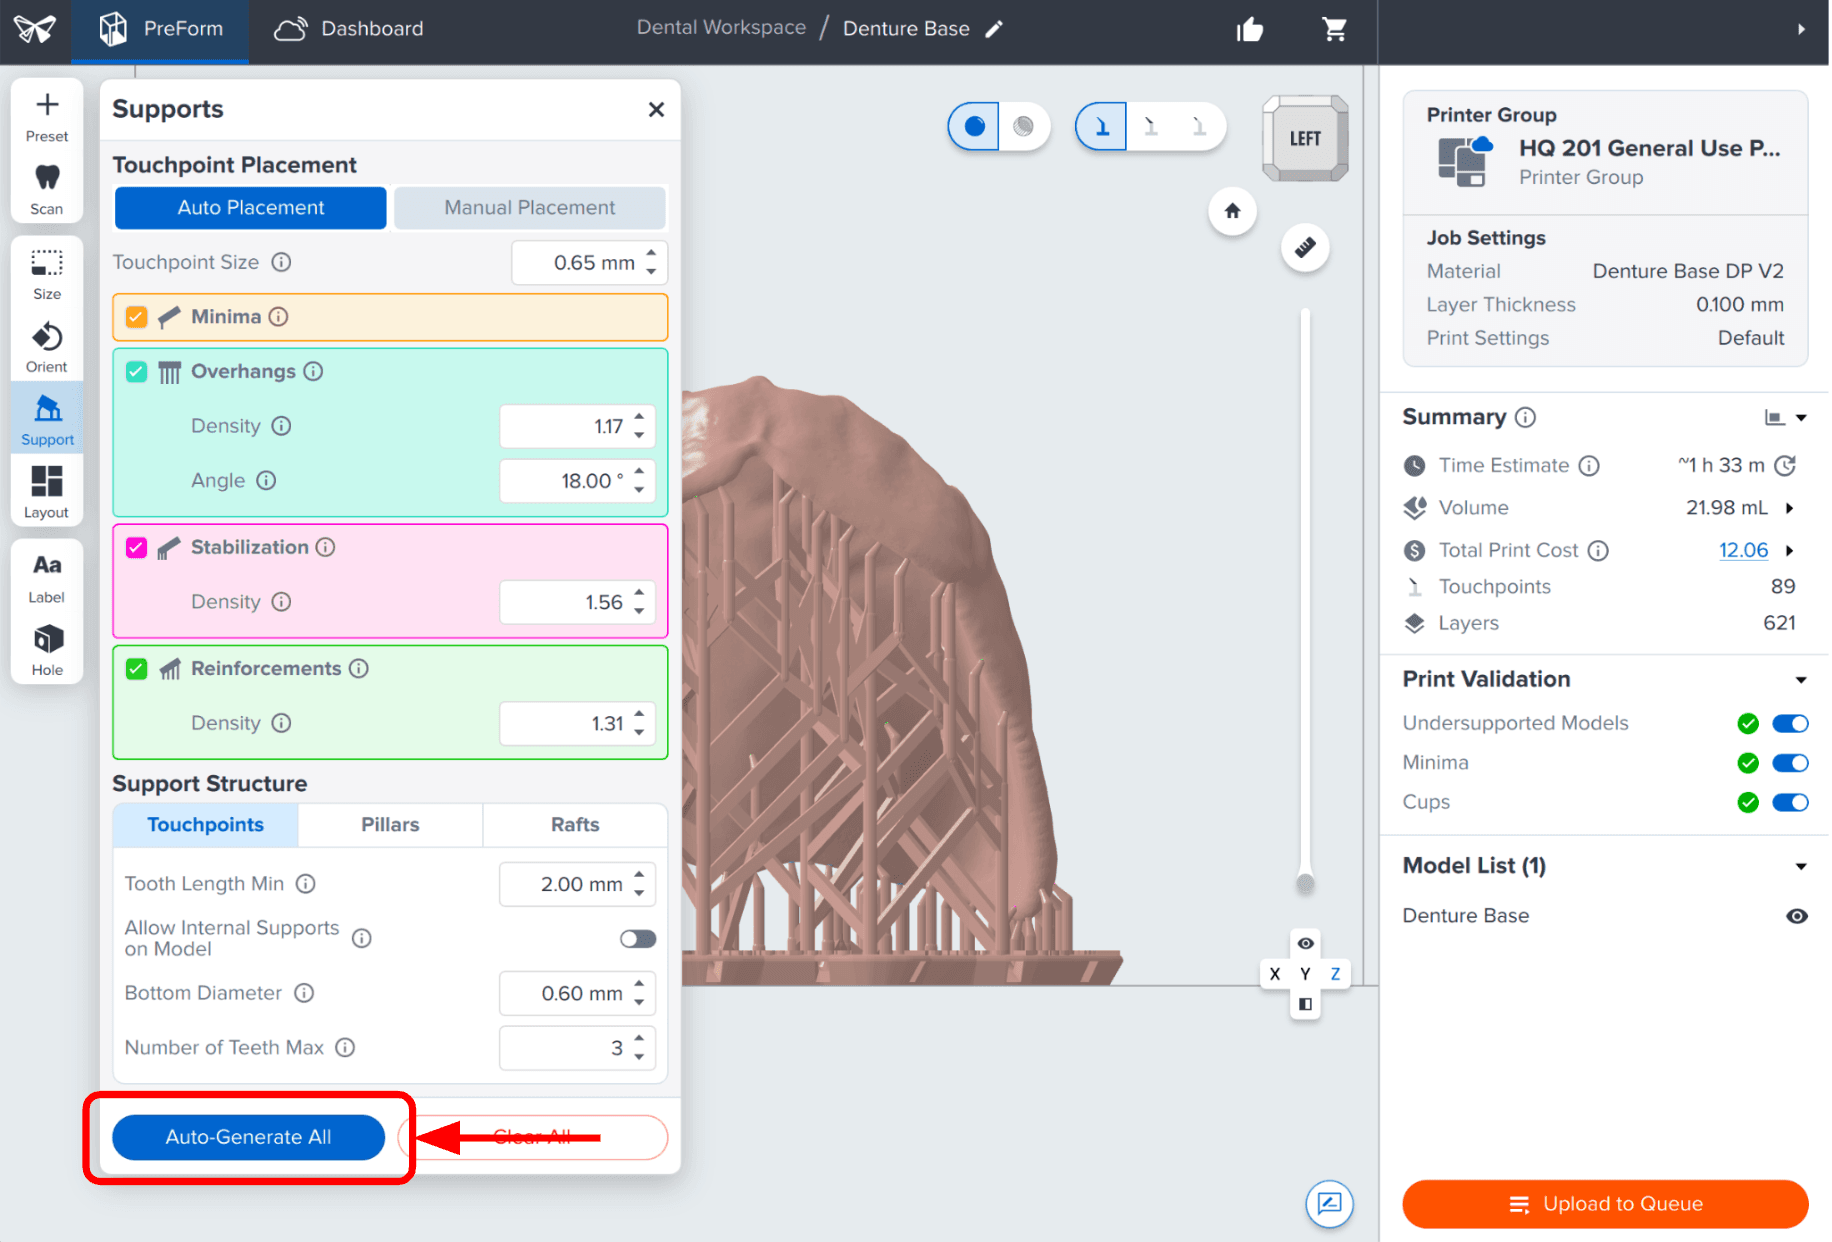
To generate supports automatically, under the Supports menu, ensure Auto-Placement is selected and click Auto-Generate All.
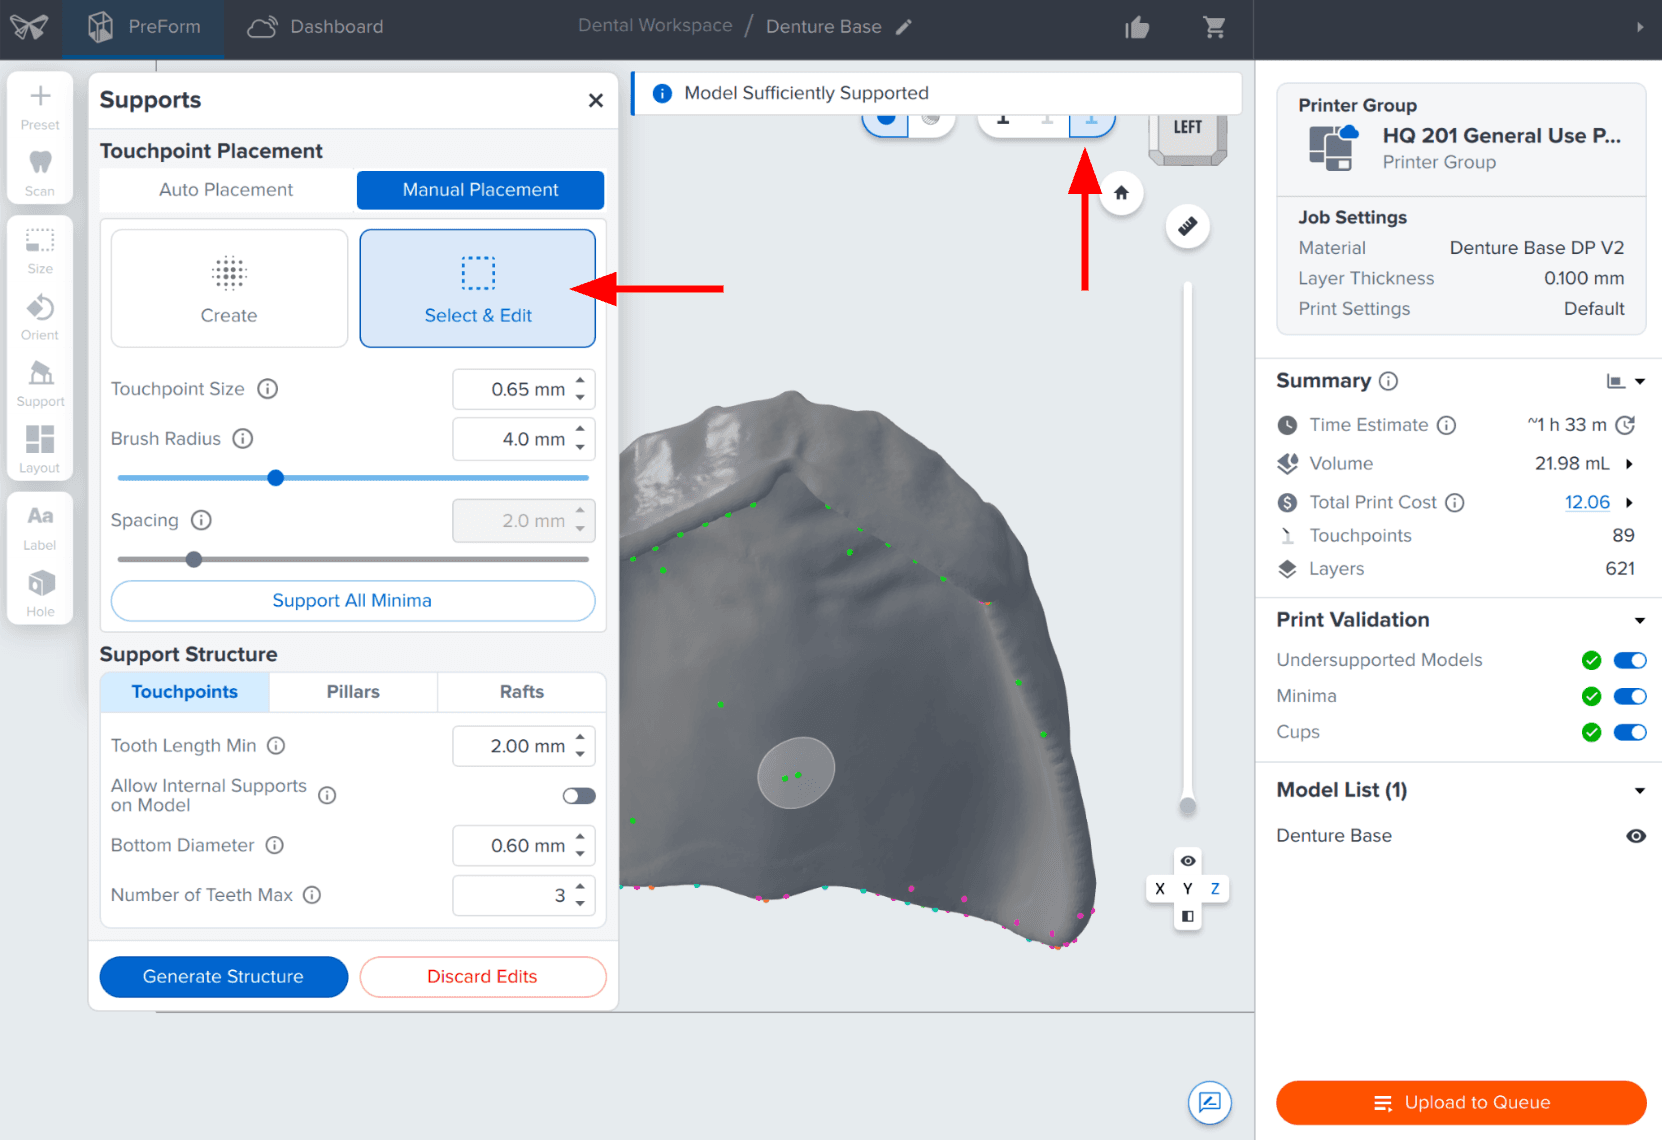
If any supports appear in undesired areas — especially if they interfere with anatomical features or increase post-processing complexity, return to the Supports menu and select Manual Placement to modify supports. Toggle the view to “Show touchpoints only” for better visibility. Clicking directly on an existing touchpoint will remove it.
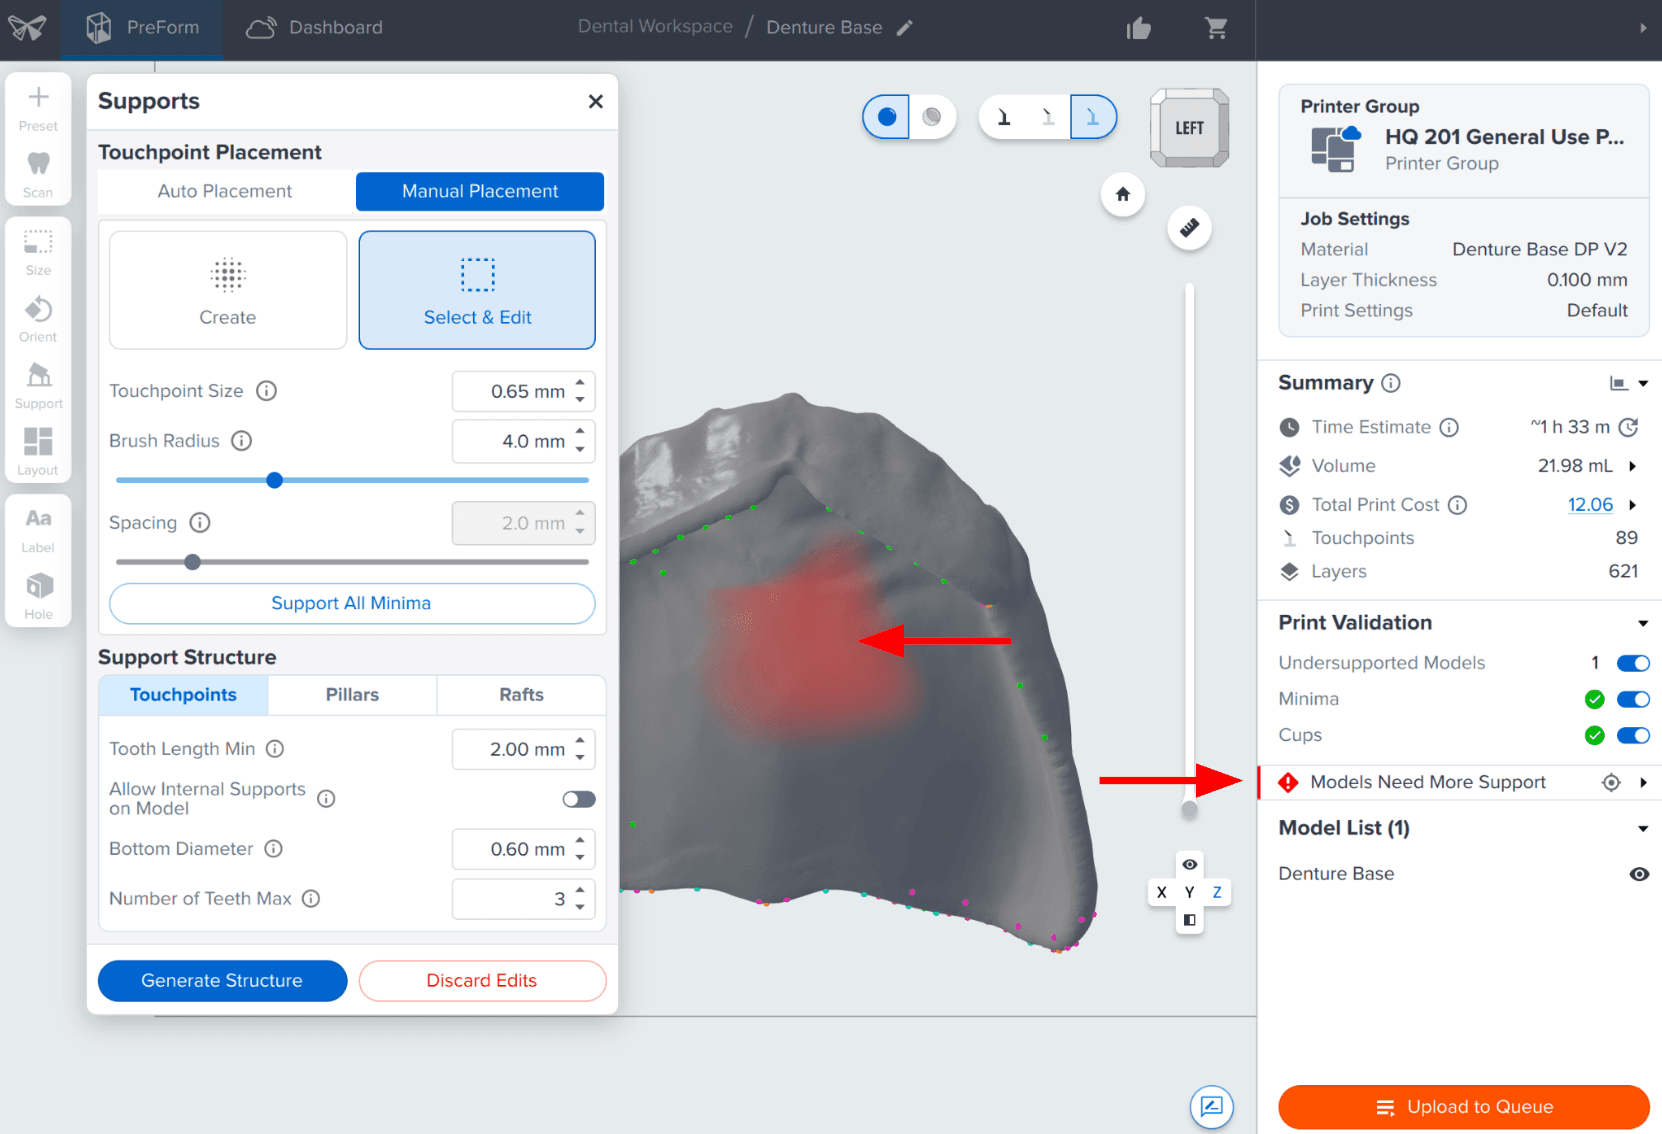
PreForm will alert you if you have an undersupported model and need to add additional supports for a successful print.
Note
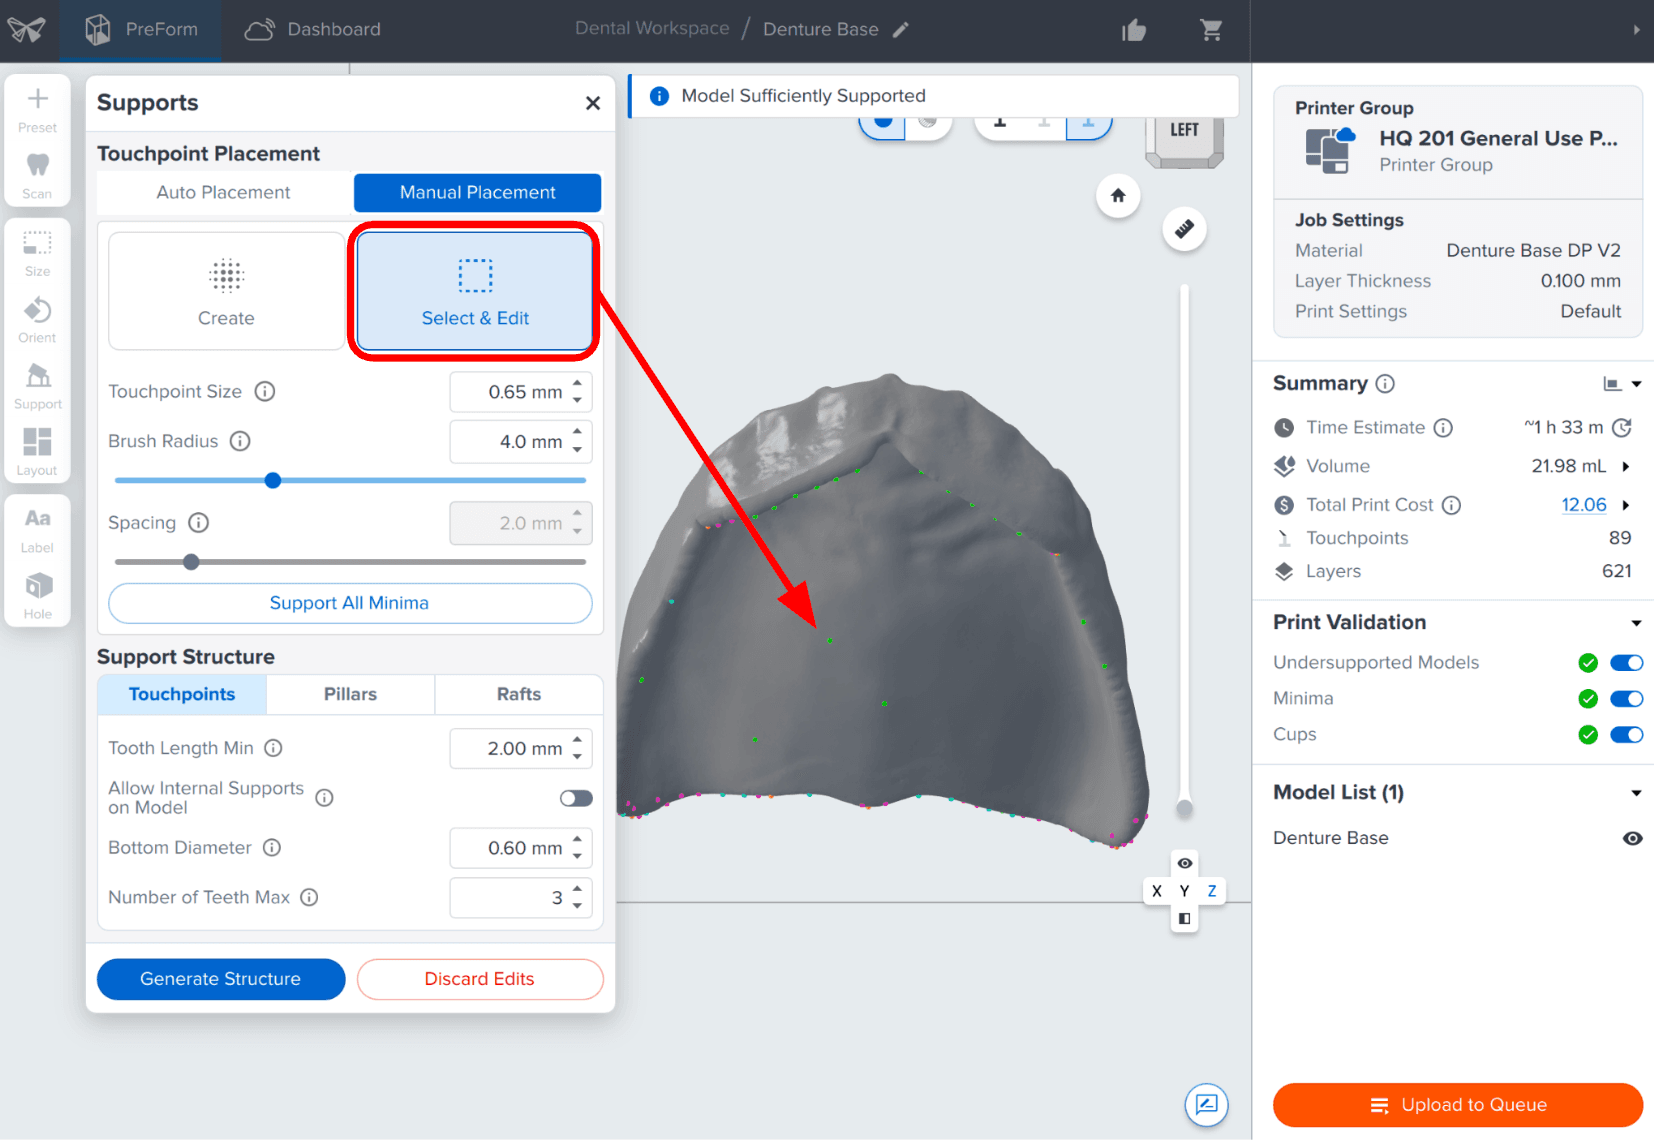
For the best results, concentrate support touchpoints around the perimeter of the denture. Support removal from these areas is less laborious and leaves critical detailed areas support-free. Remove support touchpoints from the teeth sockets or cervical margin if possible to reduce post-processing. Cross-arch bars may also be utilized if additional support is needed.
Premium Teeth
Orientation:
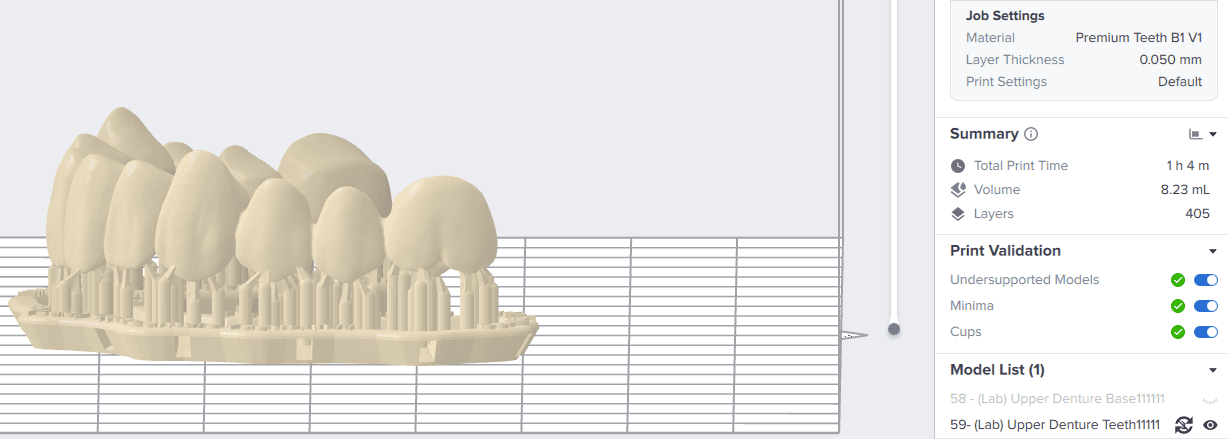
Position the tooth arch at approximately a 0-30° angle to the build platform. The occlusal surface of the teeth can face towards or away from the build platform, depending on preference in finishing the part.
Supports:
To generate supports automatically, under the Support menu, ensure Auto-Placement is selected and click Auto Generate. If any supports appear in undesired areas — especially if they interfere with anatomical features or increase post-processing complexity, return to the Supports menu and select Manual Placement to modify supports.
4. Print
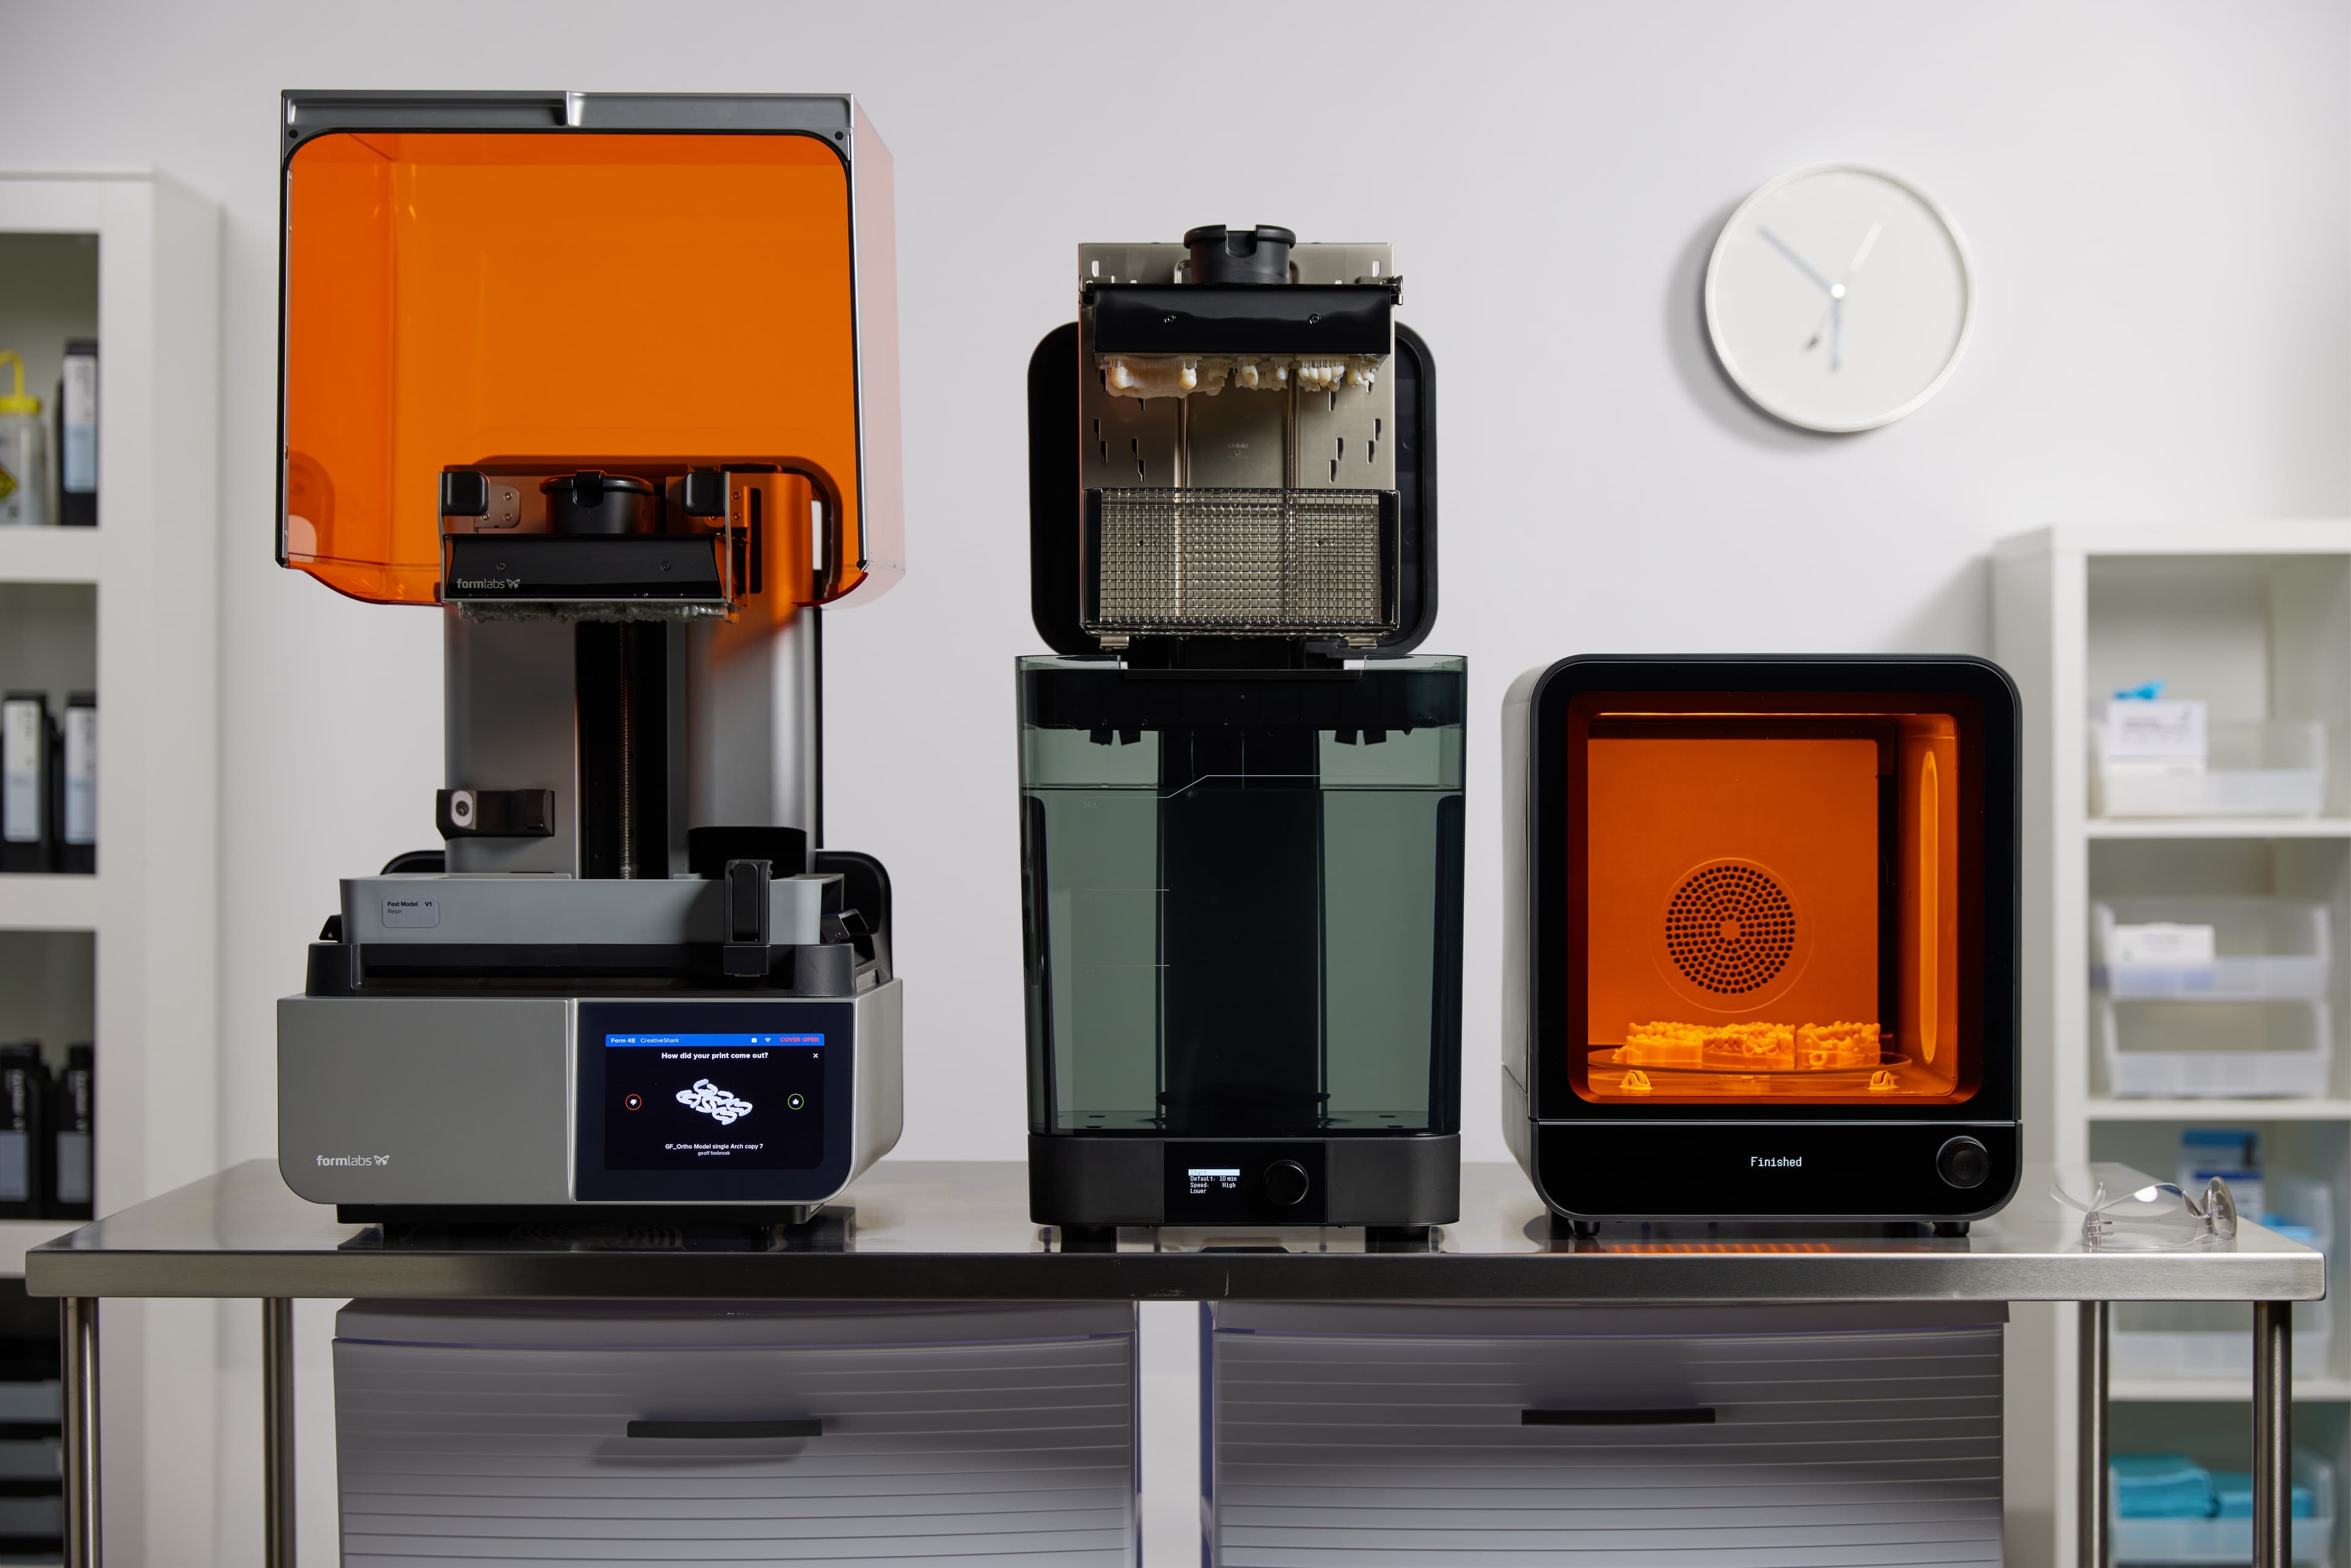
Thoroughly shake the resin cartridge before use. Prepare the 3D printer by inserting a resin tank, resin cartridge, and build platform into the printer. Send the job to the printer from PreForm, and start the print.
Important
For full compliance and biocompatibility, Formlabs Denture Base Resin V2 and Premium Teeth Resin each require a dedicated resin tank, build platform, and Finish Kit or Form Wash.
5. Post-Processing
Note
Always use gloves when handling uncured resins and parts.
See the instructions for post-processing in our Instructions for Use for Premium Teeth Resin and Denture Base Resin V2.
5.1 Washing
Parts may be removed from the build platform prior to washing or alternatively parts may be washed directly on the build platform in the Form Wash, whichever best suits your workflow.
To remove uncured or excess resin, refer to the instructions in the IFU or Manufacturing Guide.
Important
To prevent cross-contamination, do not use the same wash as for non-biocompatible resins.
Washing times for Formlabs resins can be conveniently found on this page.
If parts do not appear clean after washing, use a soft-bristle brush and Isopropyl Alcohol in a squirt bottle to clear the denture of residue and replace solvent in wash.
Do not let parts sit in Isopropyl Alcohol for longer than needed.
Parts may be washed with or without supports, but washing without supports will allow for optimal resin removal. If parts are processed with supports, it is important to ensure all resin residue is removed from the part.
After washing, allow the parts to air dry for 30 min, or use compressed air to remove alcohol from the parts’ surfaces and air dry.
Note
Proper drying is necessary to prevent potential aesthetic issues with whitening
5.2 Support Removal
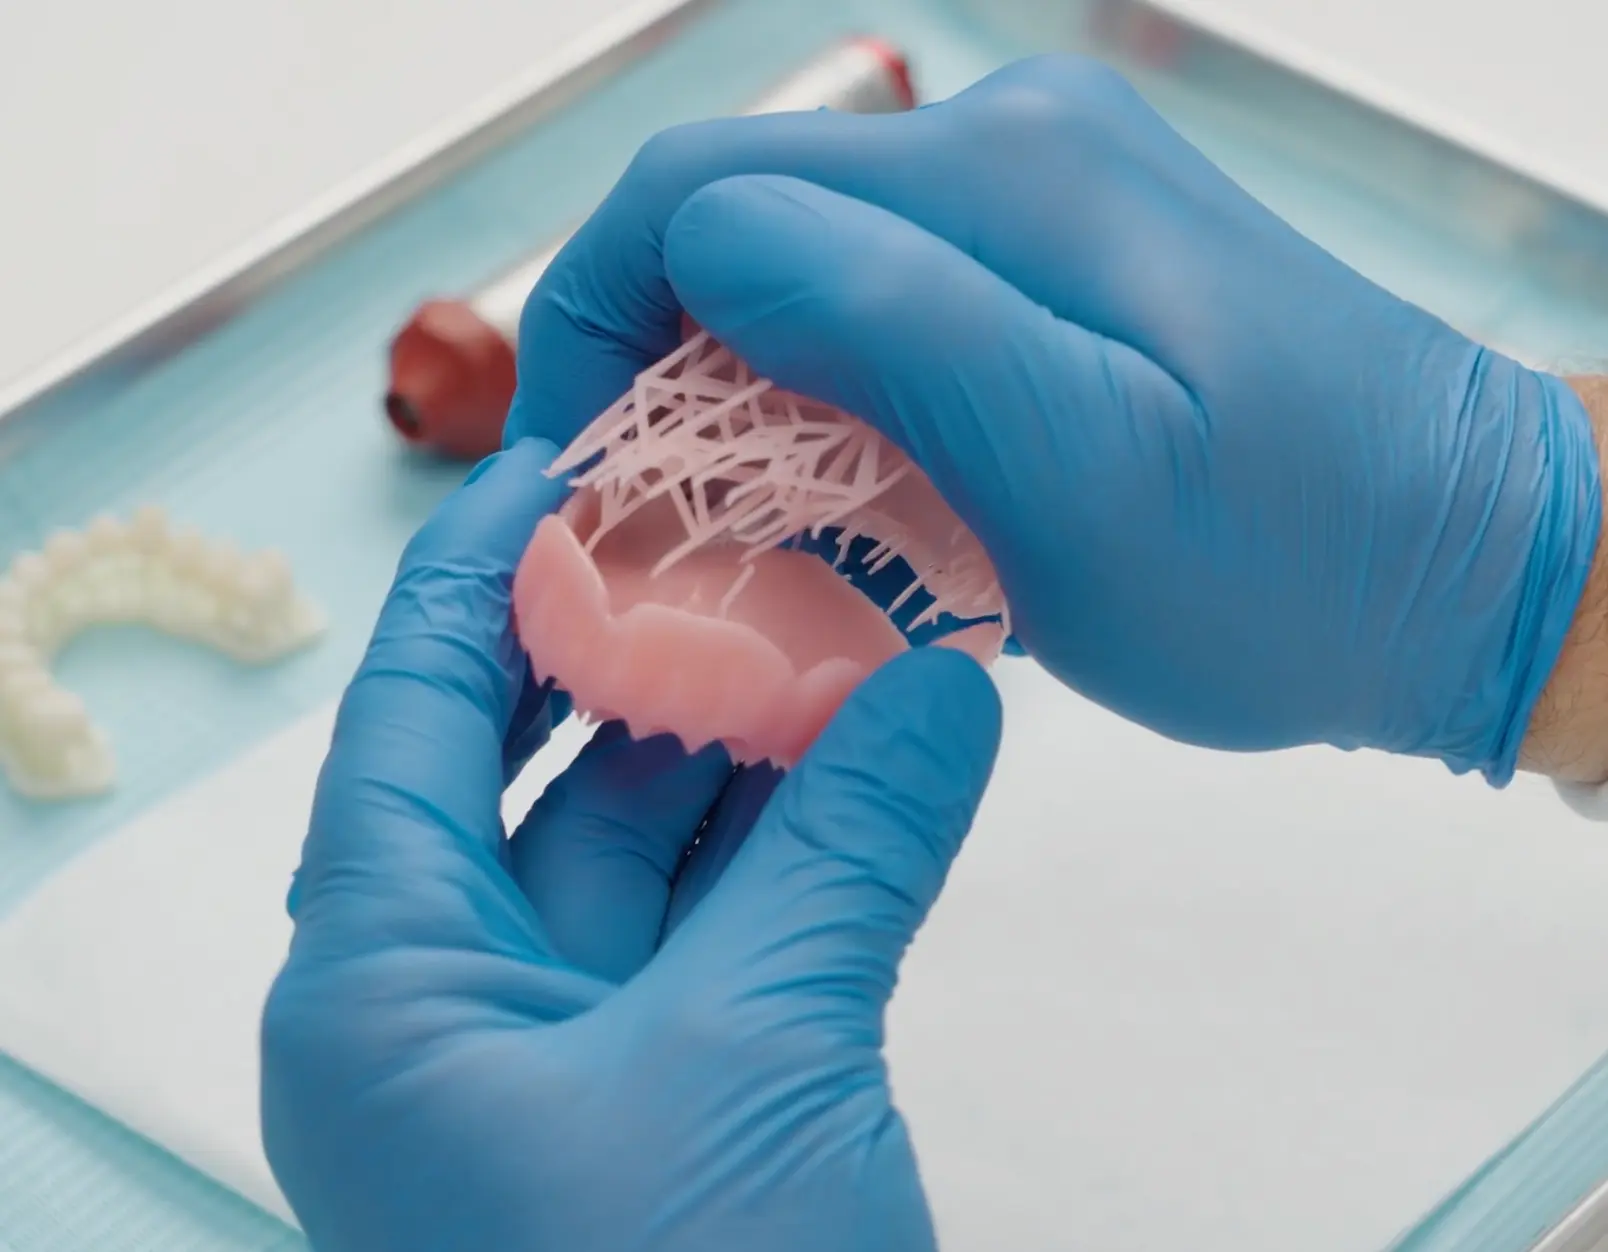
Once the parts have been washed and dried, remove the raft and supports from the base and teeth. To save time, consider using a low-speed dental handpiece, cutting disc, and a universal silicone polisher wheel.
Note
Support removal may also be completed after curing and assembly.
6 Curing and Assembly
Please note that there are several potential workflows depending on your material choices and preferred method of assembly. Please refer to the Manufacturing Guide for full instructions.
6.1 Denture Assembly using Formlabs Denture Base V2 as a bonding agent with Formlabs Premium Teeth Resin
6.1.1 Denture Assembly
Ensure parts are completely dry and free of IPA.
Insert the teeth into the denture base to test the fit. If anything inhibits seating, trim the teeth and the base as needed using a hand tool.
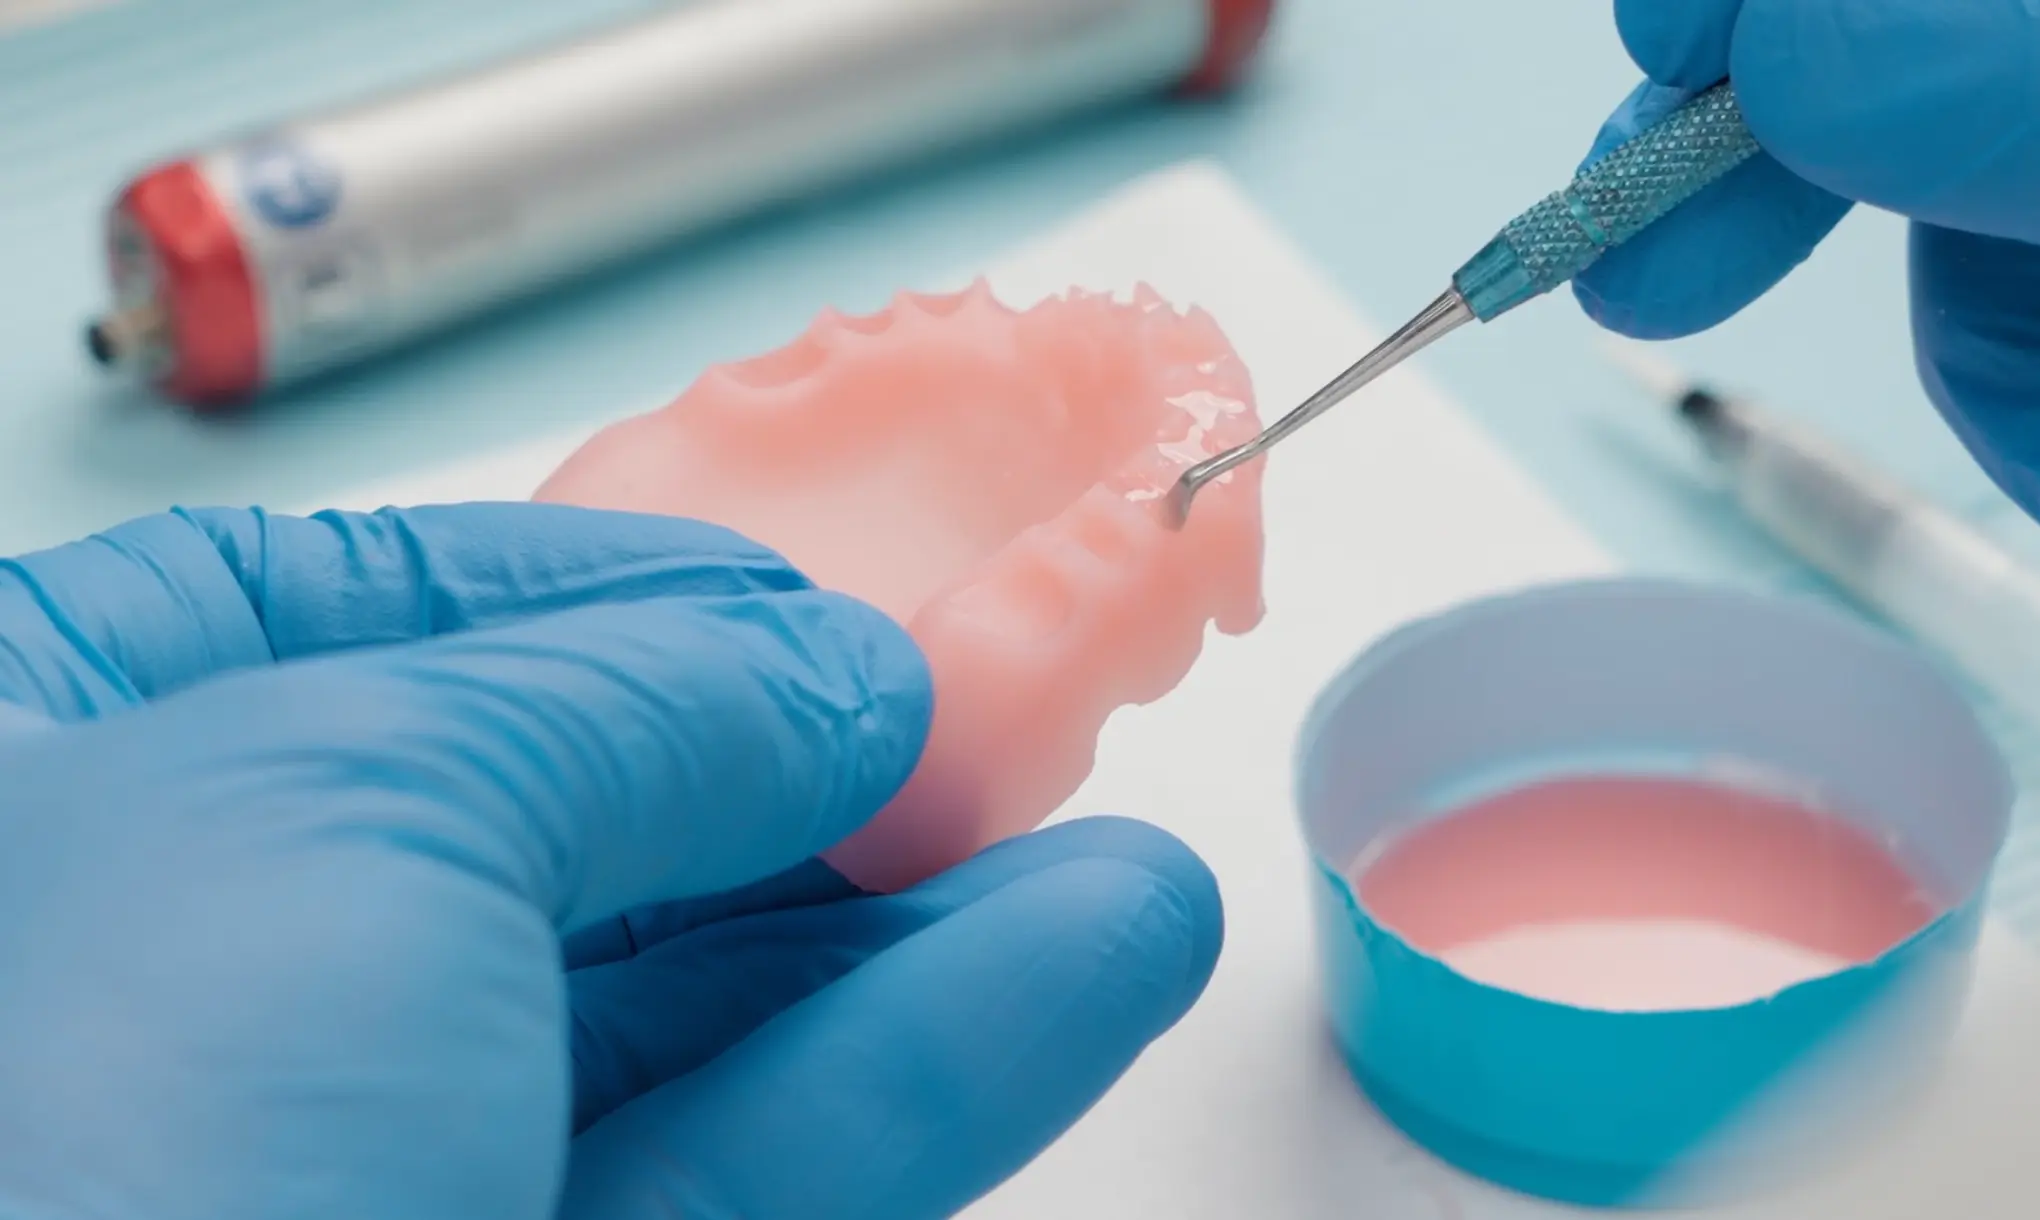
Once your tooth arch fits without obstructions in the sockets on the printed base, the two parts can be assembled. Prepare the denture base by applying, in each pocket, a small amount of liquid Denture Base Resin V2 to the uncured denture.
Affix uncured teeth printed in Premium Teeth Resin to the base. Remove any excess liquid resin with a brush and/or a lint-free cloth.
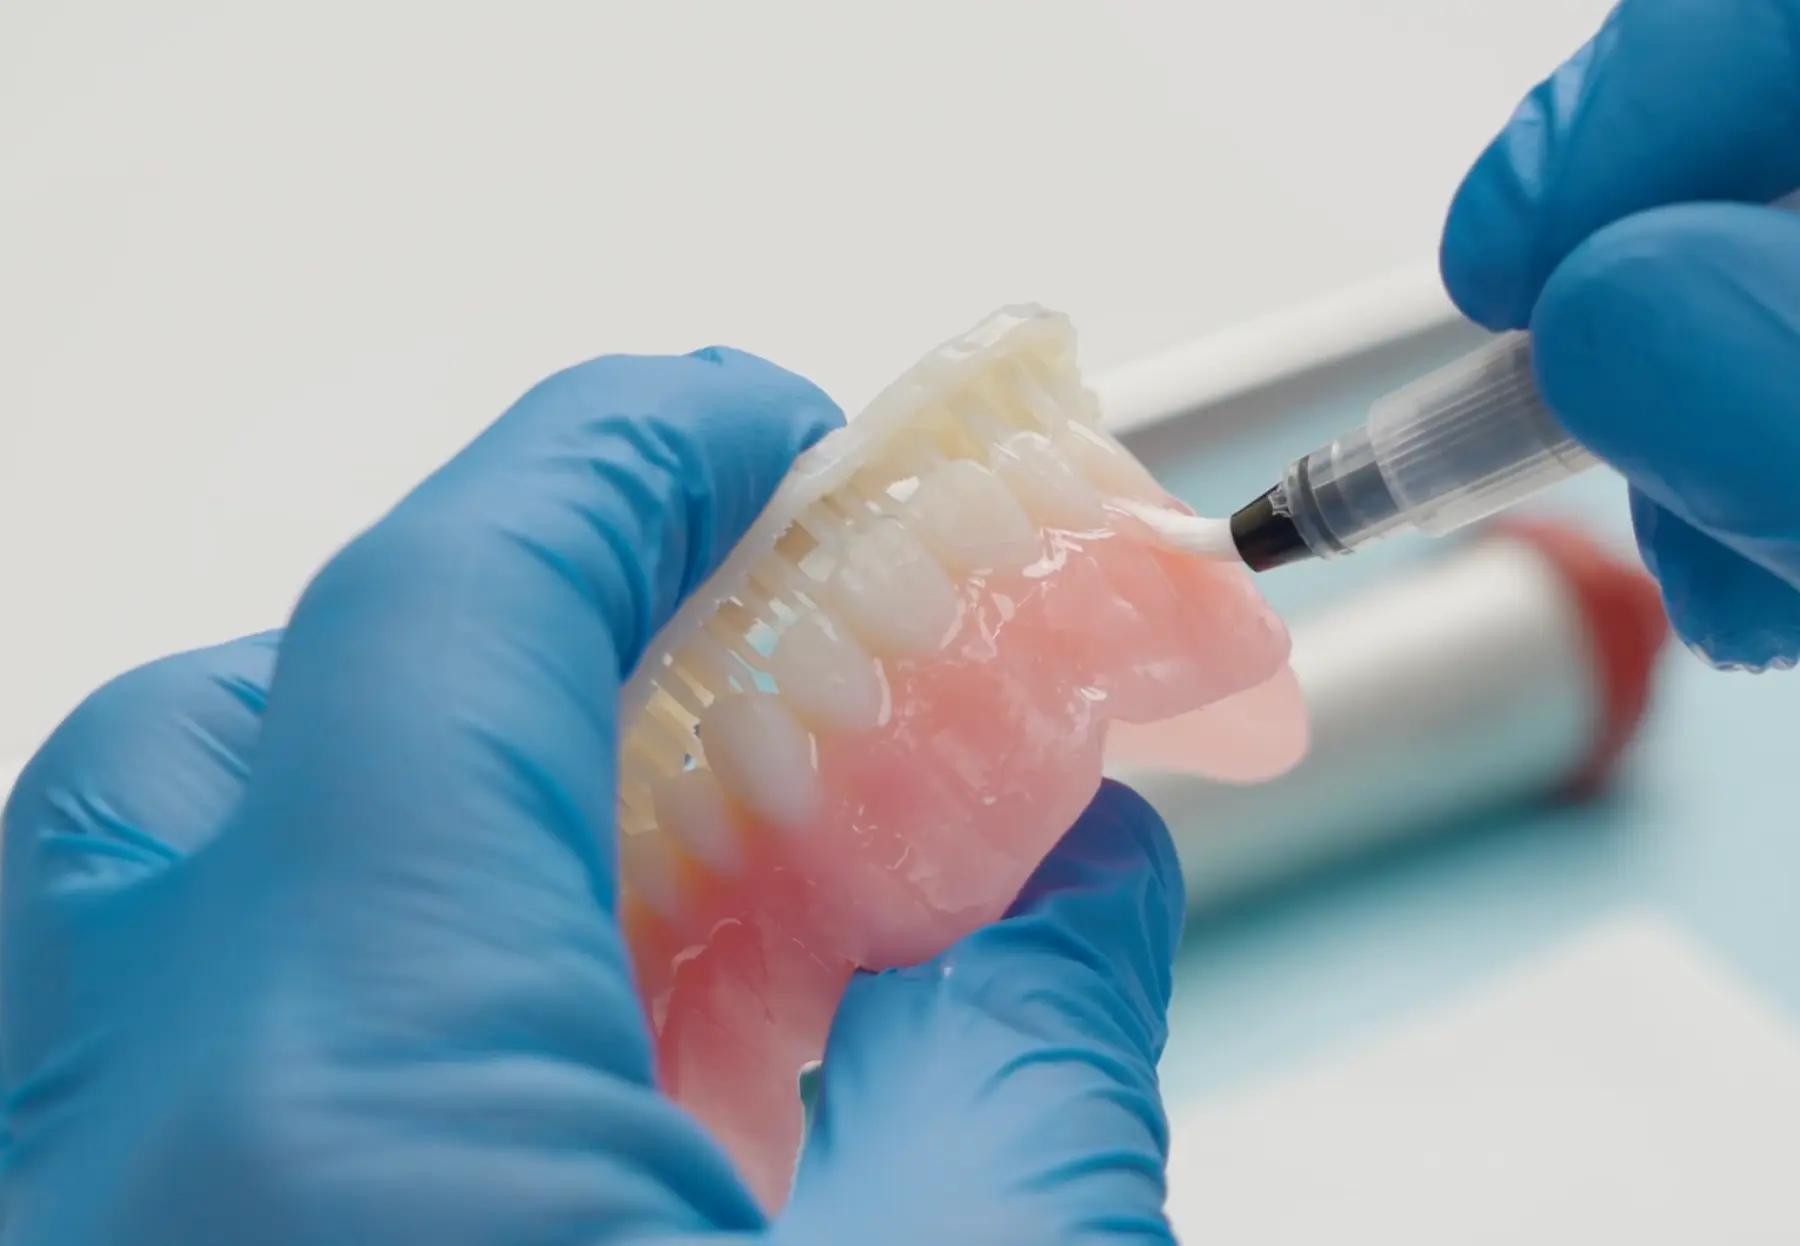
Tack cure interproximal spaces between each tooth with a handheld UV light for 5-10 seconds each or as necessary. All in-house testing at Formlabs was done with a 405 nm handheld UV light, but any light source between 365 nm and 405 nm may also be used.
6.1.2 Curing
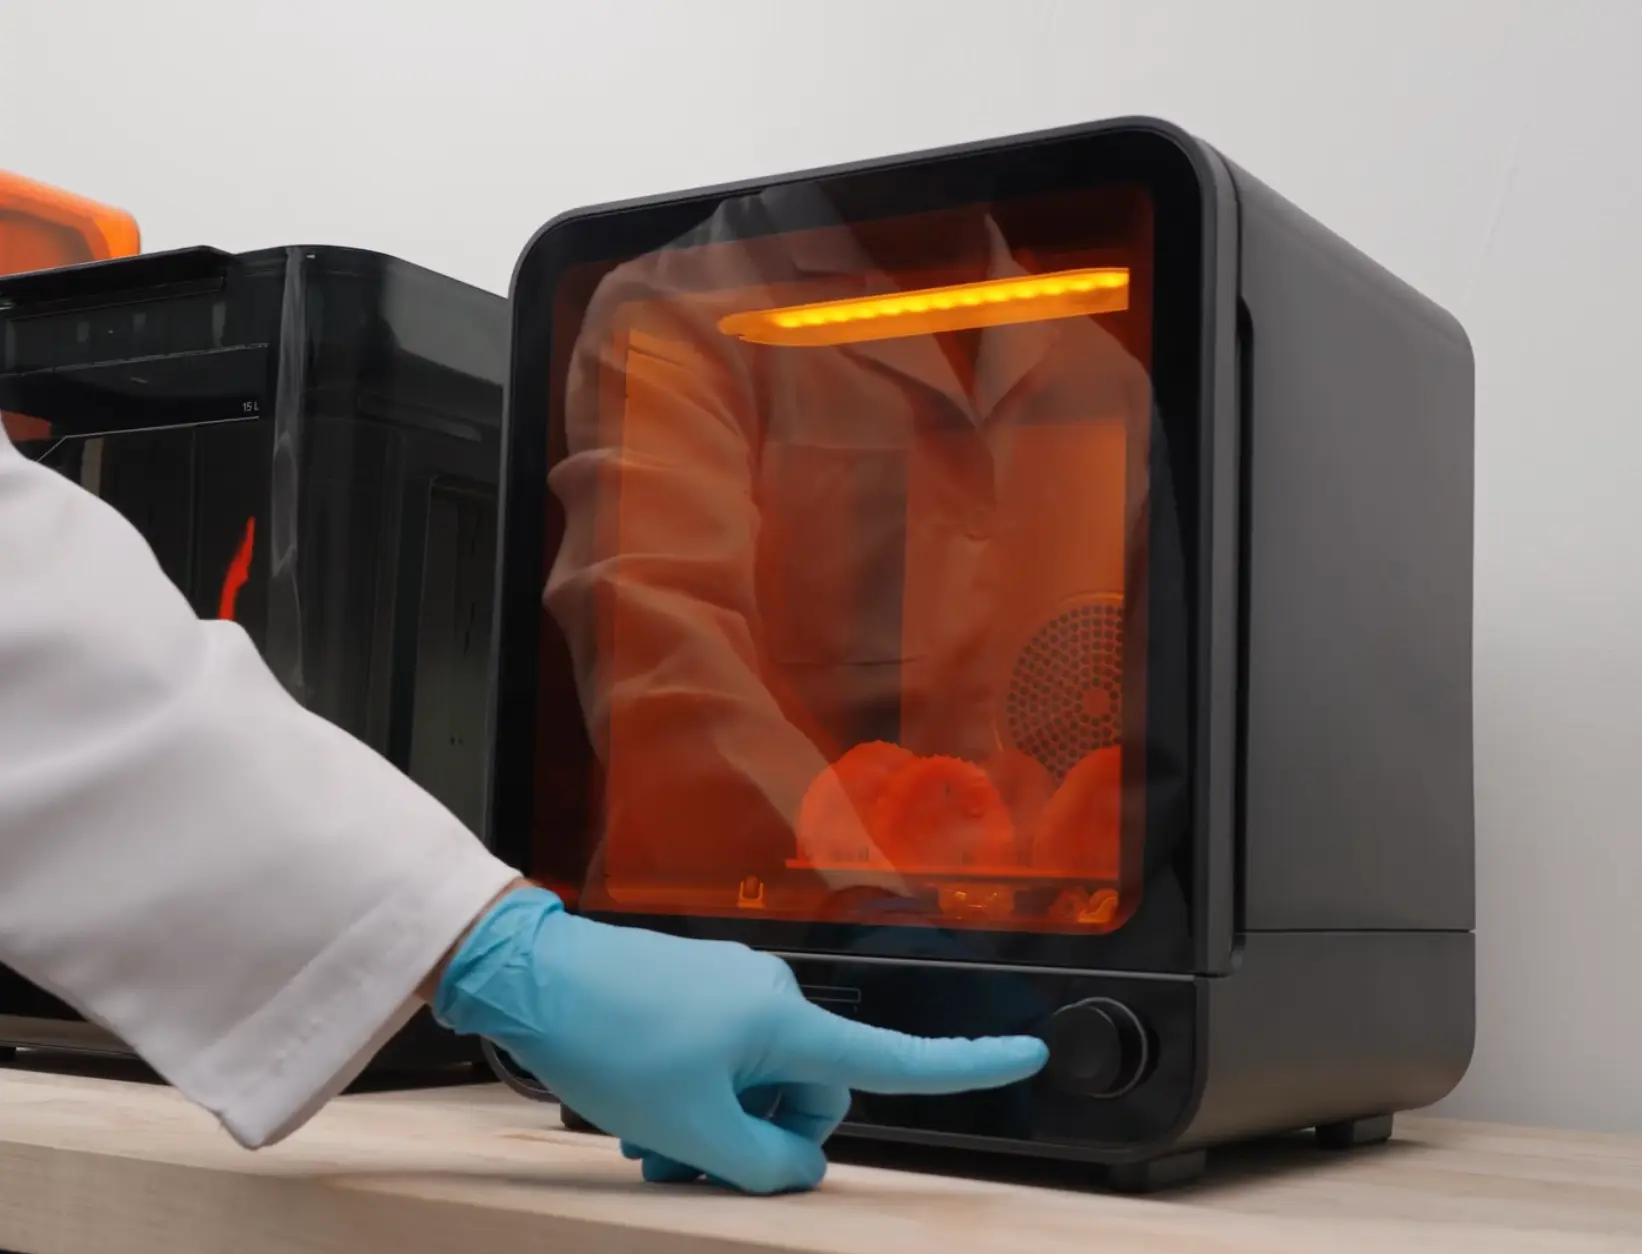
Place the printed parts occlusal side up in a Formlabs post-curing unit, select Denture Base V2, and cure for the required time. For the Form Cure V2 or Cure L V2, there is a 15-minute, 80 °C preheat followed by a 5-minute, 80 °C cure. Full curing instructions can be found in the Manufacturing Guide.
Allow the cure unit to cool down to room temperature between cure cycles.
6.2 Denture Assembly using a 3rd party bonding system with Formlabs Premium Teeth Resin, milled teeth, stock/carded teeth, or other 3D-Printed Teeth
6.2.1 Cure All Printed Parts Separately
6.2.1.1 Denture Base
Ensure denture base parts are completely dry and free of IPA.
Place in a Formlabs post-curing unit, select Denture Base V2, and cure for the required time. For the Form Cure V2 or Cure L V2, there is a 15-minute, 80 °C preheat followed by a 5-minute, 80 °C cure. Full curing instructions can be found in the Manufacturing Guide.
Allow the cure unit to cool down to room temperature between cure cycles.
6.2.1.2 Formlabs Premium Teeth (if using)
Ensure Premium Teeth parts are completely dry and free of IPA.
Place in a Formlabs-validated post-curing unit, select Premium Teeth, and cure for the required time. In the Form Cure V2 or Cure L V2, there is a cure time of 5 minutes at 80 °C. Full curing instructions can be found in the Manufacturing Guide for Premium Teeth Resin.
Allow the cure unit to cool down to room temperature between cure cycles.
6.2.1.3 Other 3D printed teeth (if using)
Follow the manufacturer’s instructions.
6.2.2 Denture Assembly
Once all parts are fully cured and cool, insert the teeth into the denture base to test the fit. If anything inhibits seating, trim the teeth and the base as needed using a hand tool.
Once your tooth arch fits without obstructions in the sockets on the printed base, the two parts can be assembled.
To securely attach the denture base to the teeth, we recommend using a dental-grade, self-polymerizing, gap-filling bonder for optimal results. While Formlabs has tested the Ivoclar Ivotion Bond Kit, any similar product designed for bonding acrylic to composite materials will be effective. Self-curing bonding systems are preferred over UV-curing options to prevent additional UV light exposure to the printed parts. To ensure proper bonding, roughen the bond surfaces (both denture base and teeth) with sandblasting or a carbide bur. Please follow the manufacturers’ instructions for use.
7. Finishing
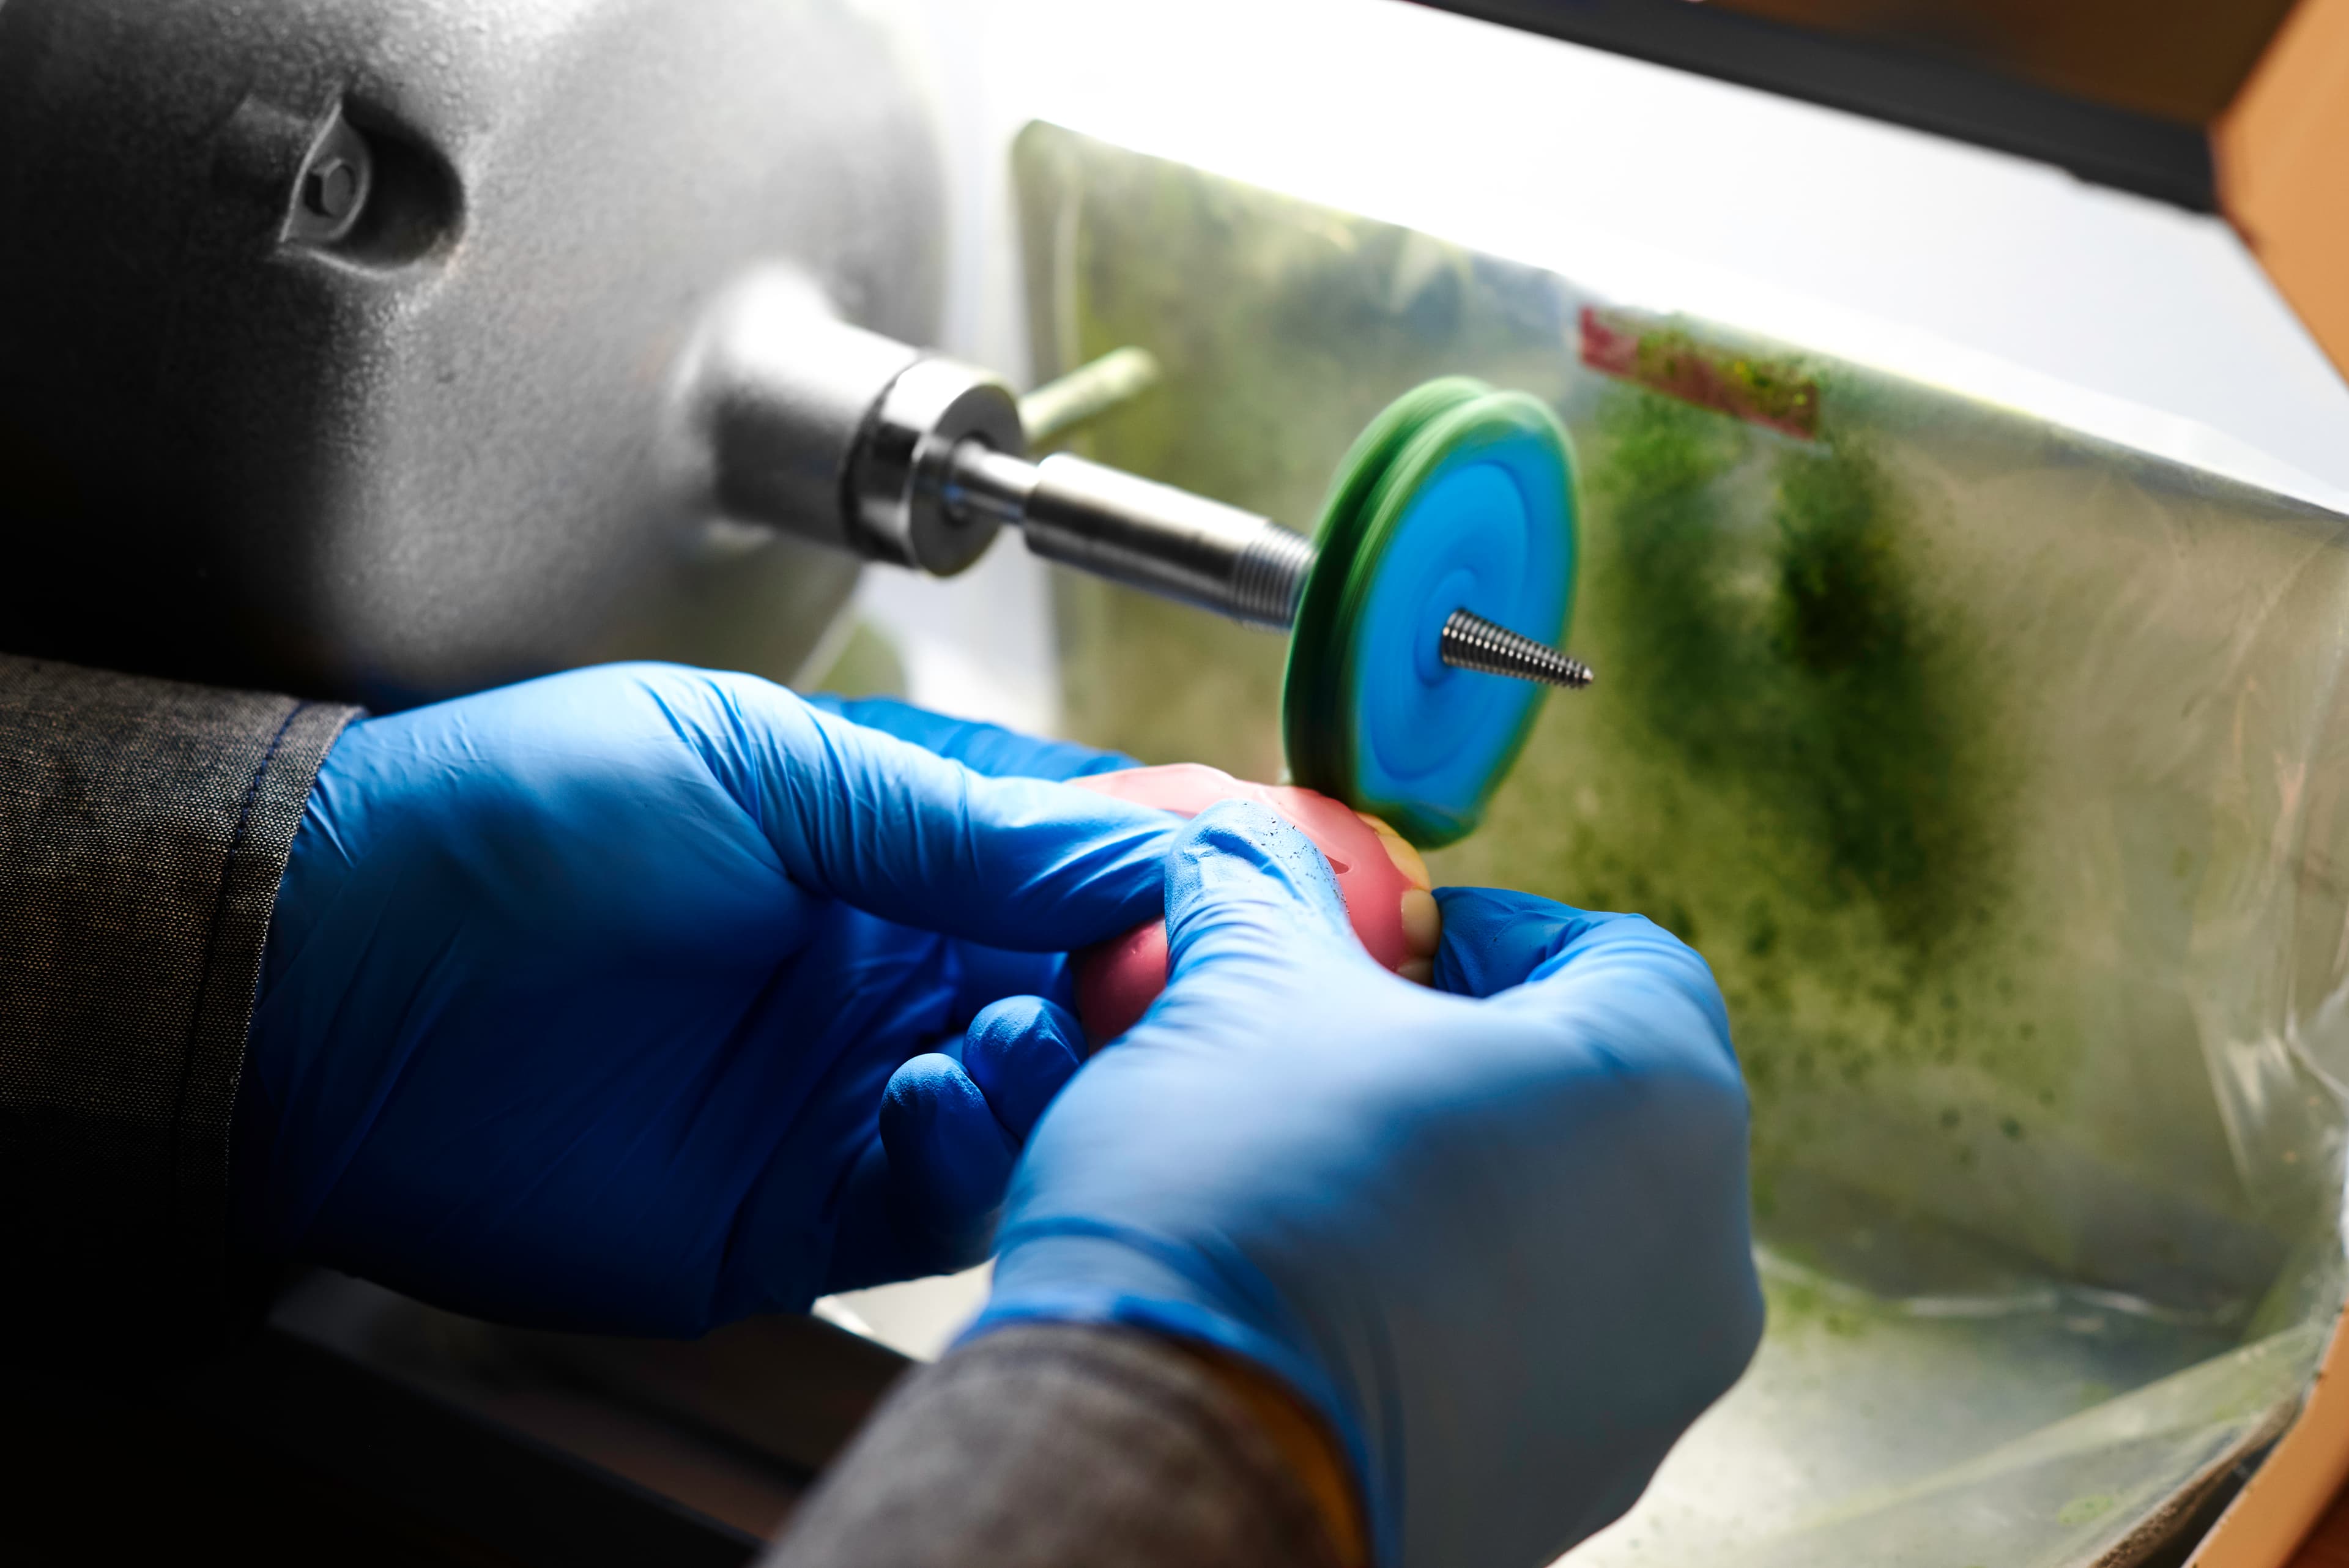
Once assembled, 3D printed dentures can be pre-polished and polished using traditional methods. For optimal efficiency, if available, we suggest utilizing a lathe with medium-fine pumice and a high-gloss acrylic polishing compound. While traditional polishing offers the best finish, a dental-grade light-curing varnish, such as Kulzer Palaseal© or GC Optiglaze©, can be used as an alternative.
Important Note
Polishing is required to remove any residual resin or bonding agent from the surface. Polishing also helps to avoid whitening of the denture base and to maintain a high-quality aesthetic appearance. Unpolished surfaces may whiten in the mouth or with prolonged exposure to water or other liquids.
After confirming the desired outcome, cleanse the denture using mild soap and water and rinse thoroughly. A soft-bristled brush or ultrasonic bath may be used if desired. Your denture is then ready for delivery.
Congratulations! You have successfully created a beautiful and natural-looking denture for your patient.
8. Repair & Relining
Dentures produced with Formlabs resins are fully repairable and relinable. Full instructions can be found in the Manufacturing Guide..
Note
For maximum bond strength for repair and bonding, ensure you are using reliners/repair agents that are compatible with acrylic/resin. It is very important to thoroughly roughen the part surface completely up to the edges with a carbide bur or sandblasting media to ensure a sufficient bond. The use of a “universal” or “multipurpose” primer may be used to aid in bonding.
8.1 Surface Repair
Ensure the part is disinfected and dry before beginning the repair.
Physically etch the entire repair surface with a carbide bur and/or sandblasting media. A third-party universal/multipurpose primer may be used to aid in bonding. Follow the manufacturer’s instructions.
Apply Denture Base Resin V2 to the repair area with a brush, allowing the material to flow to avoid bubbles. Tack cure with a handheld UV light to secure the repair. All in-house testing at Formlabs was done with a 405 nm handheld UV light, but any light source between 365 nm and 405 nm may also be used.
If needed, add additional Denture Base Resin V2 and tack cure using a handheld UV light, repeating until desired thickness is reached. It is beneficial to overbuild the repair area as material will be removed during finishing and polishing.
Place in a Formlabs post-curing unit, select Denture Base V2, and cure for the required time. For the Form Cure V2 or Cure L V2, there is a 15-minute, 80 °C preheat followed by a 5-minute, 80 °C cure. Full curing instructions can be found in the Manufacturing Guide.
Allow the cure unit to cool down to room temperature between cure cycles.
Finish and polish the repair area to remove any surface residue and ensure patient comfort. Follow the instructions above in Section 7.
Note
Exposing an already cured device to additional UV light for repair will likely cause the teeth to darken. Fully curing the resin after repair is required for biocompatibility, mechanical integrity, and patient safety. Repeated repairs should be minimized where possible.
8.2 Fracture Repair
Ensure the part is disinfected and dry before beginning the repair.
Tack the fractured denture together with sticky wax or glue.
Fabricate a putty model using an appropriate dental stone or plaster.
After the denture is removed from the model, wax may be removed with mild steam cleaning or warm (not hot) soap and water.
Prepare the fracture for repair by physically etching the repair surface with a carbide bur and/or sandblasting media. It is important to ensure that there is adequate surface area for the repair material to make a strong bond to the appliance. A third-party universal/multipurpose primer may be used to aid in bonding. Follow the manufacturer’s instructions.
Prior to returning the prepared denture parts to the model, a 3rd party release agent may be applied to the putty model used to aid in the removal of the denture following repair. Secure denture onto the putty model with sticky wax, being sure to keep the repair area free from wax or other contamination. Apply Denture Base Resin V2 to the repair area with a brush, allowing the material to flow to avoid bubbles. Tack cure to secure the repair.
If needed, add additional Denture Base Resin V2 and tack cure using a handheld UV light, repeating until desired thickness is reached. It is beneficial to overbuild the repair area as material will be removed during finishing and polishing.
Manually remove any excess sticky wax, if needed. Place in a Formlabs post-curing unit, select Denture Base V2, and cure for the required time. For the Form Cure V2 or Cure L V2, there is a 15-minute, 80 °C preheat followed by a 5-minute, 80 °C cure. Full curing instructions can be found in the Manufacturing Guide.
Allow the cure unit to cool down to room temperature between cure cycles.
Finish and polish the repair area to remove any surface residue and ensure patient comfort. Follow the instructions above in Section 7.
Note
Exposing an already cured device to additional UV light for repair will likely cause the teeth to darken. Fully curing the resin after repair is required for biocompatibility, mechanical integrity, and patient safety. Repeated repairs should be minimized where possible.
8.3 Tooth Replacement
Ensure the part is disinfected and dry before beginning the repair.
If any tooth material remains in the tooth socket, remove by grinding with a bur.
Prepare the denture to receive the replacement tooth/teeth by physically etching the repair surface on the denture base with a carbide bur and/or sandblasting media.
Use sticky wax, if desired, to position the new tooth/teeth. Wax may be removed with mild steam cleaning or warm (not hot) soap and water.
Due to the potential for tooth discoloration with repeated UV light exposure, we recommend using a dental-grade, self-polymerizing, gap-filling bonder for optimal results. While Formlabs has tested the Ivoclar Ivotion Bond Kit, any similar product designed for bonding acrylic to composite materials will be effective. Please follow the manufacturer’s instructions for use to attach new tooth/teeth to denture base.
Finish and polish the repair area to remove any surface residue and ensure patient comfort. Follow the instructions above in Section 7.
8.4 Hard and Soft Relining
Hard and soft reliners that are compatible with acrylic/resin may be used with Denture Base Resin V2.
Prepare the surface for relining. For maximum bond strength of the reliner to the denture base, it is very important to thoroughly roughen the part surface completely up to the edges using a coarse carbide bur.
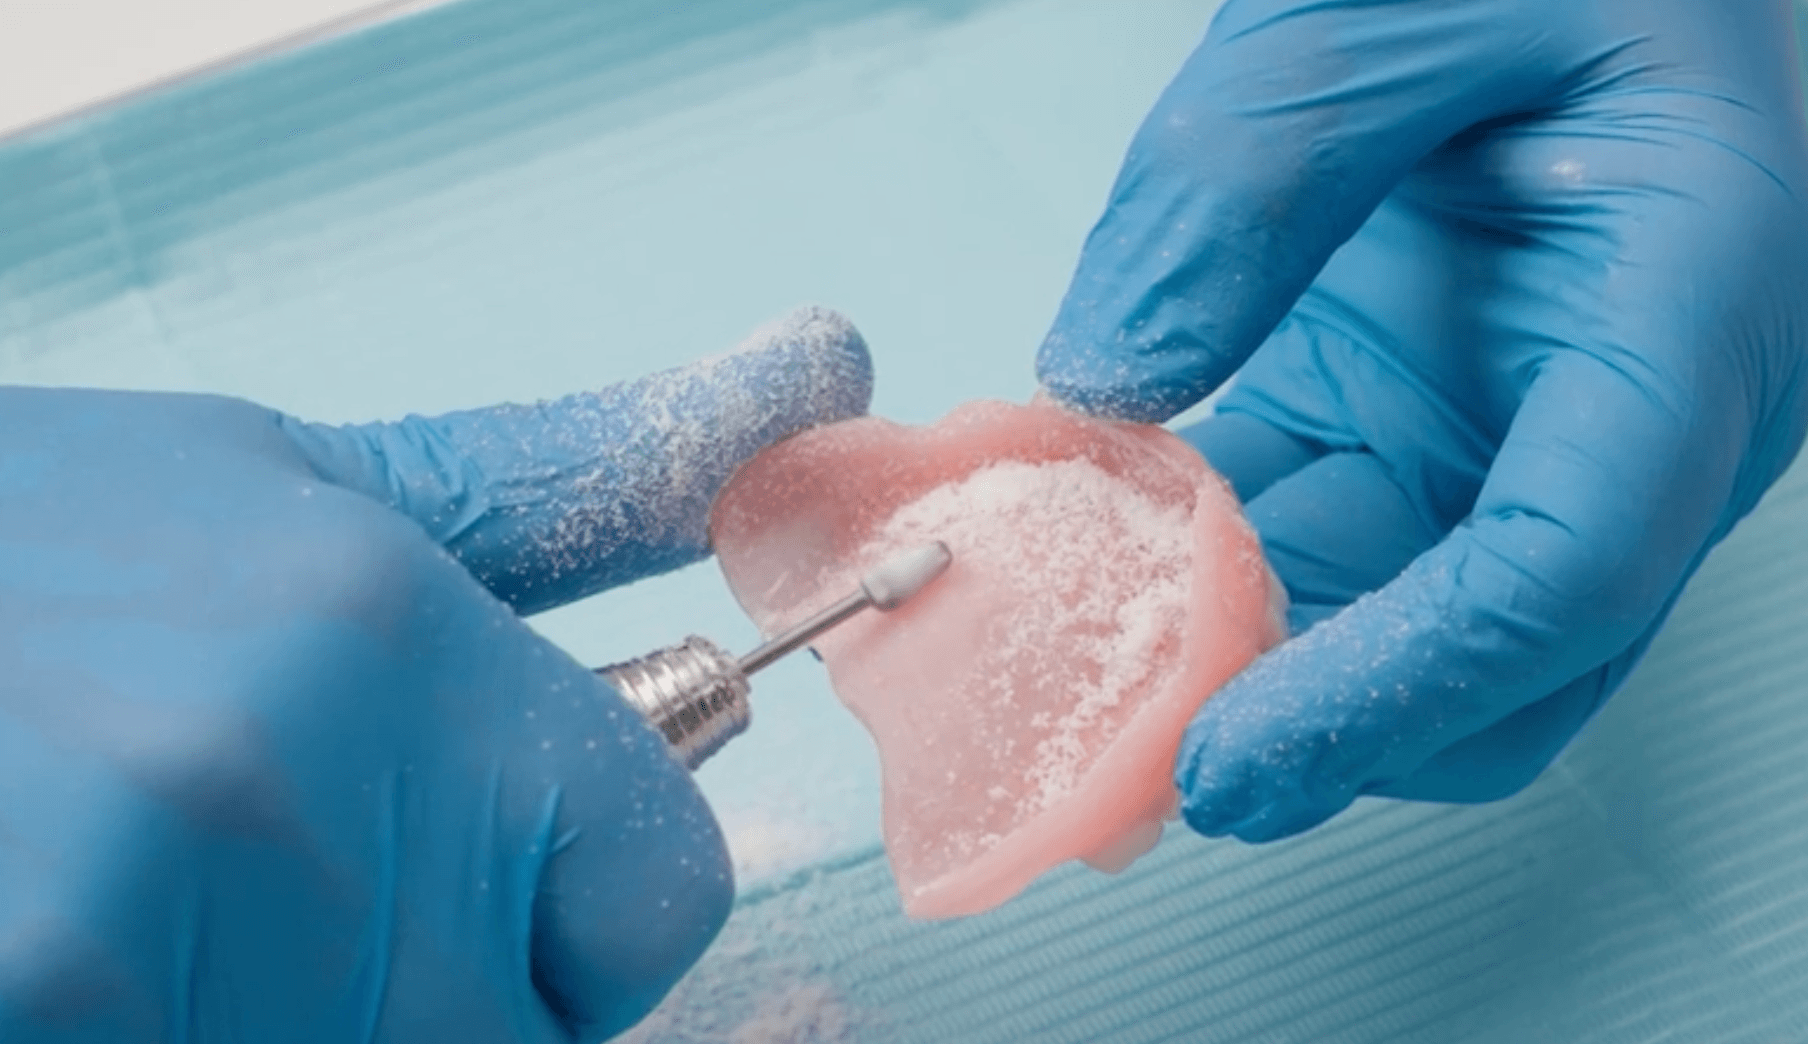
The use of a “universal” or “multipurpose” primer may be used to aid in bonding. Refer to the manufacturer’s instructions for use.
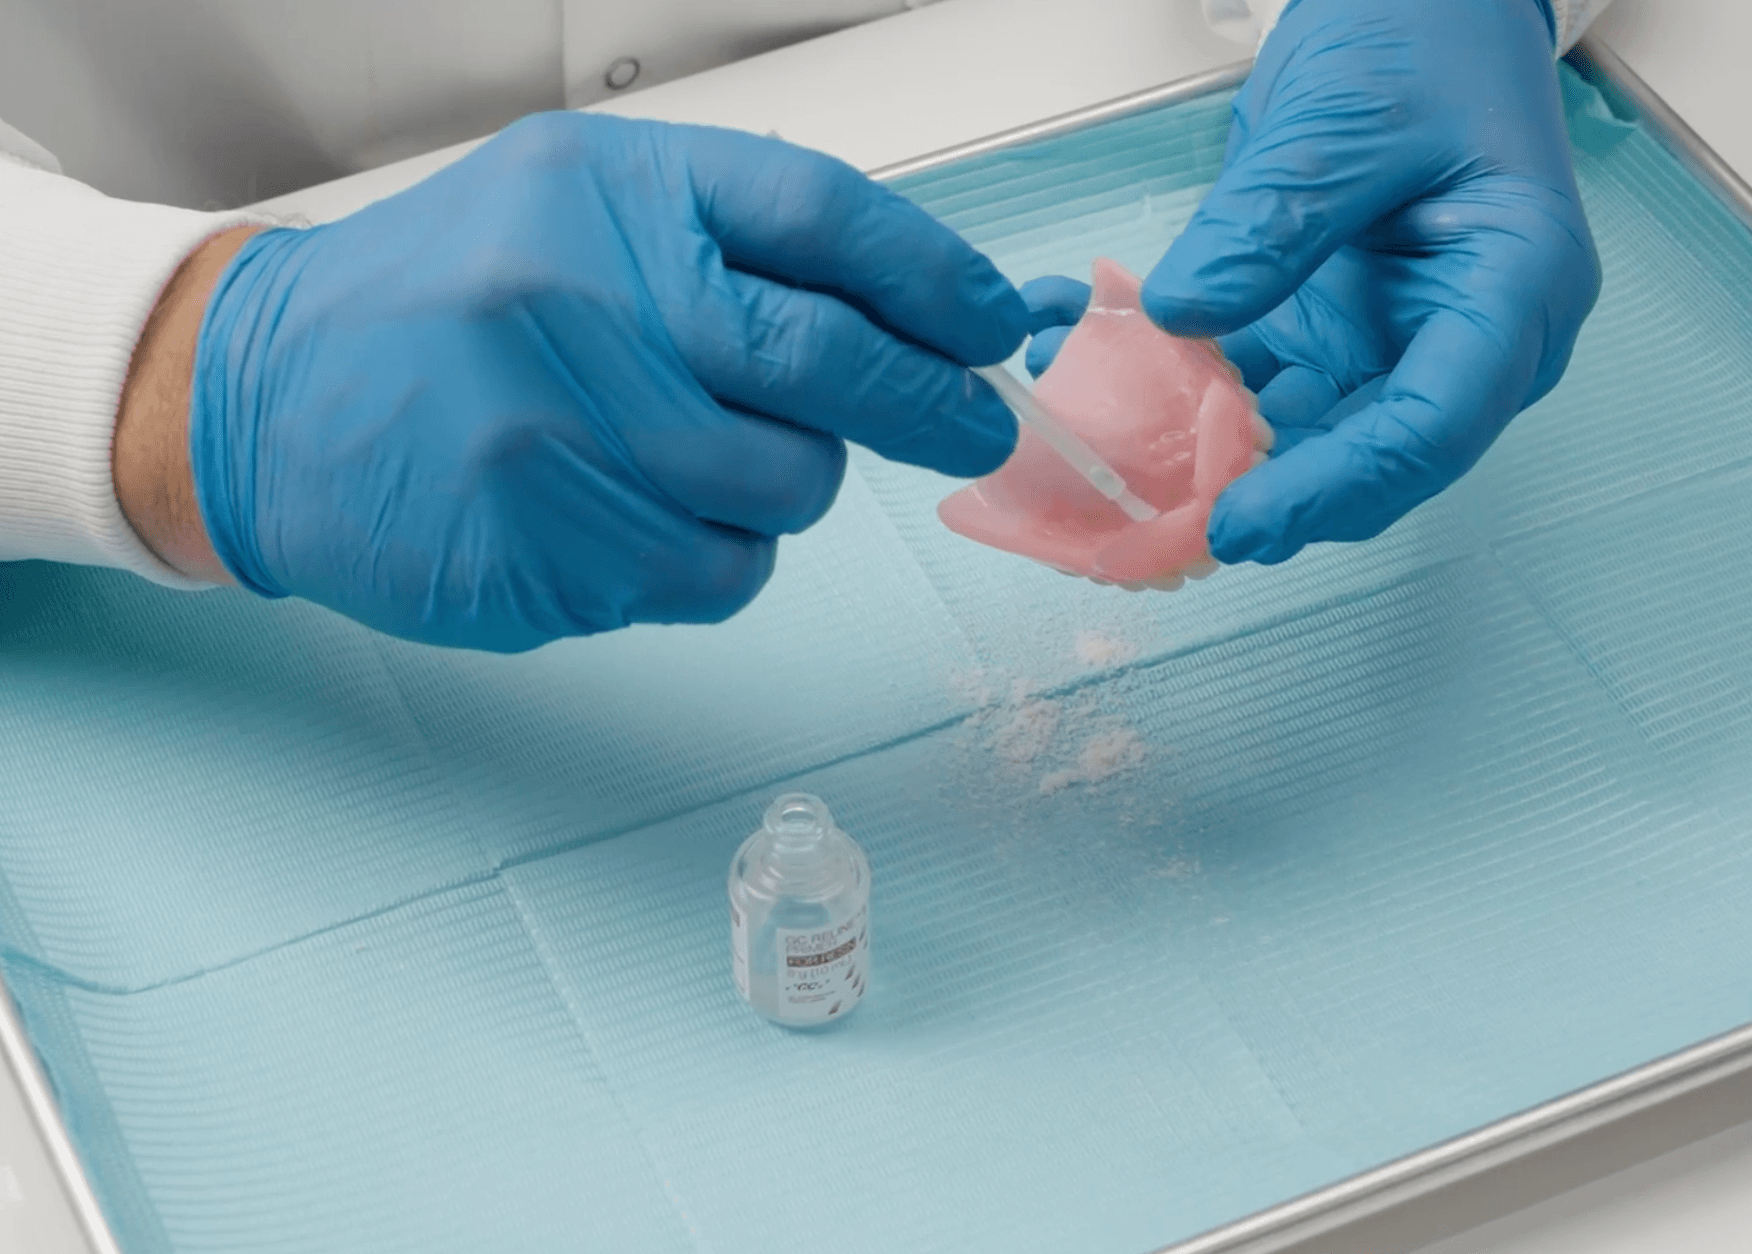
Formlabs has tested the following relining materials:
GC Reline Chairside Hard Denture Liner
GC Reline II Soft
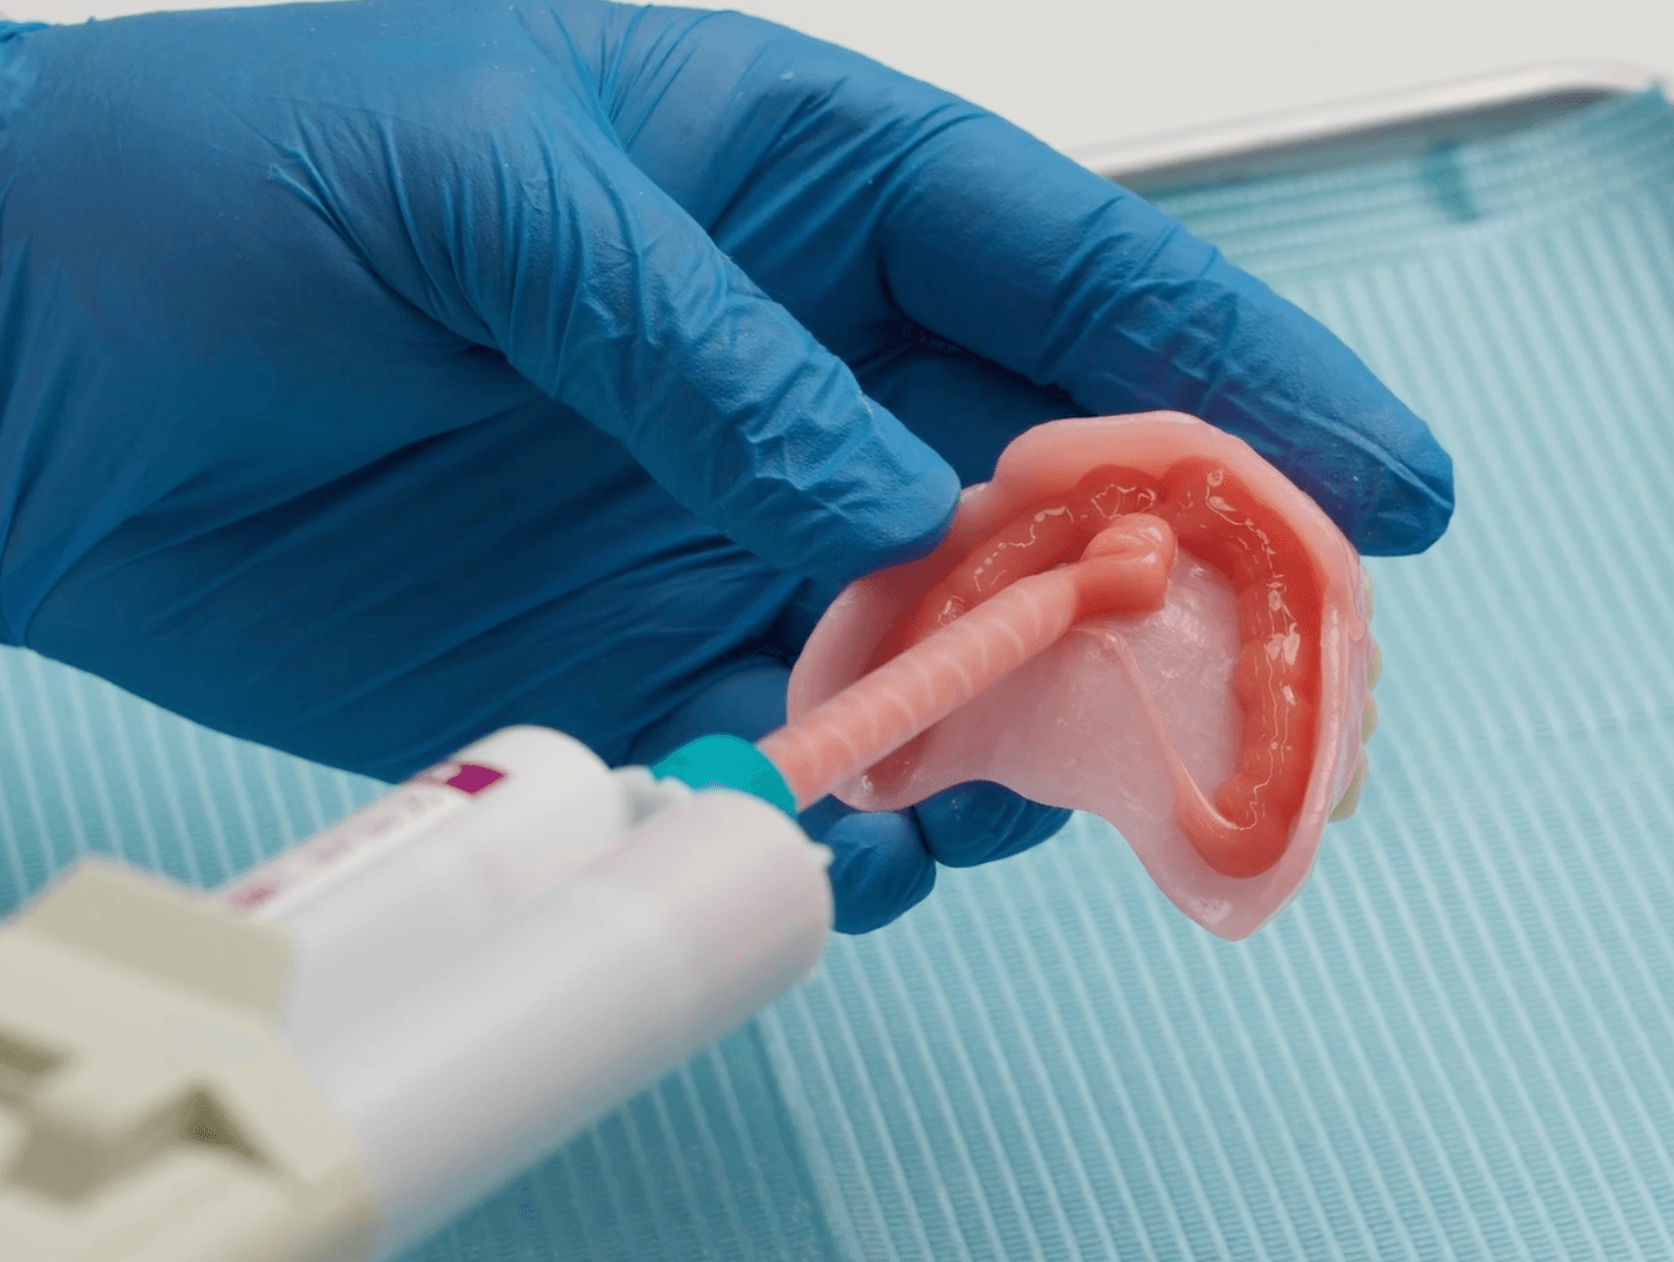
While Formlabs has tested the above relining materials, any similar product designed for bonding to acrylic/resin materials will be effective. Please follow the Manufacturer’s Instructions for Use.