Attention
Only use the Form 4 Flex Build Platform with BEGO™ VarseoSmile® TriniQ® Resin.
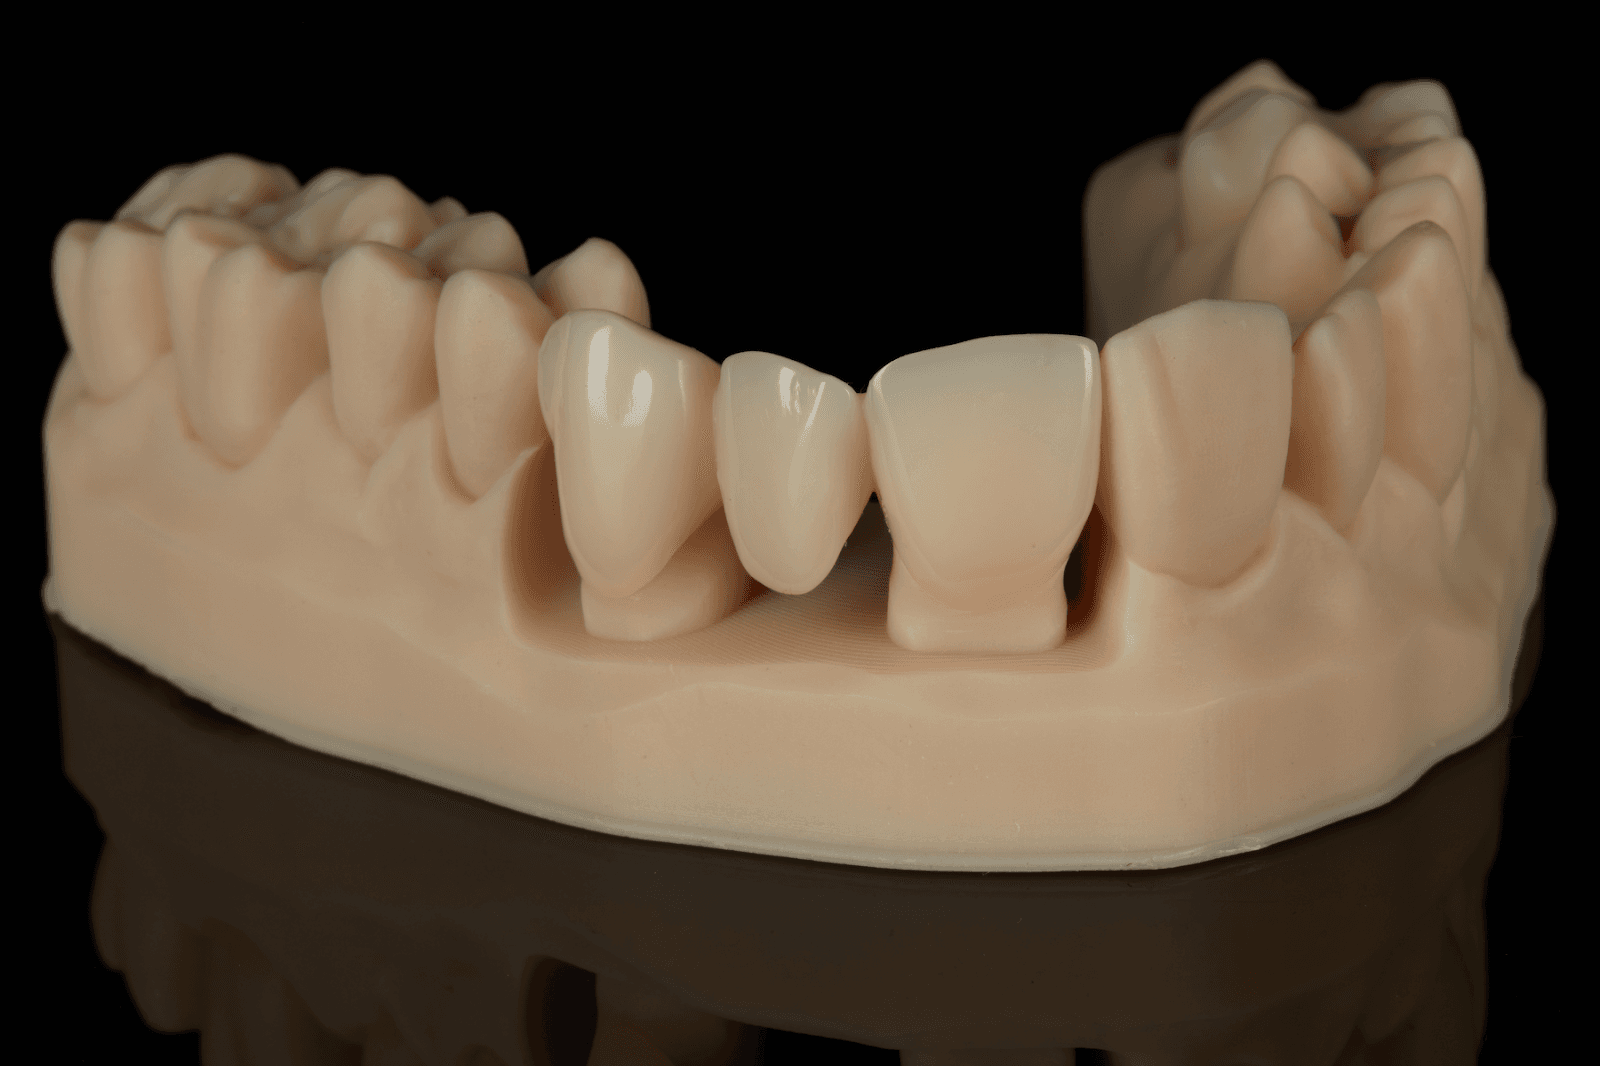
This application guide shows how to 3D print monolithic full contour crowns and restorations for permanent use with Formlabs BEGO™ VarseoSmile® TriniQ® Resin on Formlabs SLA 3D printers. Always consult the official instructions for use included in the packaging of the resin for the absolute requirements.
This application guide shows how to 3D print monolithic full contour crowns and restorations for permanent use with Formlabs BEGO™ VarseoSmile® TriniQ® Resin on Formlabs SLA 3D printers. Always consult the official instructions for use included in the packaging of the resin for the absolute requirements.
Essentials
Needed From the Dentist
A physical or digital impression of the patient's dentition
Required Hardware and Materials
Made by Formlabs:
Formlabs Form 4B 3D printer with a compatible Resin Tank and Form 4 Flex Build Platform
PreForm Dental Software (free)
Form Cure, Form Cure V2, or Fast Cure
Made by Third Parties:
Desktop scanner (if physical impression or model)
Dental handpiece with cutting and finishing wheels
Sandblaster
Polishing or glazing equipment and materials
Glass bead blasting material (50 µm)
Isopropyl alcohol (IPA) ≥99%
Required Software
Note
For full compliance and biocompatibility, BEGO™ VarseoSmile® TriniQ® Resin requires a dedicated resin tank, Form 4 Flex Build Platform, Form Wash, and Finish Kit, which should not be used with any non-biocompatible resins.
1. Scan
Dental design software requires a digital impression of the patient’s anatomy in order to design a dental prosthetic. To acquire this data, scan the patient directly with a 3D intraoral scanner or scan a physical impression or poured model with a desktop 3D scanner.
2. Design
2.1 Design the Appliance
Digital design of dental crowns and restorations can be done using various dental software, such as exocad and 3Shape. When designing, ensure you adhere to the minimum requirements detailed in the BEGO™ VarseoSmile® TriniQ® Resin Instructions for Use.
Note:
To access the required instructions for use on the BEGO page, you need to enter the REF code. This code can be found on a white label on the side of your cartridge.
Alternatively, a digitized impression can be sent to outsourced dental CAD providers for the design creation.
We recommend using the standard cement gap for crowns in your CAD software.
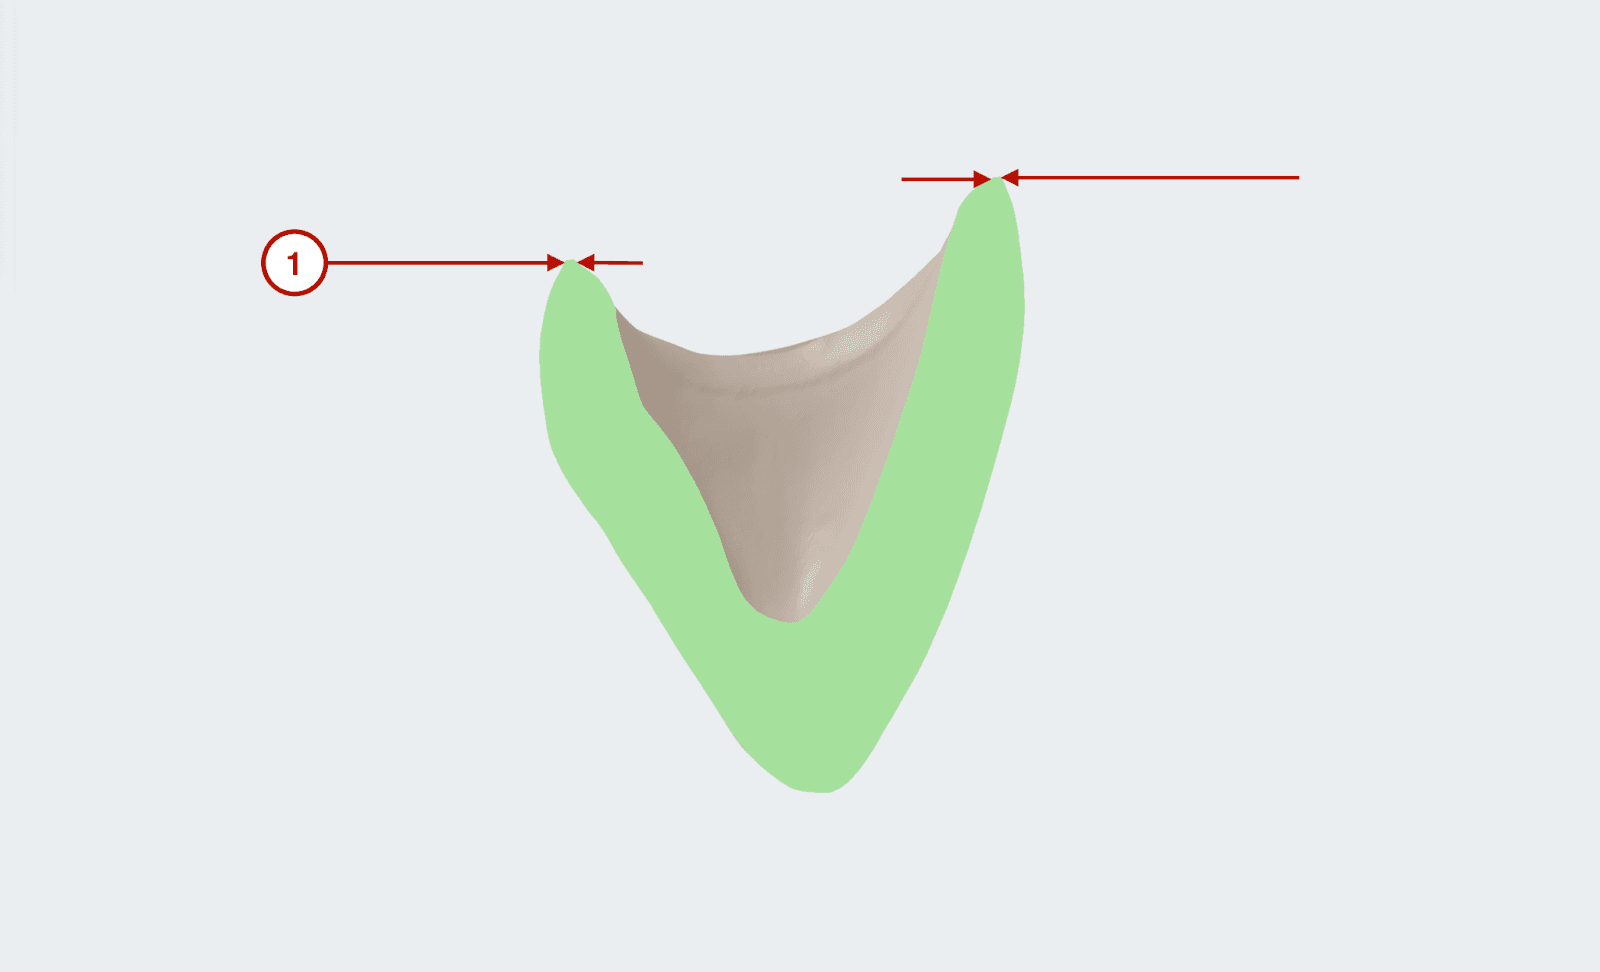
A key benefit of 3D printing over milling is the ability to use a narrower margin line setting. Because 3D printing does not use a rotating instrument, there is no risk of chipping associated with a thinner margin line. You can set the “Margin line offset” in 3Shape or “Border > Horizontal” value in exocad to 0.15 mm (1).
2.2 Export the STL File
Once the case has been designed to specification, manufacturing can begin. The majority of dental design software generates a manufacturing file in STL format. Locate the file and move it into the print preparation software, PreForm.
3. Print
Note
Use PreForm version 3.10 or higher and firmware 1.8 or higher.
Note:
If you are new to PreForm software, please refer to this playlist on our YouTube channel.
3.1 Import the File(s)
Import or open the design file(s) by dragging them into PreForm, or open them using the File menu to locate them on your computer or network.
3.2 Material Selection
In the Job Setup menu, select your printer (1), select BEGO TriniQ and the correct shade (2), and set the Layer Thickness to 0.05 mm (3).
BEGO™ VarseoSmile® TriniQ® Resin is available in the VITA Classical® shades B1, A2, and A3.

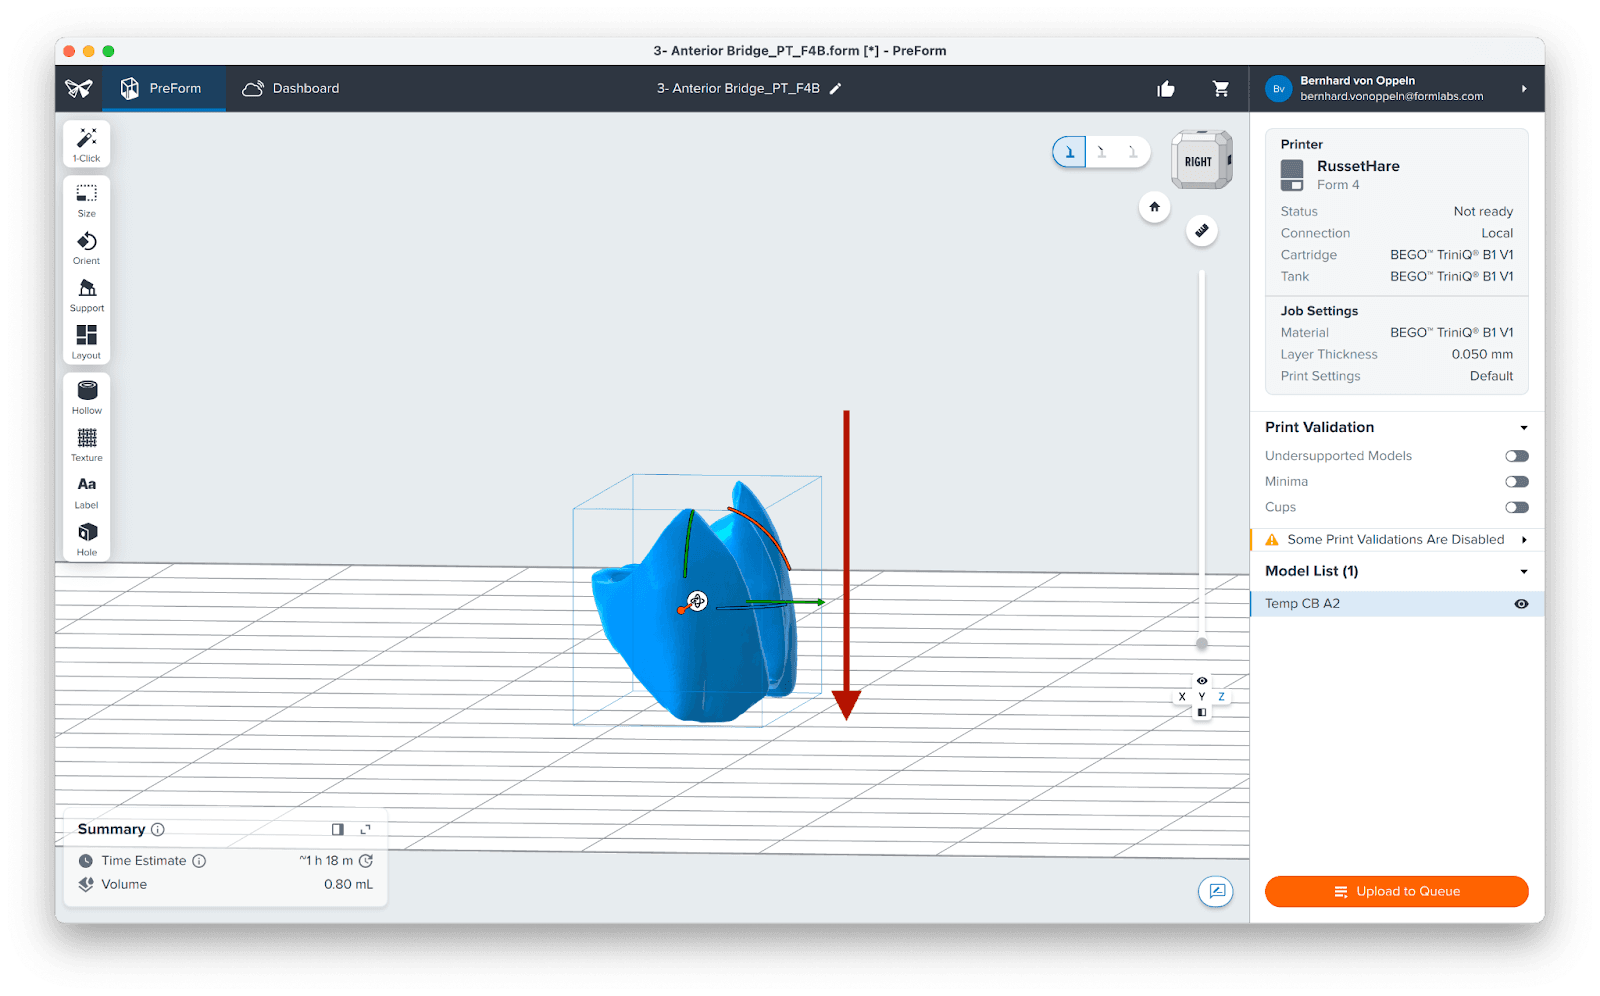
3.3 Orientation
Position the crown, bridge, inlay, onlay, or veneer so that the occlusal face is oriented towards the build plate, using the rotation manipulators (1). This positioning prevents supports from being generated on the intaglio surface or the margin line.
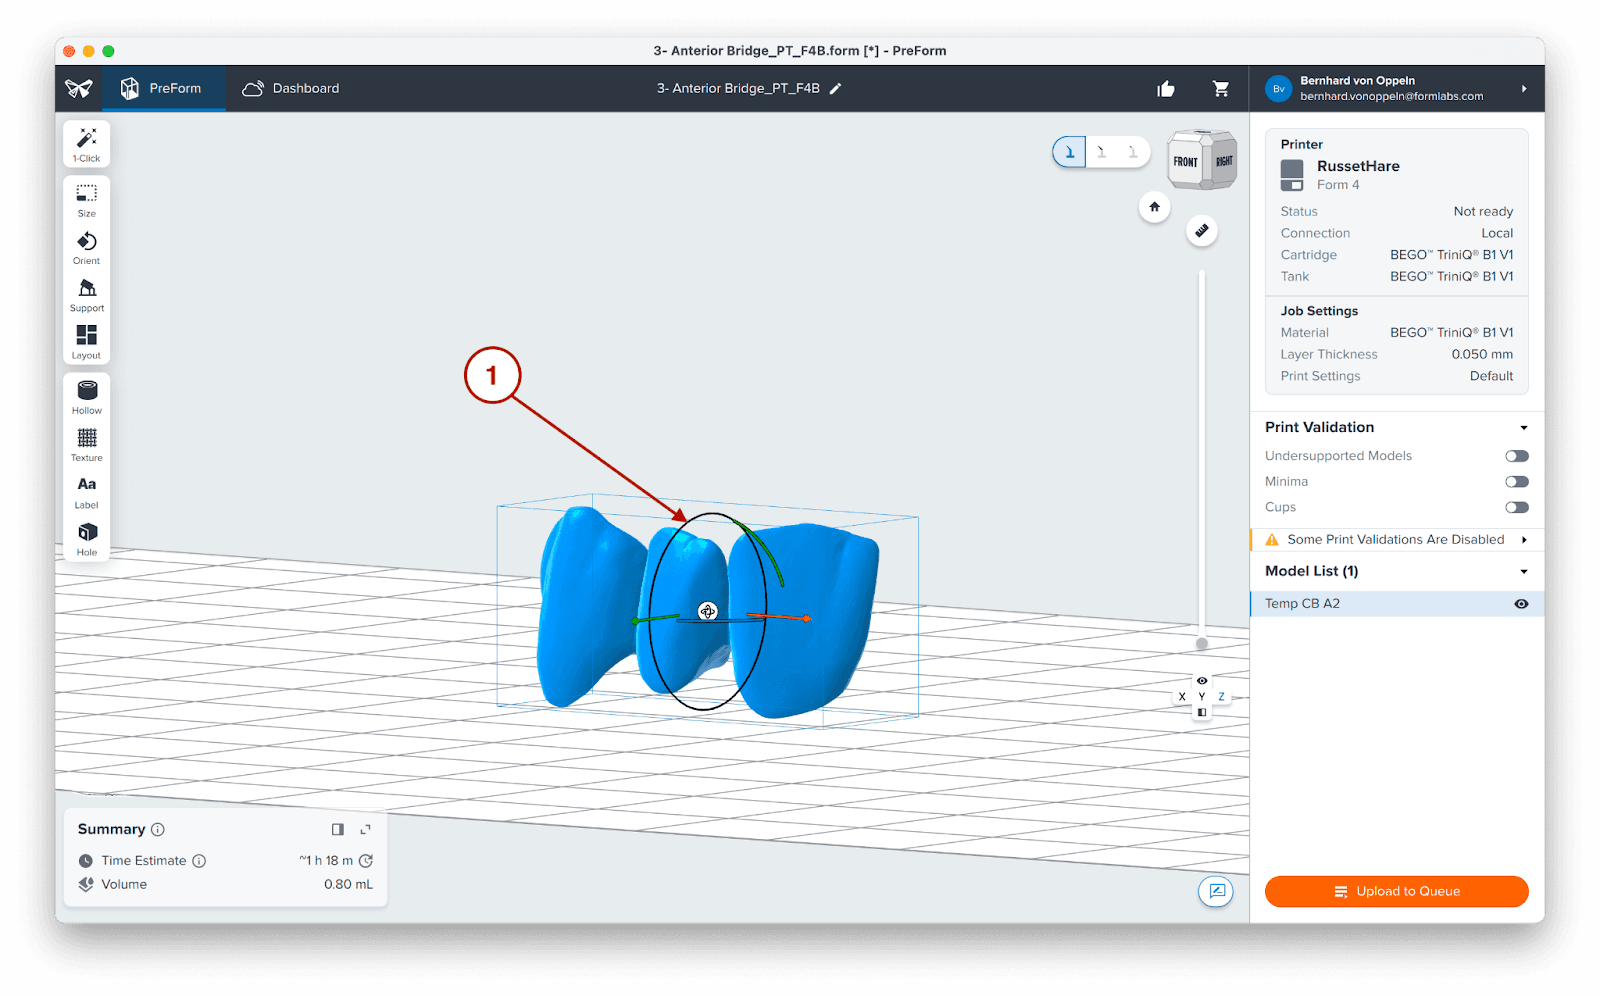
For anterior restorations, slightly tilt the part so the vestibular face is positioned slightly away from the build plate. This can help to avoid placing supports on the esthetically crucial vestibular faces.
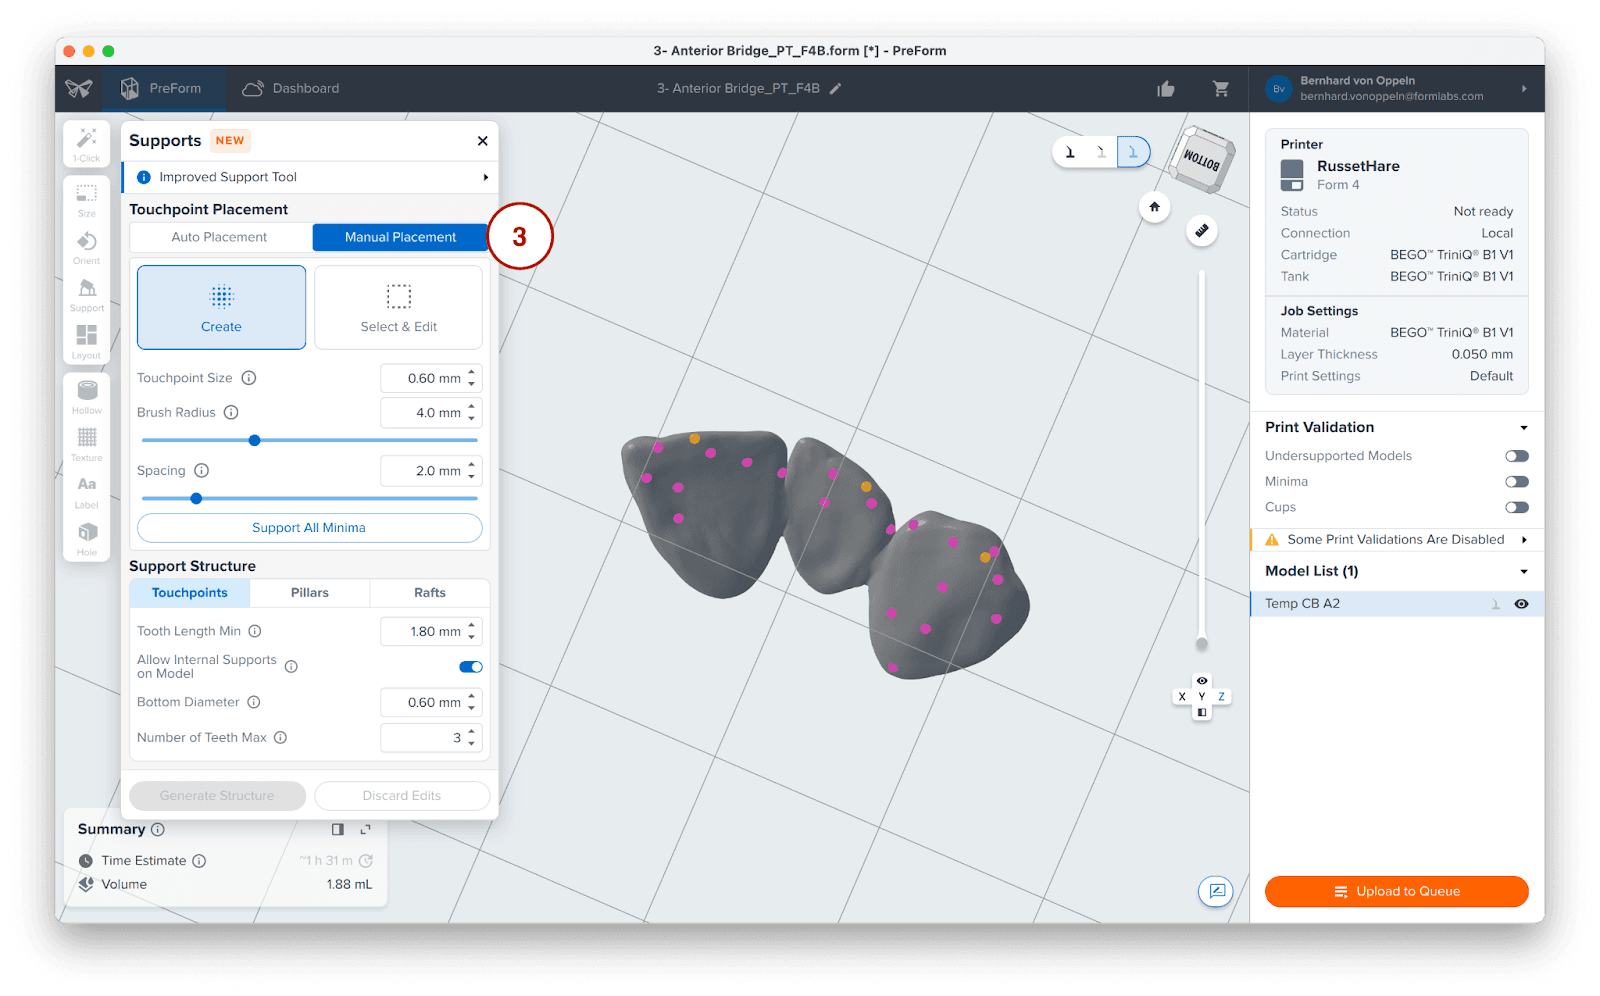
3.4 Generate Supports
Generate supports (1) using the Auto-Generate Selected (2) button.
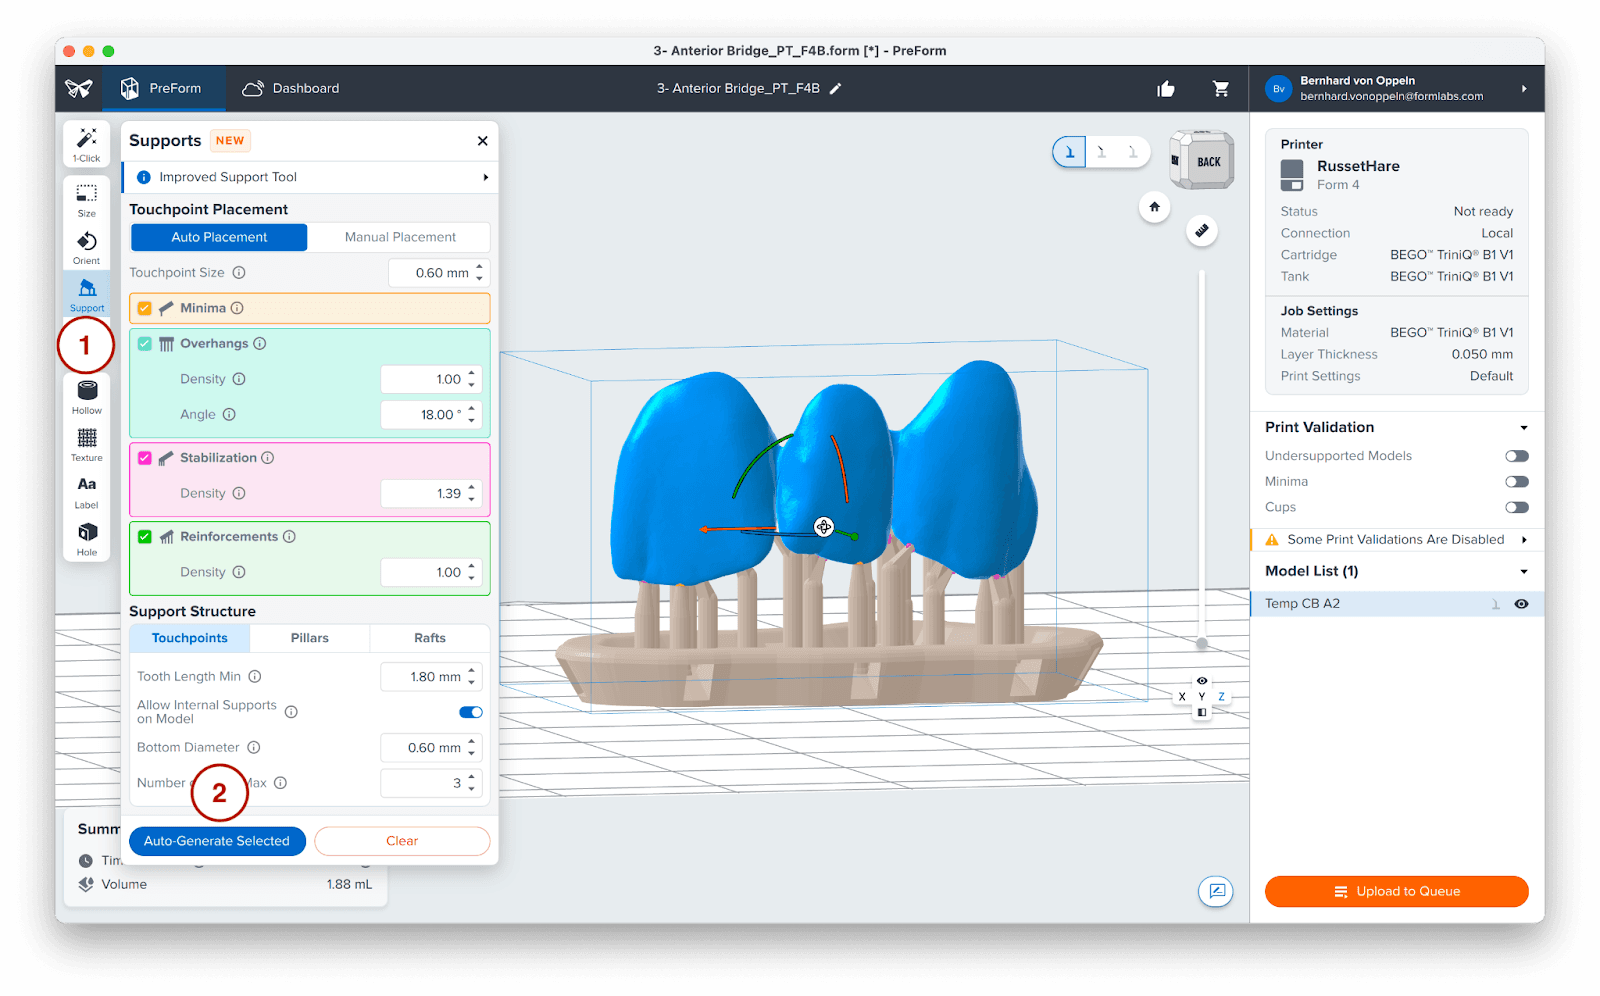
Always inspect the support locations. Use the Manual Placement (3) editing feature to add or remove supports as needed.
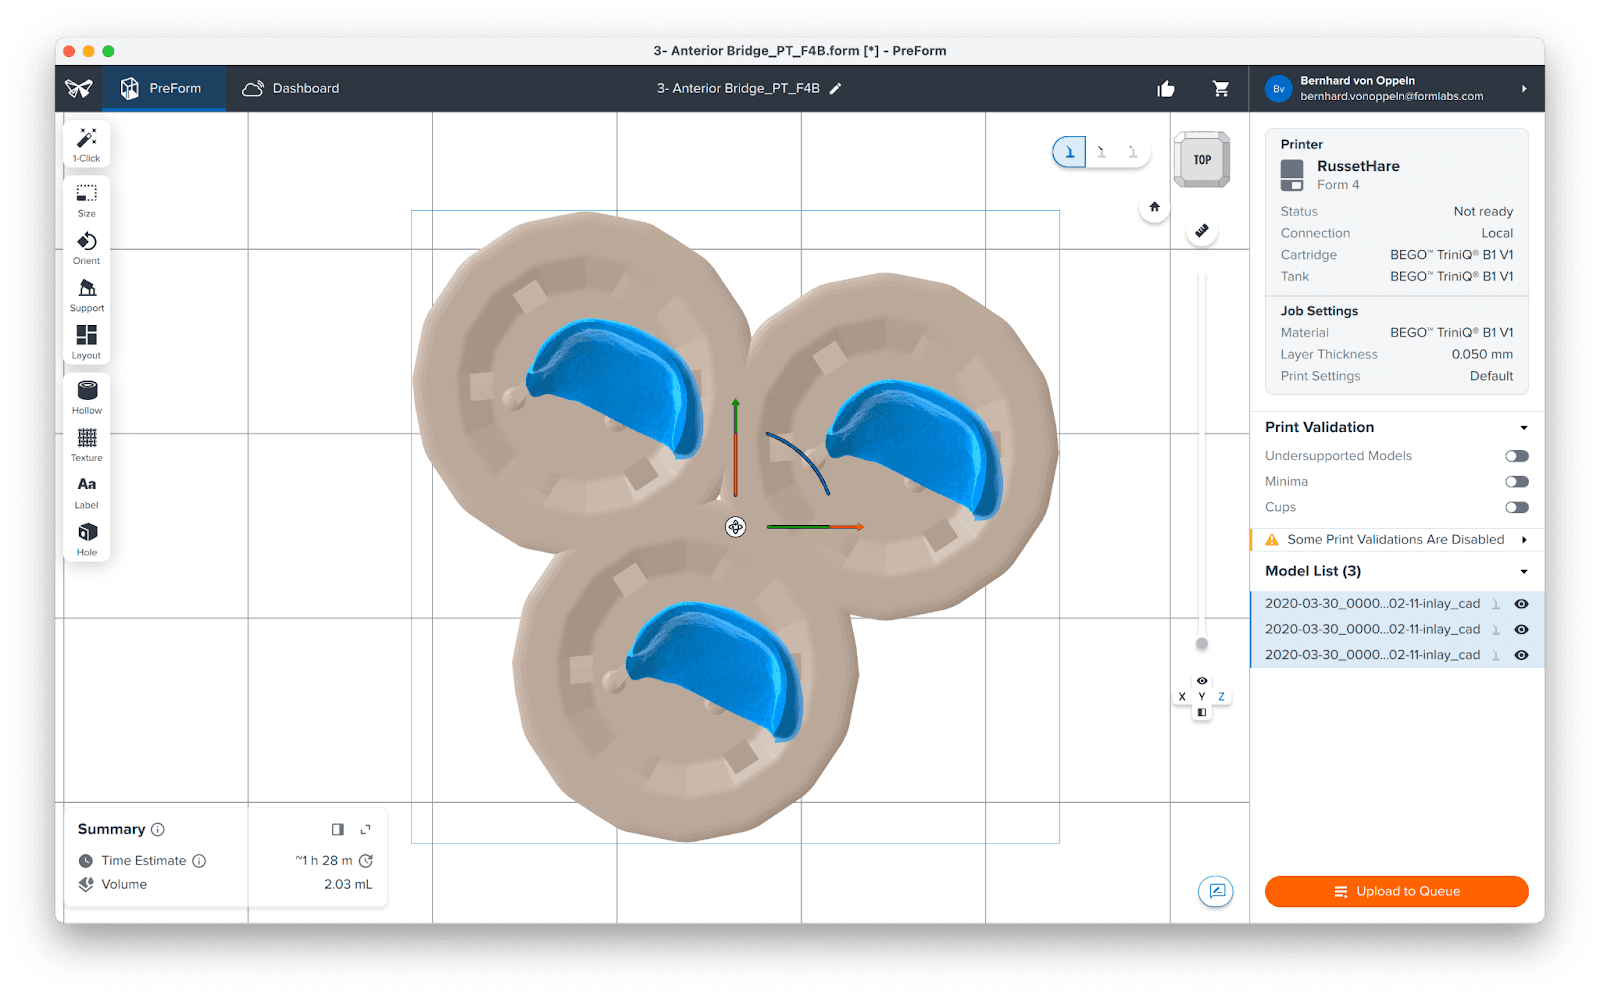
3.5 Printing Layout
To simplify the post-processing of very small parts like veneers, we suggest grouping them by slightly overlapping their printing rafts. This approach allows for easier removal as a single unit and reduces the number of separate pieces requiring washing after the print is complete.
3.6 Transferring the Job to the Printer
Click the orange button (4) on the lower right to send your print job to the printer. This button will be labeled either Print Now or Upload to Queue, depending on your printer's current status.

3.7 Set Up the Printer
Shake the BEGO™ VarseoSmile® TriniQ® Resin cartridge and insert the cartridge, a Form 4 Flex Build Platform, and a compatible resin tank into the Form 4B 3D printer.
Begin printing by selecting the print job from the printer’s touch screen.
Follow any prompts or dialogs shown on the printer screen.
The printer will automatically complete the print.
Attention
Only use the Form 4 Flex Build Platform with BEGO™ VarseoSmile® TriniQ® Resin.
4. Post-Processing
Always use gloves when handling uncured resin and parts.
4.1 Part Removal
To remove parts from the Form 4 Flex Build Platform, apply pressure to the handles. Given the small size of these parts, you may also need to use a spatula or the part removal tool included in the Finish Kit.

4.2 Washing
Precautions
When washing the printed part with solvent, it should be in a properly ventilated environment with protective masks and gloves.
Expired or unused BEGO™ VarseoSmile® TriniQ® Resin shall be disposed of in accordance with local regulations.
IPA shall be disposed of in accordance with local regulations.
Attention
Only use the Form Wash with other Formlabs biocompatible resins, such as Surgical Guide Resin.
Place printed parts in a Form Wash or Form Wash L filled with isopropyl alcohol (IPA, ≥99%) and wash them for the time established in the BEGO™ VarseoSmile® TriniQ® Resin Instructions for Use.
Make sure the parts are fully submerged in IPA when washing.
Exceeding wash duration may affect dimensional accuracy and performance of printed parts over time.
4.3 Drying
Compressed air can be used to help dry parts and allow for rapid inspection of unwashed resin.
Leave parts to air dry for at least 30 minutes in a well-ventilated area.
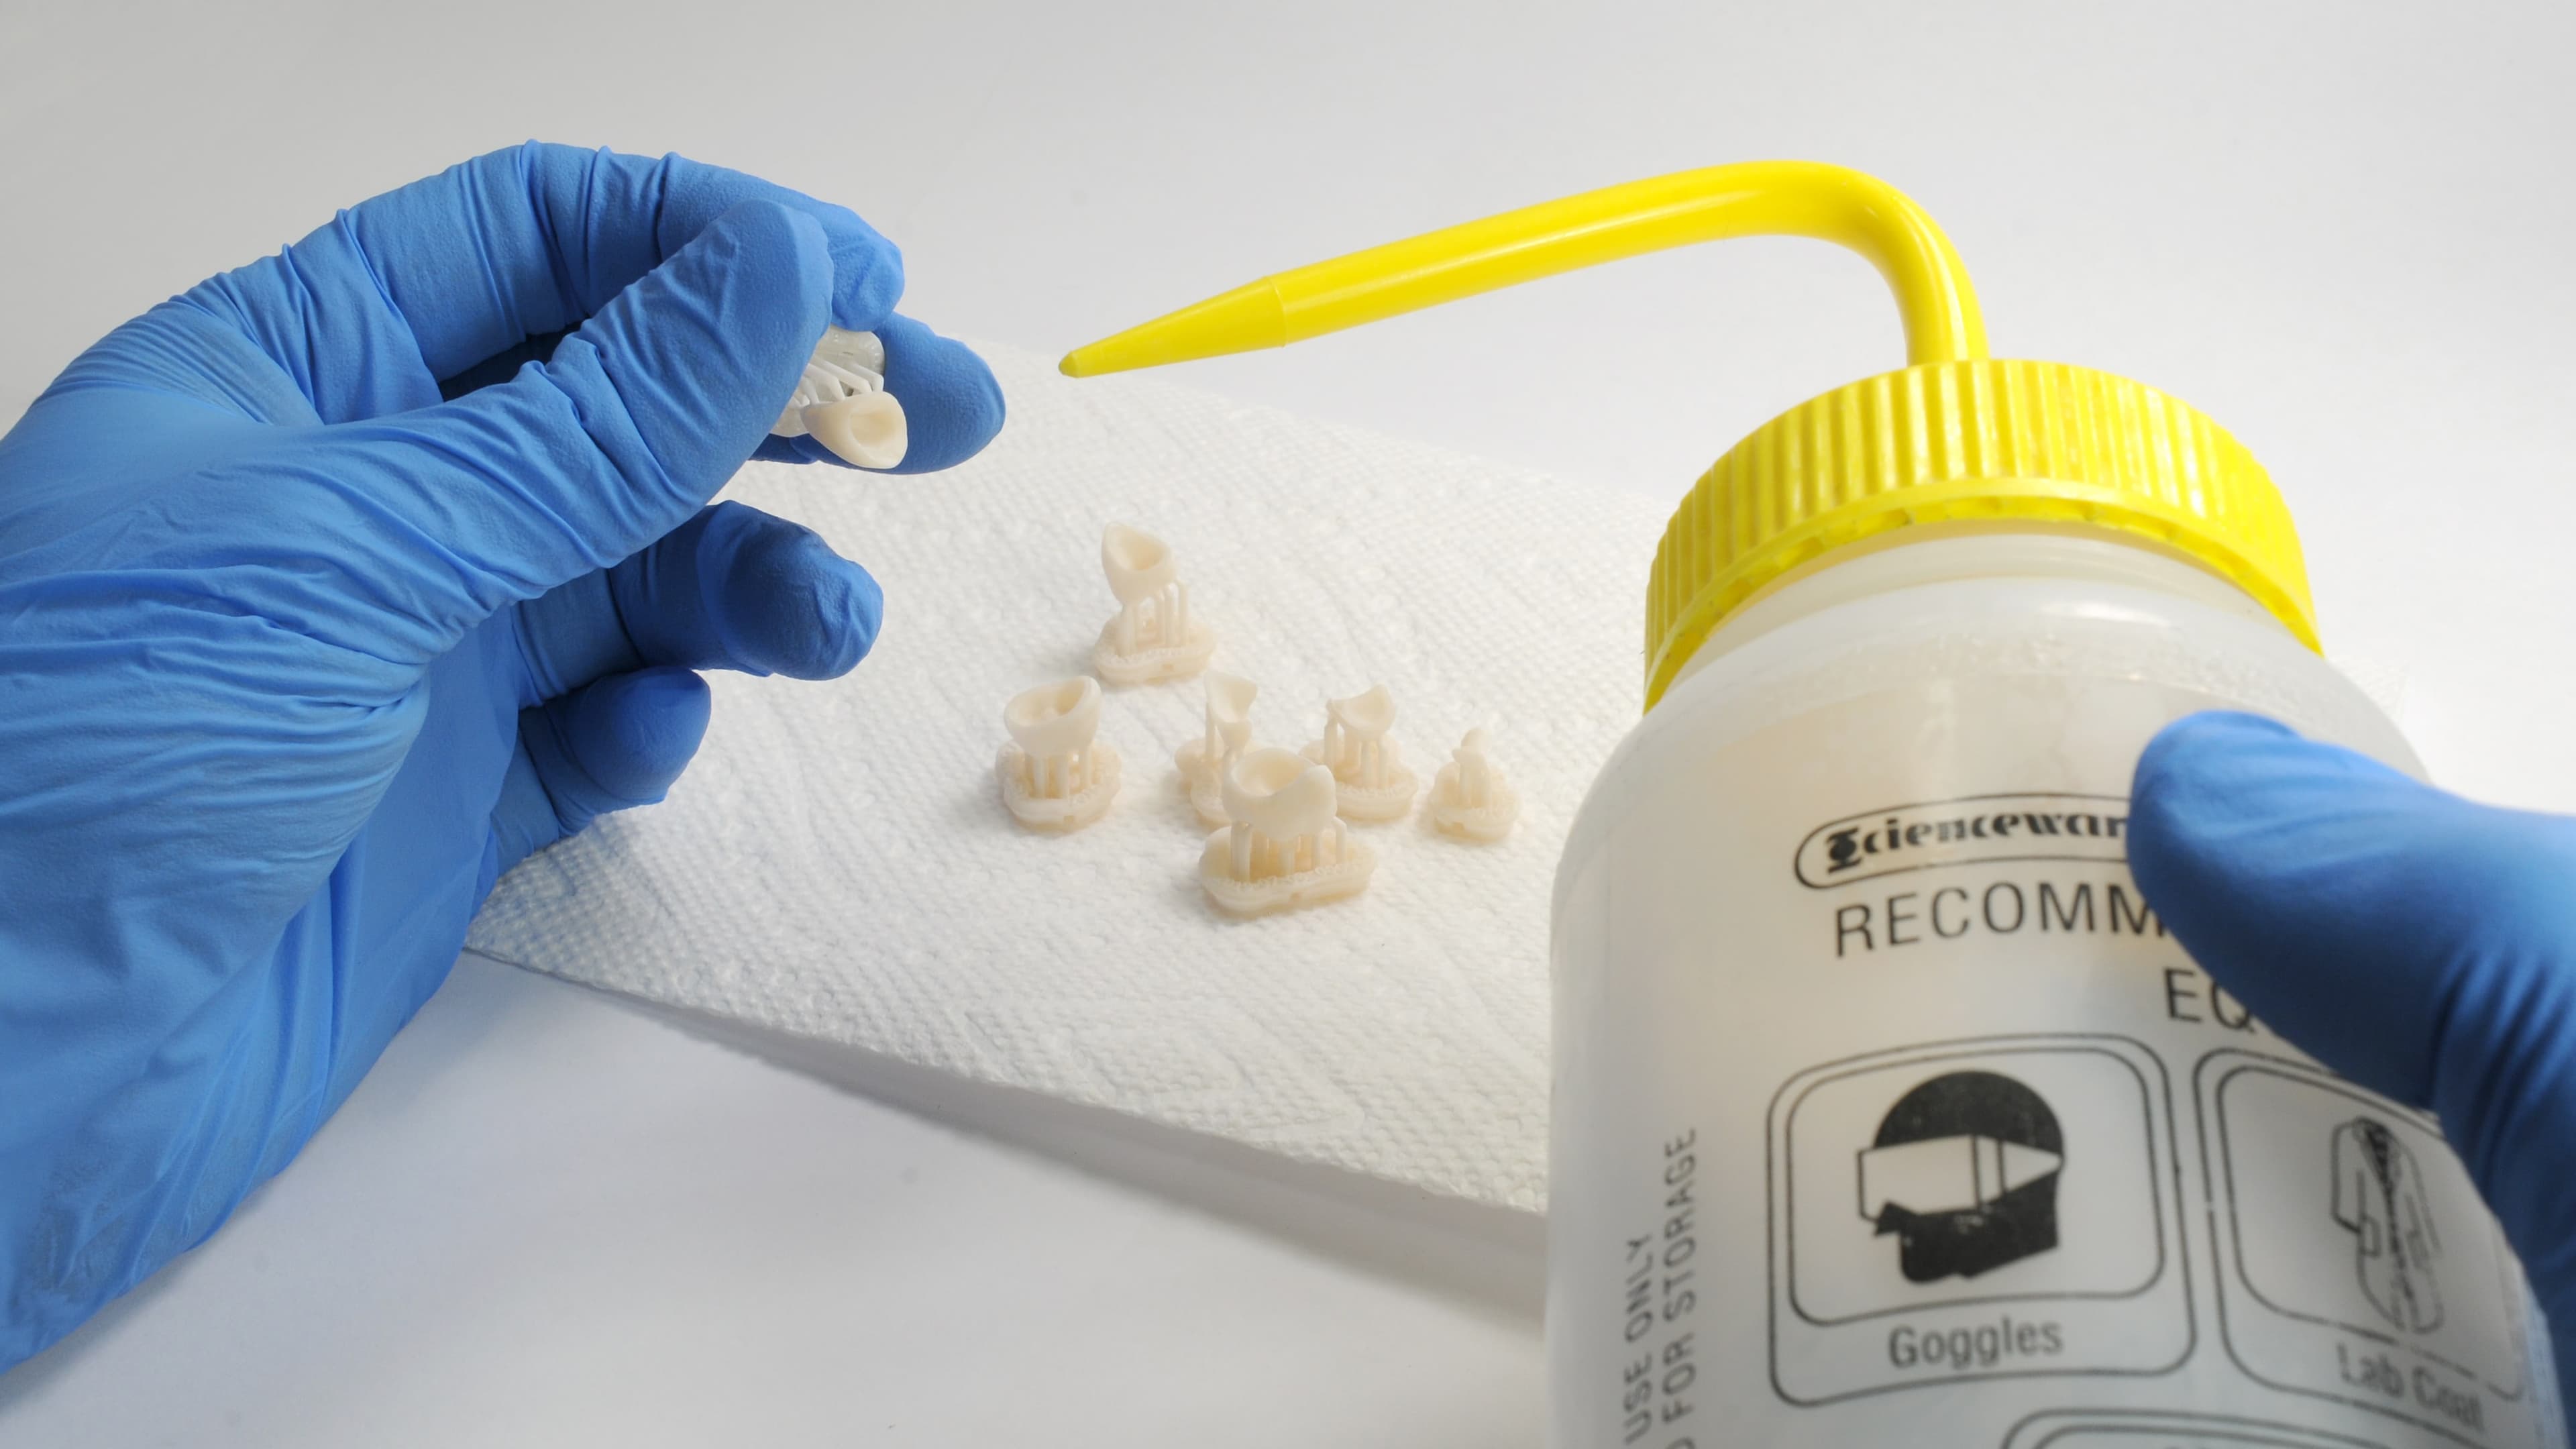
It is normal if a white residue forms on the surface of dried parts. This can be addressed by either polishing the part, or using a sandblaster with 50 µm glass beads at 1.5 bar pressure to remove the residue as described in the BEGO™ VarseoSmile® TriniQ® Resin Instructions for Use.
If any wet, uncured resin is still present after drying, use a squeeze bottle with fresh IPA to remove uncured resin and then air dry the parts again.
4.4 Post-Curing and Support Removal
With the raft and supports still intact, place printed parts in the Form Cure, Form Cure V2, or Fast Cure with the raft side down.
Post-cure the parts using settings established in the BEGO™ VarseoSmile® TriniQ® Resin Instructions for Use.
4.4.2 Support Removal
Remove parts from the Form Cure, Form Cure V2, or Fast Cure and use a handpiece with a cutting disc to remove supports and the raft from printed parts. With the Form Cure, this has to be done after the first curing cycle, as established in the instructions for use.
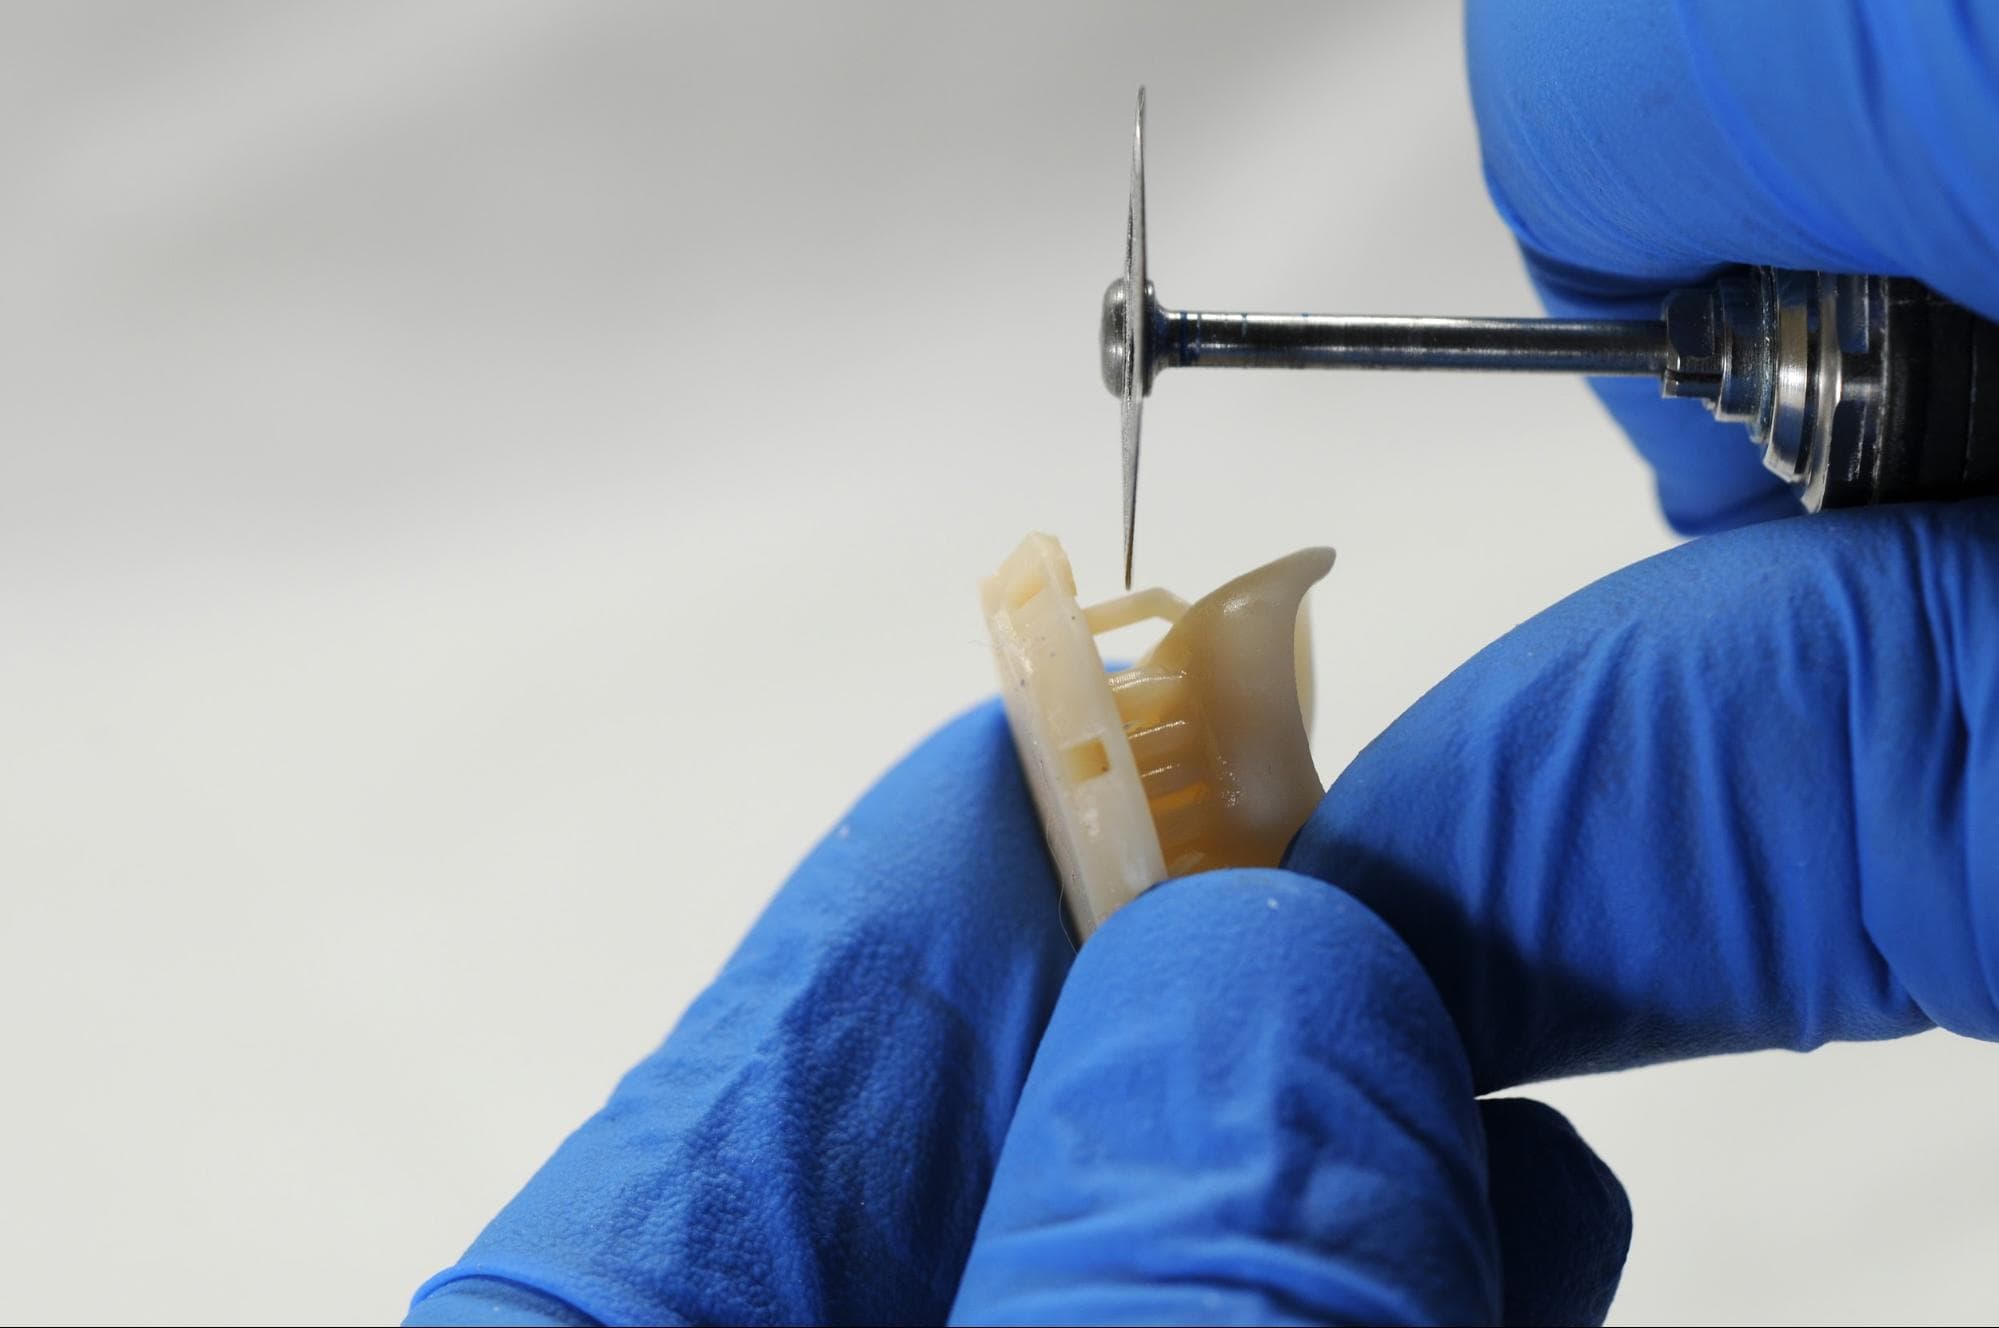
Note
For optimal surface quality, it is recommended to avoid using clippers, as they can leave indentations in the part's surface. Instead, use a cutting disc and carbide cutters to maintain better control over the final surface.
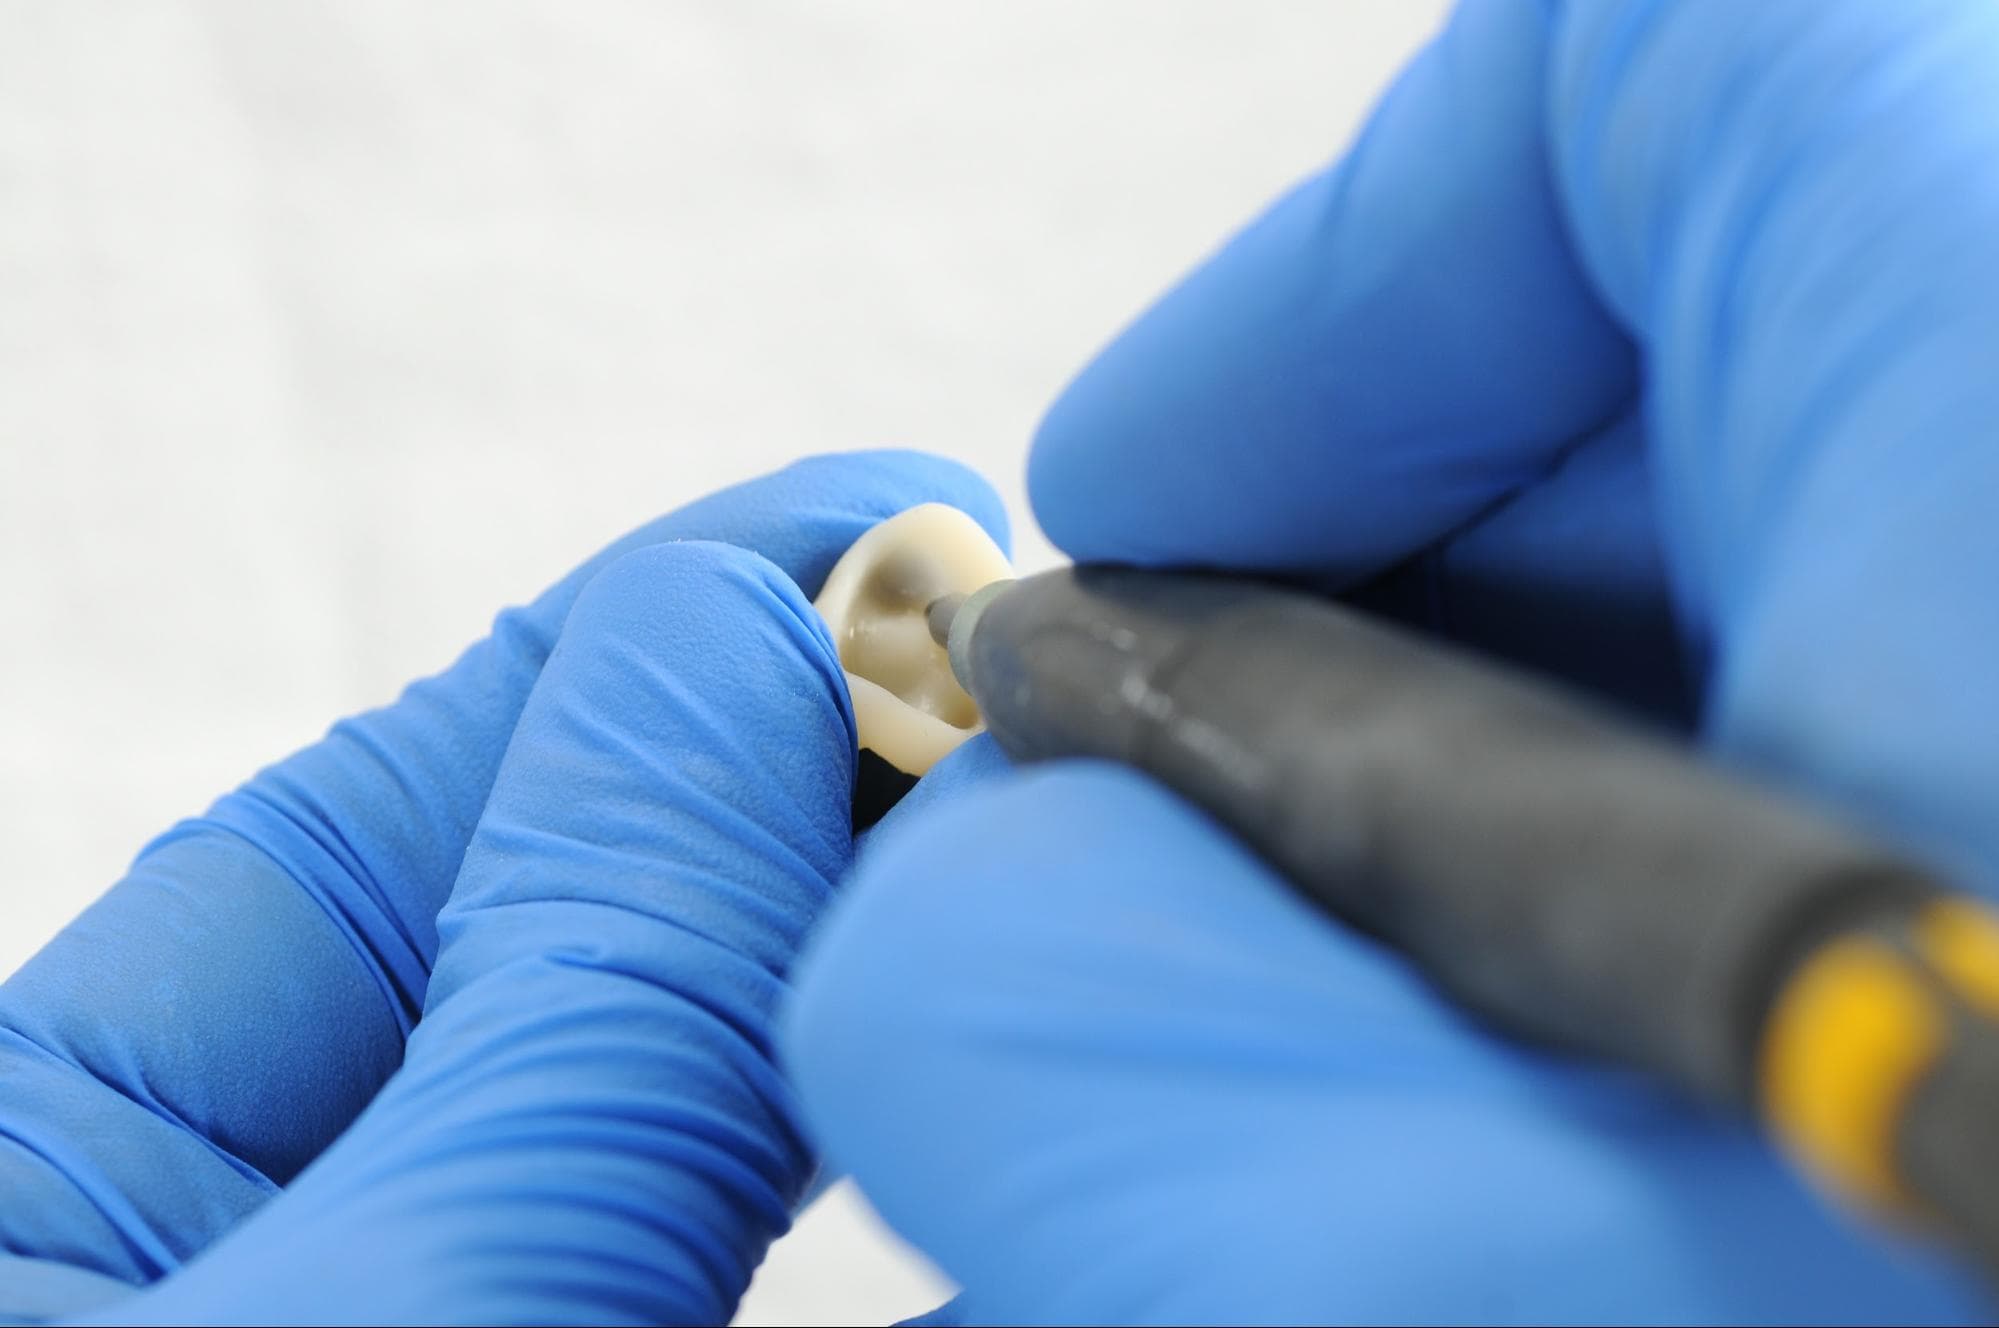
Check printed part fit and finish, and contour parts as needed using a dental handpiece and carbide rotary burs.
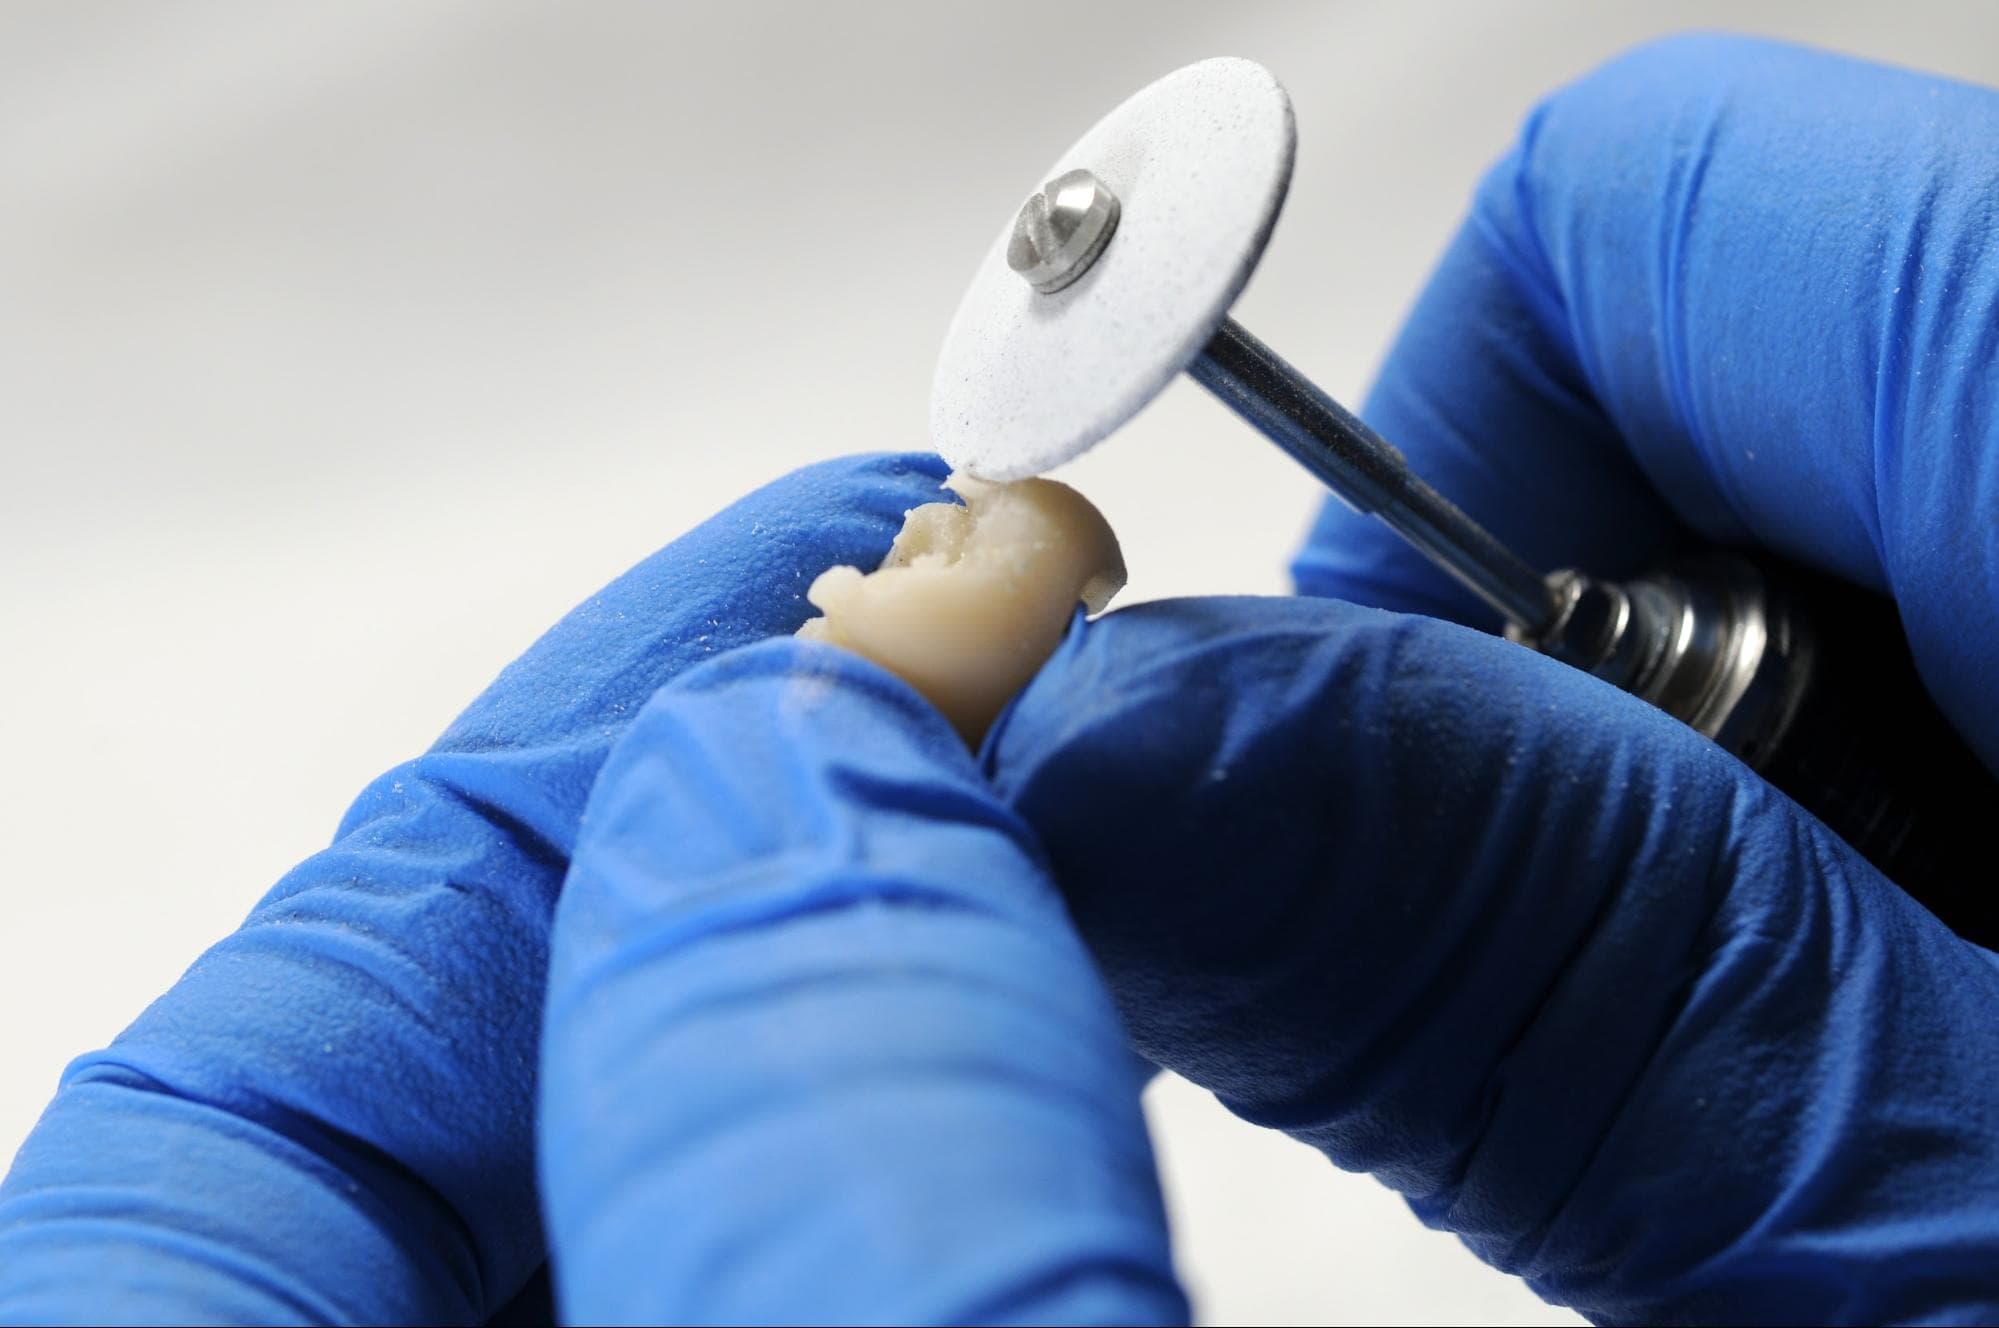
4.5 Finishing and Polishing
Post-cured parts must be polished or glazed prior to use.
If rough marks are left behind after support removal, use a carbide or other rotary before polishing surfaces to improve patient comfort.
A high gloss shine can be achieved with traditional polishing tools and materials used for acrylics and composites.
Alternatively, you can use a dental-grade, light-curing glaze like GC Optiglaze or VITA Akzent LC Glaze to finish the outer surfaces. Follow the instructions from the material manufacturer.
Note:
Robinson brushes and rubberized spiral wheels are ideal for polishing occlusal anatomy. Refert Opal-L works very well as a polishing material.
Avoid overheating the parts during polishing. Finally, inspect the restoration again. Discard and reprint it if any cracks or damage are detected.
5. Delivery and Treatment
Permanent attachment of restorations made from BEGO™ VarseoSmile® TriniQ® Resin onto a natural tooth can be done using fully adhesive or self-adhesive luting composites.
Temporary attachment of restorations made from BEGO™ VarseoSmile® TriniQ® Resin onto a natural tooth can be done using temporary luting cements.
Attachment of restorations made from BEGO™ VarseoSmile® TriniQ® Resin onto metal frames can be done using luting composites or veneering composites.
Note
The instructions of the relevant composite or cement manufacturer must always be followed.
6. Additional Resources
Explore Formlabs dental resources for in-depth guides, step-by-step tutorials, white papers, webinars, and more.
Dentistry Made Easier
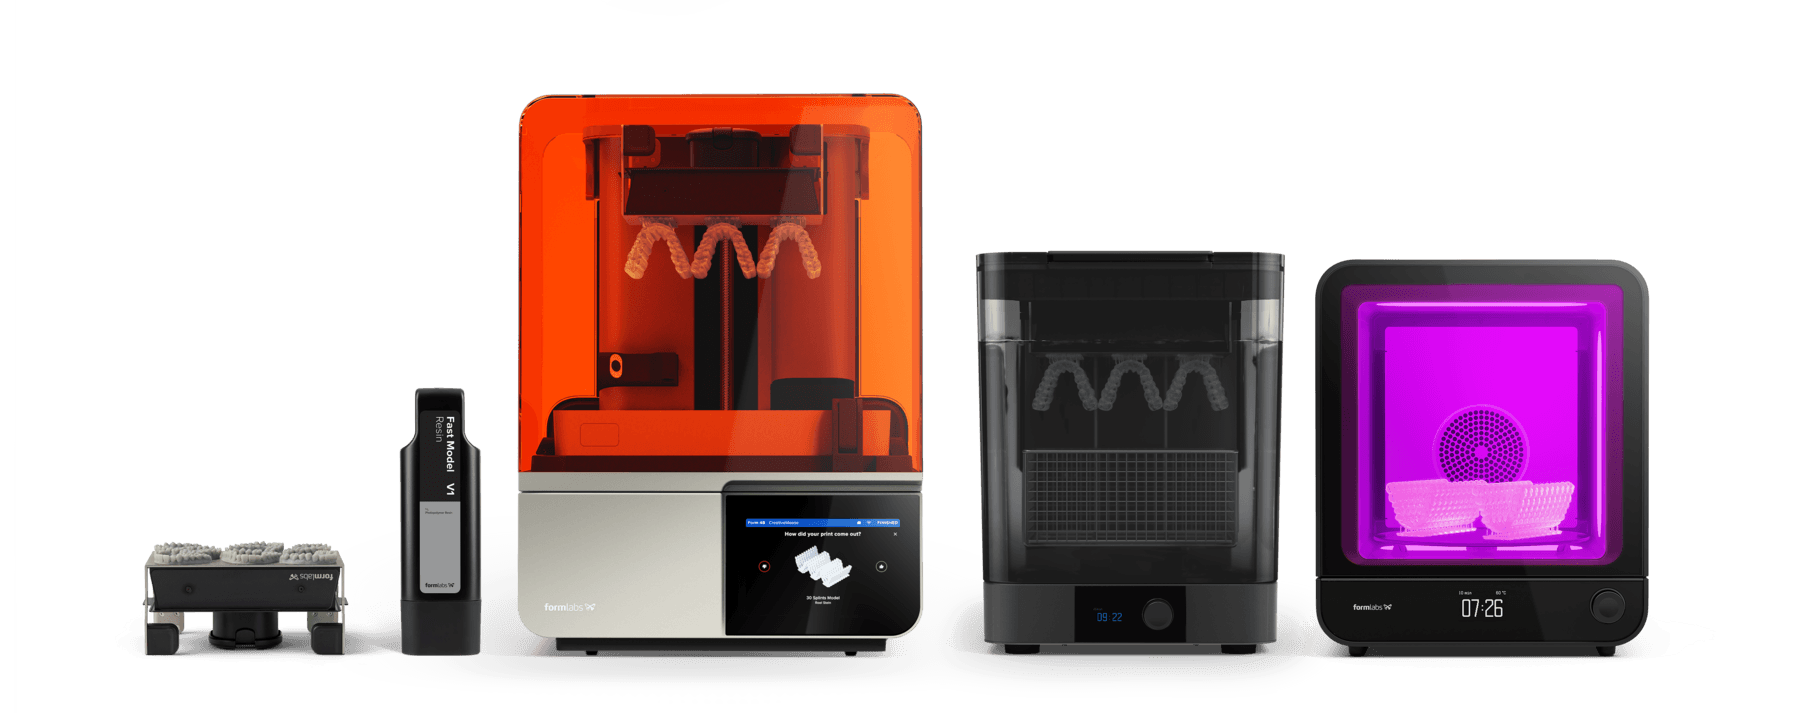
Form 4B is a blazing fast dental 3D printer that offers the most diverse materials library for dentistry and orthodontics. Create high-quality dental models and biocompatible appliances fast, with easy workflows, leading reliability, and stunning part quality using the Form 4B ecosystem.