
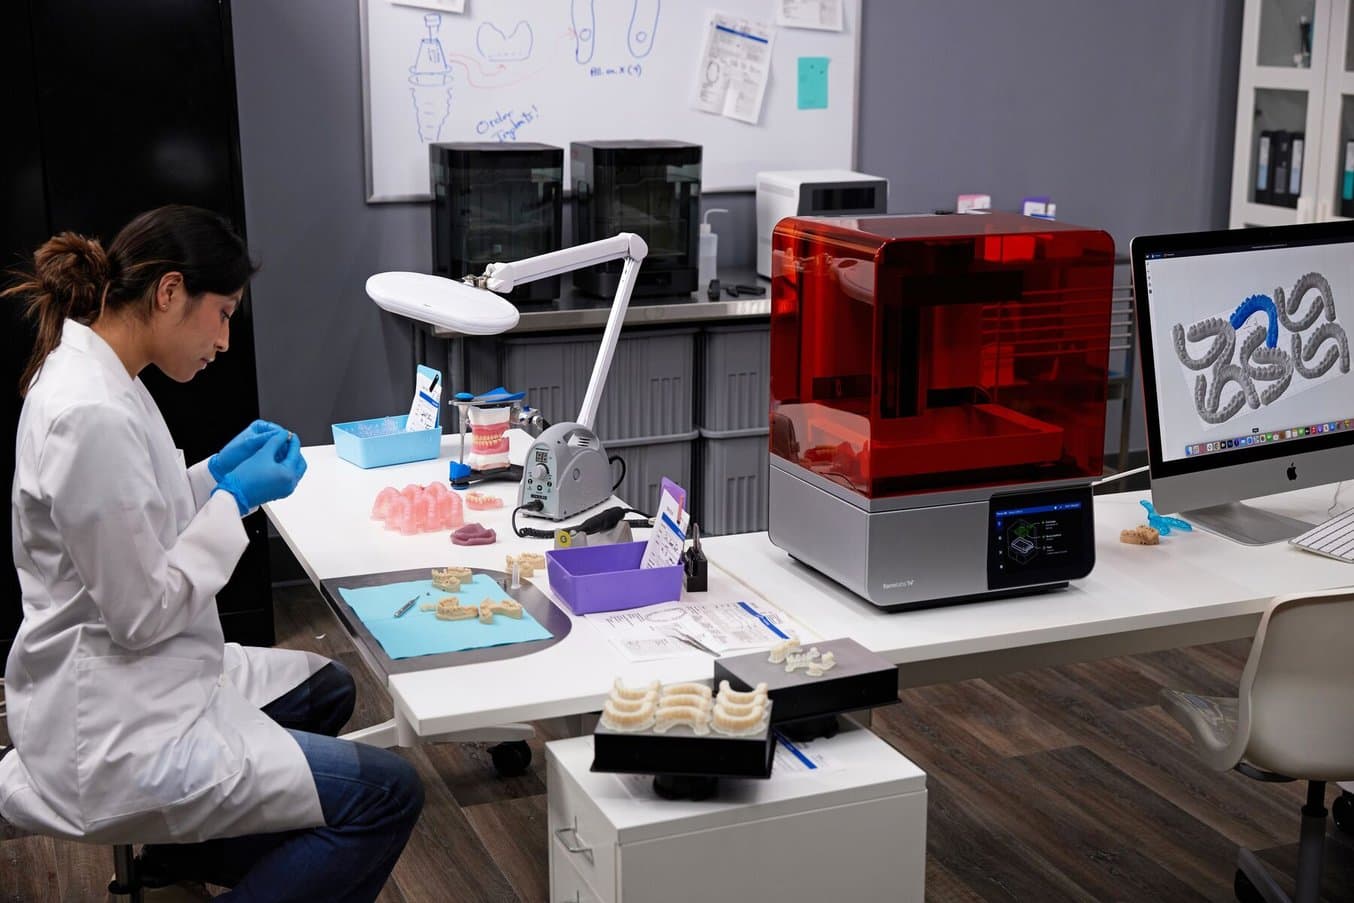
The present and future of dentistry is digital. With cutting-edge dental technologies for digital intraoral impressions, AI-assisted treatment planning, CAD design, and 3D printing, what was once prohibitively expensive is now becoming more accessible, already transforming dental practices and labs worldwide. As CAD/CAM continues to replace traditional workflows as the standard of dental care, digital solutions are a necessary consideration for any dental business.
What are the benefits of going digital? What are the differences between analog and digital workflows? What are the best strategies for getting started? Read on to discover the answers in our guide to digital dentistry.
Looking for a dental 3D printer? Check out our guide where we walk you through the different 3D printing technologies for dentistry and orthodontics and all of the attributes to evaluate before investing in a dental 3D printer.
Product Demo: Form 4B Dental 3D Printer
Blazing speed meets unmatched accuracy in the next generation of dental 3D printing. Explore the latest innovations in our webinar.
Why Go Digital?
High Quality and Precision
No two dental cases are the same. Patient anatomy is unique, and each treatment is tailored, enabled by a long history of custom, human-centric craftsmanship. But, as with any trade, quality is dependent on the skills of a given dentist, orthodontist, assistant, or technician, and achieving consistent, high-quality, affordable dental products with so many potential sources of error is incredibly difficult.
Digital dentistry reduces the number of steps and, therefore, the risks and uncertainties introduced by human factors, providing higher consistency, accuracy, efficiency, and precision at every stage of the workflow. 3D intraoral scanning removes many of the variables associated with taking a traditional impression, giving dental technicians more accurate data to design from.
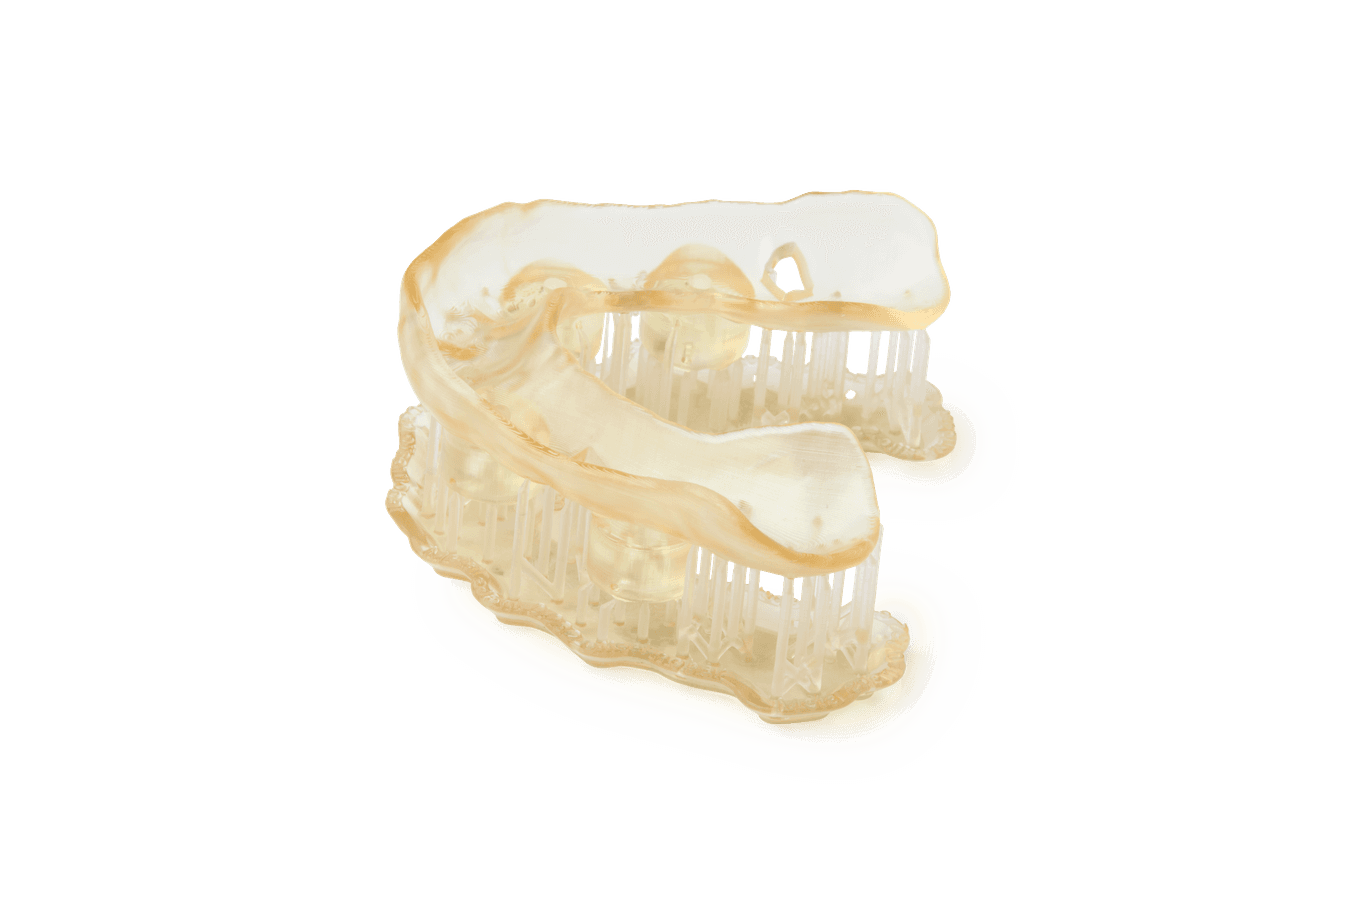
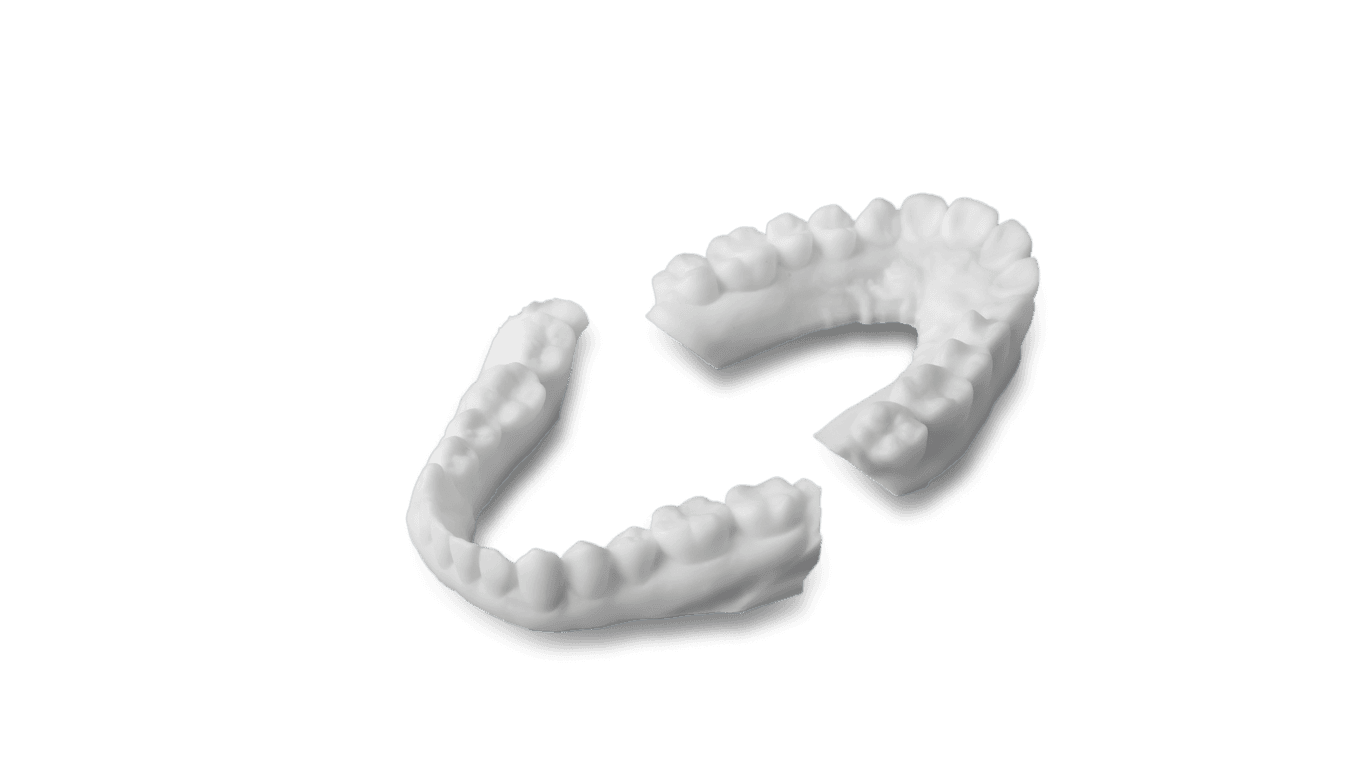
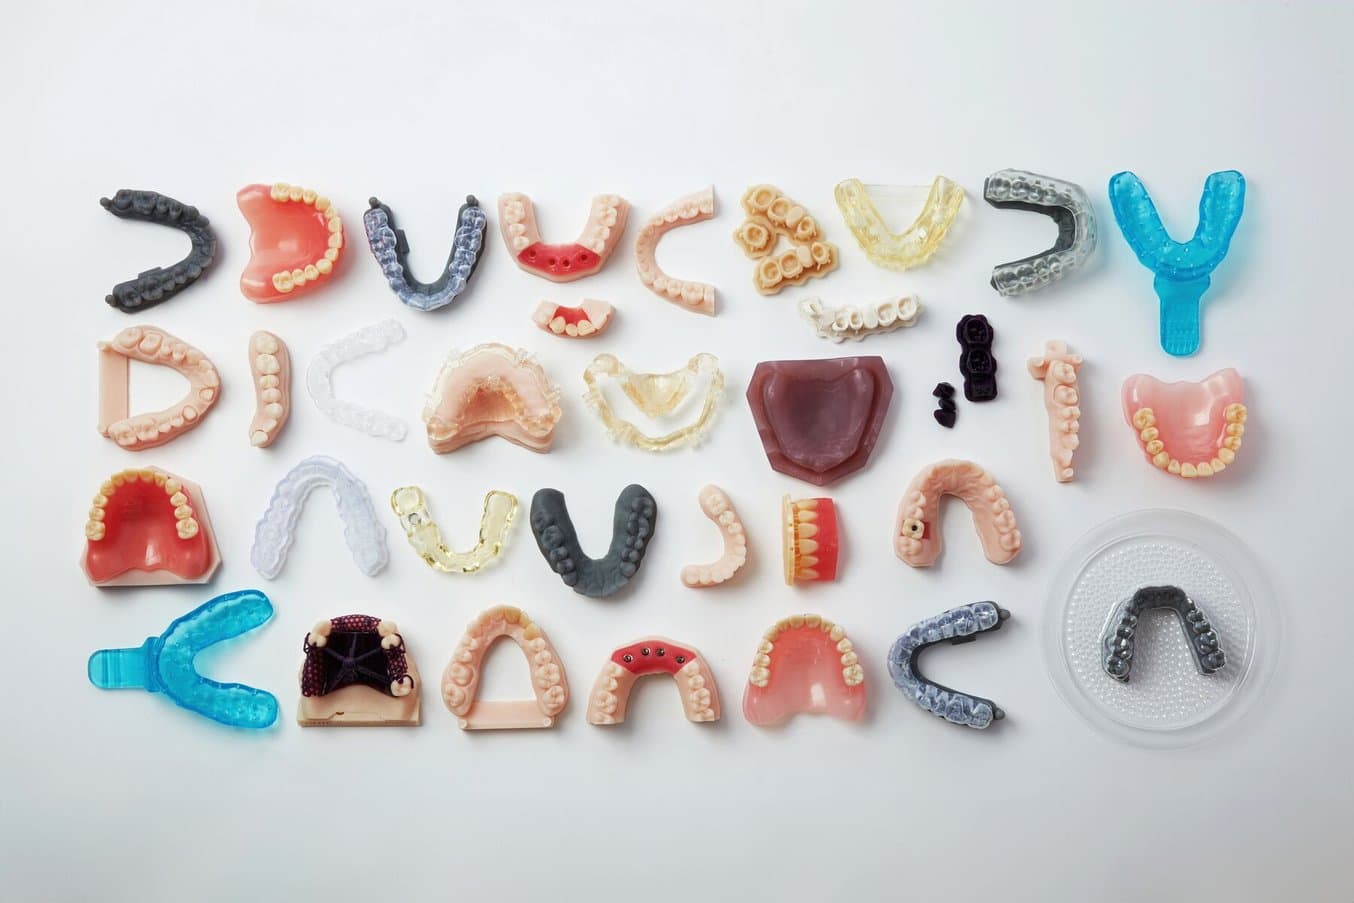
3D printers today can produce natural, long-lasting appliances, such as full dentures or temporary and permanent restorations.
Dental and orthodontic CAD software tools provide visual interfaces similar to traditional workflows, with the added benefit of being able to automate certain steps, as well as easily identify and fix mistakes.
Digital manufacturing equipment such as 3D printers or milling machines deliver a range of high-quality custom products, prosthetics, and appliances with superior fit and repeatable results for fewer errors, lower costs, and improved clinical performance and experience for practices and patients.
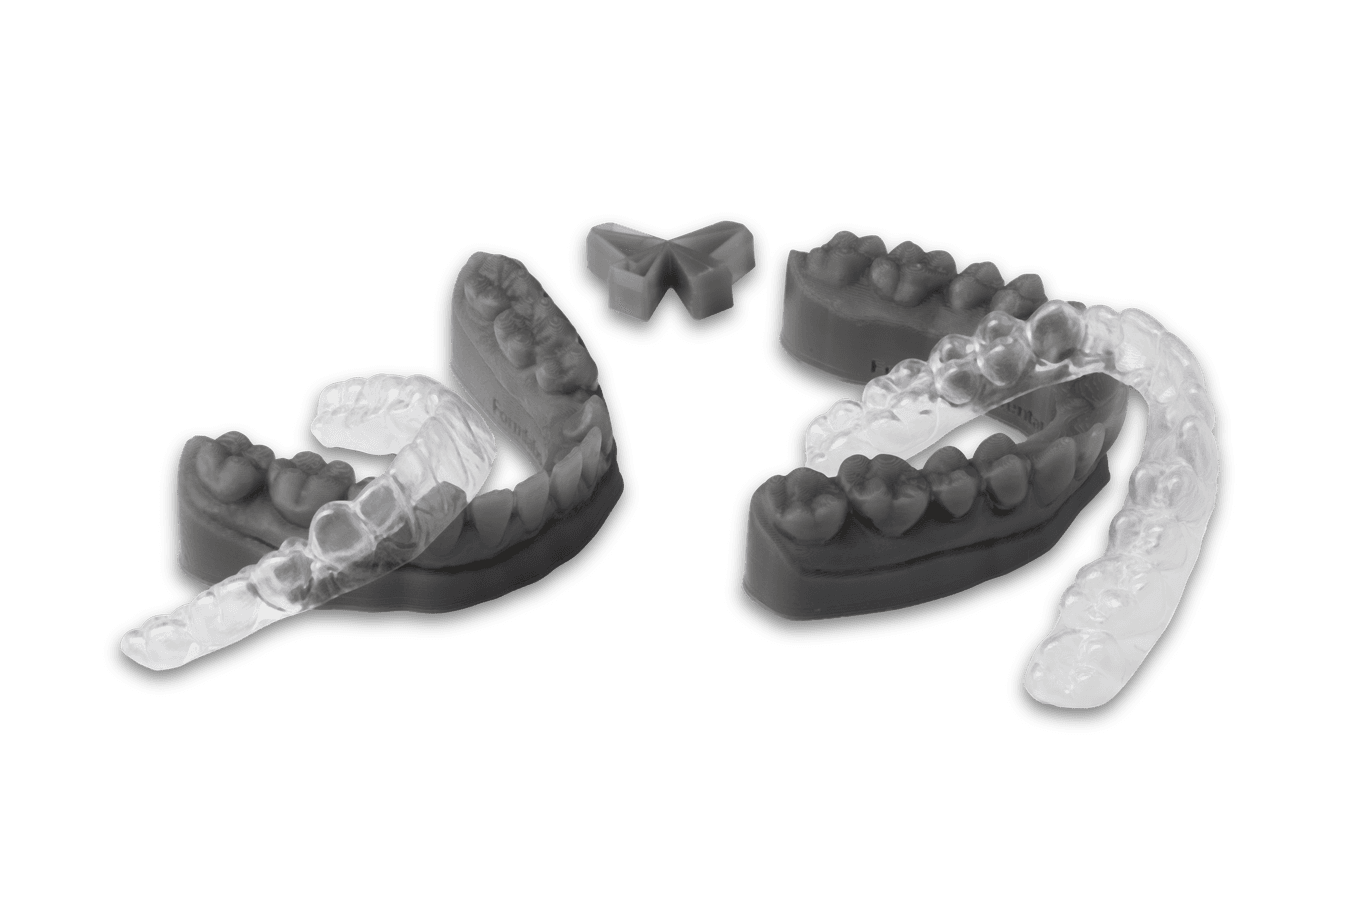
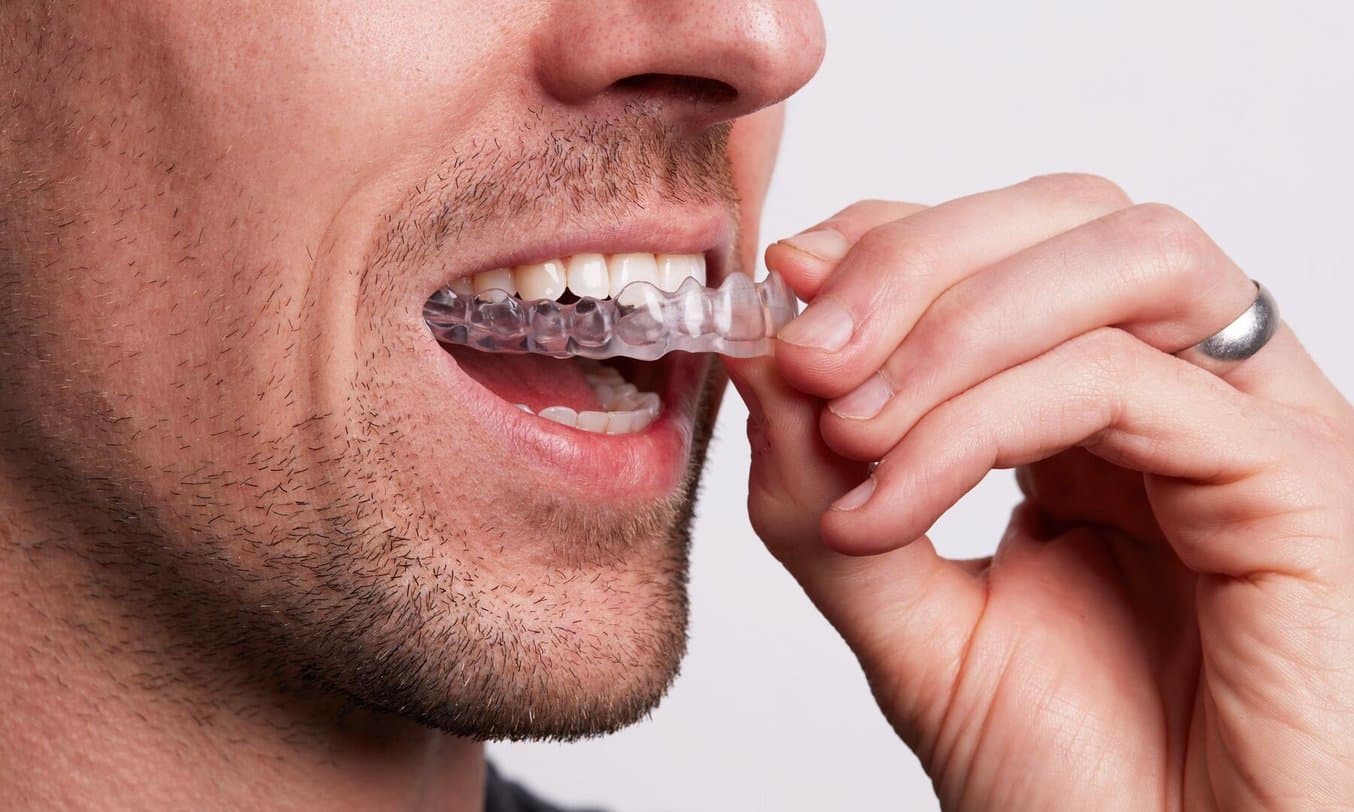
Manufacturing thermoformed appliances like clear retainers and aligners over 3D printed orthodontic models is fast and affordable.
Request a Free Sample Part
See and feel Formlabs quality firsthand. We’ll ship a free 3D printed sample part printed on the Form 4B to your office.
Improved Efficiency: Time and Cost Savings
Digital dentistry improves the efficiency of procedures and streamlines workflows in dental and orthodontic practices, and dental labs alike.
Dental or Orthodontic Practice
In a dental or orthodontic practice, saving time on menial tasks means shorter appointments, increased throughput, and patient satisfaction. Taking impressions with 3D intraoral scanners is easy, reducing chair time and labor. Digital impressions cut out the cost of materials and the time required to ship impressions to a laboratory. Instant feedback and the elimination of manual errors like voids, bubbles, or tears reduce the need to duplicate impressions.
Intraoral scanners help reduce chair time and labor, and cut out the cost of materials and the need to ship impressions to the dental laboratory.
Digital design and manufacturing increase productivity, reducing hands-on work for streamlined production, fewer remakes, and less time per part. Dental and orthodontic CAD software tools are incredibly powerful and application-specific, enabling dental professionals to plan and design a variety of orthodontic or restorative appliances.
In many countries, dentists and orthodontists are required to store patients’ physical models and records for years. This often requires renting space or dedicating a significant part of the office for storage. With digital impressions, patient anatomy can be saved in the cloud or on a local server, requiring significantly less space and making searching for records easier. Additionally, patient models can be rapidly produced from these digital impressions on-demand with desktop 3D printers.
Dental practices can save time and costs by bringing production in-house for indications including:
- Diagnostic models
- Models for thermoformed appliances
- Surgical guides
- Occlusal splints, mouthguards, and night guards
- Temporary restorations
- Permanent restorations
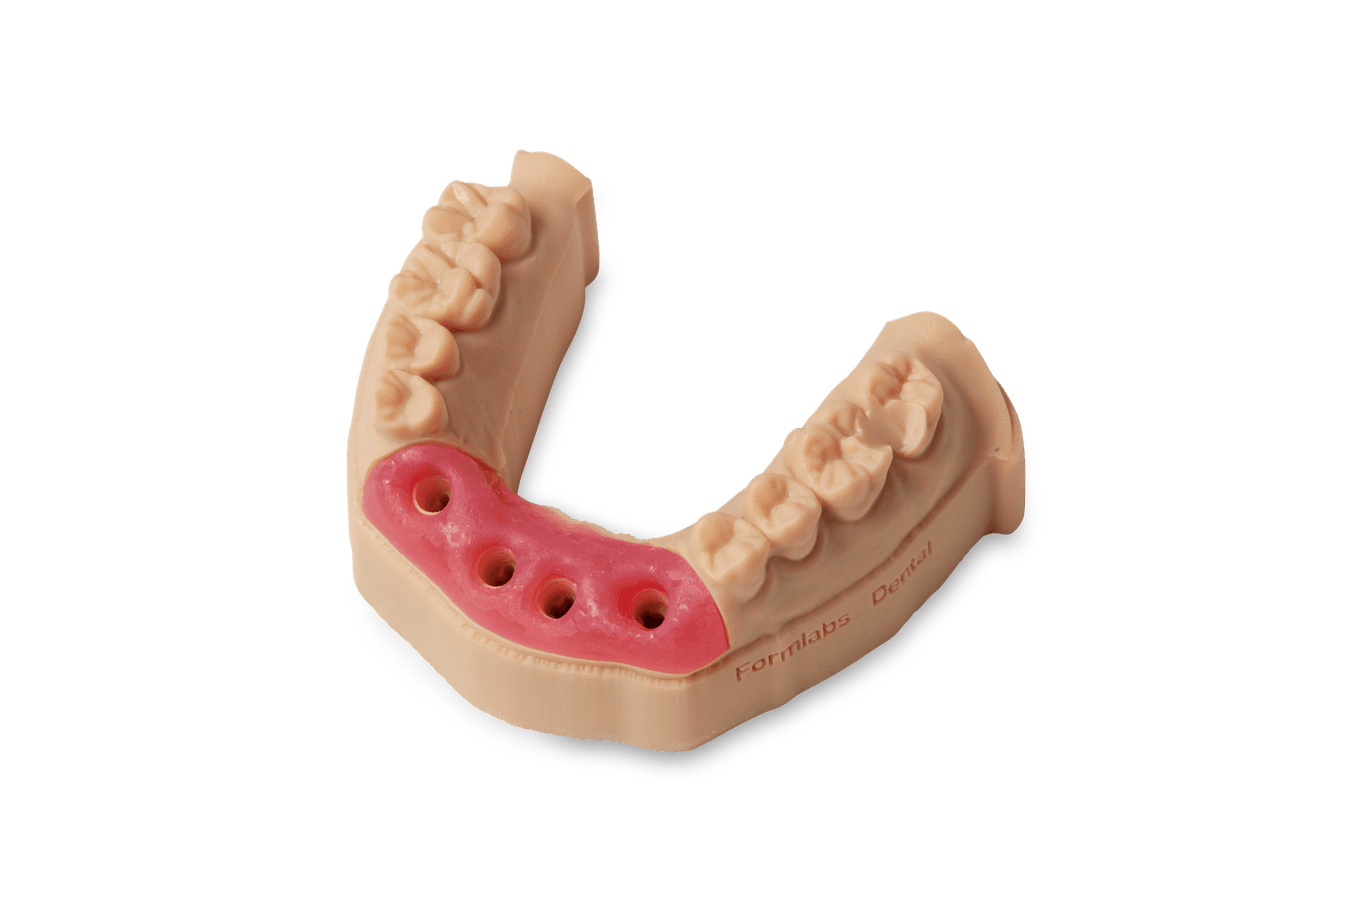
- Temporary full-arch implant-supported appliances (All-on-X)
If you are a dental practice, consider starting with the following:
Models for core applications including quick retainers, bleaching trays, and diagnostic models
- Quick delivery time
- Easy to delegate
- ~$2-3 per model
- Cost savings >75%
Occlusal splints
- Quick delivery time
- Easy to delegate
- ~$4-5 per splint
- Cost savings >85%
Surgical guides
- Quick delivery time
- Easy to delegate
- ~$3-6 per part
- Cost savings >90%
The field of orthodontics has been the fastest to adopt 3D printing given the rise of clear aligner therapy in the field that was enabled by digital technologies. 3D printed models are now the go-to method for producing clear aligners. On the latest dental 3D printers, like the Form 4B, it’s possible to print up to 11 models in as little as 10 minutes for thermoforming clear aligners or retainers, enabling efficient, high-volume production. Other orthodontic indications include Hawley retainers over a 3D printed model or directly printing indirect bonding trays with biocompatible resins that enable the placement of multiple orthodontic brackets at once with increased accuracy and decreased chair time.
If you are an orthodontic practice, consider starting with the following:
Models for core applications including quick retainers, bleaching trays, and diagnostic models
- No CAD software needed; use Preform’s Scan to Model
- Quick delivery time
- Easy to delegate
- ~$2-3 per model
- Cost savings >75%
Models for clear aligners
- Quick delivery time and independence
- Easy to delegate
- ~$2-3 per model
- Cost savings >80%

Indirect bonding trays
- Reduce patient chair time to half
- Easy to delegate
- ~$5-6 per part
3D Printing Technology in an Ortho-Restorative Practice
In modern dental practices, providing comprehensive care using digital workflows is becoming the new standard. Using 3D printing and concepts such as DSD brings multiple benefits to dental professionals, team members and, specially, to patients.
Dental Lab
In a dental lab, digital design and manufacturing increases technician productivity and reduces hands-on work, leading to streamlined production, fewer remakes, and less time per part — all resulting in lower costs.
Milling machines and 3D printers can batch jobs together and operate unattended. This can be further optimized with the addition of automation, which enables 24/7 production, equating to a second shift worker. The latest professional systems are now so cost-effective that dental labs of any size can take advantage.
Labs can efficiently produce a wide range of indications, including:
If you are a dental lab, consider starting with the following:
Restorative models
- Quick delivery time
- Easy to delegate
- ~$2-3 per model
- Cost savings >70%

Occlusal splints
- Quick delivery time
- ~$4-5 per splint
- Cost savings >80%
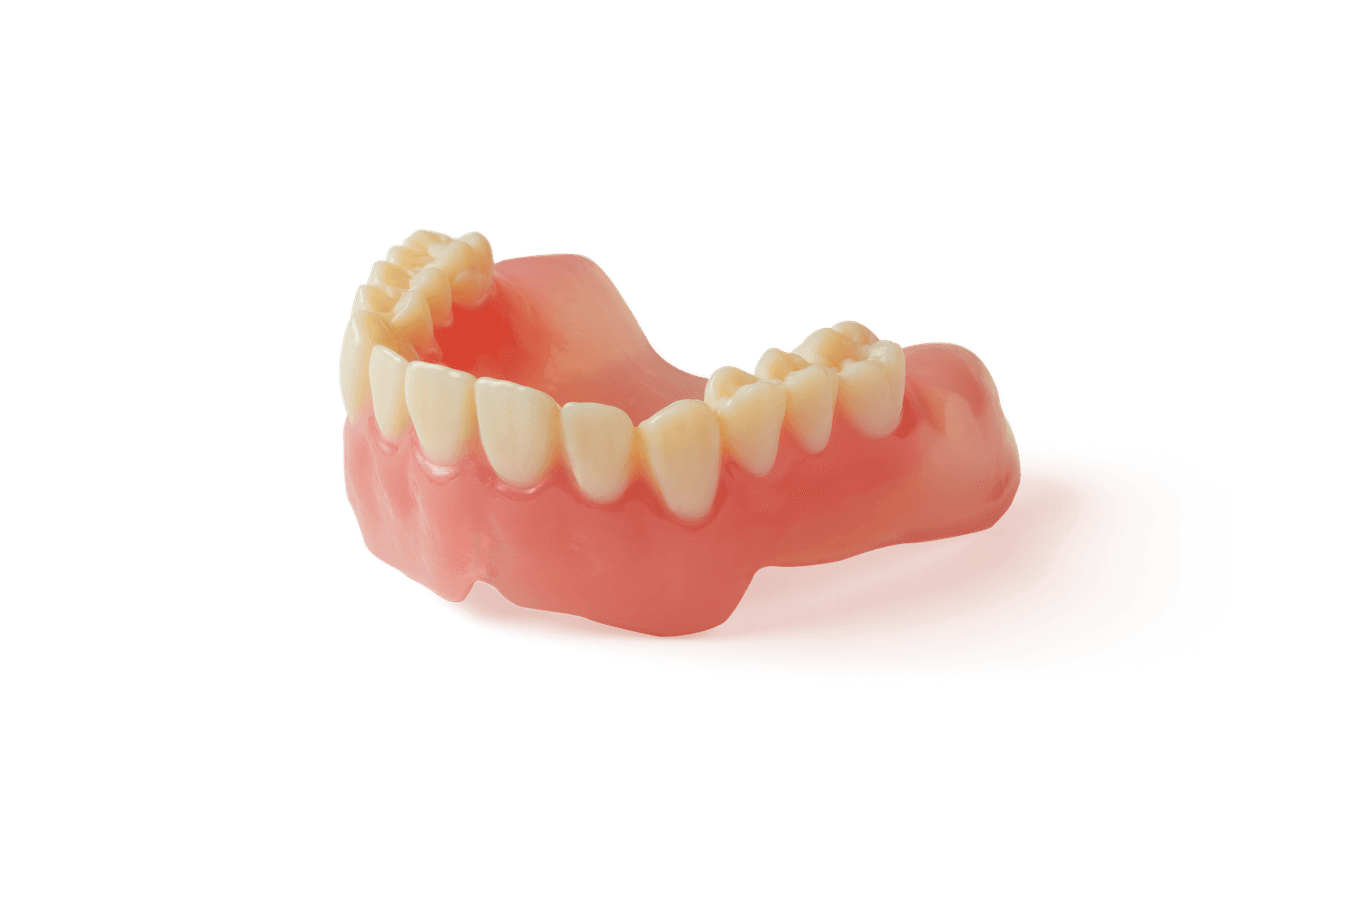
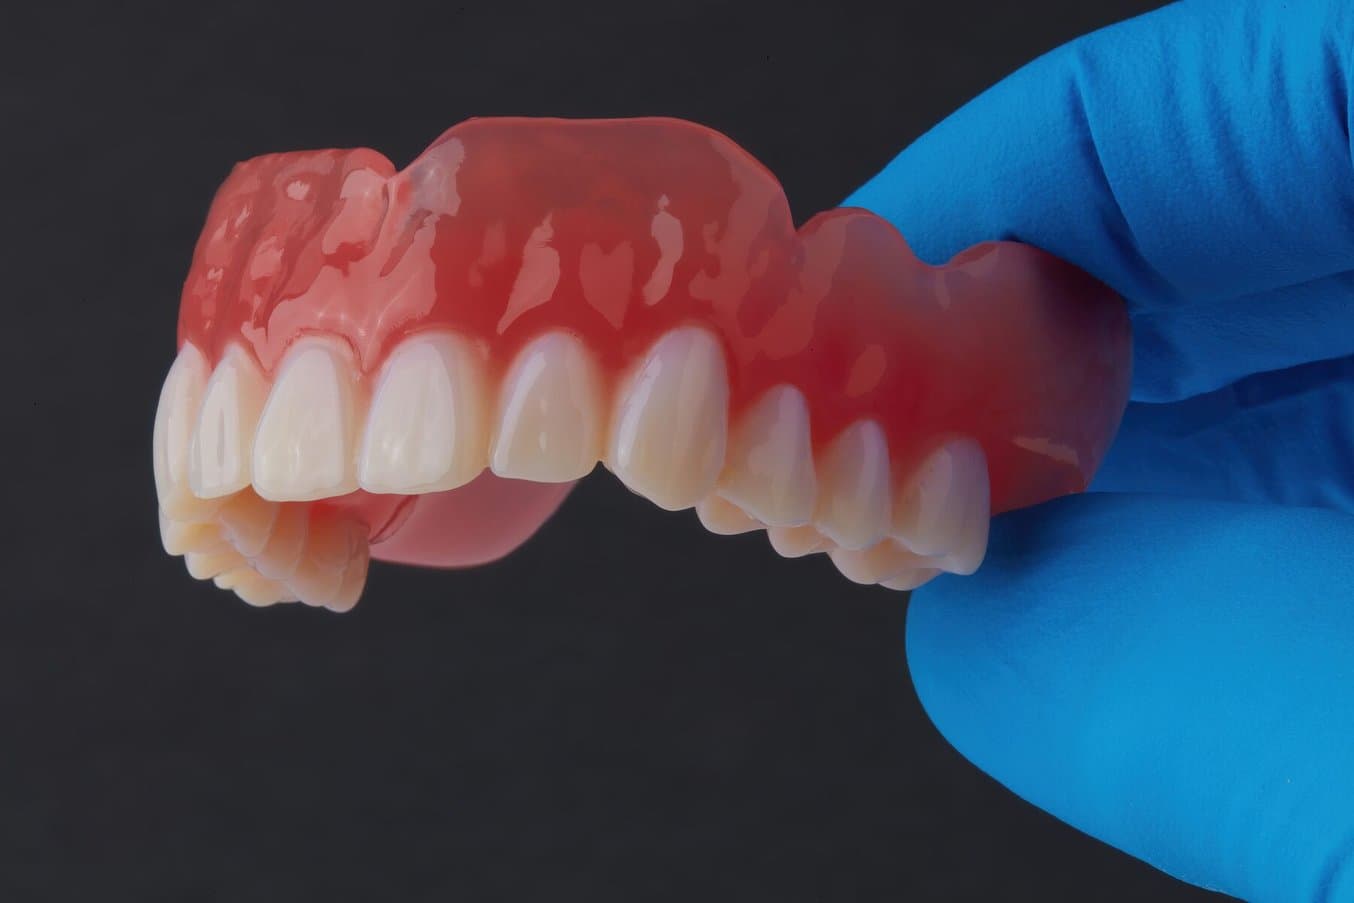
Digital dentures
- Quick delivery time
- ~$10 per denture
- Cost savings >80%
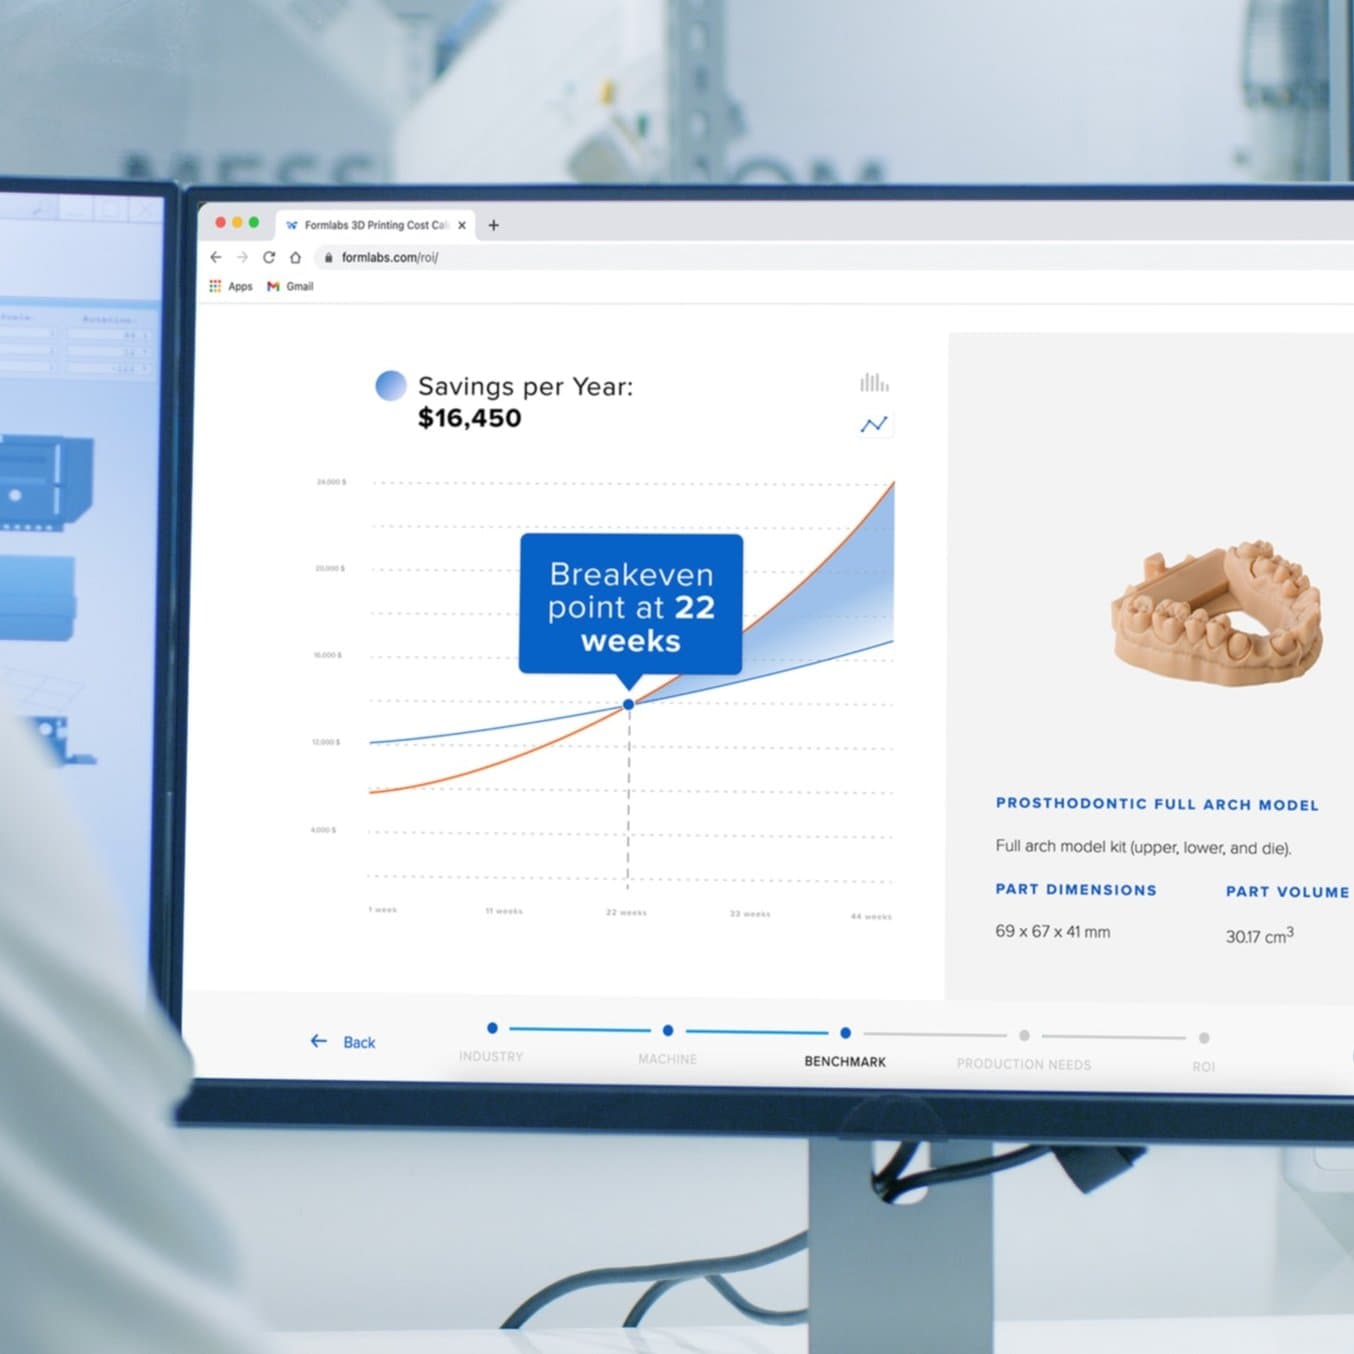
Calculate Your Time and Cost Savings
Try our interactive ROI tool to see how much time and cost you can save when 3D printing on Formlabs dental 3D printers.
Better Patient Experience and Outcomes
One of the most significant benefits of digital technologies is improved patient experience and comfort. A satisfied patient is more likely to follow treatment plans, return to a clinic, and recommend it to others, contributing to the long-term success of a practice.
Digital technologies improve the workflow from diagnosis to planning to treatment. Intraoral scanning is faster and substantially more comfortable than regular impressions, while Cone Beam Computed Tomography (CBCT) scanning adds a new dataset to assist in planning for implant surgery or further diagnosis in orthodontic treatments. Virtual treatment planning and appliance design enable less invasive treatments and better-fitting prosthetics. Digital tools also simplify communication between the dentist and patient, and the practice and lab, allowing for immediate data transmission and worldwide reachability.
3D printers can create temporary or permanent prosthetics chairside, so there’s no need to wait when presented with an urgent case. If replacement aligners or occlusal splints are needed, patients can quickly be presented with the appliances they need, removing potential gaps in treatment plans. Same-day and chairside delivery of appliances became possible thanks to digital production methods and technical developments. As a result, digital dentistry makes for reduced chair time, faster treatments, and higher acceptance rates, all with scientifically proven, superior clinical outcomes.
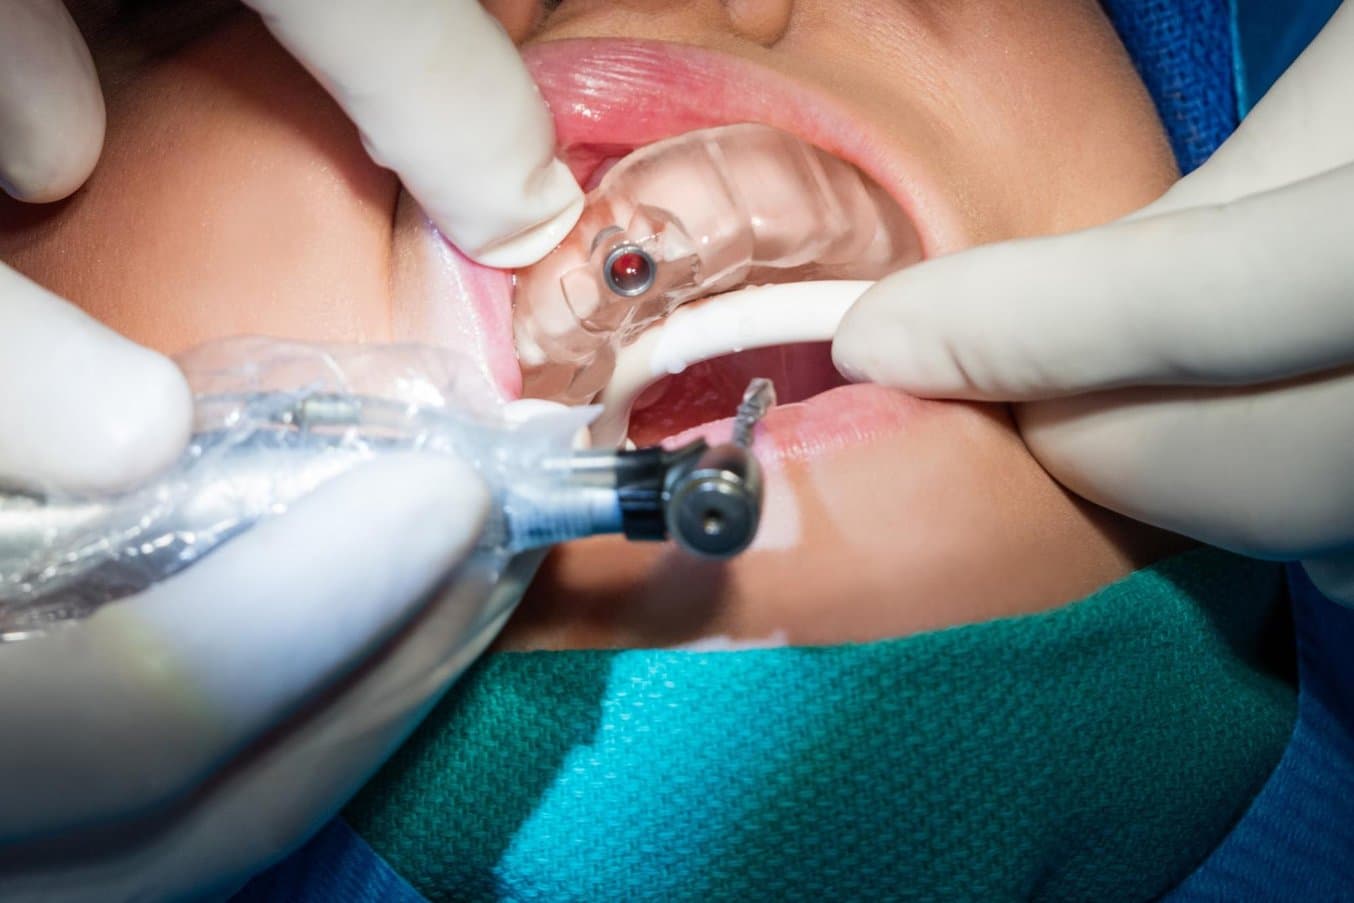
3D printed surgical guides enable quick and high-precision implant placement. Print up to 6 surgical guides on the Form 4B in 35 minutes for just $2-6 per guide.

3D printed indirect bonding trays enable the quick and accurate placement of multiple orthodontic brackets at once.
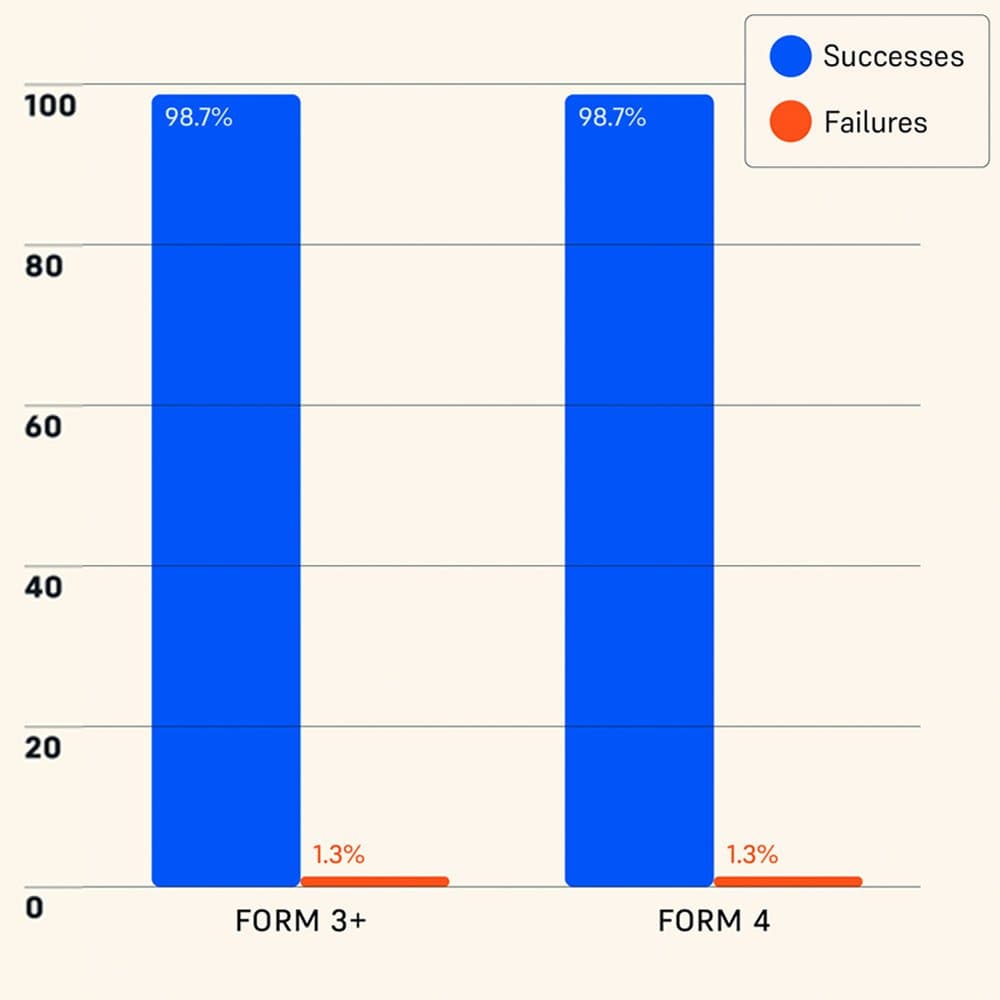
Independently Tested Reliability of Form 4 and Other Resin 3D Printers
Formlabs Form 4 was measured to have a 98.7% print success rate by an independent global leader in product testing. Read a complete description of the test methodology and see the results in our white paper.
New Business Opportunities
The dental industry is going through rapid change. Practices and labs that delay adopting new technologies risk falling behind their competition and leave money on the table by over-reliance milling centers and outsourced providers.
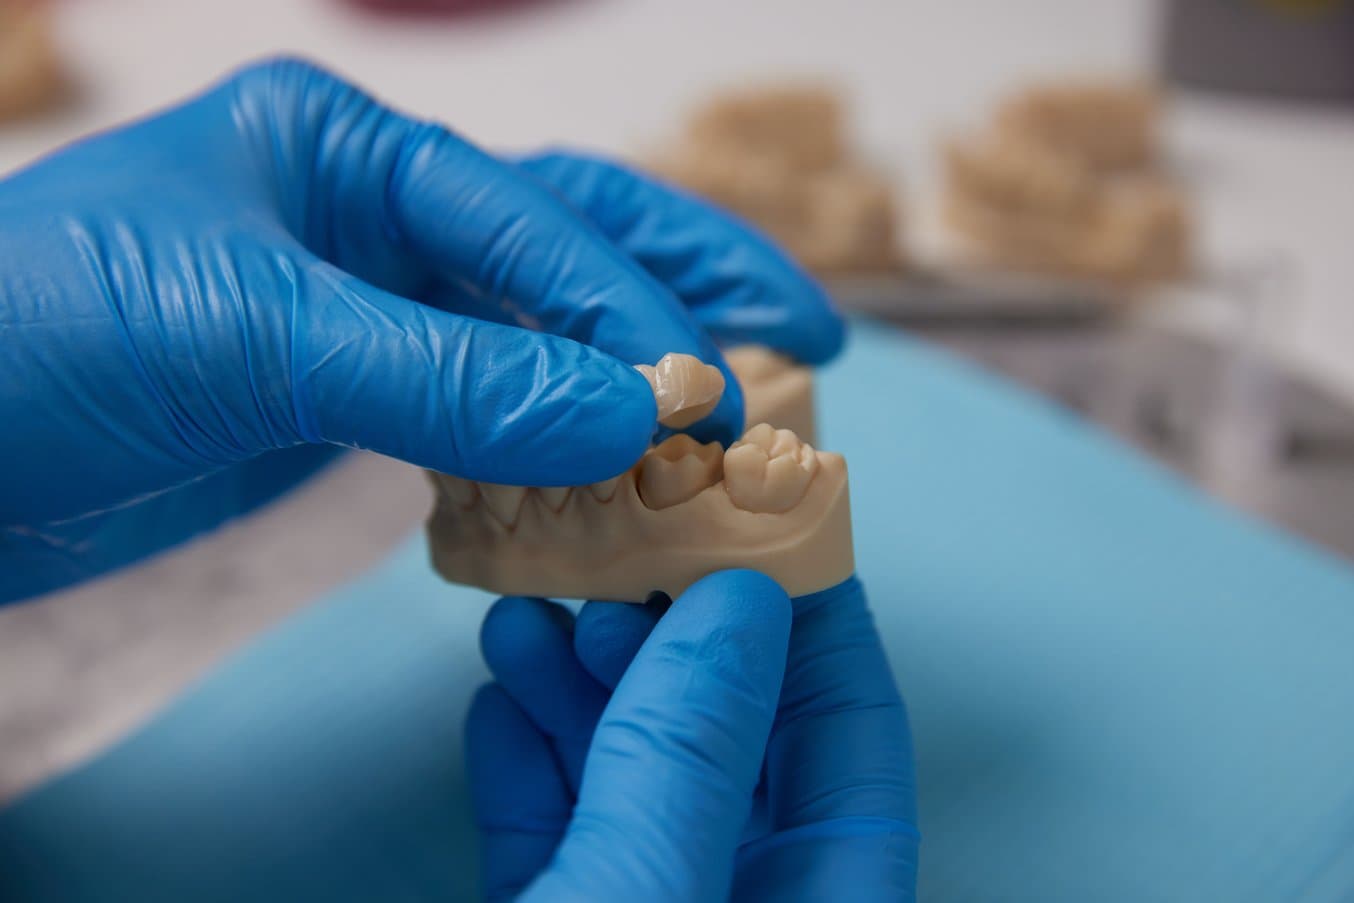
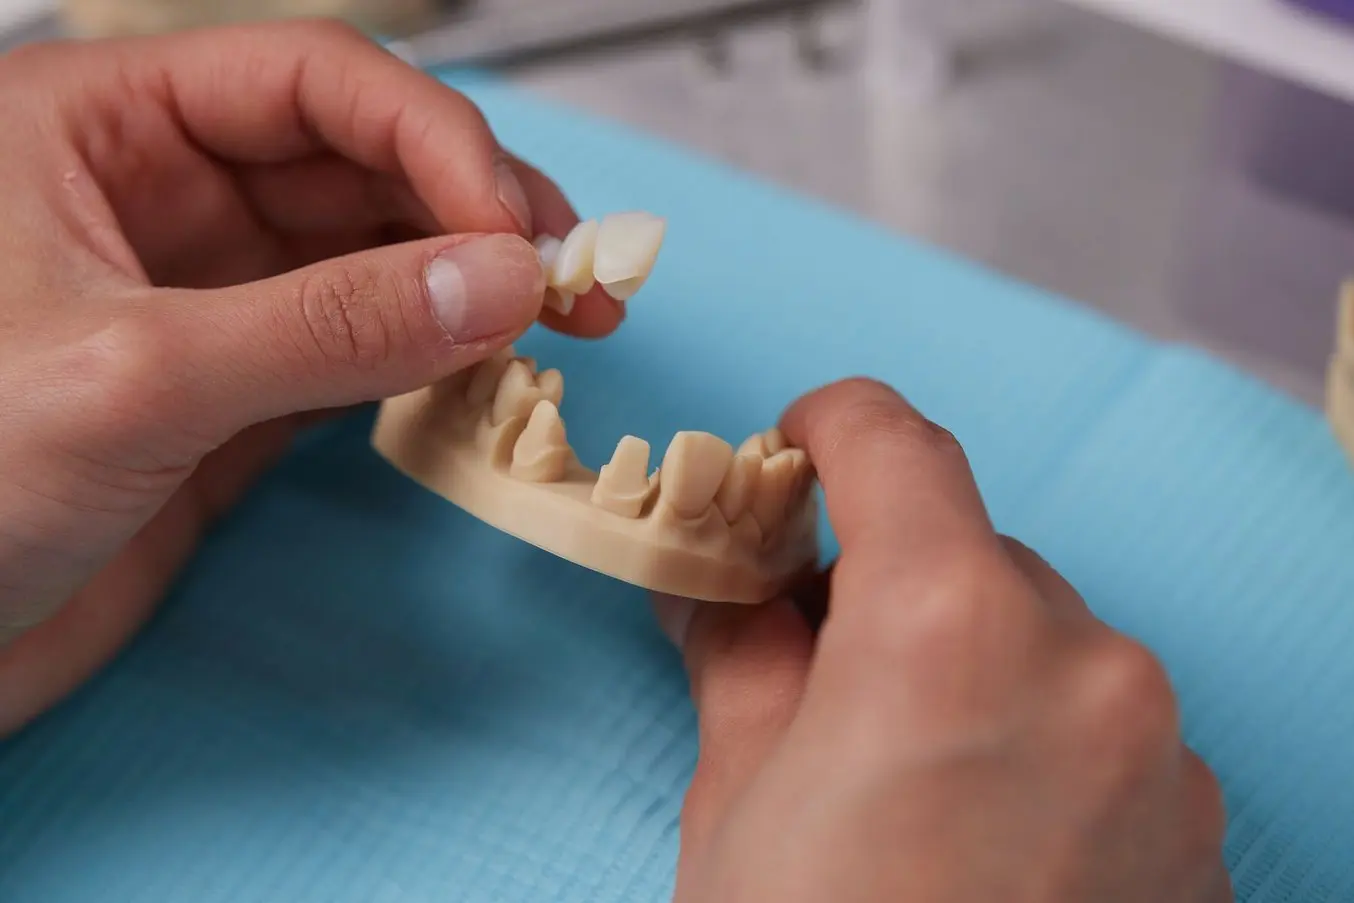
3D printed removable die models are similar to traditional made models used for fit-checking final restorations.
According to findings published in 2024 by Key Group, 74% of dentists own an intraoral scanner and 14% own a 3D printer, with 51% planning or considering purchase of a 3D printer. Adoption of 3D printers by practices is rapidly increasing as dental professionals look to control workflows, improve efficiency, and reduce costs and lead times.
Labs have an even higher adoption rate. A survey of more than 215 dental labs in the US by Key Group inc in 2022 found that 57% (up from 45% in 2020) of dental laboratories in the United States have 3D printing technology and 66% are planning to purchase or lease a 3D printer in the next 12 months. The technology adoption is partly driven by the need to cater to dentists.
In a transnational study published in the International Dental Journal in 2023, more than 78% of respondents, all dental clinicians, utilize an intraoral scanner to take impressions. This represents significant opportunities for dental labs. Accepting digital impressions cuts out the lengthy shipping time for physical impressions, which can be distorted during the trip. As a result, digital labs can service clients in a wider geographical area or specialize in certain products.
The Digital Dentistry Workflow
With a wide range of dental specialties from general dentistry to implantology, prosthodontics to orthodontics, the planning of treatments and design of different appliances varies somewhat by specialty and application, but they all follow the same basic workflow.
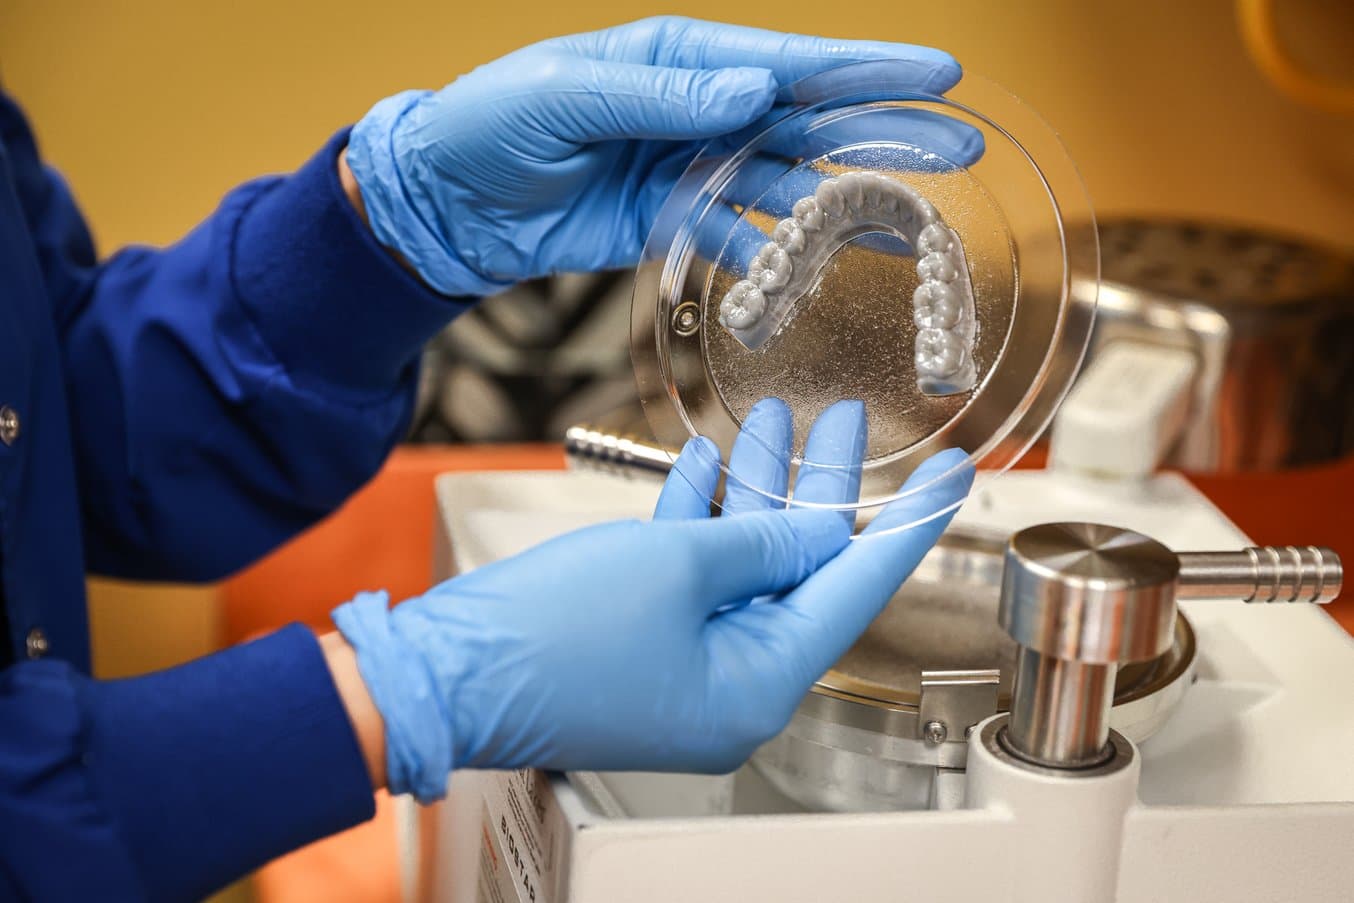
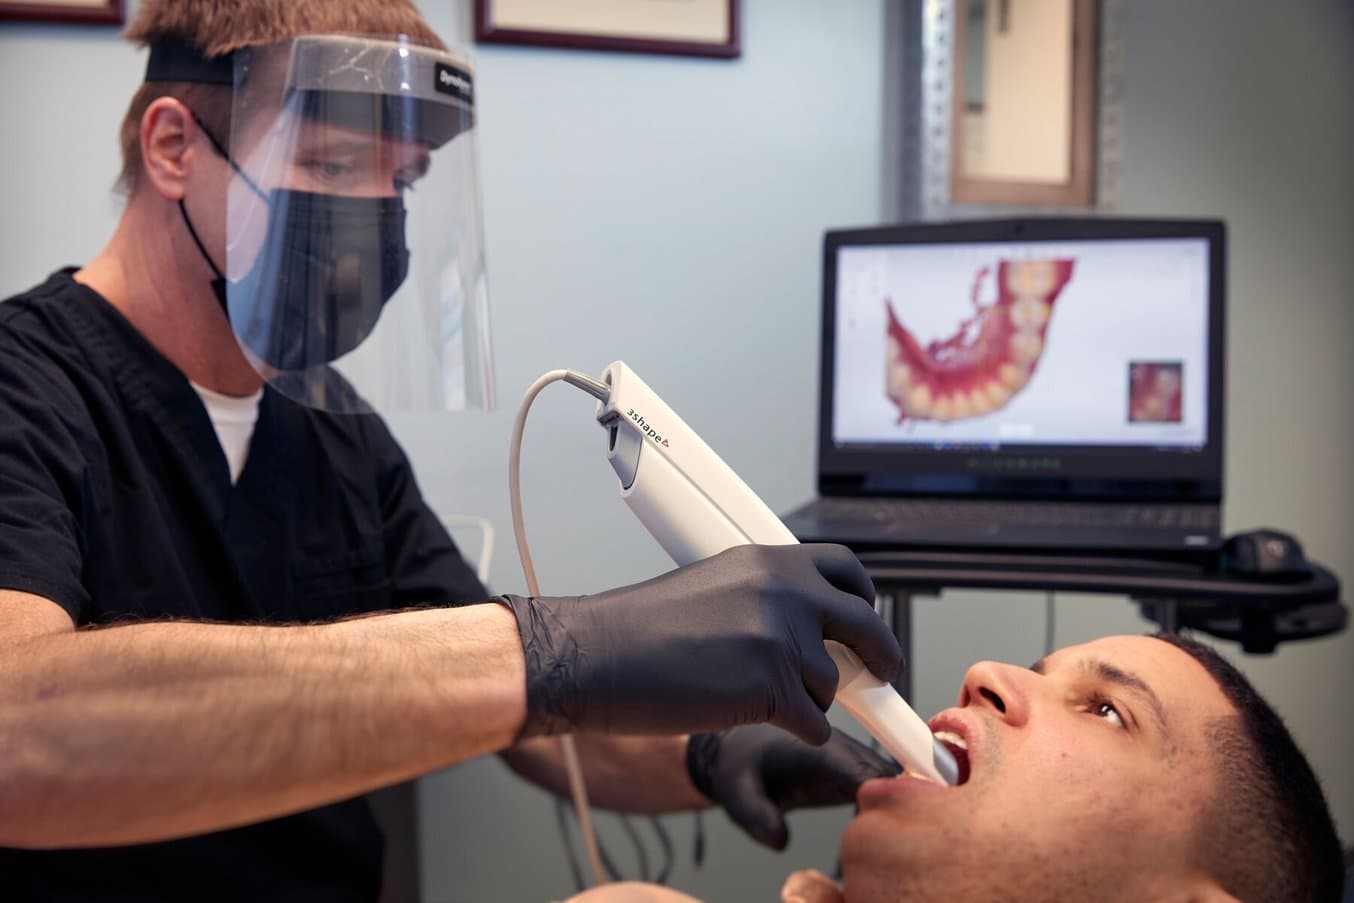
1. Scan
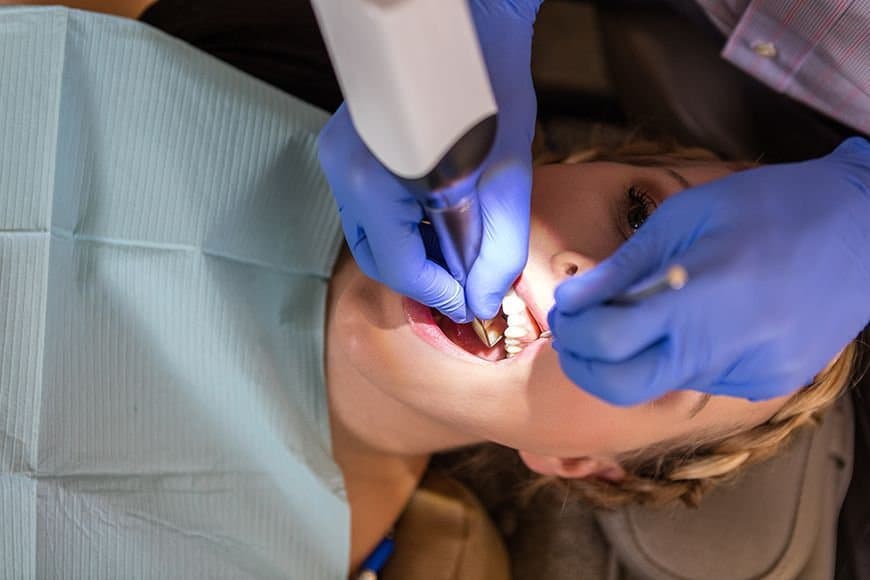
An intraoral scan is more comfortable for the patient and has less chance of errors than taking traditional impressions.
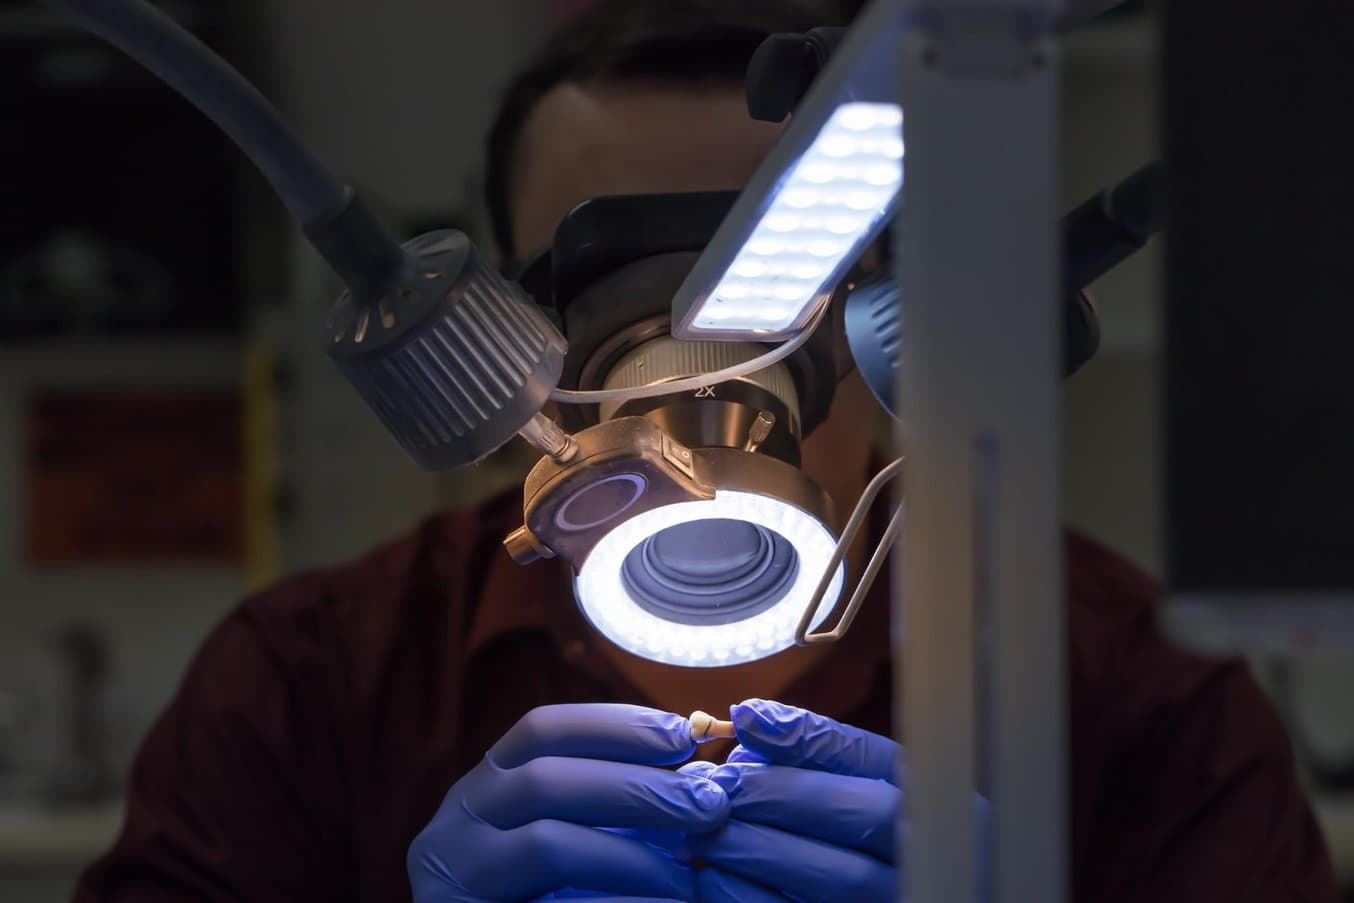
Like traditional dental and orthodontic product fabrication, digital production starts with the patient’s individual anatomy. 3D intraoral scanners can be used in the dental or orthodontic practice to capture fast and accurate digital impressions from the patient, replacing manual impressions. Alternatively, desktop optical scanners in dental labs can be used to scan traditional impressions or plaster models. For treatments and applications that require patient osteotomy, such as surgical guides for implant placement, an additional dataset needs to be collected using CBCT scanners.
For complex rehabilitation cases, extraoral and intraoral photography and facial scanning provide further data to create highly accurate digital patient files.
Recommended tools:
- For a dental practice: 3D intraoral scanner, CBCT scanner (optional), facial scanner (optional)
- For an orthodontic practice: 3D intraoral scanner
- For a dental lab: desktop optical scanner
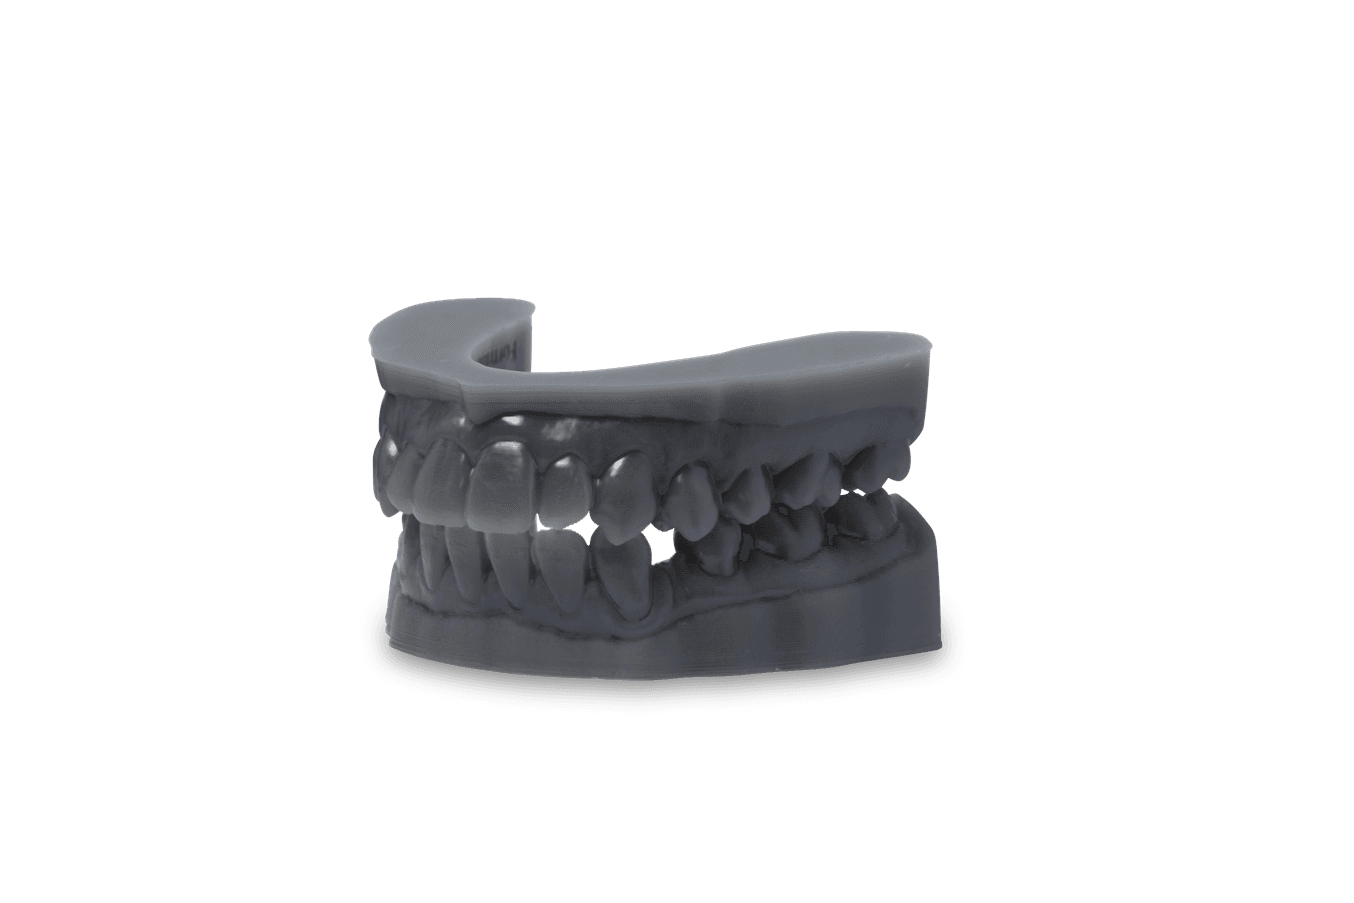
2. Plan and Design
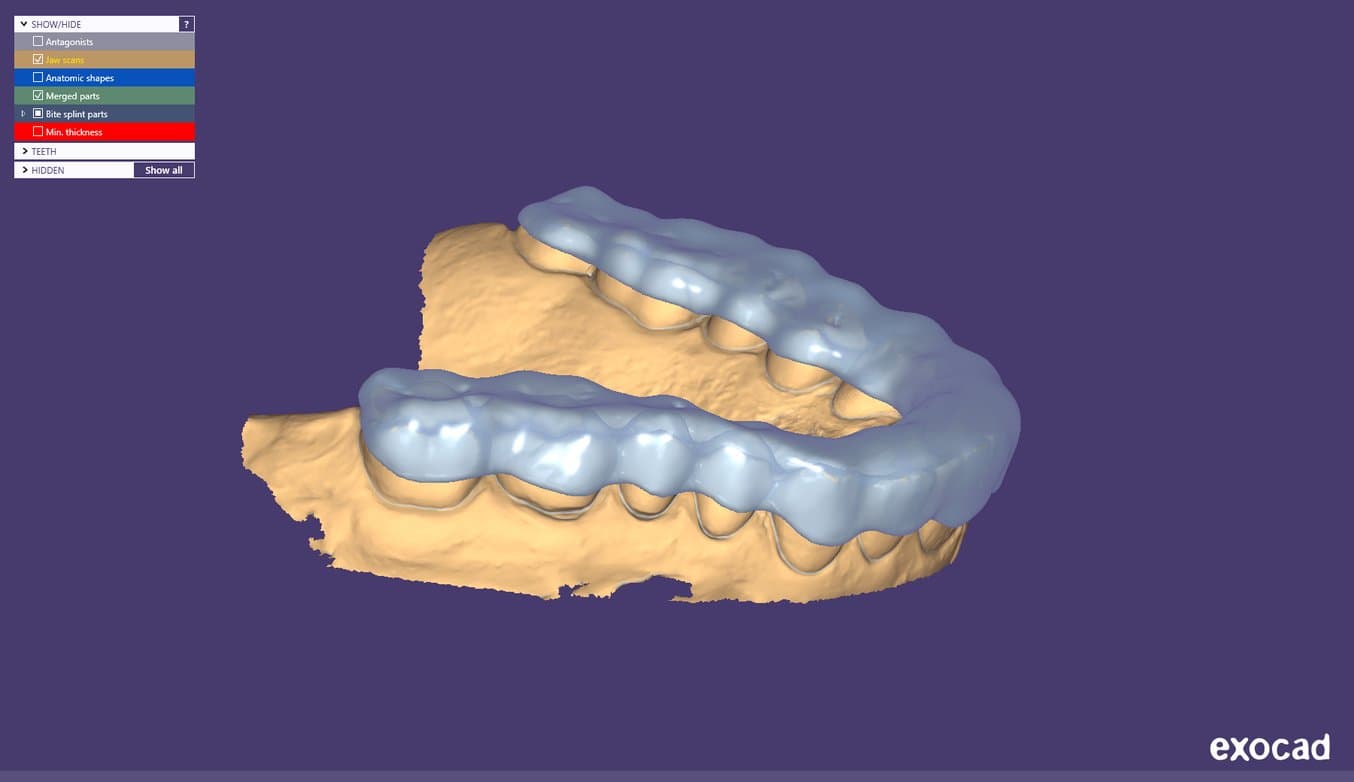
An occlusal splint being designed in exocad.
After scanning, patient anatomical data is imported into dental or orthodontic CAD software for planning treatments and designing prosthetic or restorative appliances, mock-ups, and models. For simple diagnostic models, you can also convert intraoral 3D scan files directly into printable dental models using Scan to Model in PreForm Dental, Formlabs’ print-preparation software.
Most software packages use design processes very similar to traditional methods, employing highly visual interfaces with features like virtual articulators that are familiar to dental technicians. Digital design results in easier, more precise treatments and simplified communication. After the treatments are designed, models can be exported for printing. If a remake is needed, the same digital design can be reprinted.
Dental and orthodontic digital design services have also proliferated in recent years, empowering any dental business to get started easily without design knowledge.
Recommended tools:
- Dental or orthodontic CAD software, or design service
- PreForm Dental (free)
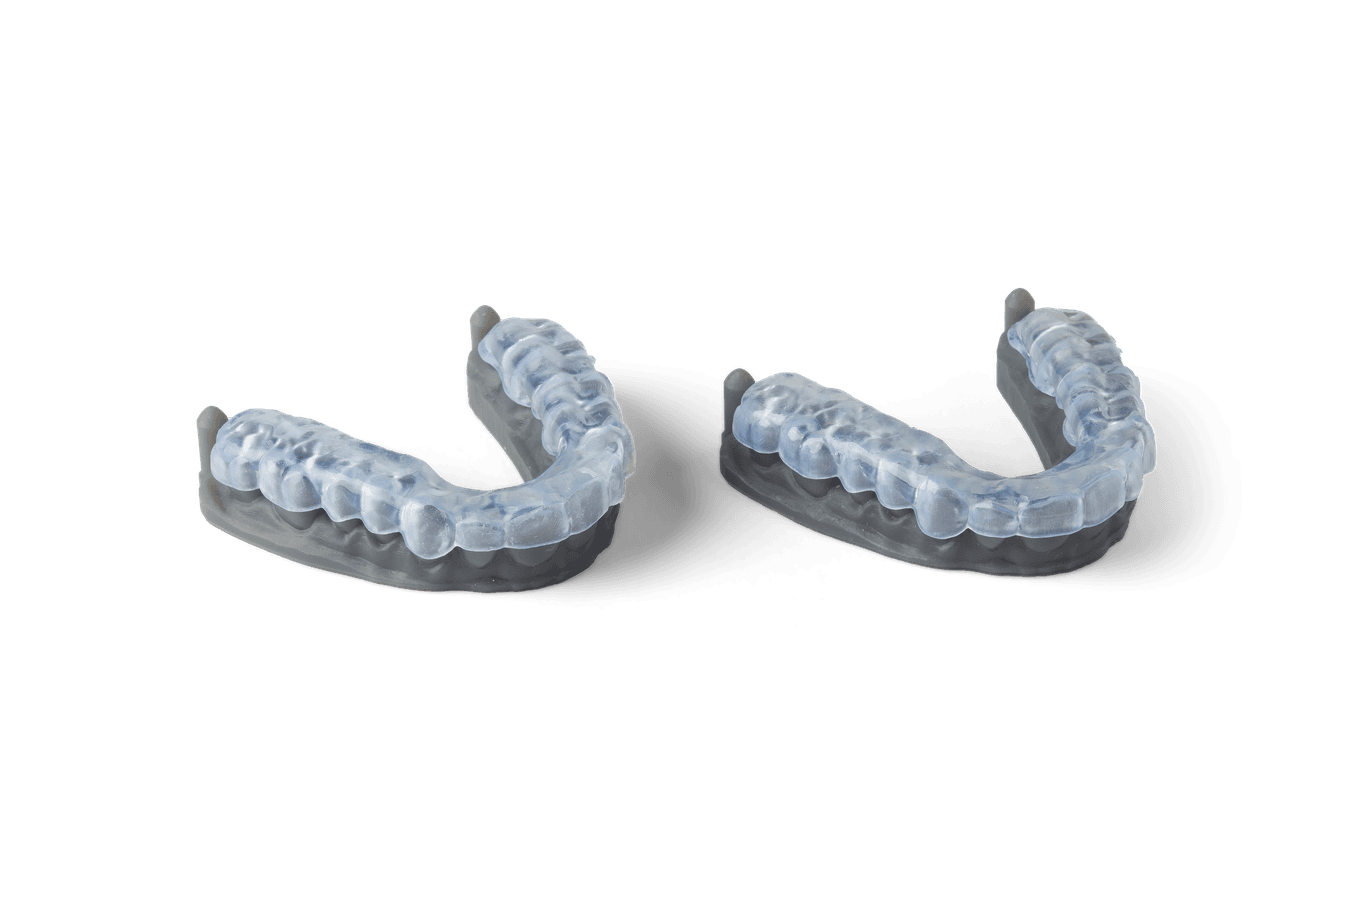
3. Manufacture
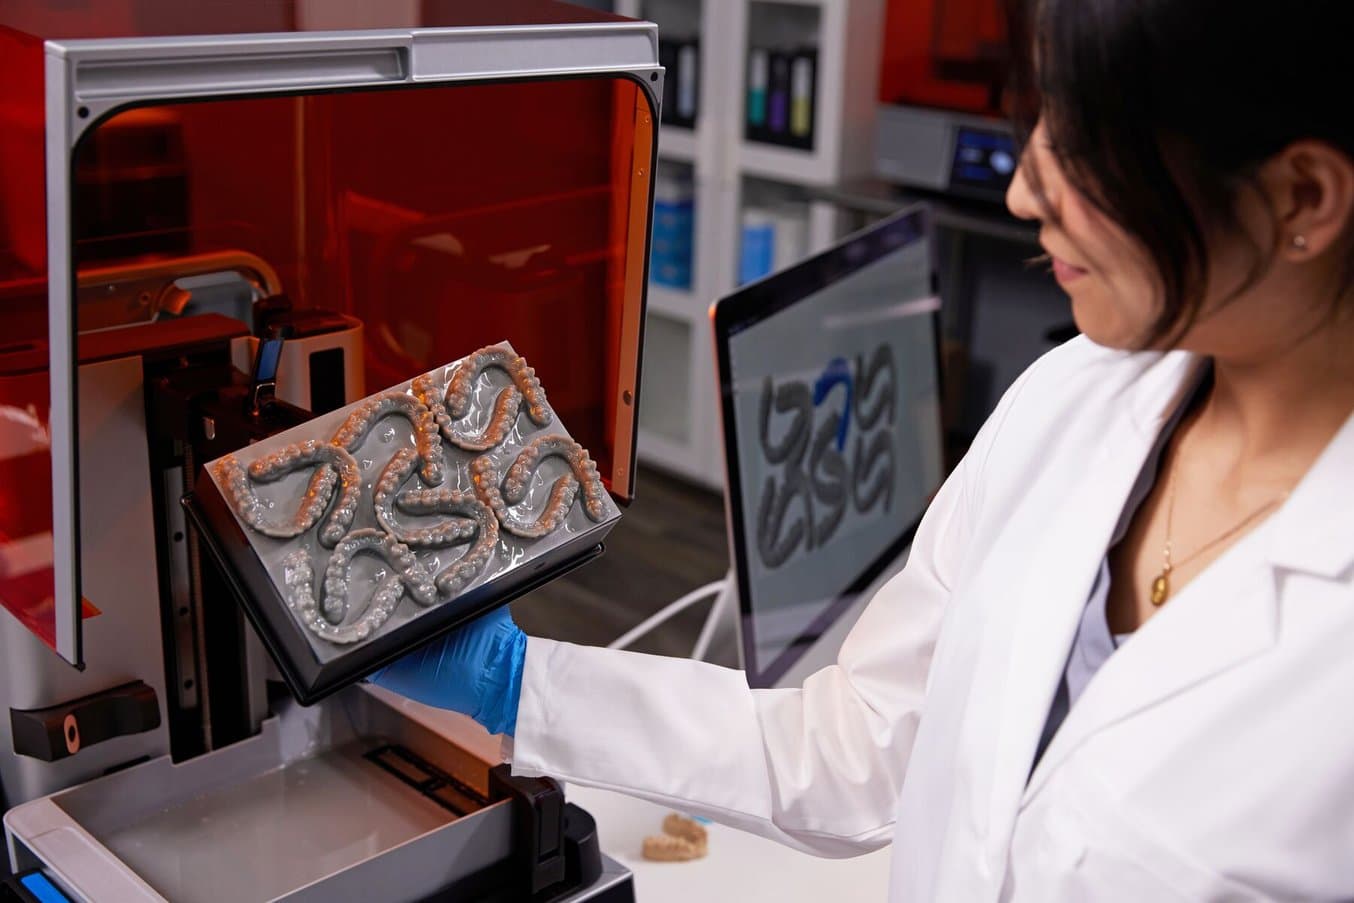
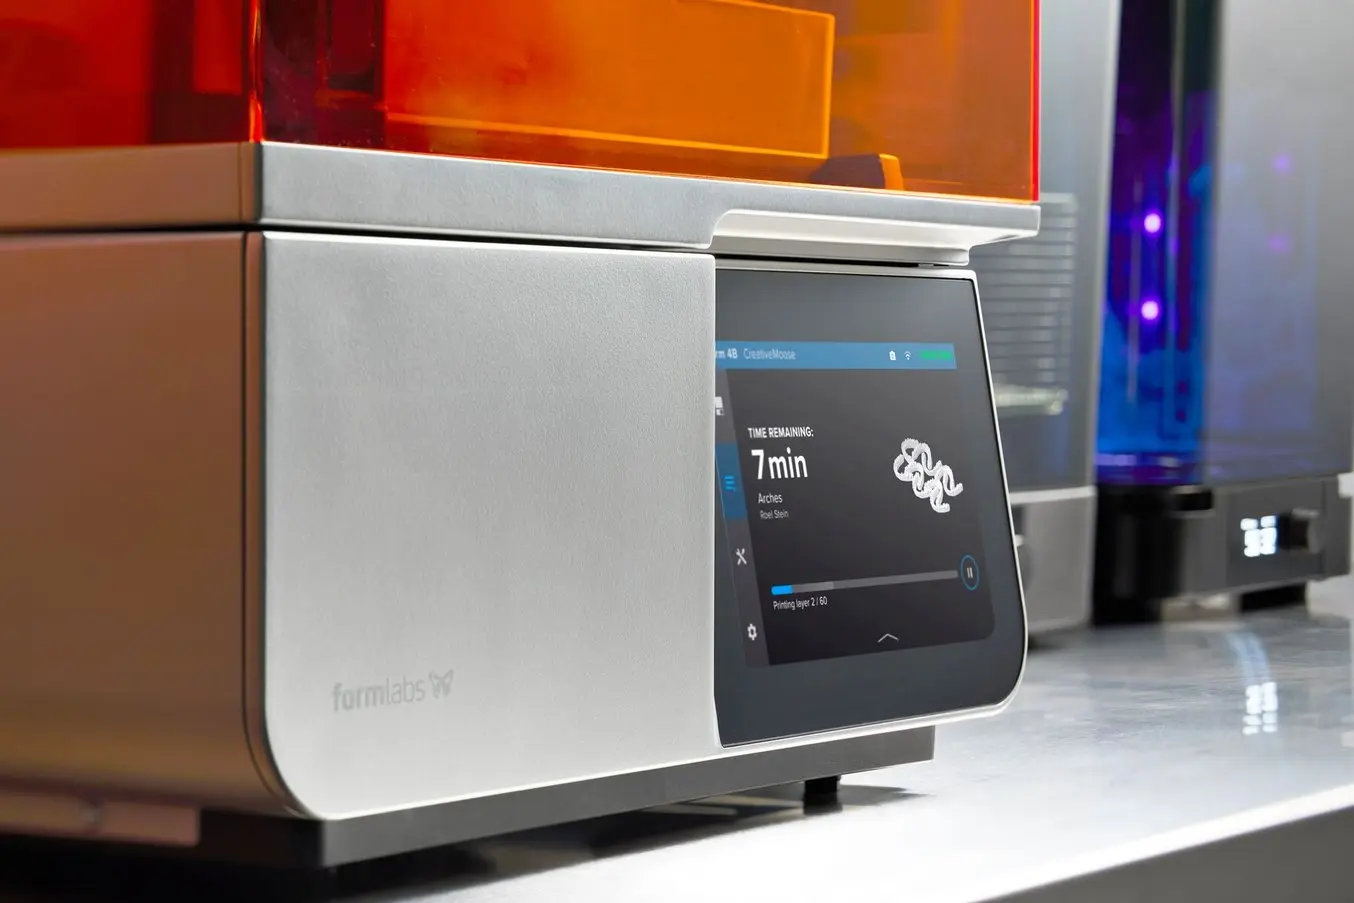
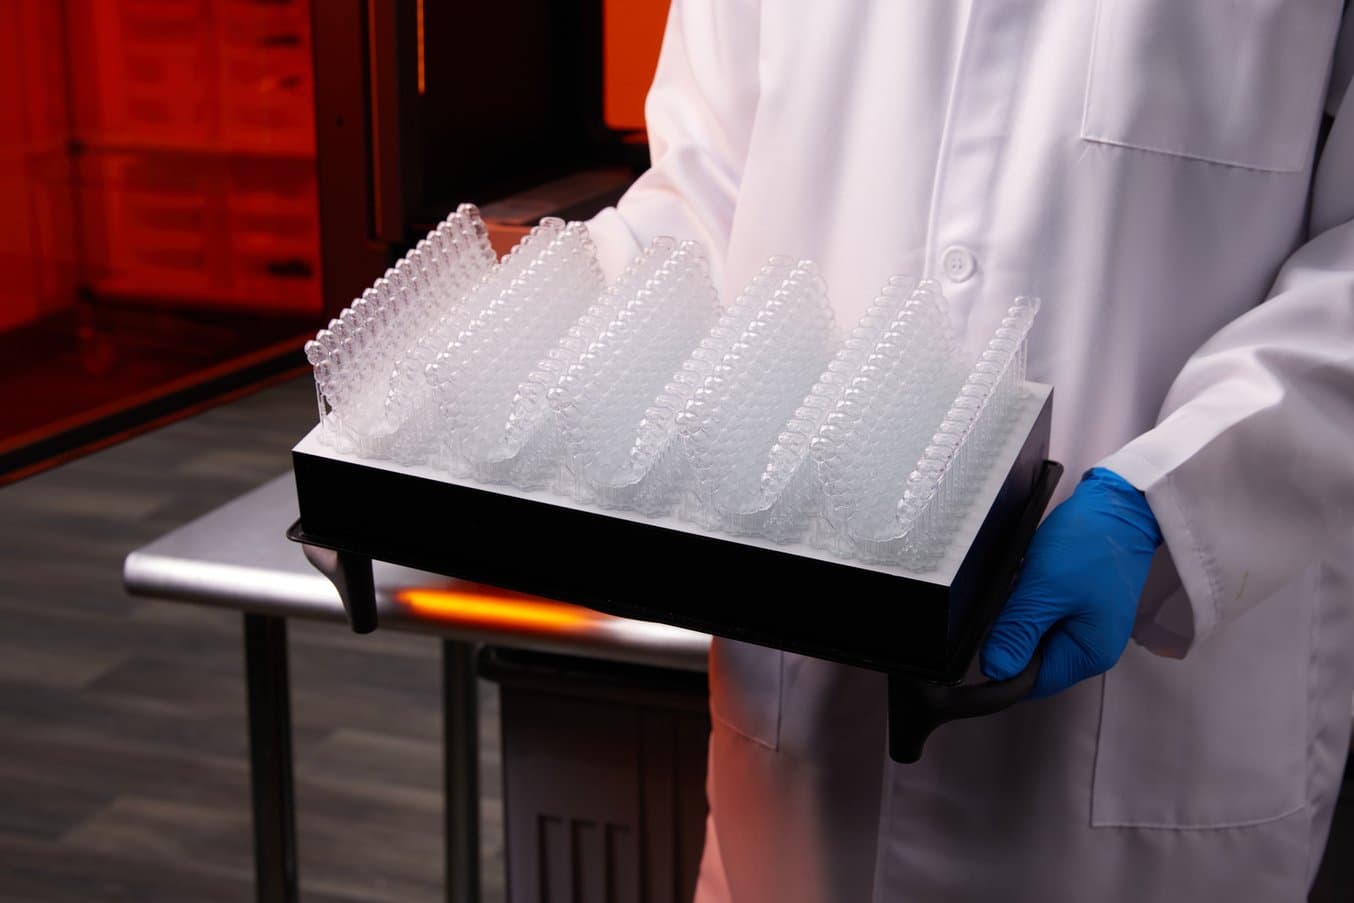
The Form 4B 3D printer can manufacture up to 11 dental models in 10 minutes.
Form 4BL can print up to 80 Occlusal Splints at 100 μm in two hours and 10 minutes.
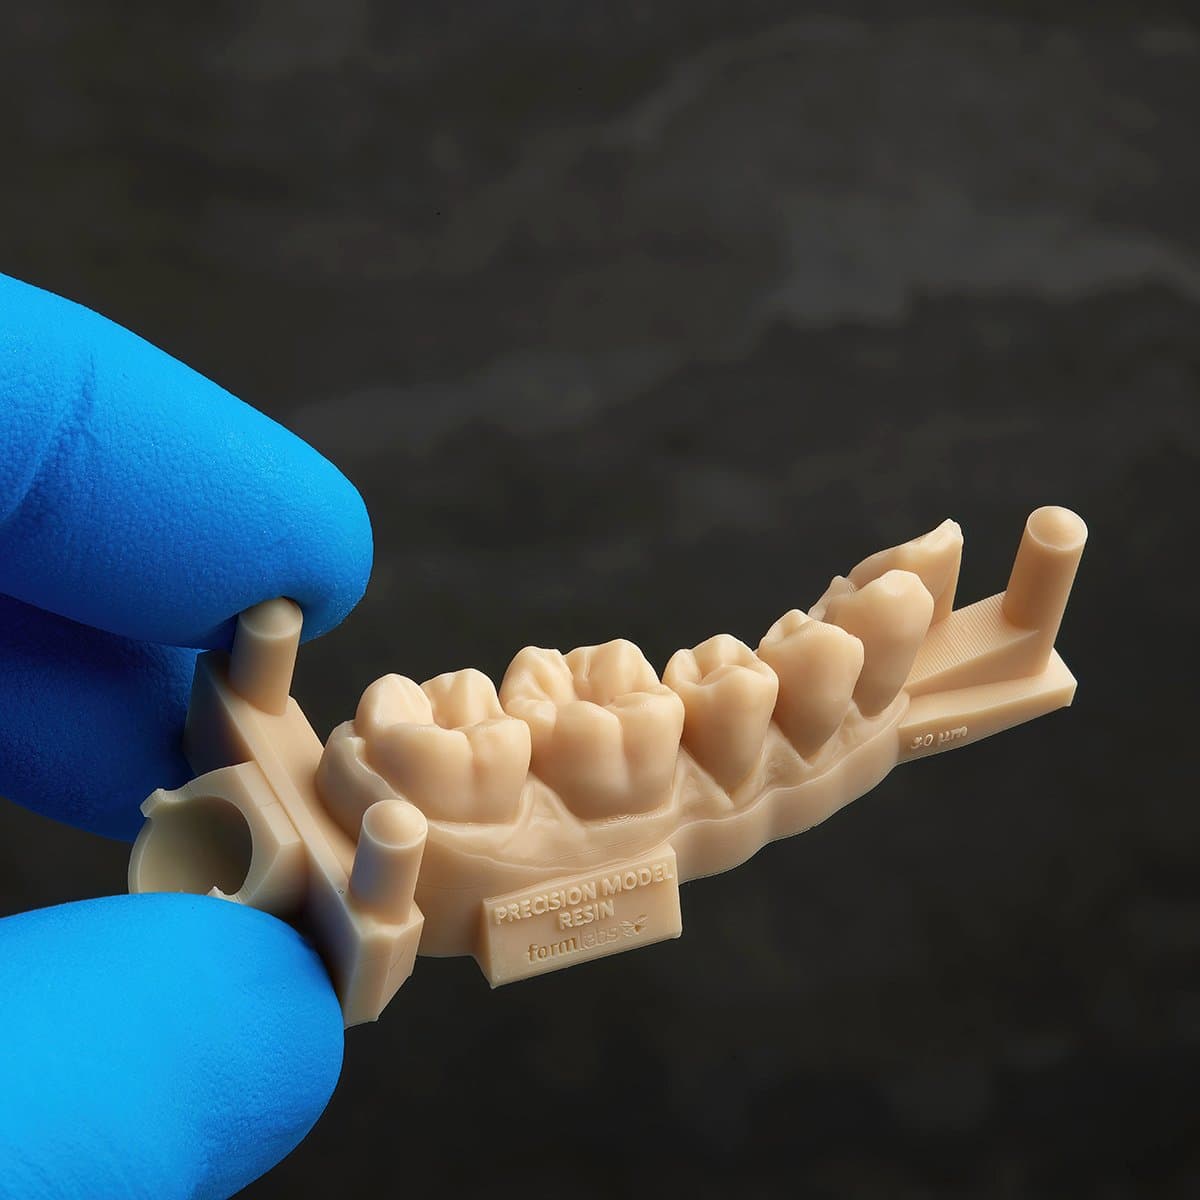
Precision Model Resin is a high-accuracy material for creating restorative models with >99% of printed surface area within 100 μm of the digital model.
To manufacture an appliance, 3D models are uploaded to the CAM or print-preparation software and then sent to a 3D printer or a milling machine. 3D printers are common in both dental labs and practices and can produce appliances for a variety of indications.
3D printers work by solidifying parts (via photopolymerization) layer by layer to form the shape of the appliances and models. To create orthodontic appliances like clear aligners or retainers, thermoforming or other techniques are applied to the 3D printed models.
Milling machines are more common in dental labs, but also have some limited applicability to the dental practice as well. These are typically used to create final restorations and dentures by using burs to subtract material from a solid block of material, such as PMMA or zirconia.
Recommended tools:
- For a dental practice: 3D printer
- For an orthodontic practice: 3D printer
- For a dental lab: 3D printer, milling machine
Precision Model Resin and Form 4B: Guide to Making the Most Accurate Restorative Dental Models
The Formlabs Form 4B Masked Stereolithography (MLSA) 3D printer is a game-changer for printing restorative dental models. It features fast printing speeds, reliability, and consistently precise outputs. This article is a guide on how to easily make functional and accurate restorative dental models on Form 4B with Precision Model Resin.
Workflows Between the Dental Lab and Practice
With a traditional workflow, a dental practice takes a physical impression of the patient and ships it to a dental lab that creates the required models, restorations, or other indication(s). The lab then ships the final parts or appliances back to the practice for treatment. If there are mistakes in the physical impression or the fabricated appliance, additional time must be added to the process, including adding additional patient appointments.
In digital workflows, the individual steps can alternate easily between the dental lab and practice depending on the complexity of the case, the indication, the tools available at a practice, and other conditions.
For example, a dental practice can take a digital intraoral impression and instantaneously send it to a lab, or send a manual impression for scanning at the lab. Alternatively, a dental practice can use a digital impression to design the models, restorations, and other indications in-house in CAD software or outsource design to a lab or design service. A practice can then manufacture simple parts such as models, surgical guides, occlusal splints, or models for thermoforming in-house and rely on a lab for complex parts such as all-ceramic restorations. Labs can manufacture parts in-house with 3D printing or milling or offer design as a service and send the design files to their customer for 3D printing in the dental practice.
Overall, digital technologies simplify the workflow between the dental practice and lab, offering unlimited freedom to optimize for speed, ease of use, or cost, depending on the case.
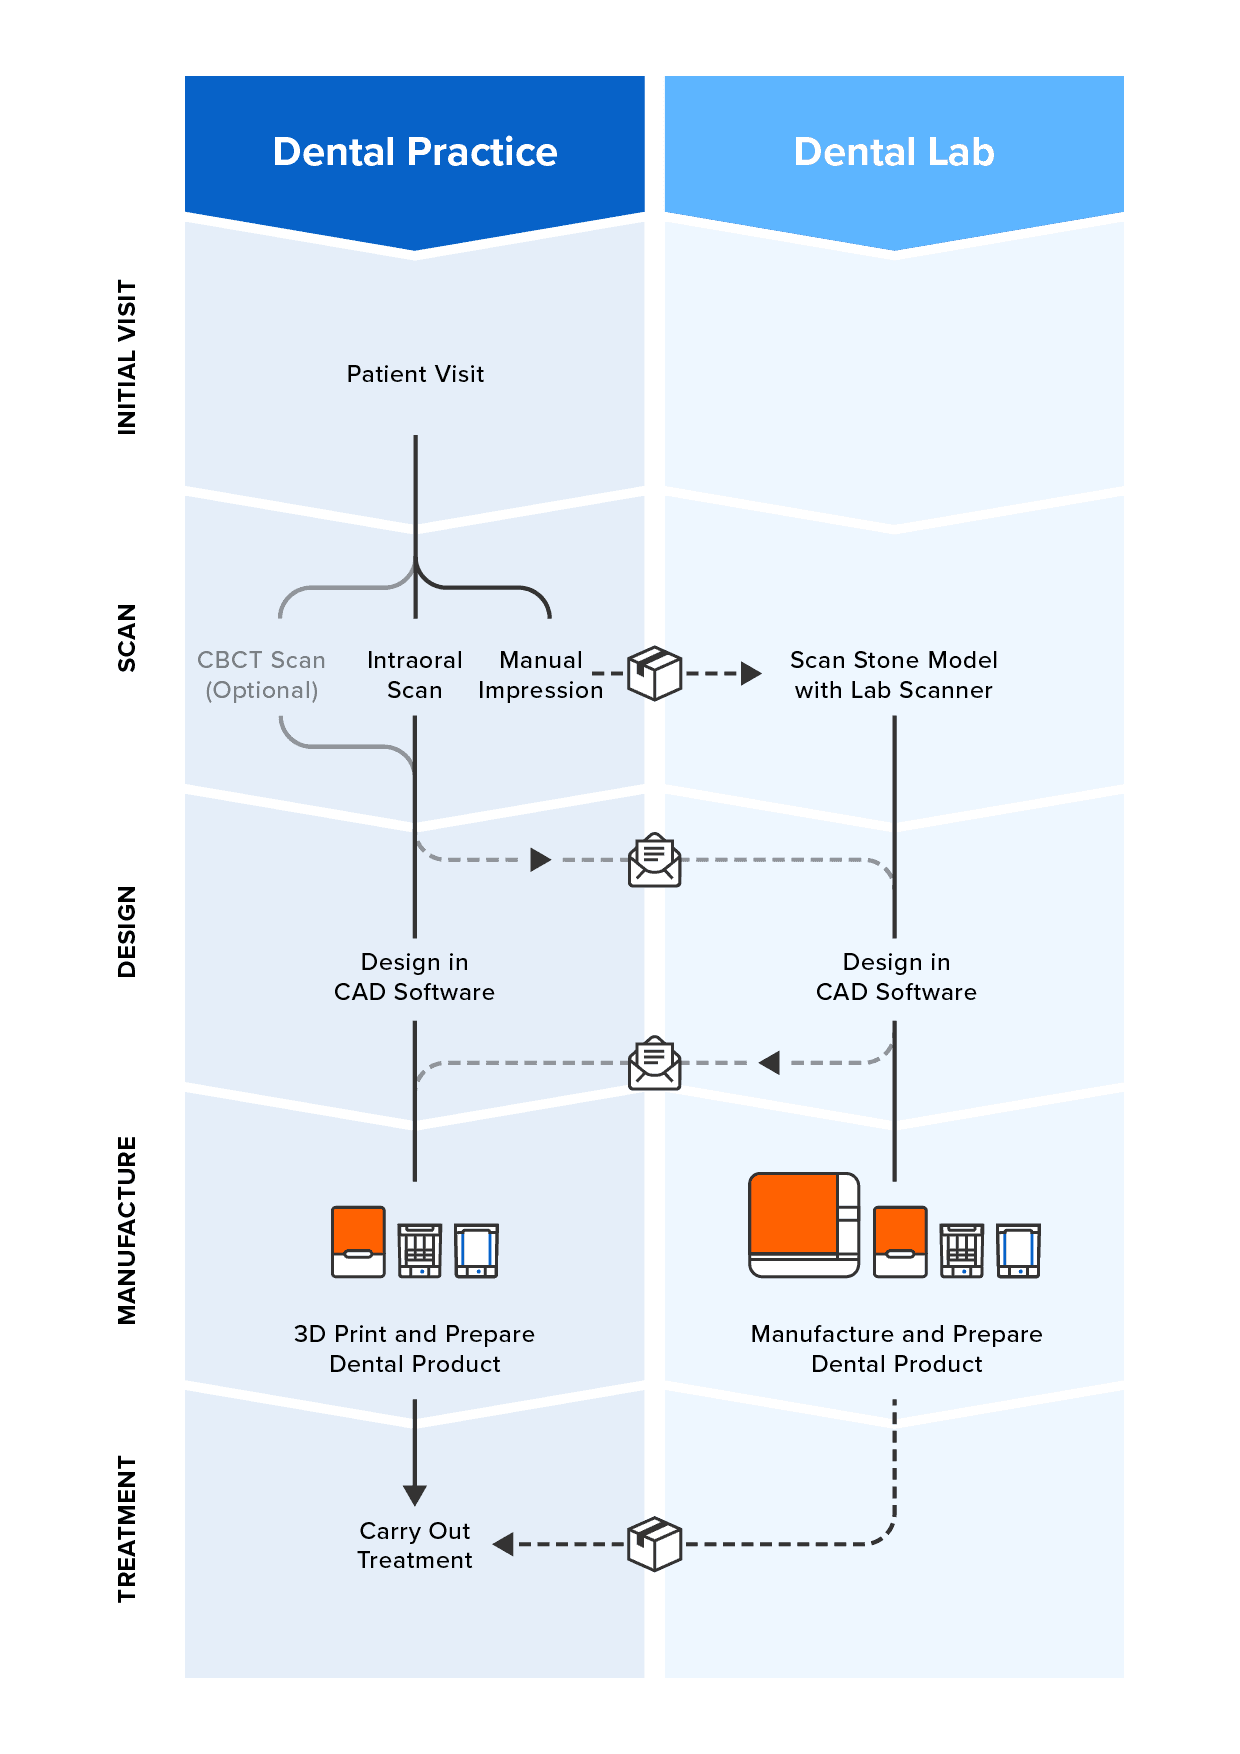
The digital dentistry workflow can move back and forth between dental practice and lab, increasing efficiency and collaboration.
How to Implement Digital Workflows in a Dental Practice or Lab
1. Pick an Application
Transitioning to digital dentistry and orthodontics doesn’t need to happen all at once. Start with the easiest 3D printing workflows first, build your team’s expertise, and gradually add new applications to avoid unnecessary risks.
The best place to start is with diagnostic models. These are the easiest parts to 3D print because they don’t require third-party design software to prepare a digital impression for printing. Formlabs Dental 3D printer customers can use the Scan to Model feature in the free PreForm Dental software to turn their digital impressions into physical models for free. These models can be used as diagnostic models or as a mold for thermoforming retainers or bleaching trays in-house. Additionally, the ability to 3D print models means you can store files, rather than physical models, freeing up valuable office space.
If you want to start with something other than simple models, choose an application that is currently inefficient, unreliable, expensive, or in high demand. Splints are one such appliance and can be directly printed with biocompatible resins and post-processed for same-day delivery – all with minimal polishing.
Surgical guides or clear aligners also have simple, quickly learned workflows. Design can be executed in-house with design software, or you can outsource this step to a design service like Evident, Full Contour, or Digital Smile Design, and still do the appliance manufacturing in-house. Whatever you choose, start with a single use case and extend to multiple applications, while continuing to rely on labs for complex cases and final restorations for maximum efficiency and accuracy.
For dental labs, 3D printers offer a variety of digital workflows. Professional 3D printers are incredibly versatile: it’s possible to manufacture a wide range of products on the same machine, just by switching materials. Explore the complete dental resin library and dental application guides to learn more about the versatility of 3D printing.
Formlabs Dental Materials Overview: Discover What You Can Print With the Form 4B
This webinar will guide you through the various benefits and applications enabled by Form 4B, including its existing biocompatible materials and newly developed formulations for model production such as Fast Model Resin and Precision Model Resin.
2. Define and Test a Digital Workflow
When you have a specific application in mind, piece together the complete step-by-step digital workflow for that application to make sure you understand all the pieces needed for scanning, design, and manufacturing, and how to time this for your practice or lab.
Educational resources, including step-by-step workflows, are available online to help ease the process of learning new indications. Formlabs offers an extensive resource library and the Formlabs Dental Academy, a hub of free courses for learning and building digital dentistry skills.
In a dental practice, consider whether it makes sense to invest in an intraoral scanner or you will be sending stone models or physical impressions to your lab for scanning. If you’re running a dental lab, consider whether you’ll only receive digital impressions from dentists or if you’ll need a desktop optical scanner to scan stone models or physical impressions.
If you’re planning to design parts in-house, make sure to get a demonstration of the workflow of any design software to understand the step-by-step process before adopting it. Then, select a dental software package compatible with the scanning and manufacturing equipment of your choice. The easiest way to do this is to stick with software that allows open importing of scan files, and open .STL file export, which ensures compatibility with all 3D printing solutions.
When considering manufacturing equipment such as milling machines or 3D printers, always source samples before buying equipment. Technical data and marketing specs can be misleading and hard to decipher. Instead of comparing sales brochures, compare actual parts — don’t hesitate to ask for a physical sample of the indication you’re looking to produce. There’s no better way to compare quality between two machines than holding the final product in your hand.
3. Start Small and Scale Up
Once you’re ready to start, trial the workflow for a few weeks before moving to full production, leaving time to learn each step and iron out any wrinkles. As you get comfortable with the results, switch the workflow fully to digital, and start scaling up.
Using Dental LT Comfort Resin, Formlabs 3D printers can manufacture flexible occlusal splints in-house. Printed appliances are easily polished to high optical transparency, and offer enhanced comfort and durability that boosts patient adoption and compliance.
In digital workflows, scaling up can include adding scanning, design, or production capacity or expanding to more complex applications. Desktop 3D printers offer more production flexibility than ever before, with access to a library of resins – including biocompatible ones – that can easily be changed out for an agile production process.
Expanding Applications in a Dental Practice
Expanding Applications in a Dental Lab
Beginner
- Restorative models with soft tissue
- Custom impression trays
Intermediate
Expanding Applications in an Orthodontic Lab
Intermediate
Advanced
When scaling up, adding printers can bring added benefits. A significant advantage of affordable desktop printers over larger, more expensive systems, is the ability to add additional printers for redundancy. Printers can also be devoted to specific materials. For example, one printer can print denture bases while another prints denture teeth, for even more efficient production.
Offering a new product or service doesn’t have to be a difficult decision with a long-term return on investment. With digital dentistry, you can start small, see faster returns on investment, and scale up over time.
Get Started With Digital Dentistry and 3D Printing
Formlabs offers 15+ unique resins for dental applications, including biocompatible resins produced at our FDA-registered facility in Ohio.
With thousands of dental and orthodontic practices and labs already using digital workflows, there’s never been a better time to adopt digital dentistry. In the past few years, technological advancements have increased speed and accuracy, improved clinical outcomes and patient experience, while making workflows easier than ever, empowering dental and orthodontic practices and labs to leverage the power of digital dentistry and 3D printing.
Explore Formlabs dental resources and Formlabs Dental Academy for free guides, step-by-step tutorials, white papers, courses, and webinars to learn how you can integrate 3D printing into your lab or practice.
Curious to see our quality firsthand? Pick a material and we'll ship you a free sample part 3D printed on the Form 4B to evaluate or talk to a 3D printing expert to learn how you can meet your business goals.