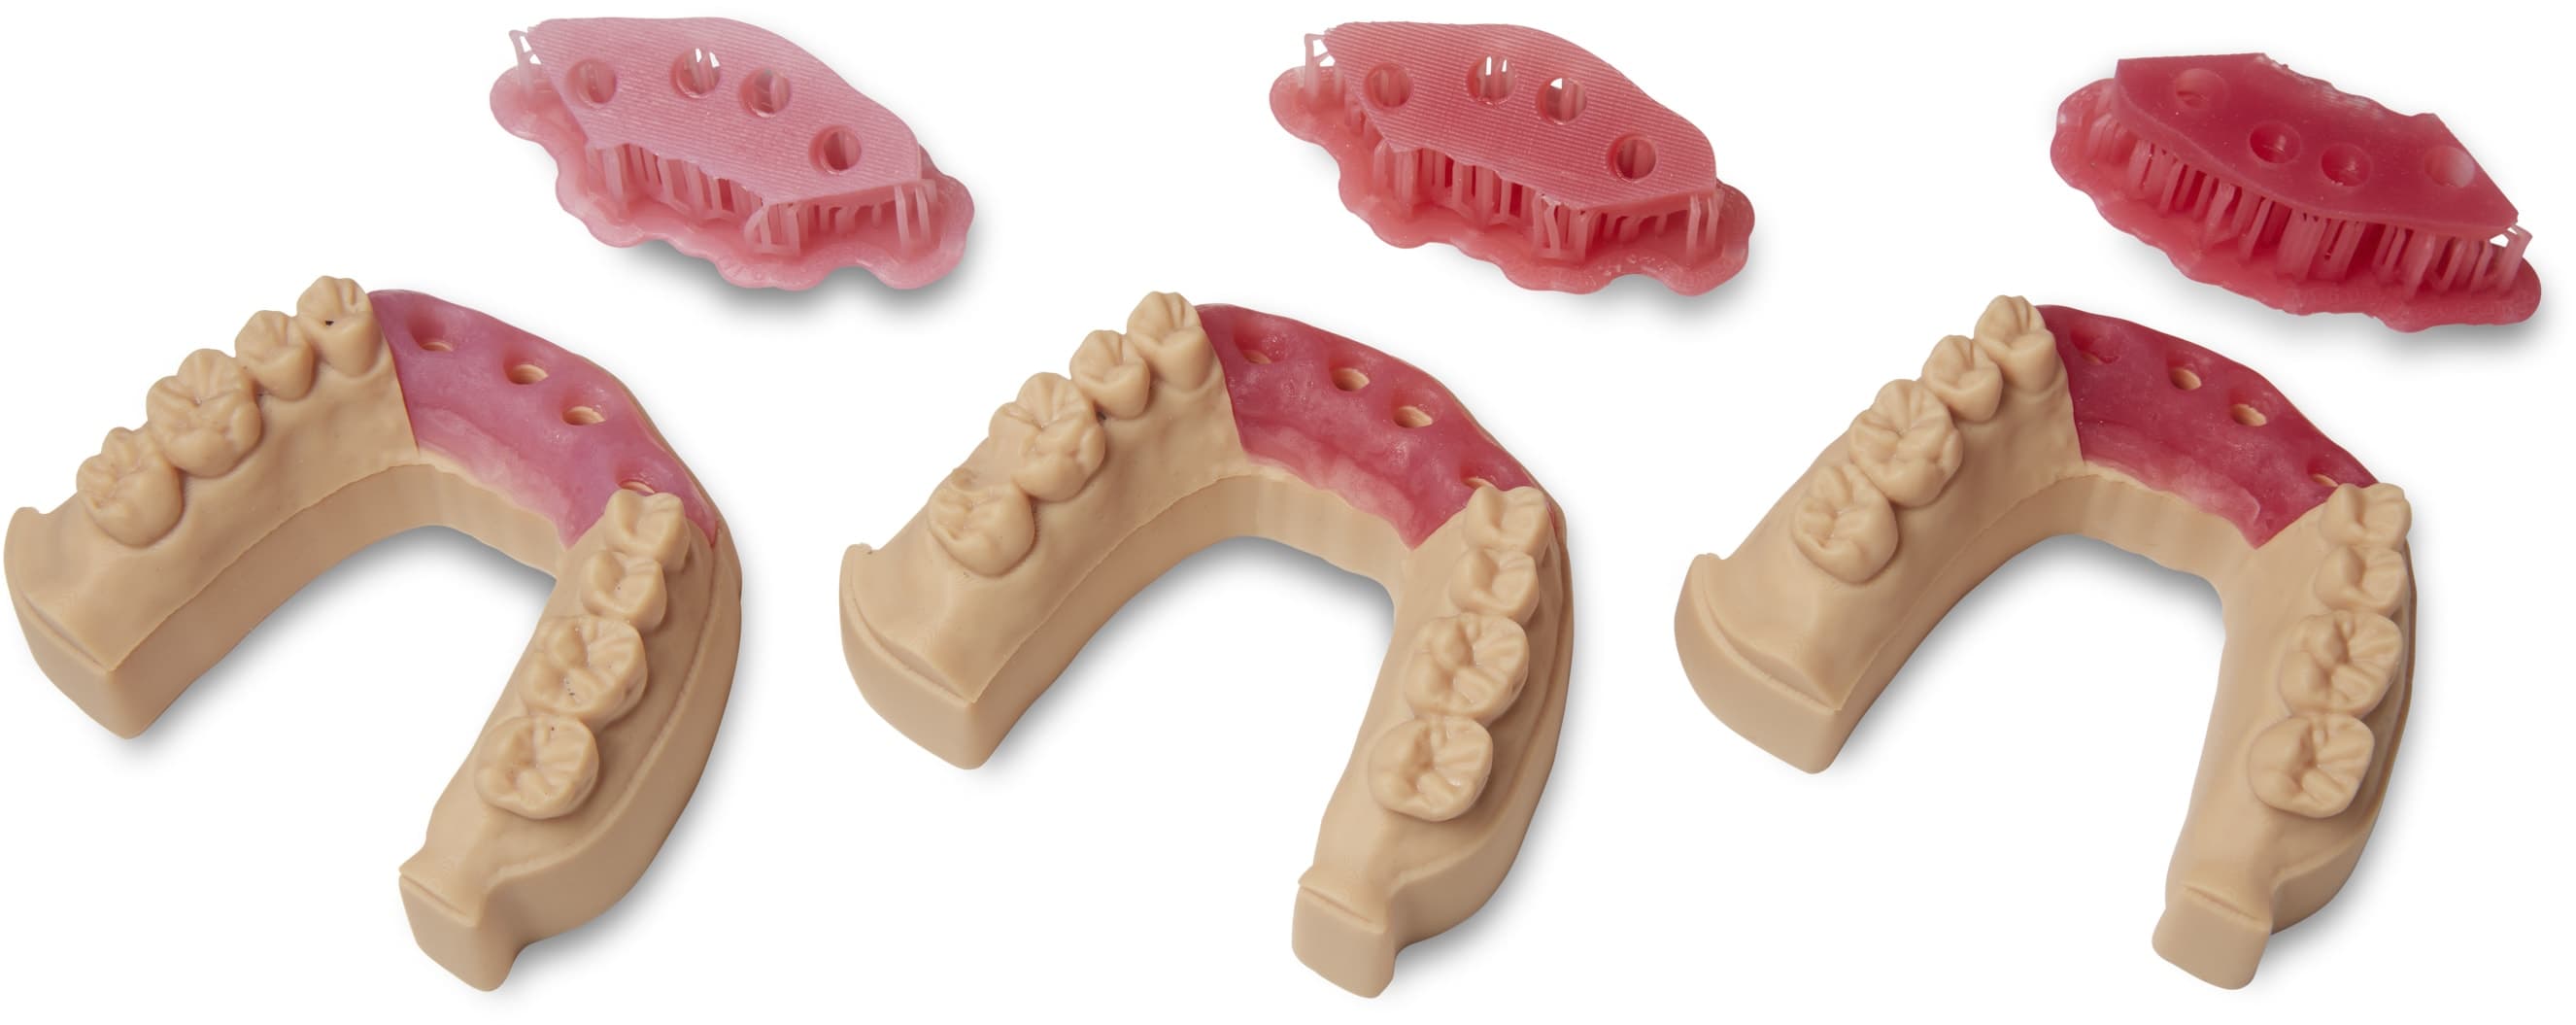
3D Printing Soft Tissue for Gingiva Mask on Dental Models
Soft tissue models, increasingly important for high-end restorative models and often a requirement for digital implant-supported prosthetics, can now be 3D printed. By utilizing Formlabs Flexible 80A Resin, a soft, flexible, and clear base, and resin pigments, healthcare professionals can produce soft tissue parts in dark, medium, or light pink shades. The process for achieving this is outlined in the following steps.
Essentials
Needed From the Dentist
-
Digital impression of the patient's dentition
Required Hardware and Materials
Made by Formlabs:
-
Formlabs SLA 3D printer with a compatible Resin Tank and Build Platform
-
Flexible 80A Resin, White Pigment, Magenta Pigment, Yellow Pigment
- PreForm Dental Software (free)
Note:
When using the Form 4 Flex Build Platform or Build Platform 2, be aware that removing the parts may not be immediate. This is because the Soft Tissue material will flex along with the Build Platform when it bends.
Made by Third Parties:
-
Cutting tools
-
Low-speed dental handpiece with finishing tools
-
Isopropyl alcohol (IPA) ≥ 90%
-
One disposable syringe, 40 mL or larger (optional)
Required Software
Made by Formlabs:
Made by Third Parties:
-
Dental model design software such as 3Shape Model Builder or exocad Model Creator
Learn more about designing and producing high-accuracy dental models in our Guide to Making the Most Accurate Restorative Dental Models.
Note:
3D printed soft tissue using Flexible 80A Resin is intended only for extra-oral use on dental models. This resin is not biocompatible and must never be used inside a patient's mouth.
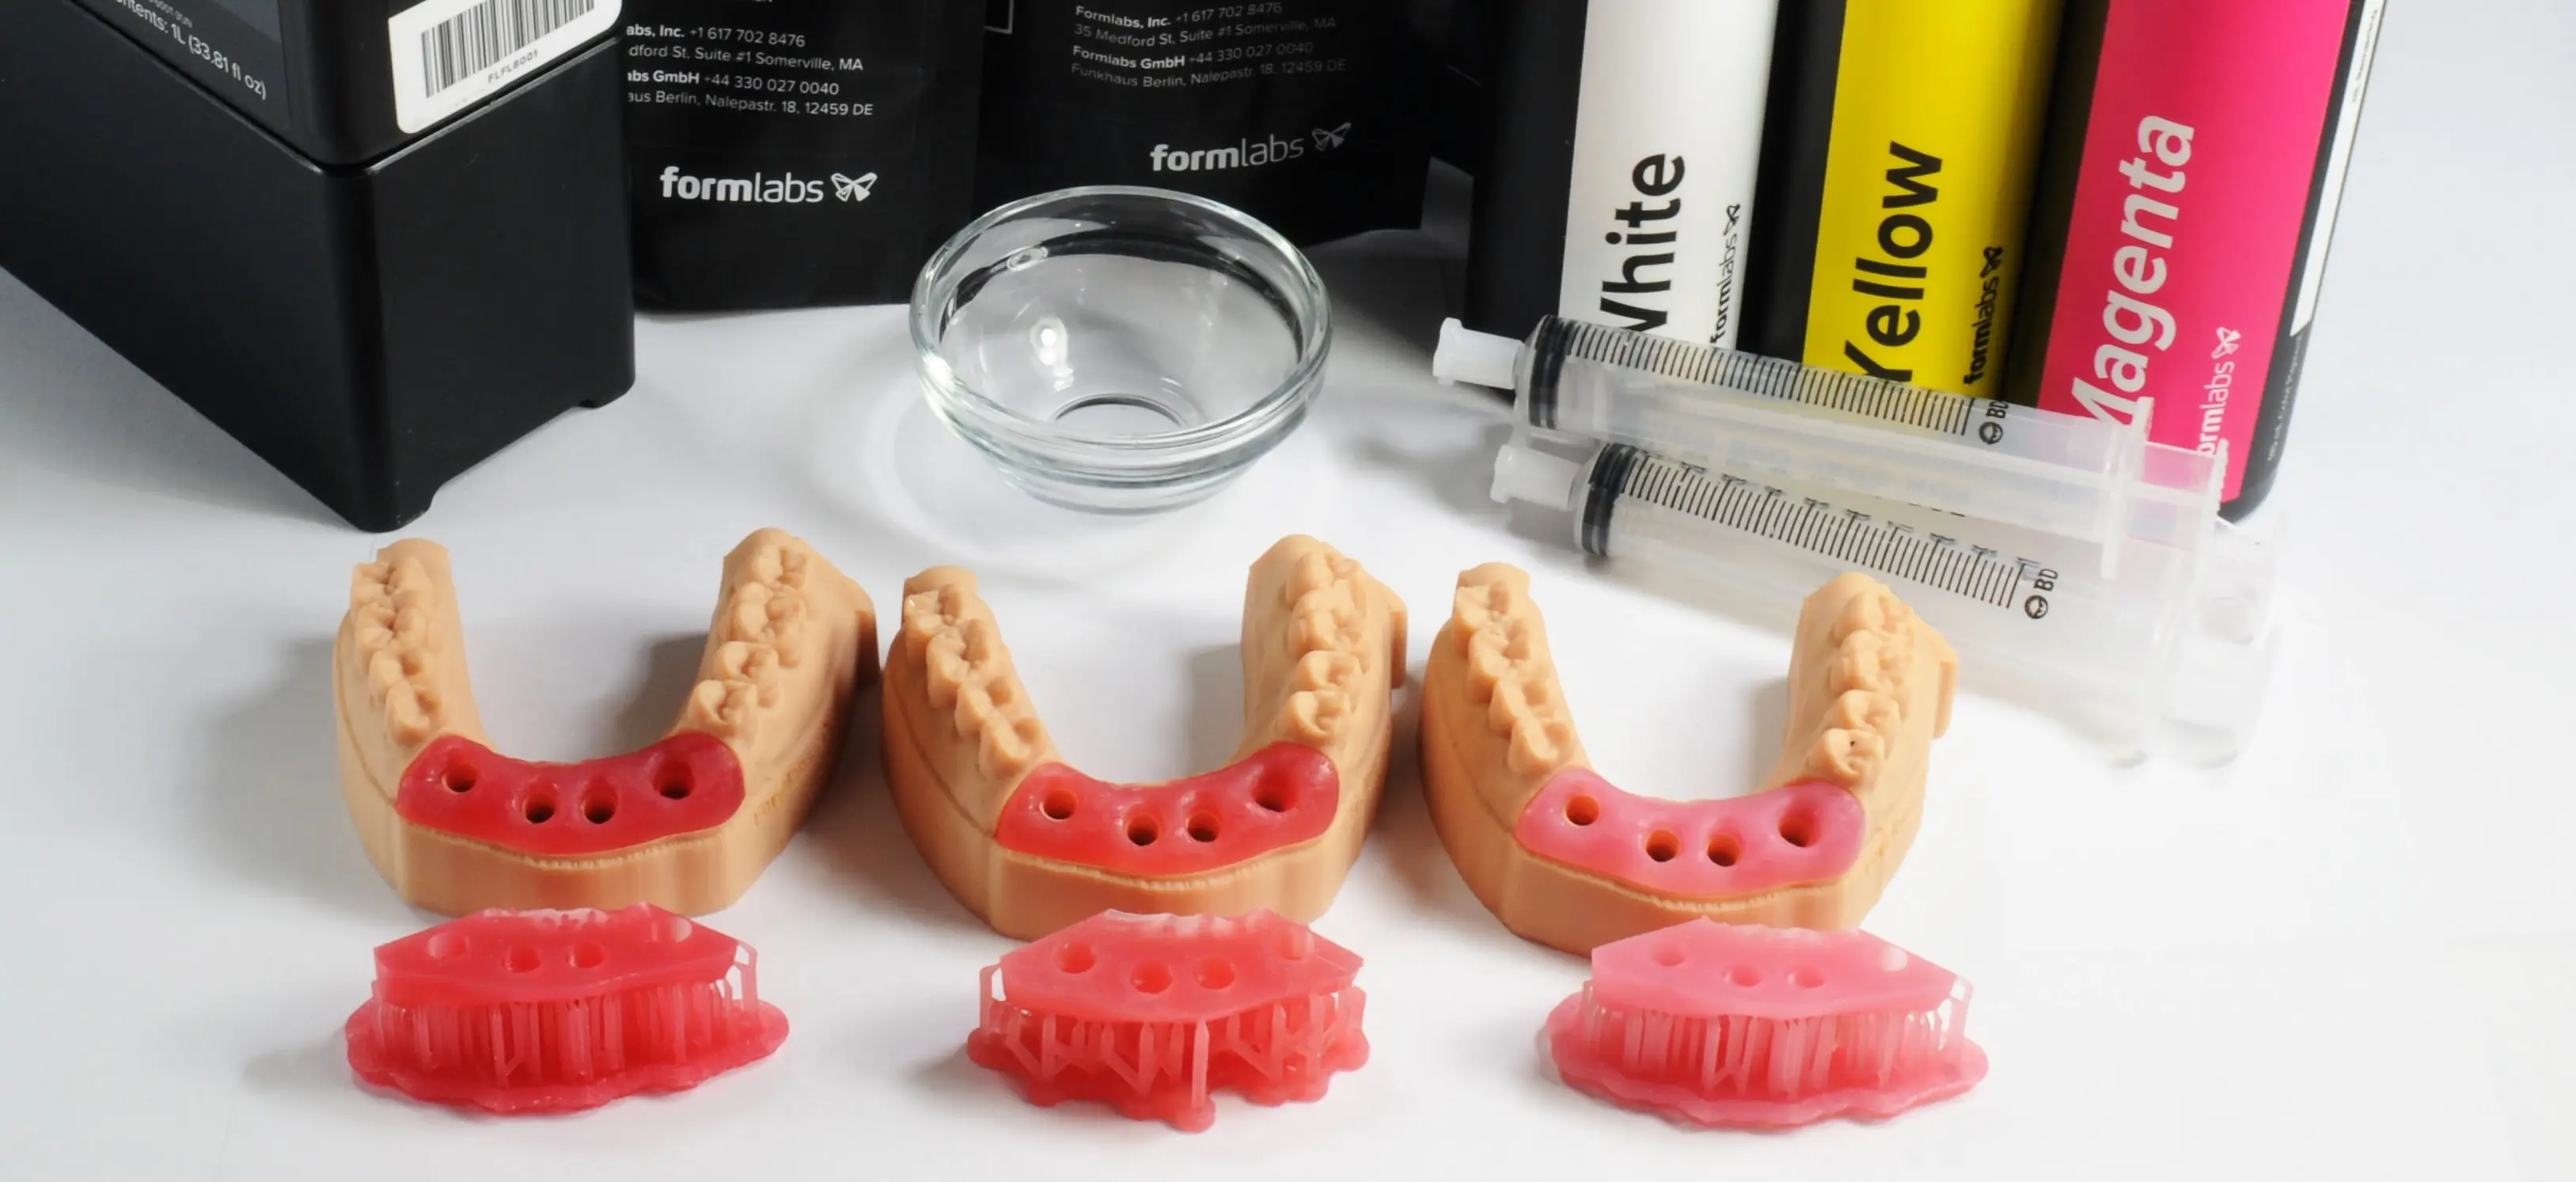
1. Add Pigment to Flexible 80A Resin
You can customize the color and opacity of your 3D printed gingiva mask by adding pigment to Flexible 80A Resin. We offer three initial recipes, but you are free to create your own unique colors using the formula detailed later in this document.
1.1 Prepare the Resin
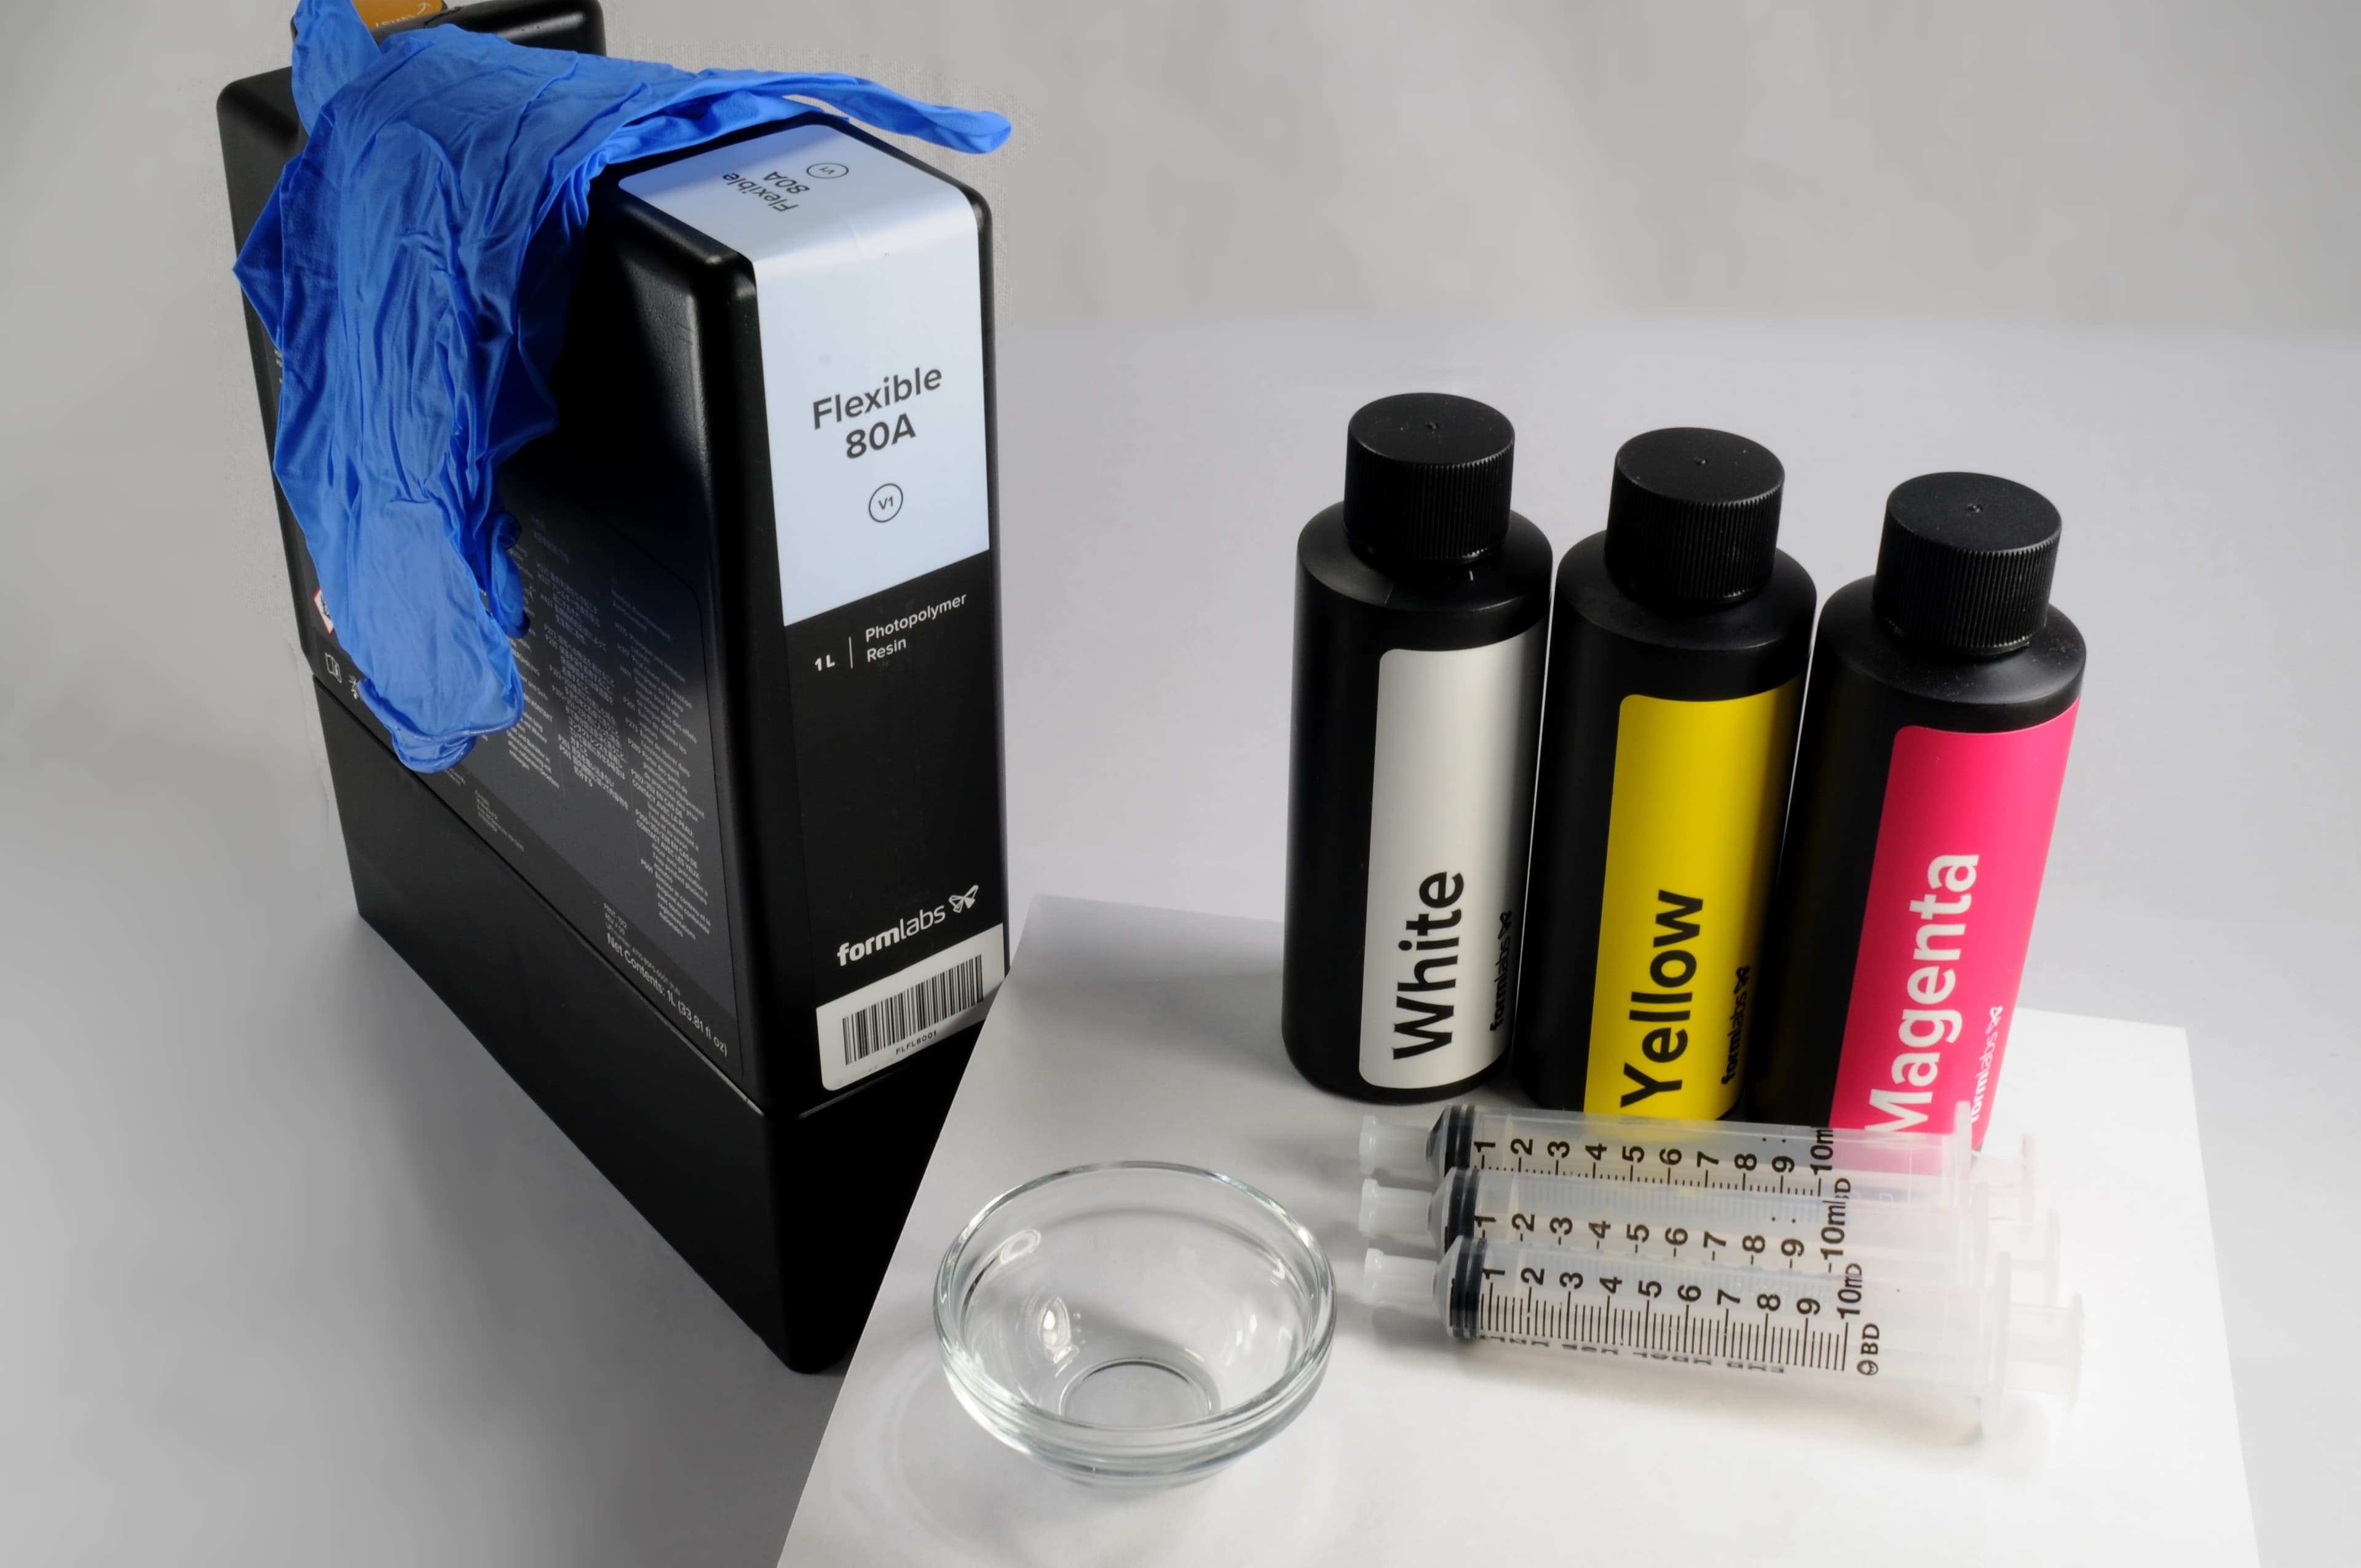
To create Soft Tissue Resin, gather the following necessary supplies:
-
One cartridge of Flexible 80A Resin
-
Color Pigments (White, Yellow, and Magenta)
-
Disposable nitrile gloves
-
A container or cup (40 mL capacity or greater)
-
Three syringes, included with the pigments
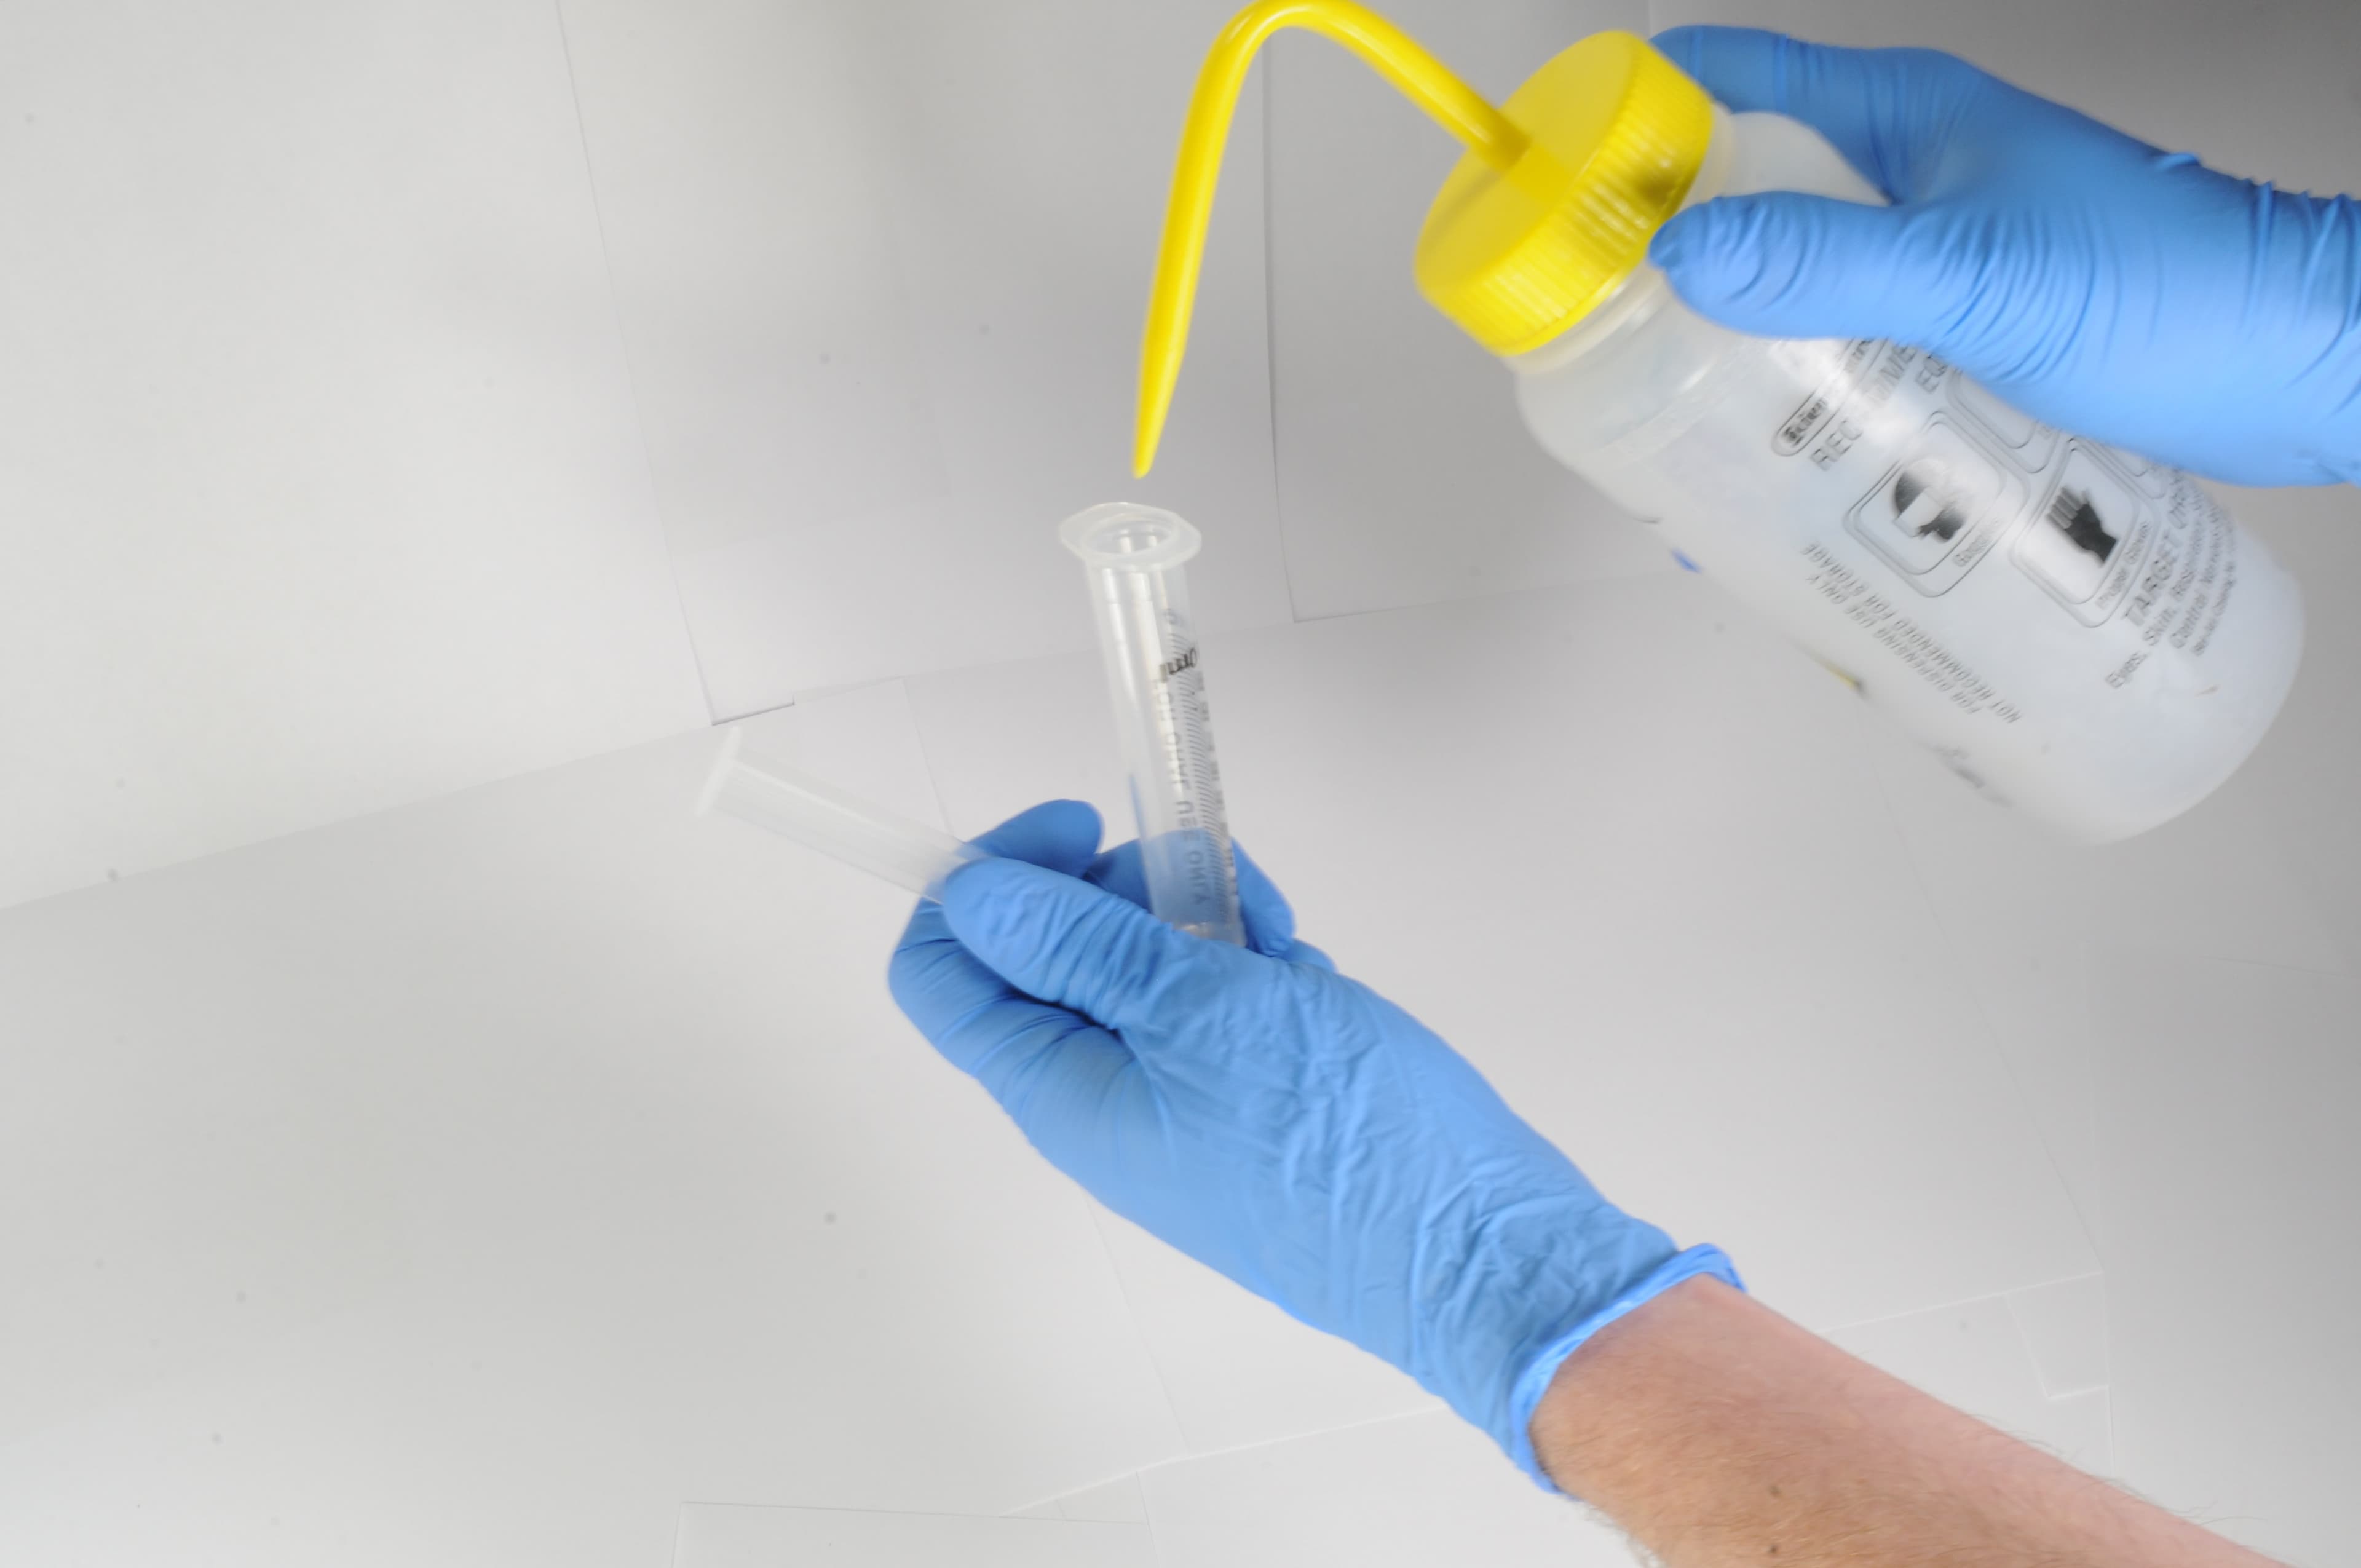
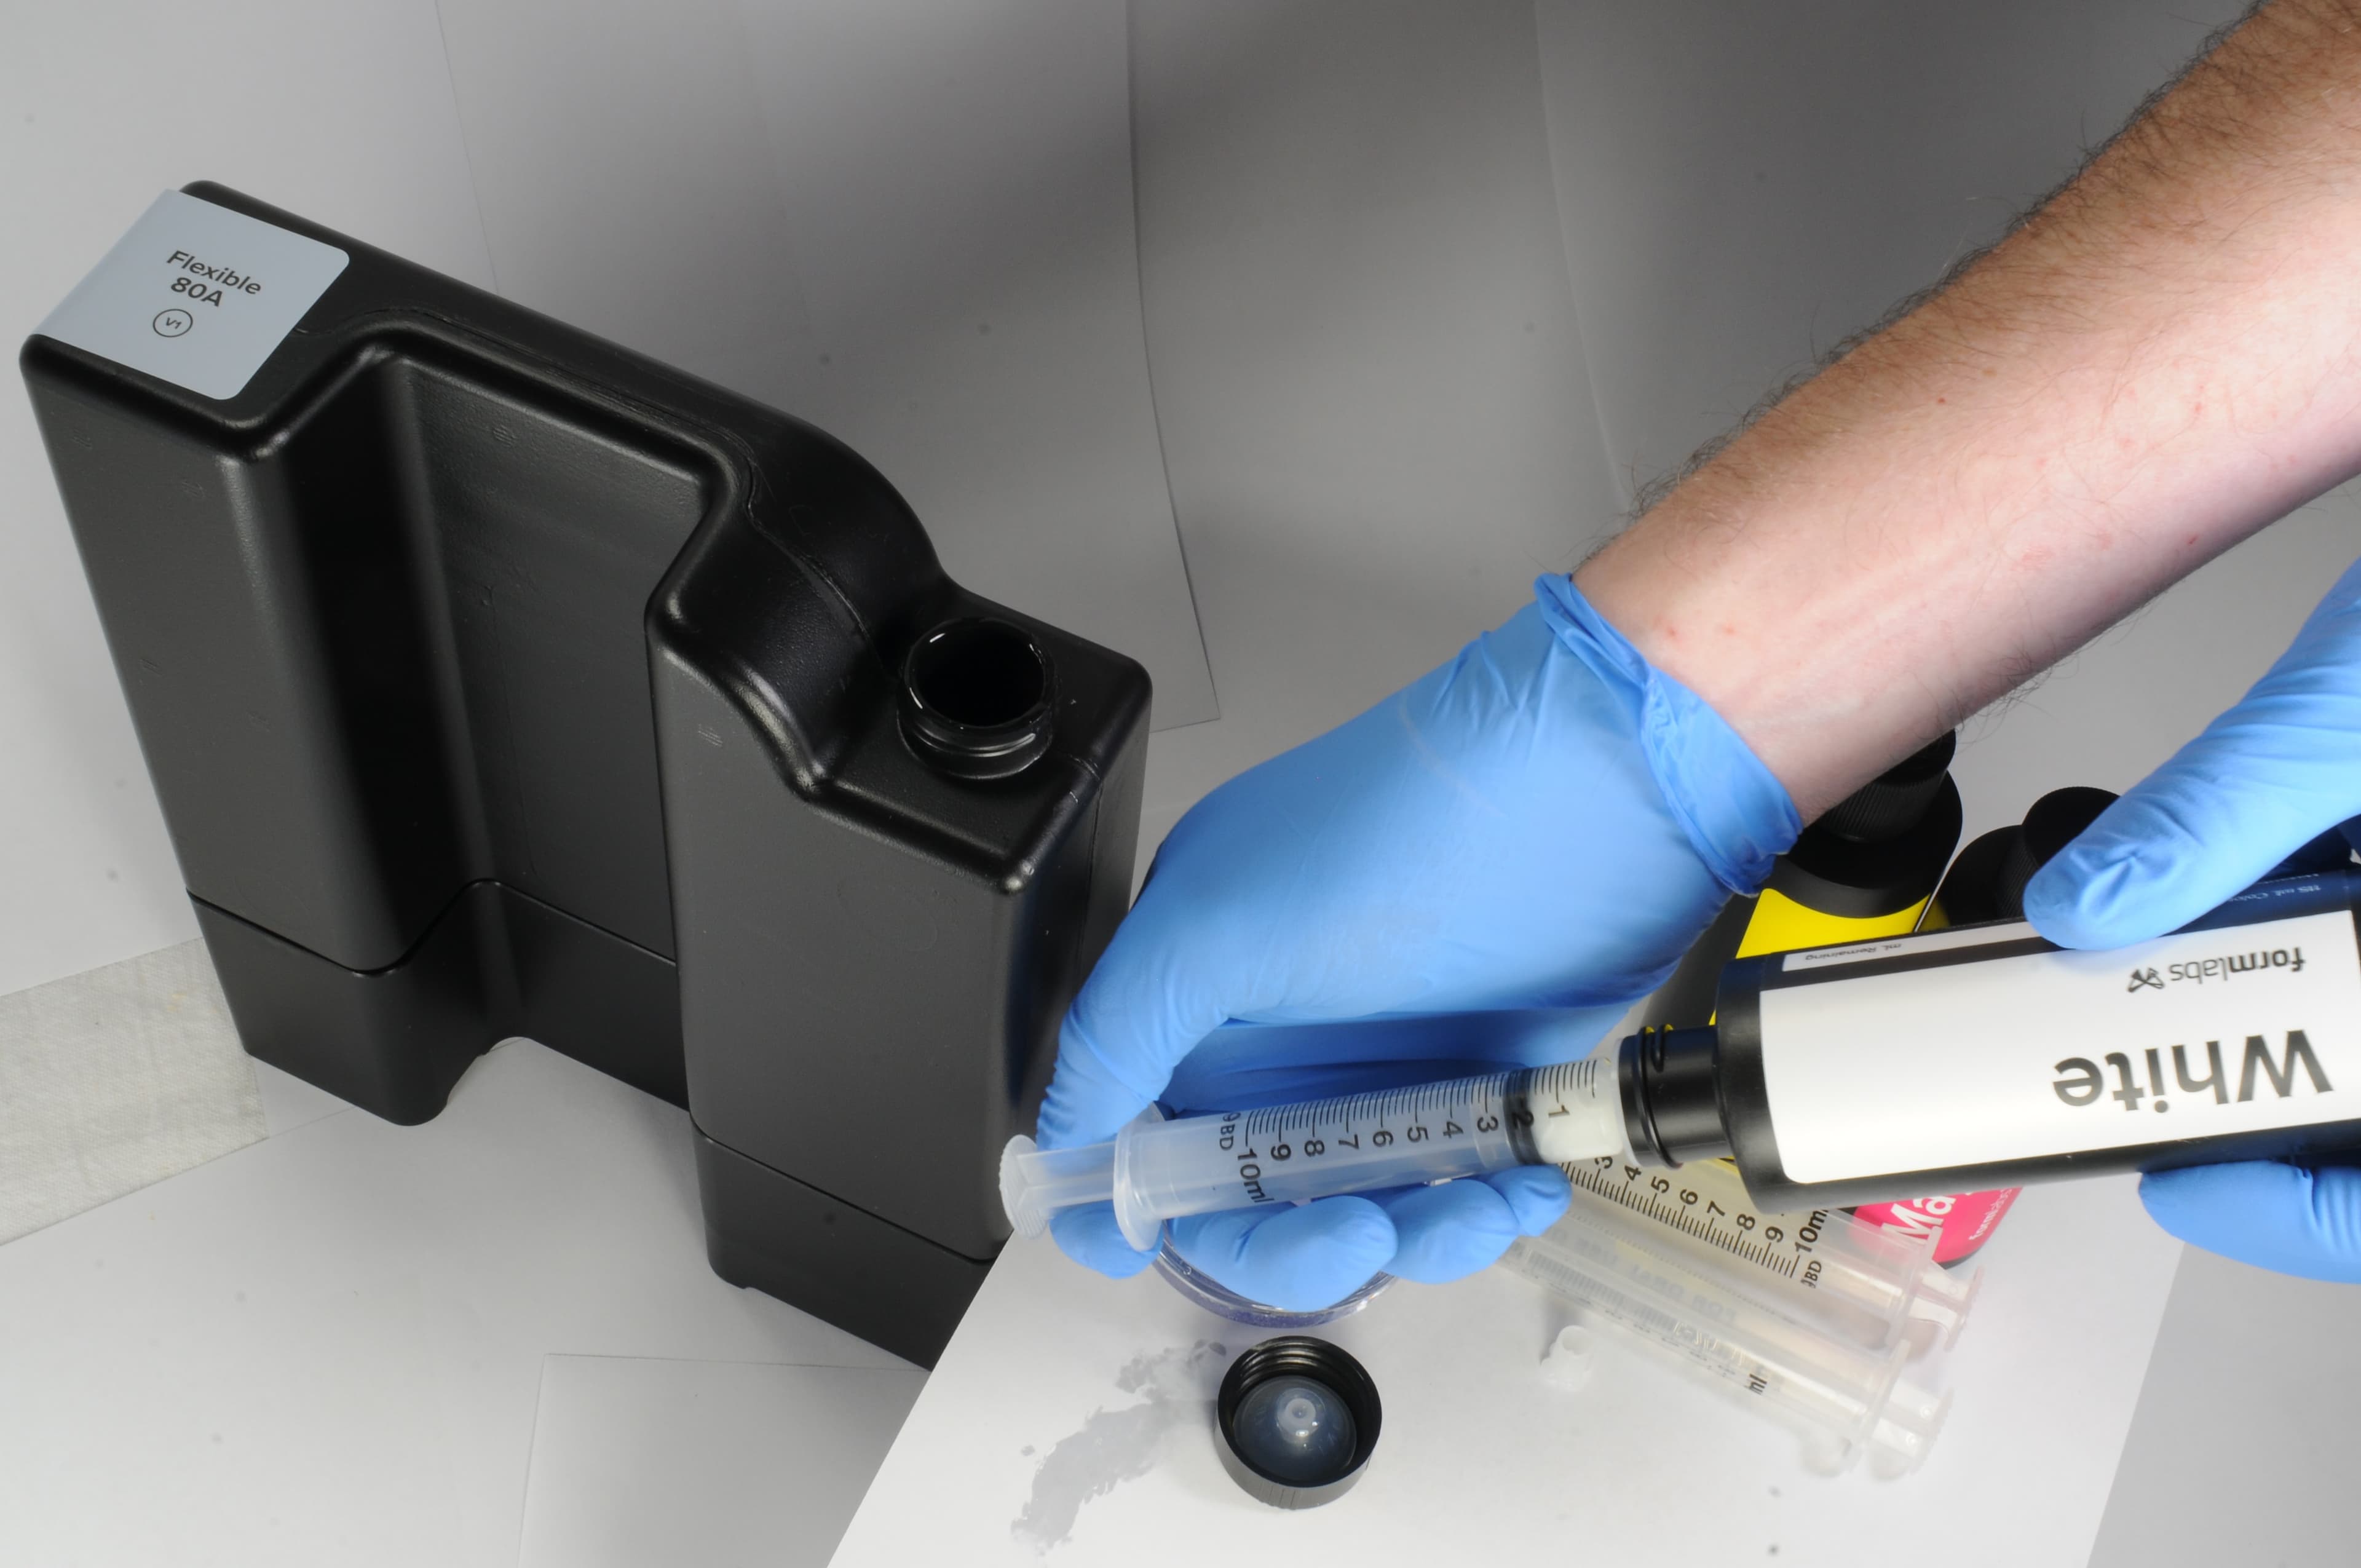
Once all supplies are assembled, put on the nitrile gloves and unpack the resin cartridge.
Remove the cap from the Flexible 80A Resin cartridge.
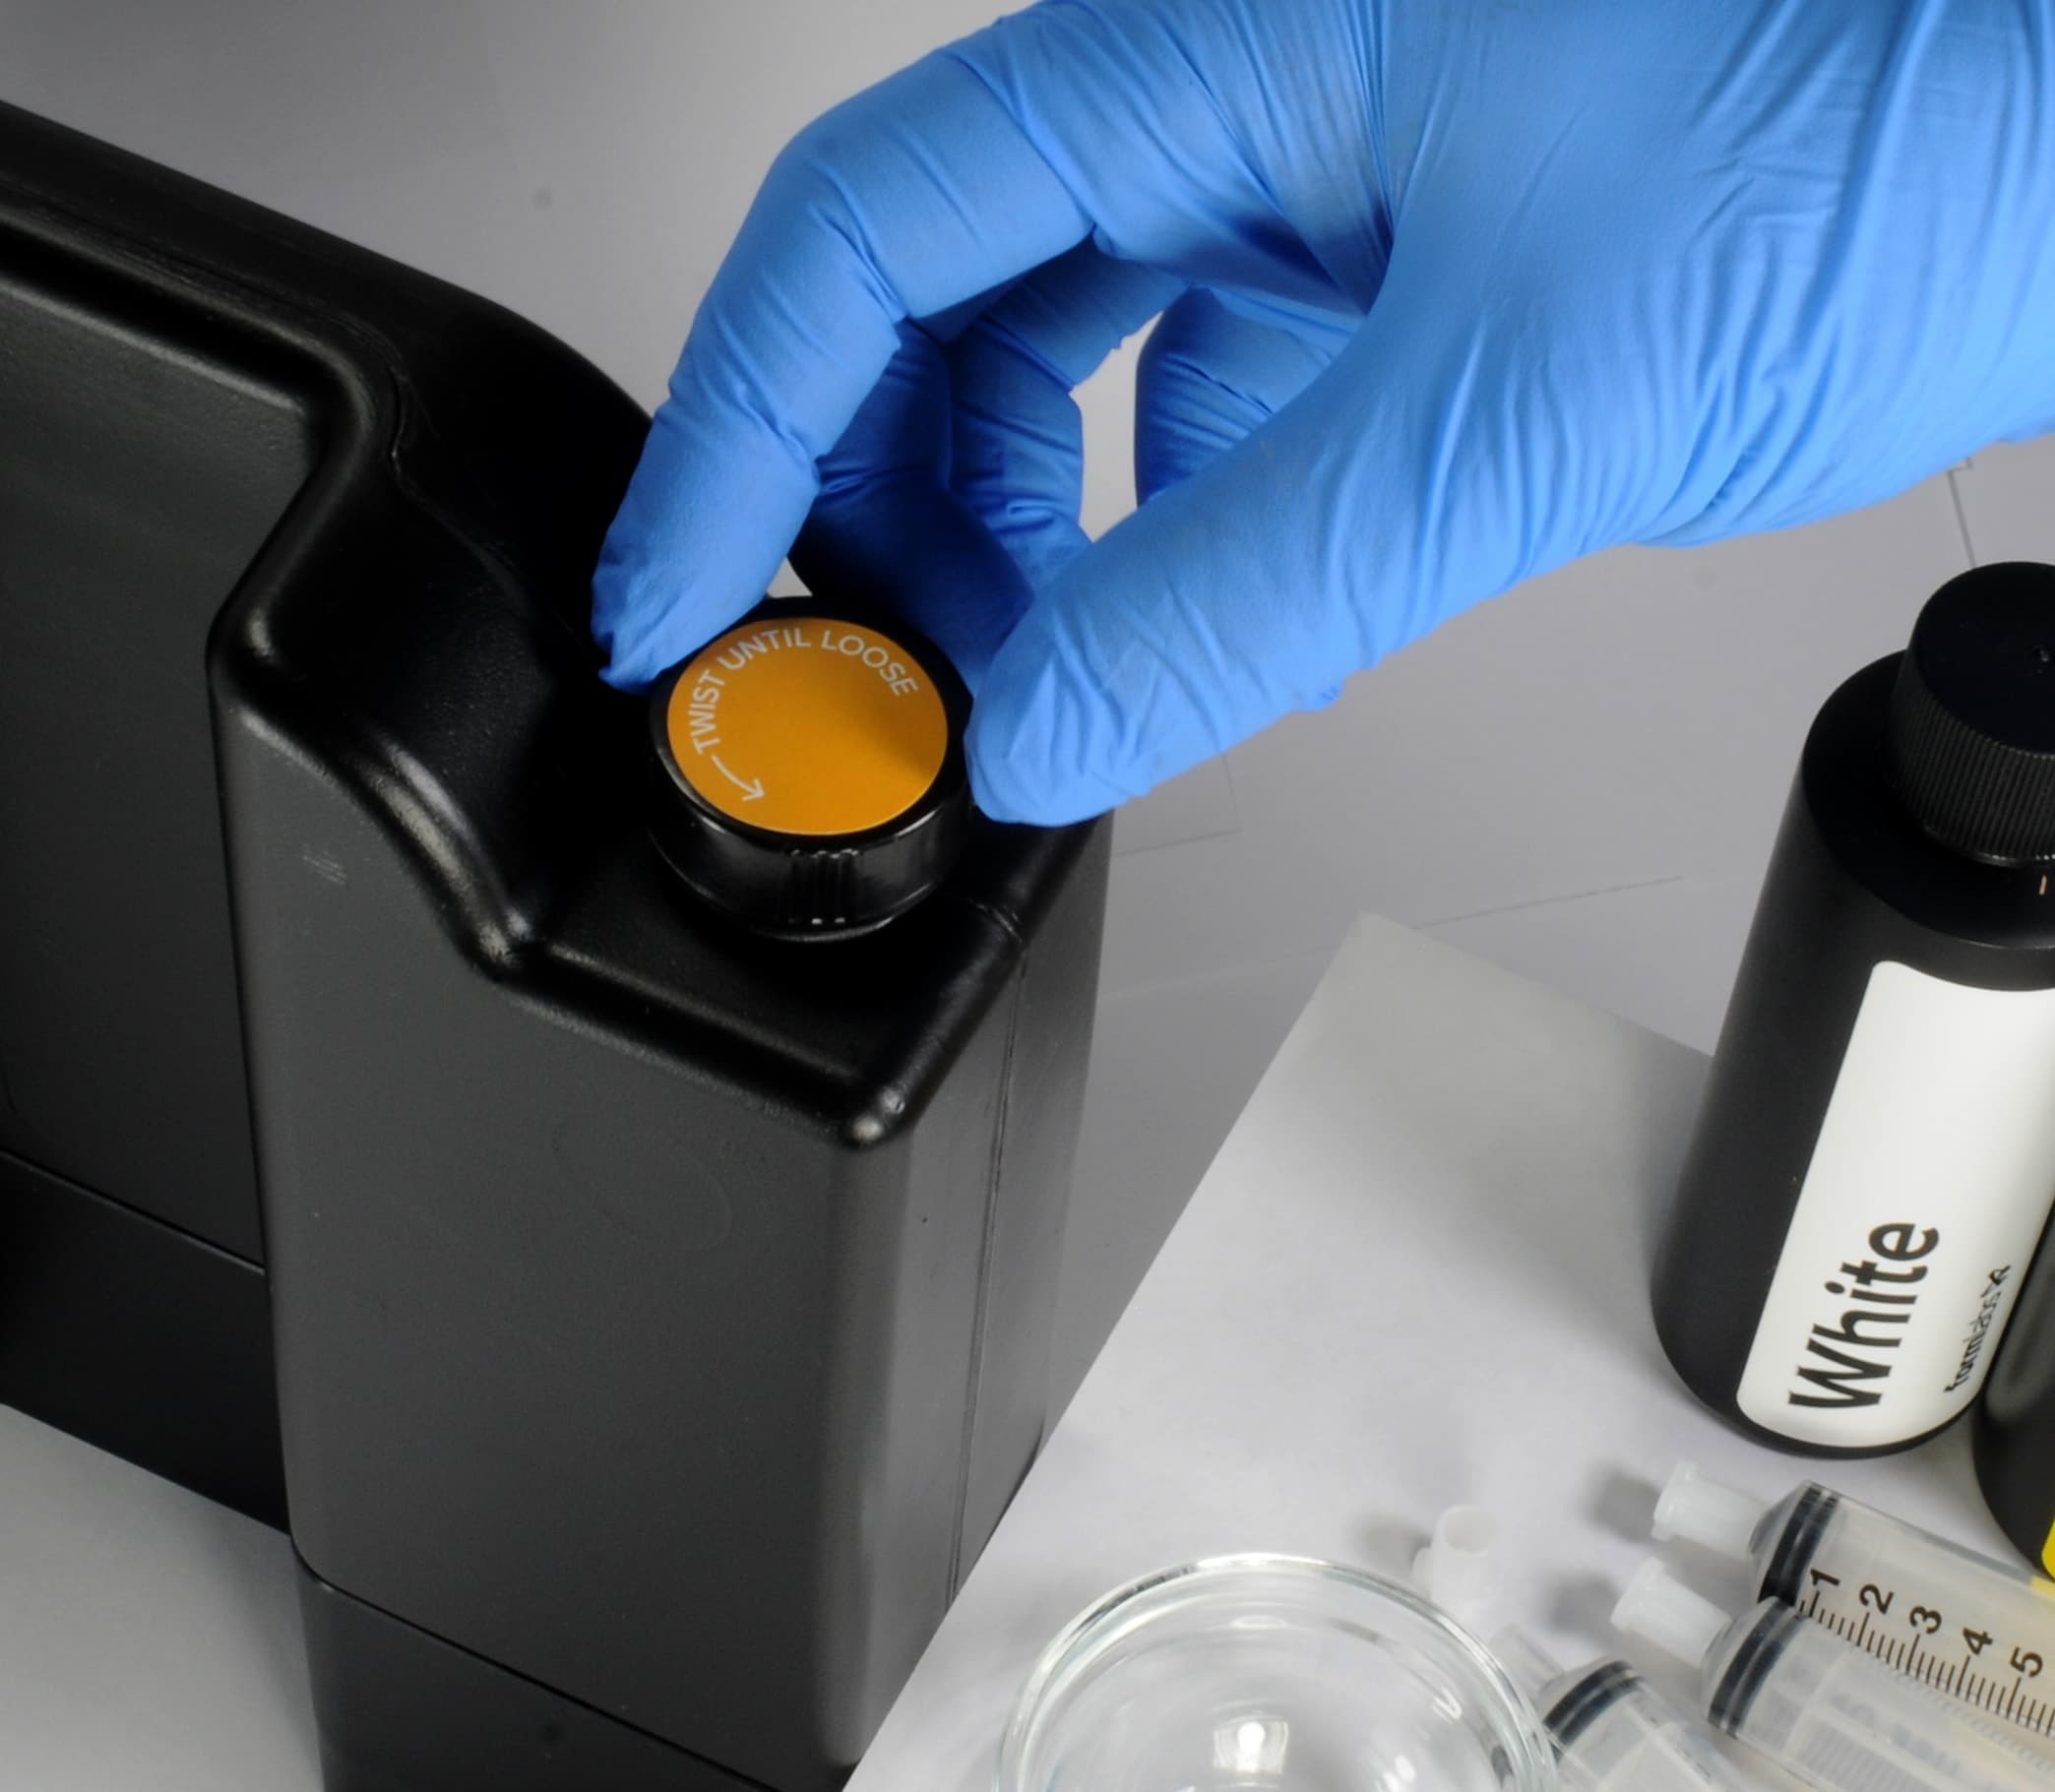
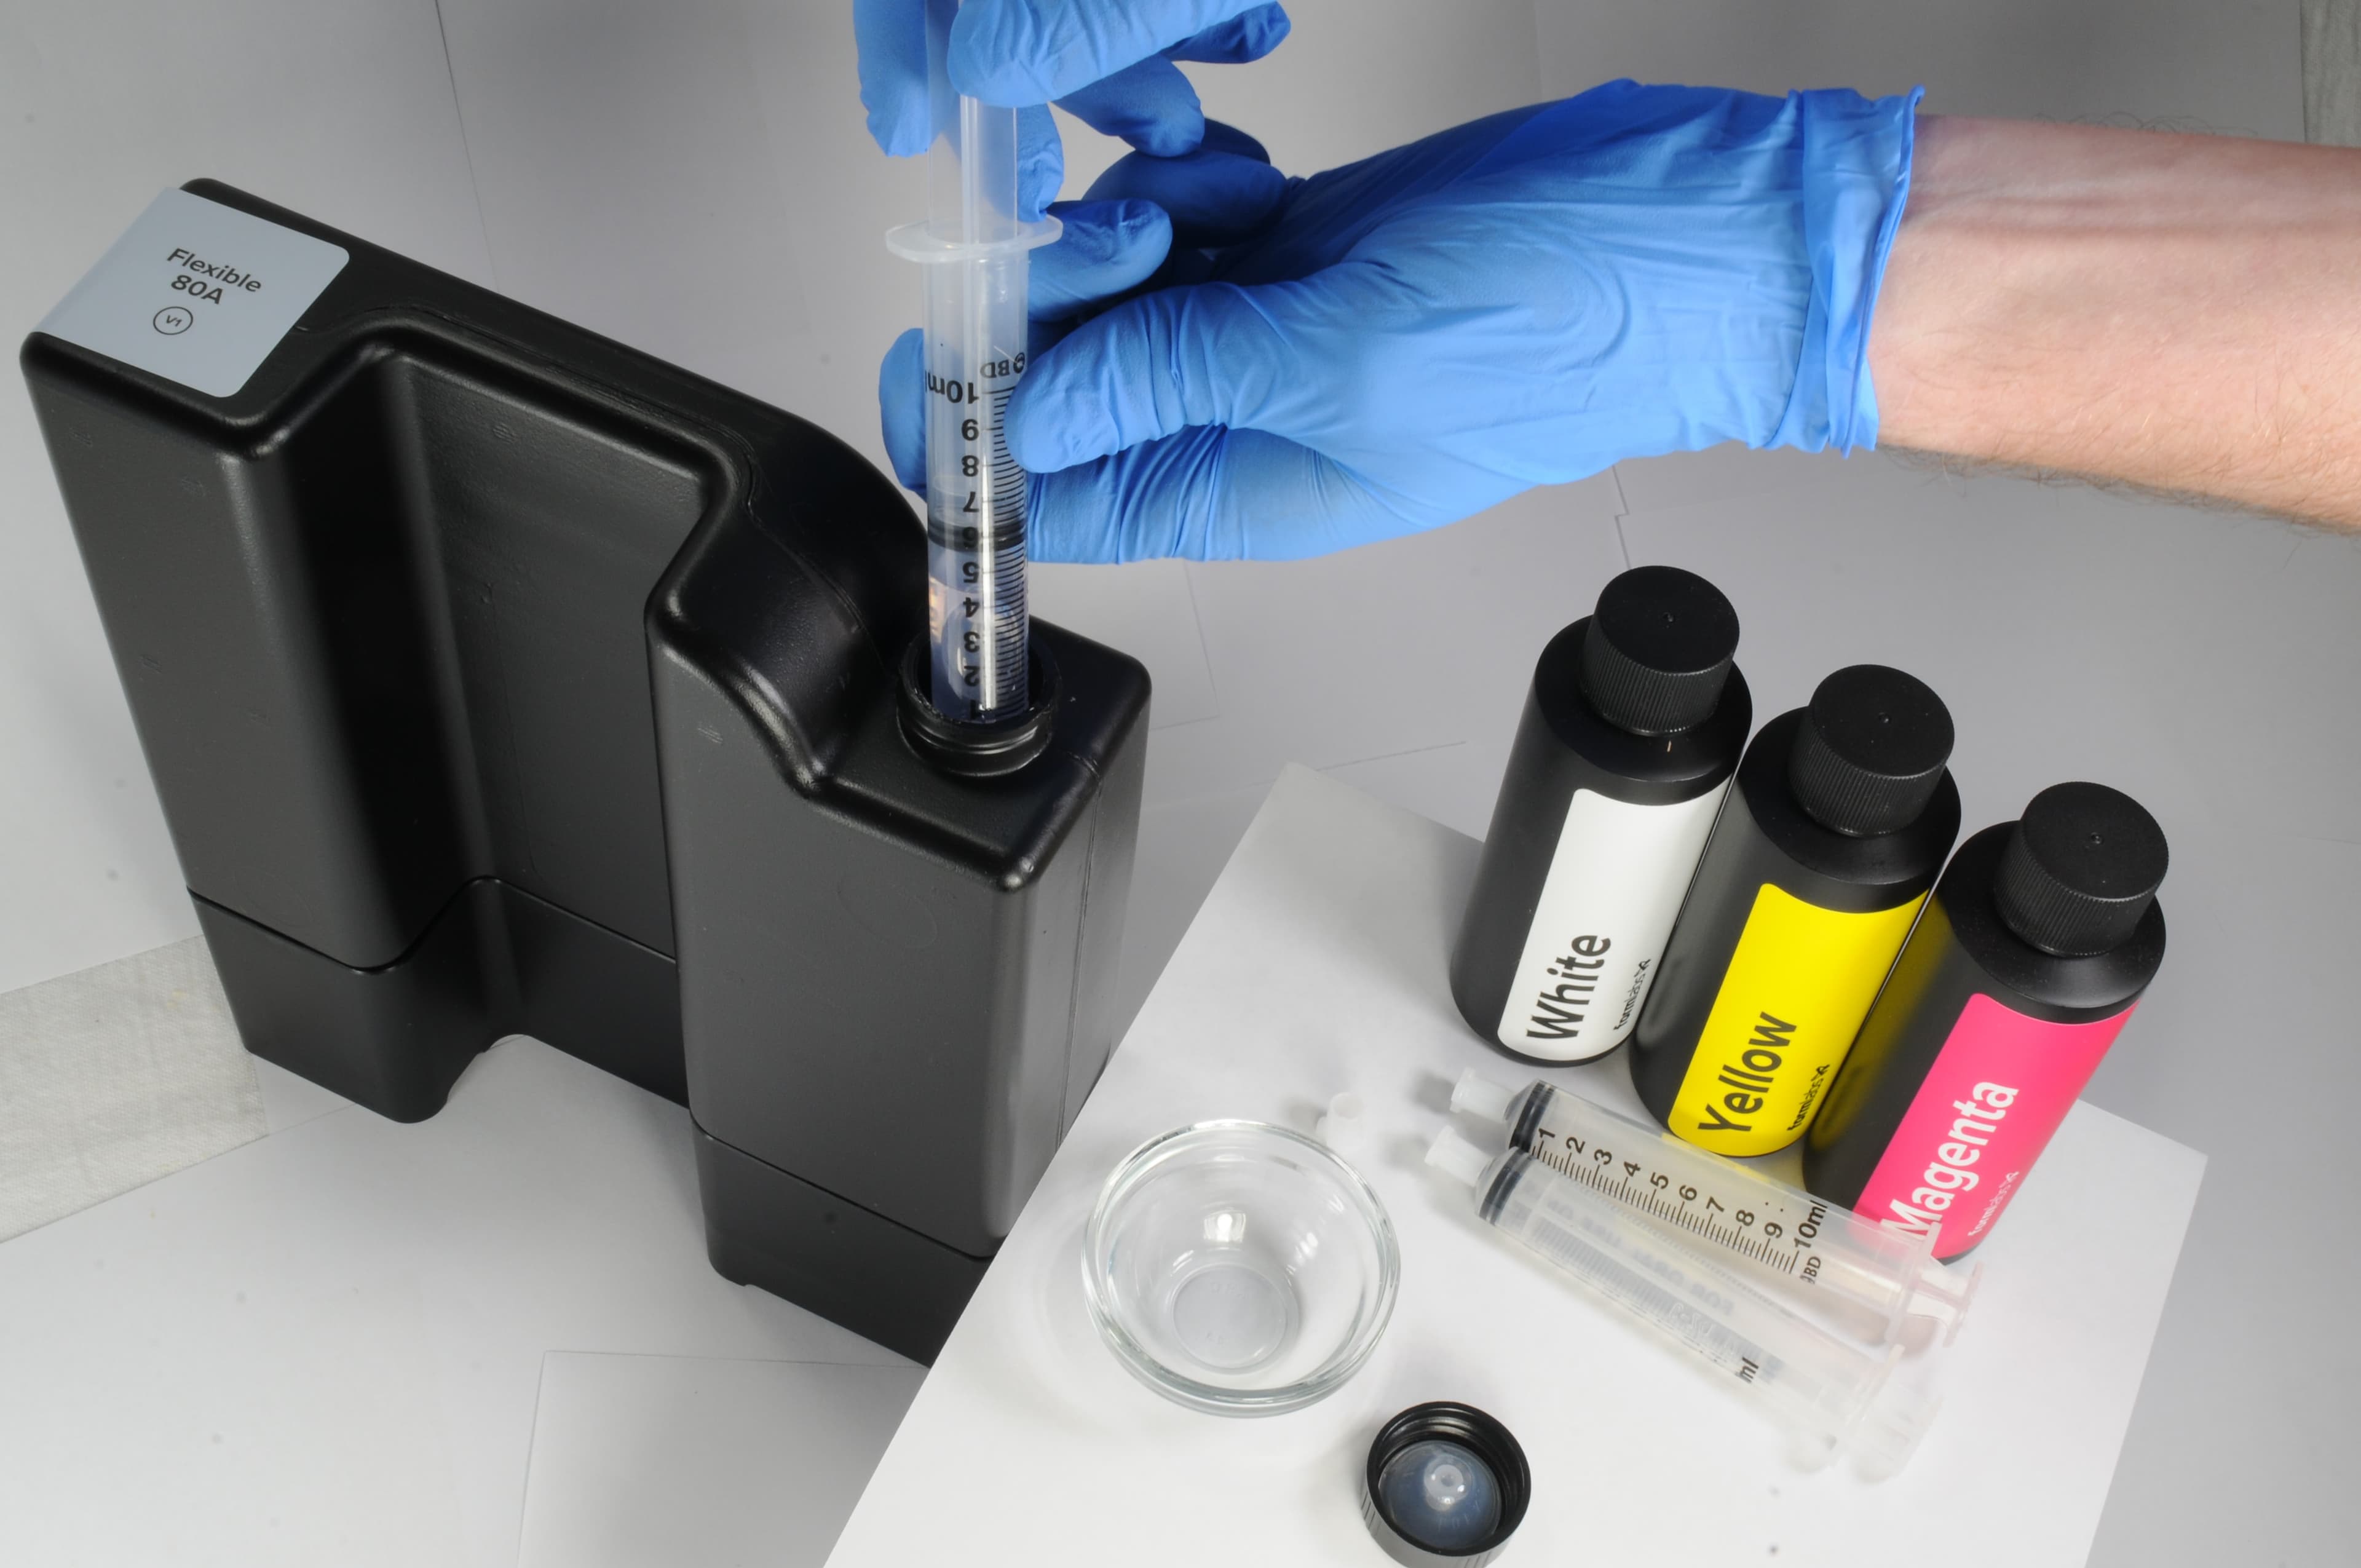
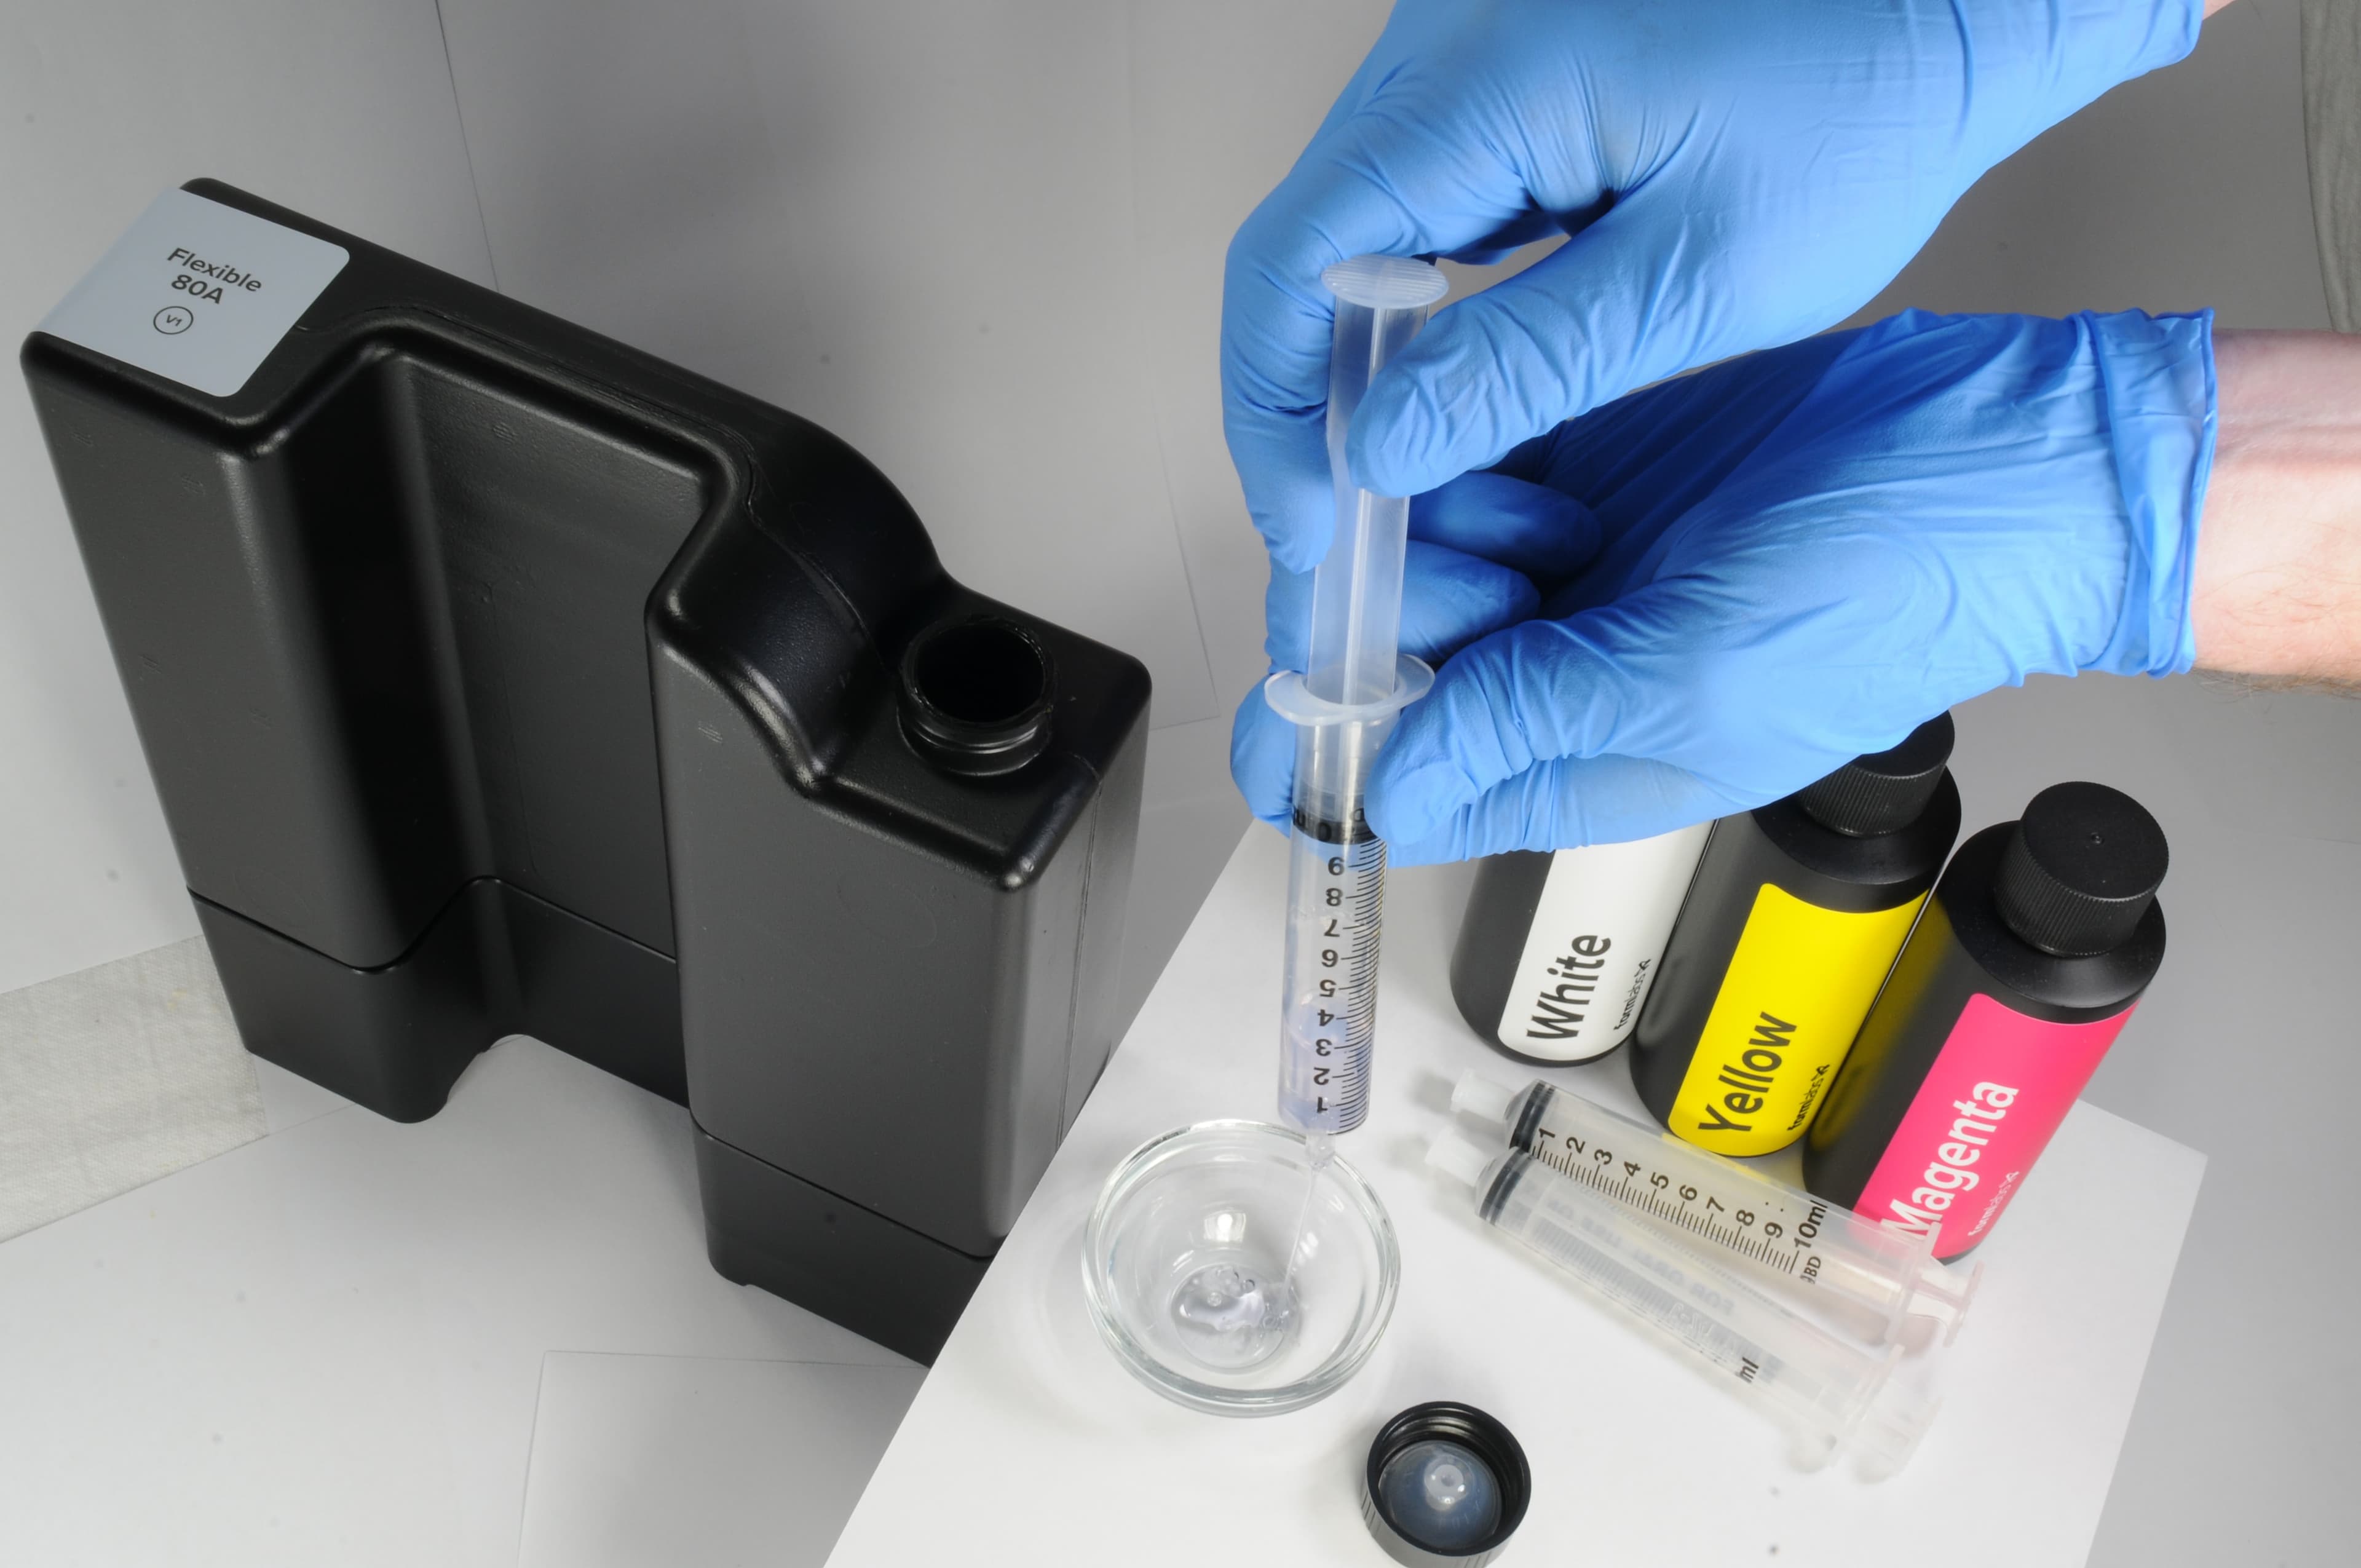
Remove 40 mL of resin from the Flexible 80A Resin cartridge using a glass cup or container and a syringe.
Note:
If you reuse the syringe with one of the pigments, make sure to rinse it thoroughly using isopropyl alcohol that is at least 90% concentration.
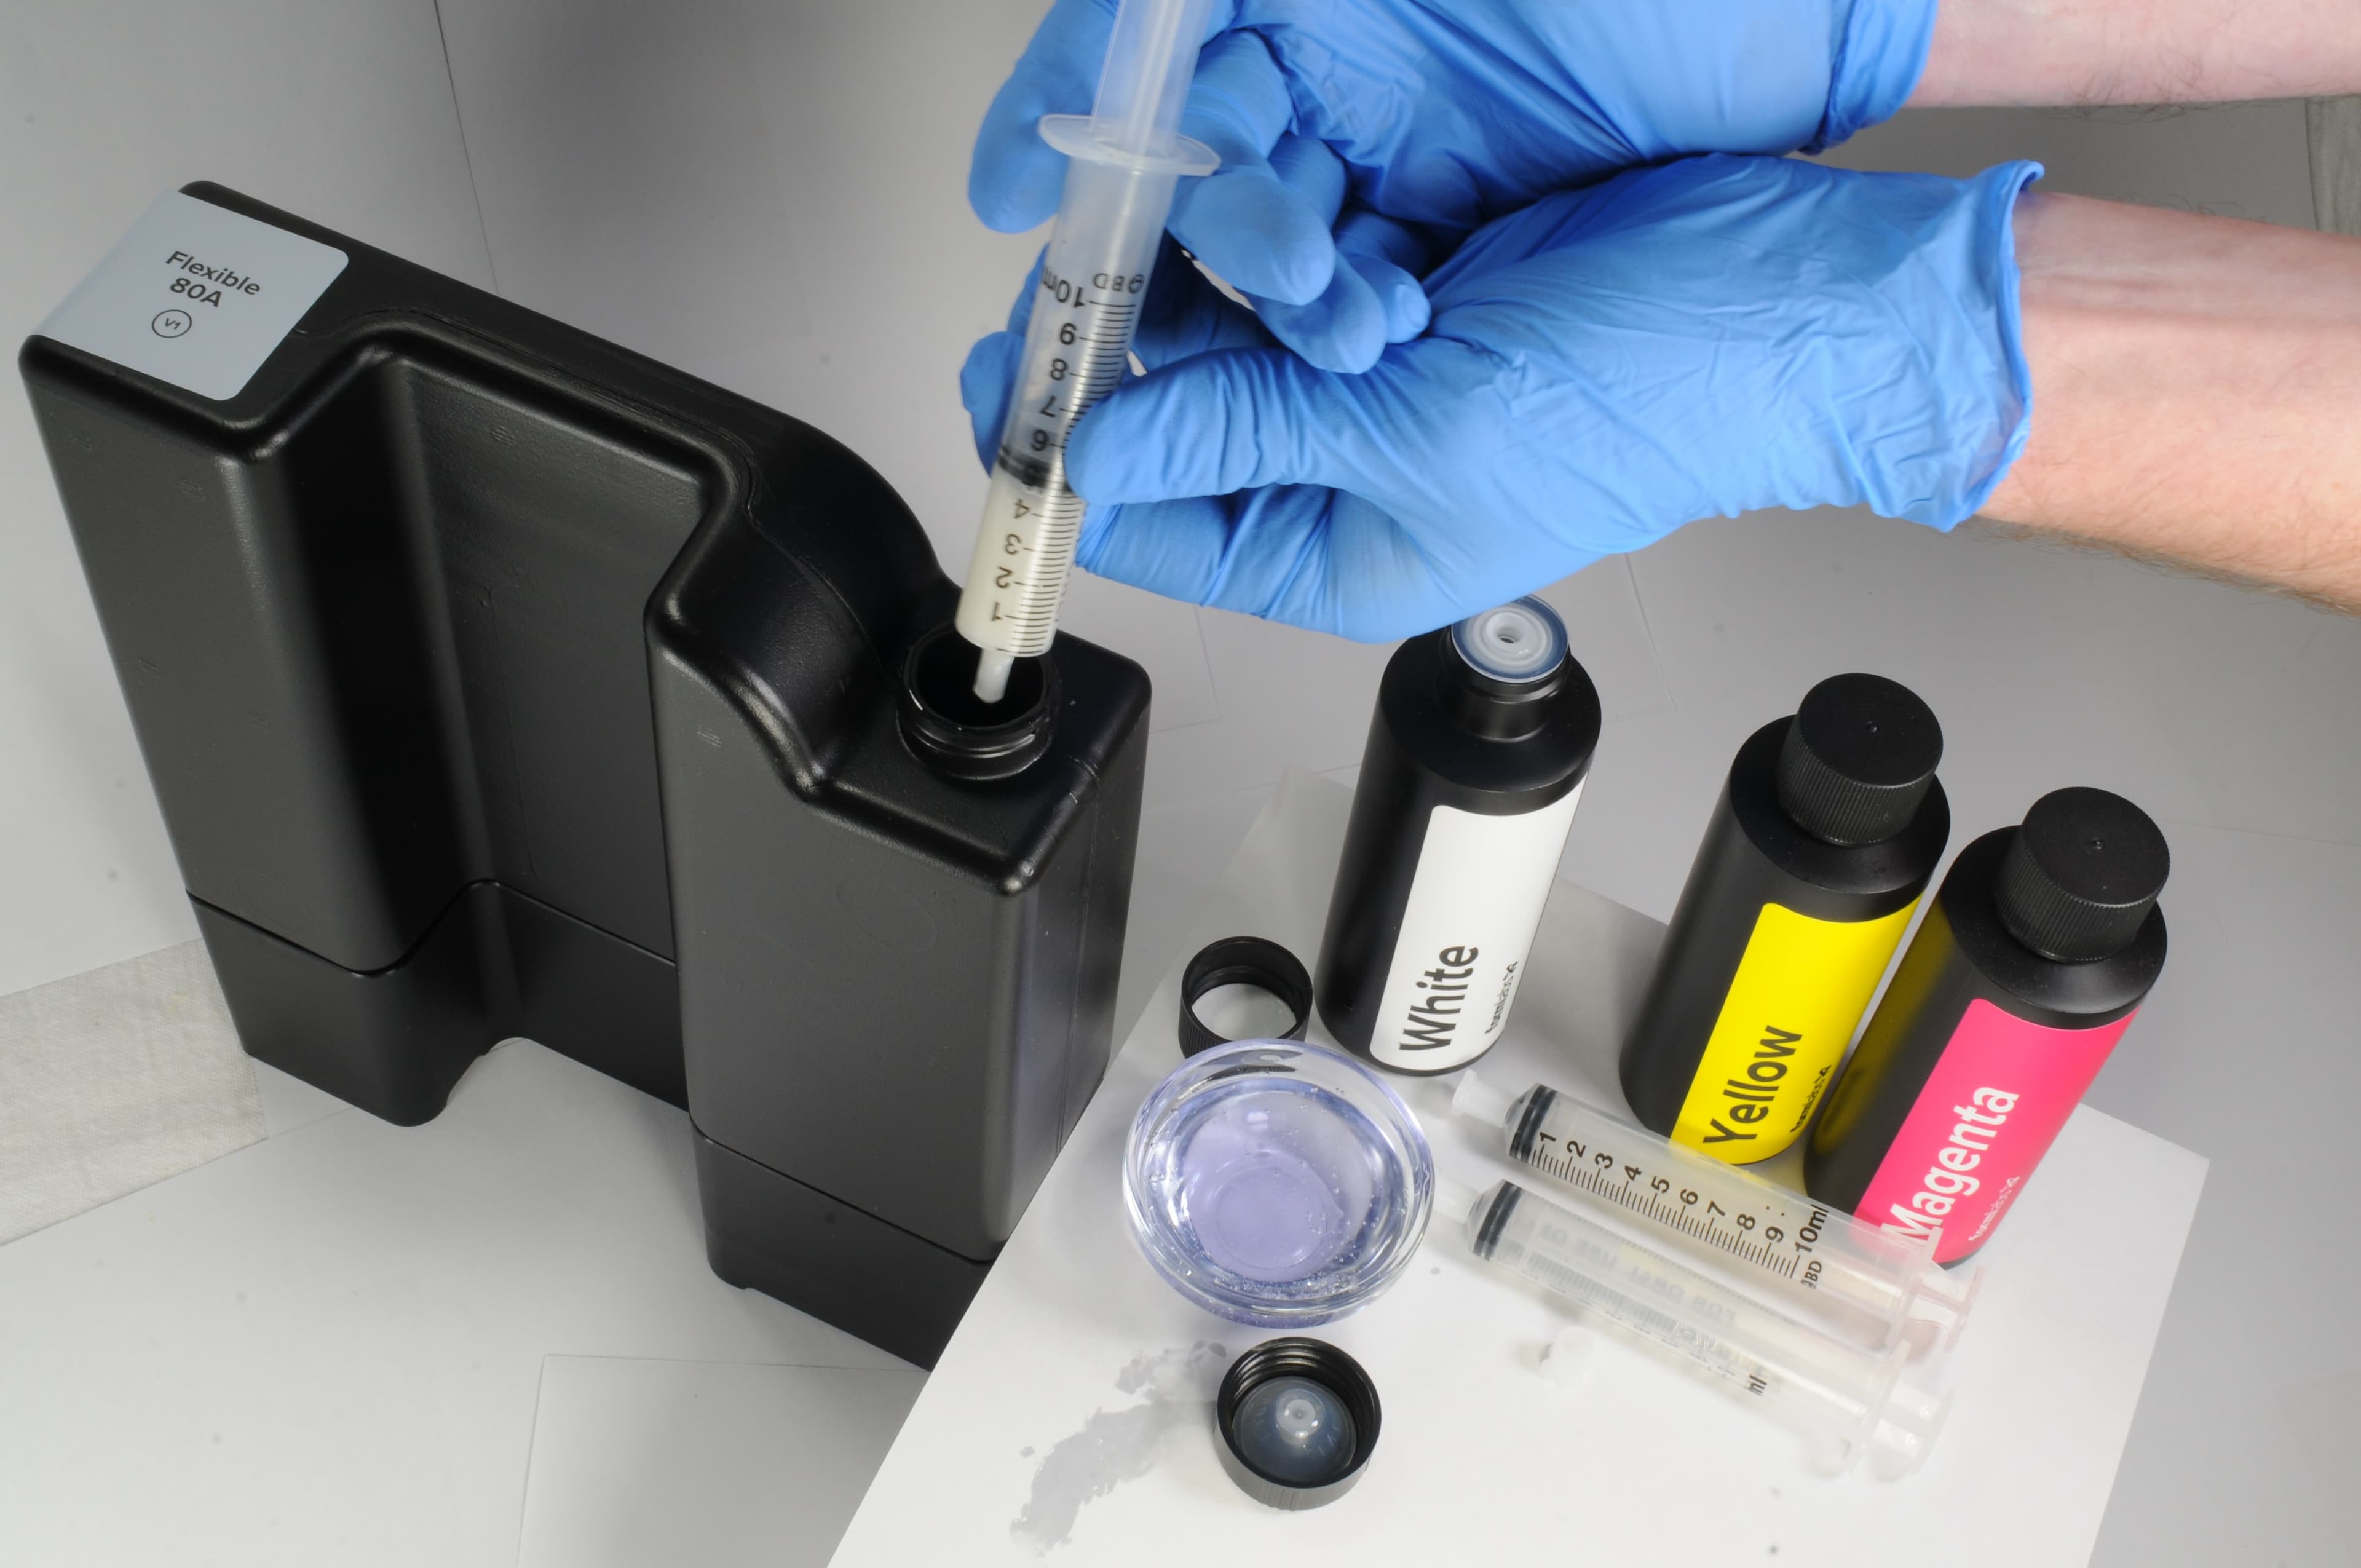
1.2 Mixing the Pigments
You will now use a mixture of pigments to replace the missing 40 mL in the cartridge.
Note:
-
Ensure your total pigment mixture does not exceed 40 mL to maintain printability.
-
Do not exceed 30 mL of white pigment as this may affect printability.
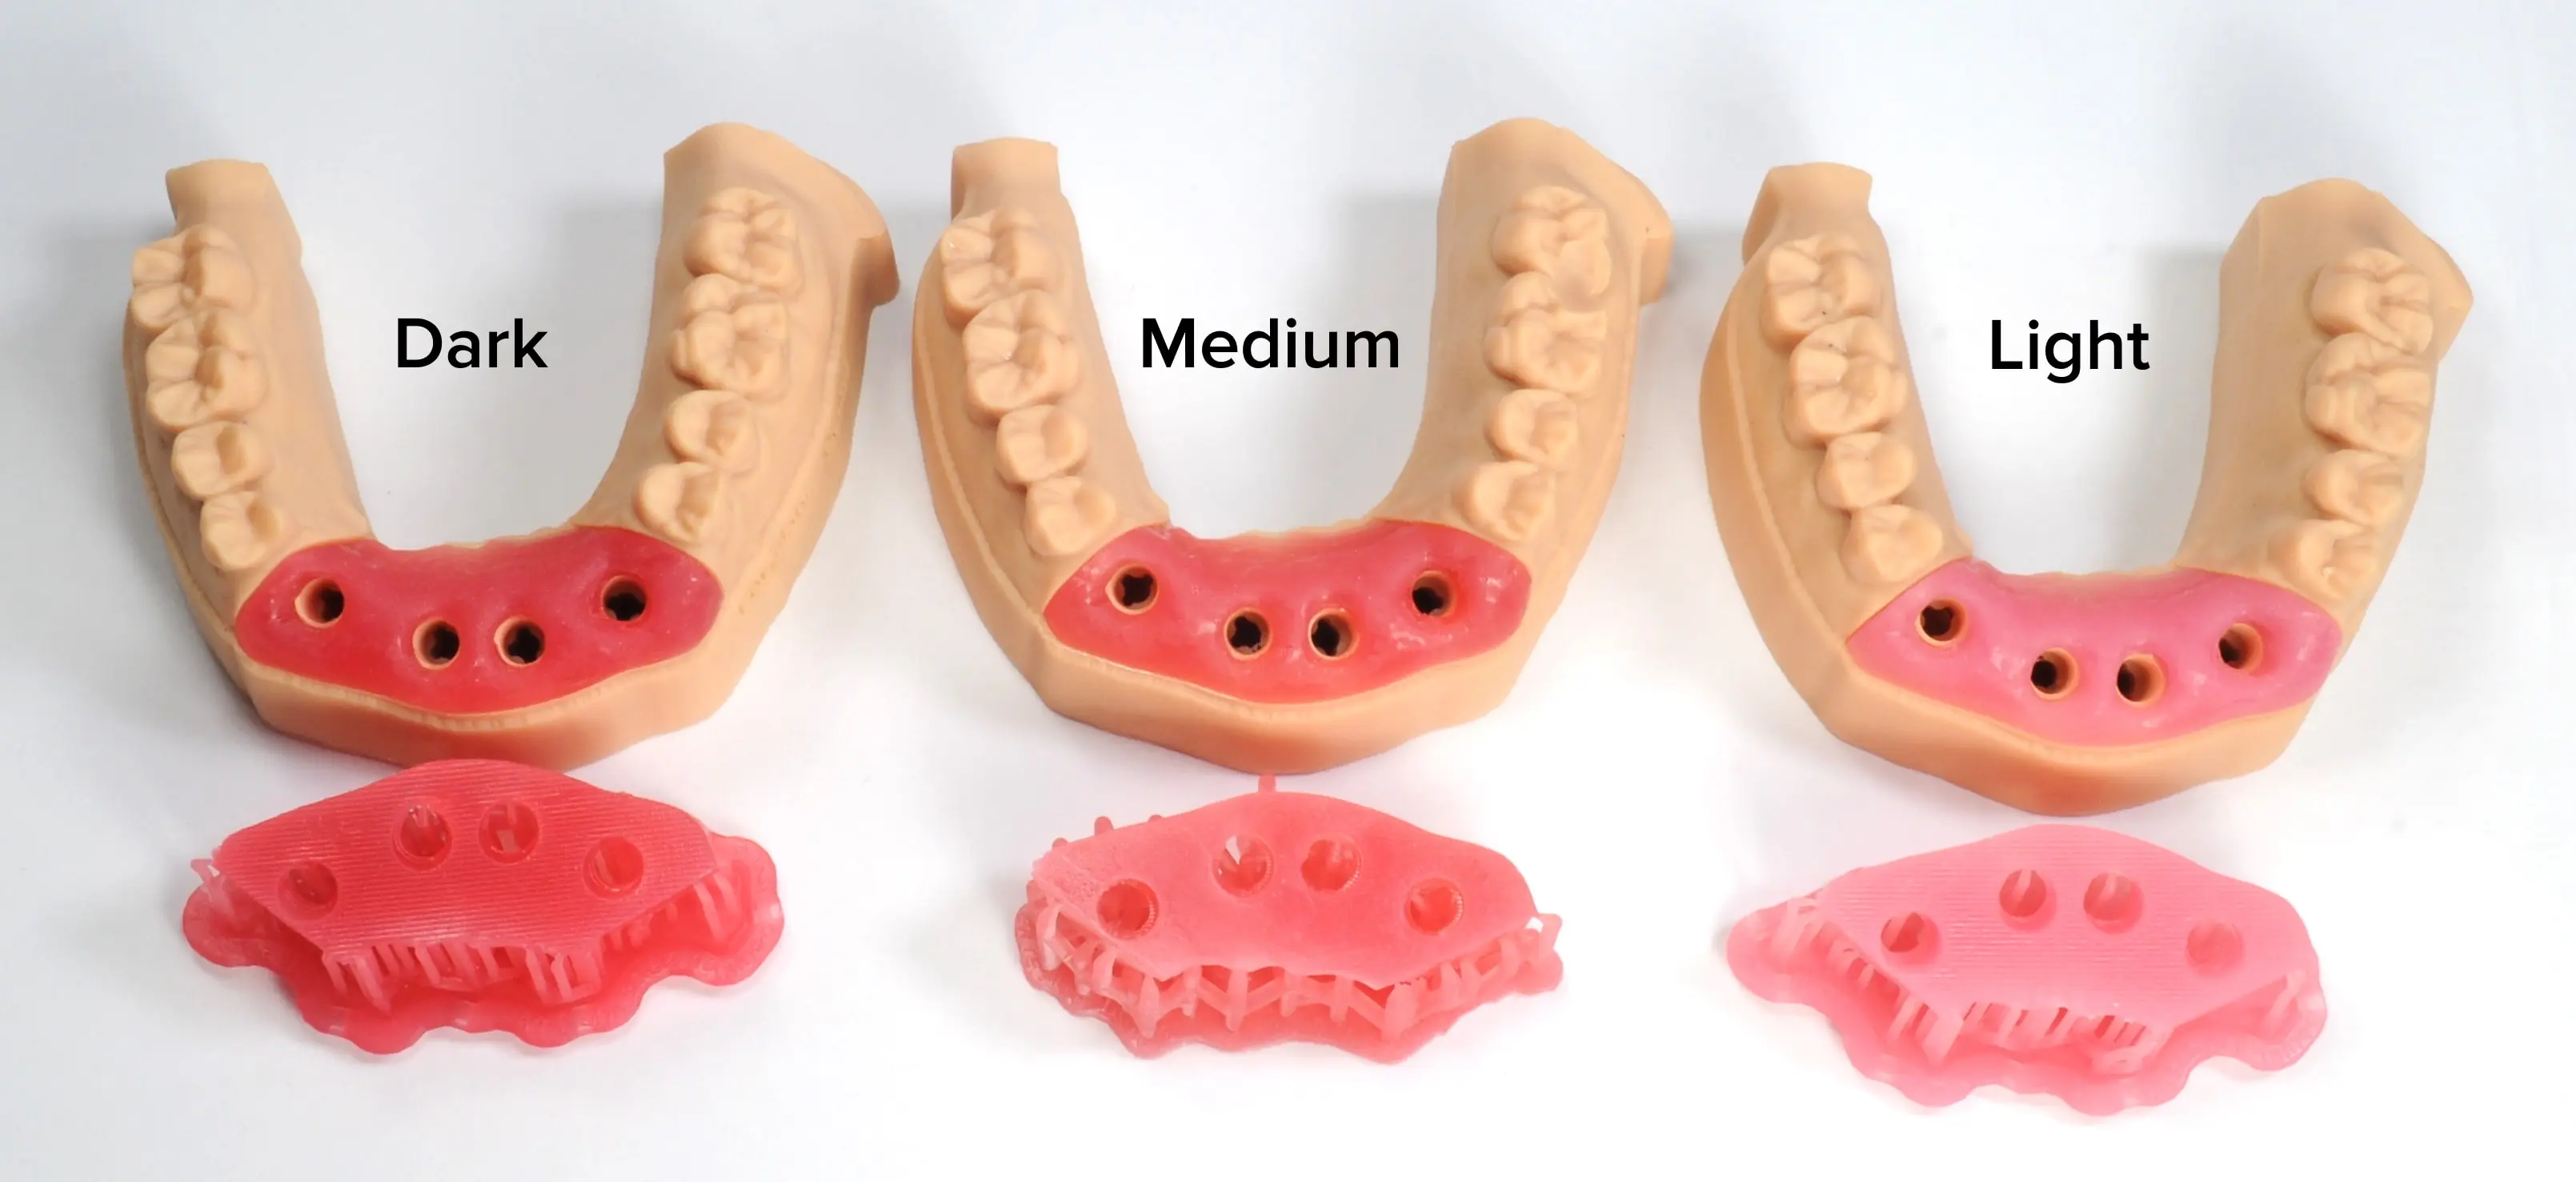
Three ready-to-use recipes are provided in the table below. Keep in mind that increasing the amount of white pigment generally results in a brighter shade and higher opacity. This higher opacity can be beneficial if you need to prevent underlying structures, such as implant analogs or metallic custom abutments, from showing through the gingiva mask.
|
Shade |
Flexible 80A Resin |
White |
Yellow |
Magenta |
|
Light Pink |
960 mL |
25 mL |
5 mL |
10 mL |
|
Orange Pink |
960 mL |
15 mL |
10 mL |
15 mL |
|
Dark Pink |
960 mL |
10 mL |
10 mL |
20 mL |
Replace the cap on the cartridge and shake the cartridge vigorously for five minutes, rotating occasionally.
Allow the cartridge to settle in an upright position for 30 minutes, followed by an additional five minutes of shaking.
After mixing, the cartridge is ready to print soft tissue for gingiva mask models.
Note:
For faster mixing, use a dental stirring rod or spatula to mix the pigment into the resin in the cartridge.
Store the pigment bottles and capped syringes in the lightproof ziplock bags provided.
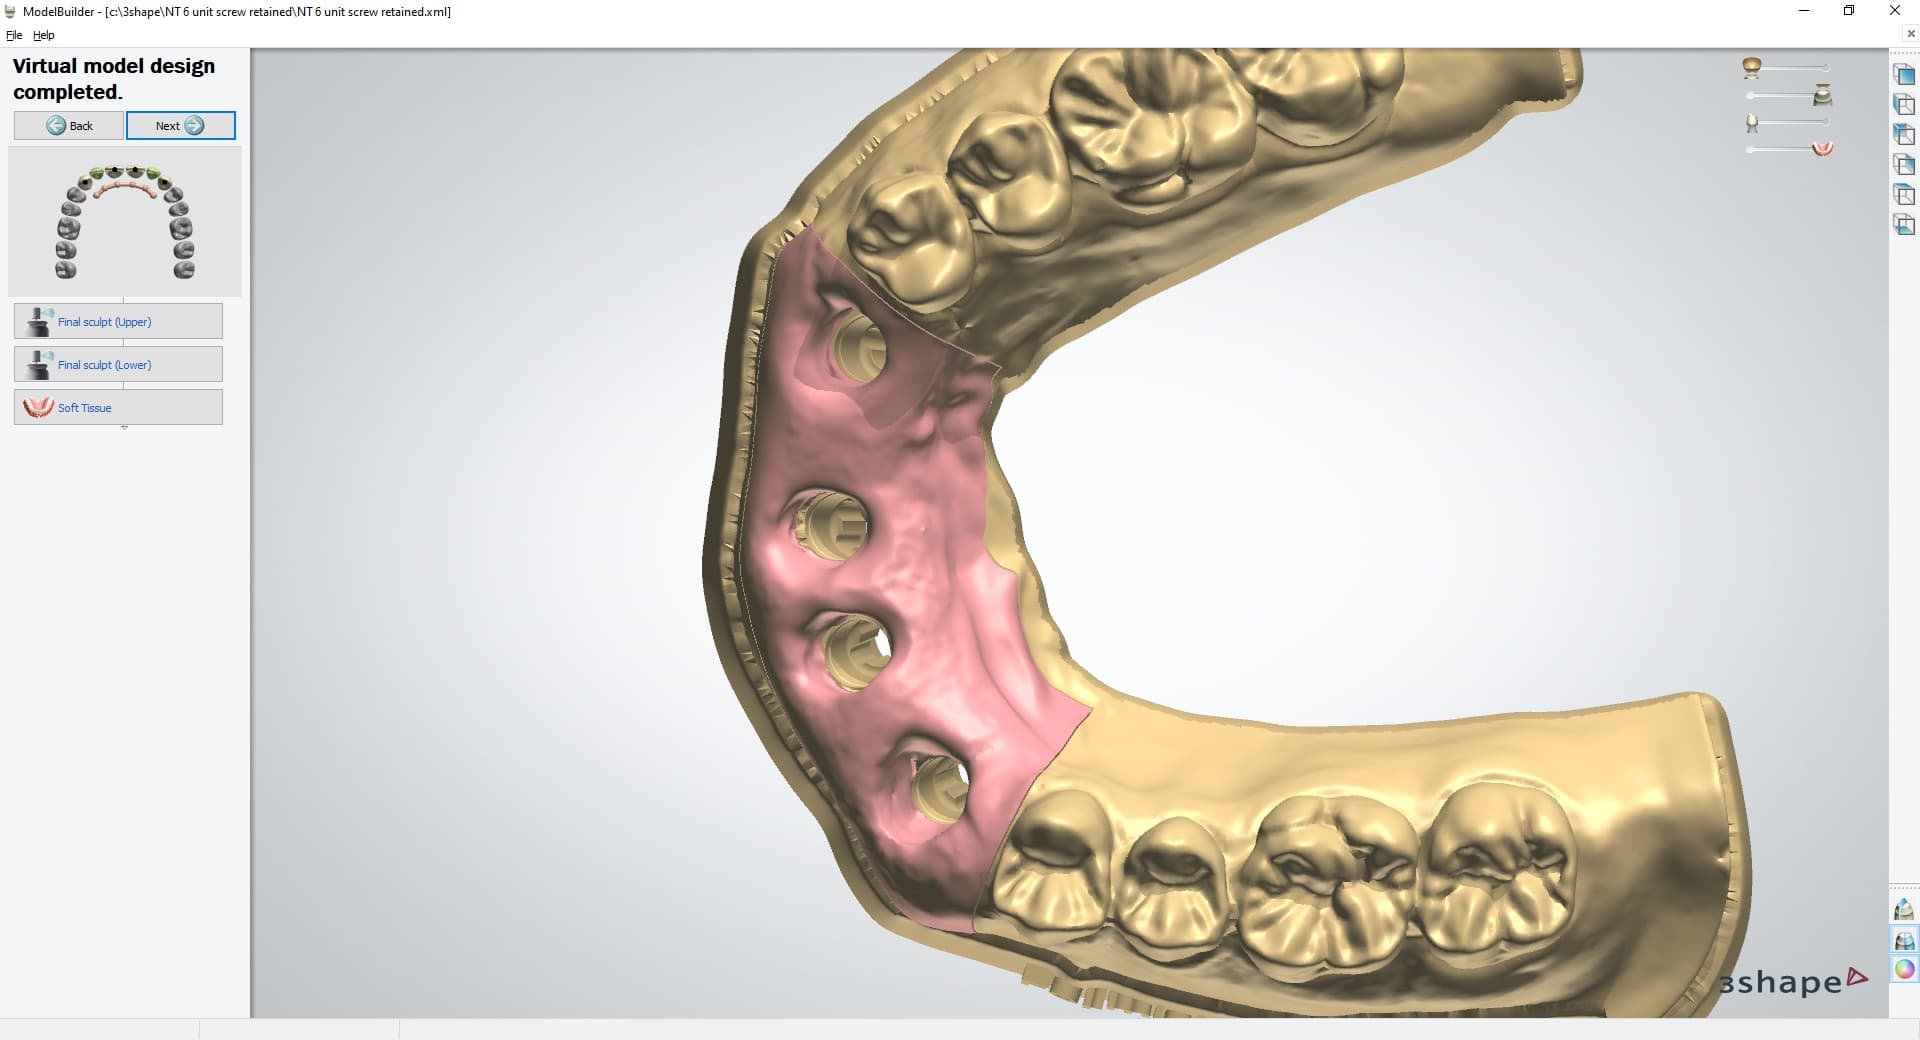
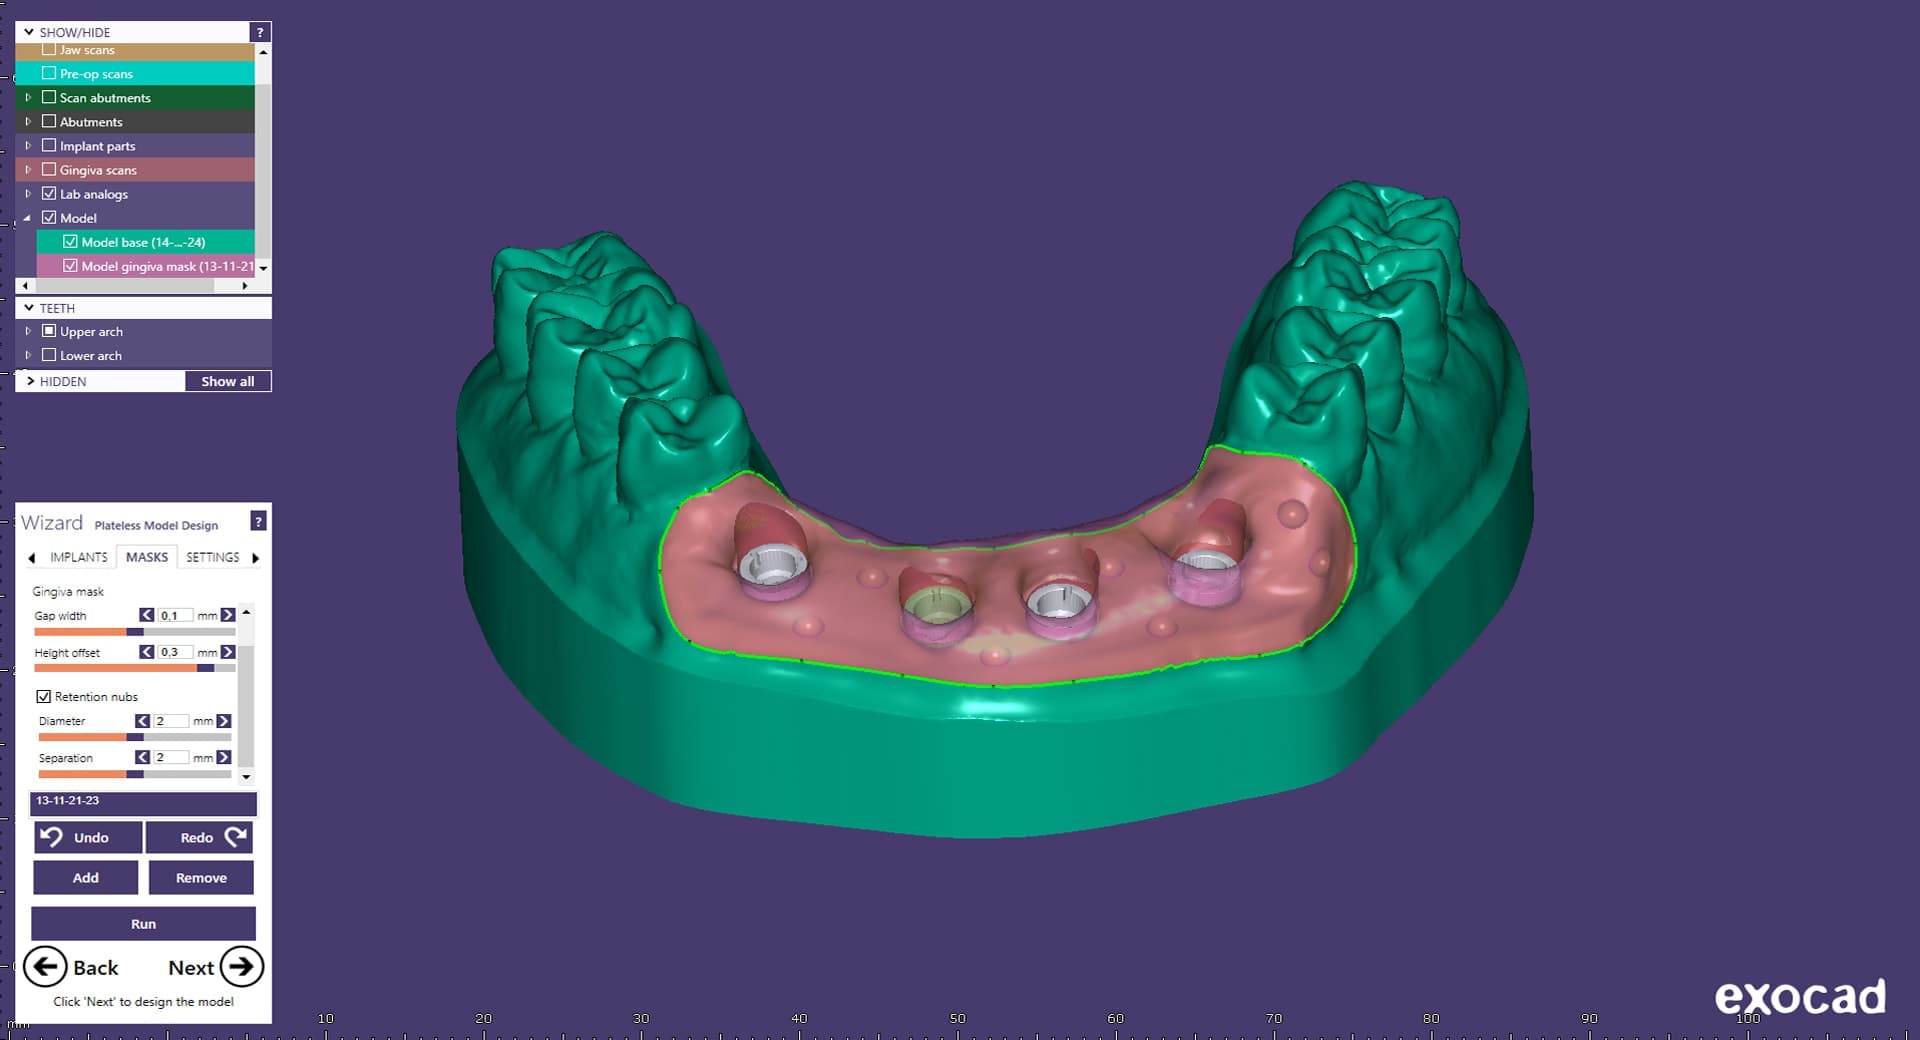
2. Design
2.1 Design the Model With Gingiva Mask or Soft Tissue
General CAD construction requirements:
-
For accurate anatomy, a minimum wall thickness of 1 mm is recommended.
-
Start with the default settings in 3Shape or exocad.
-
If designing a mask with a flat bottom, incline the mesial and distal sides to create undercuts for improved retention.
2.2 Export the STL File
Once the case has been designed, locate your designed part. The output file should be in STL or OBJ format for PreForm. Locate the file and open it in PreForm Dental print preparation software.
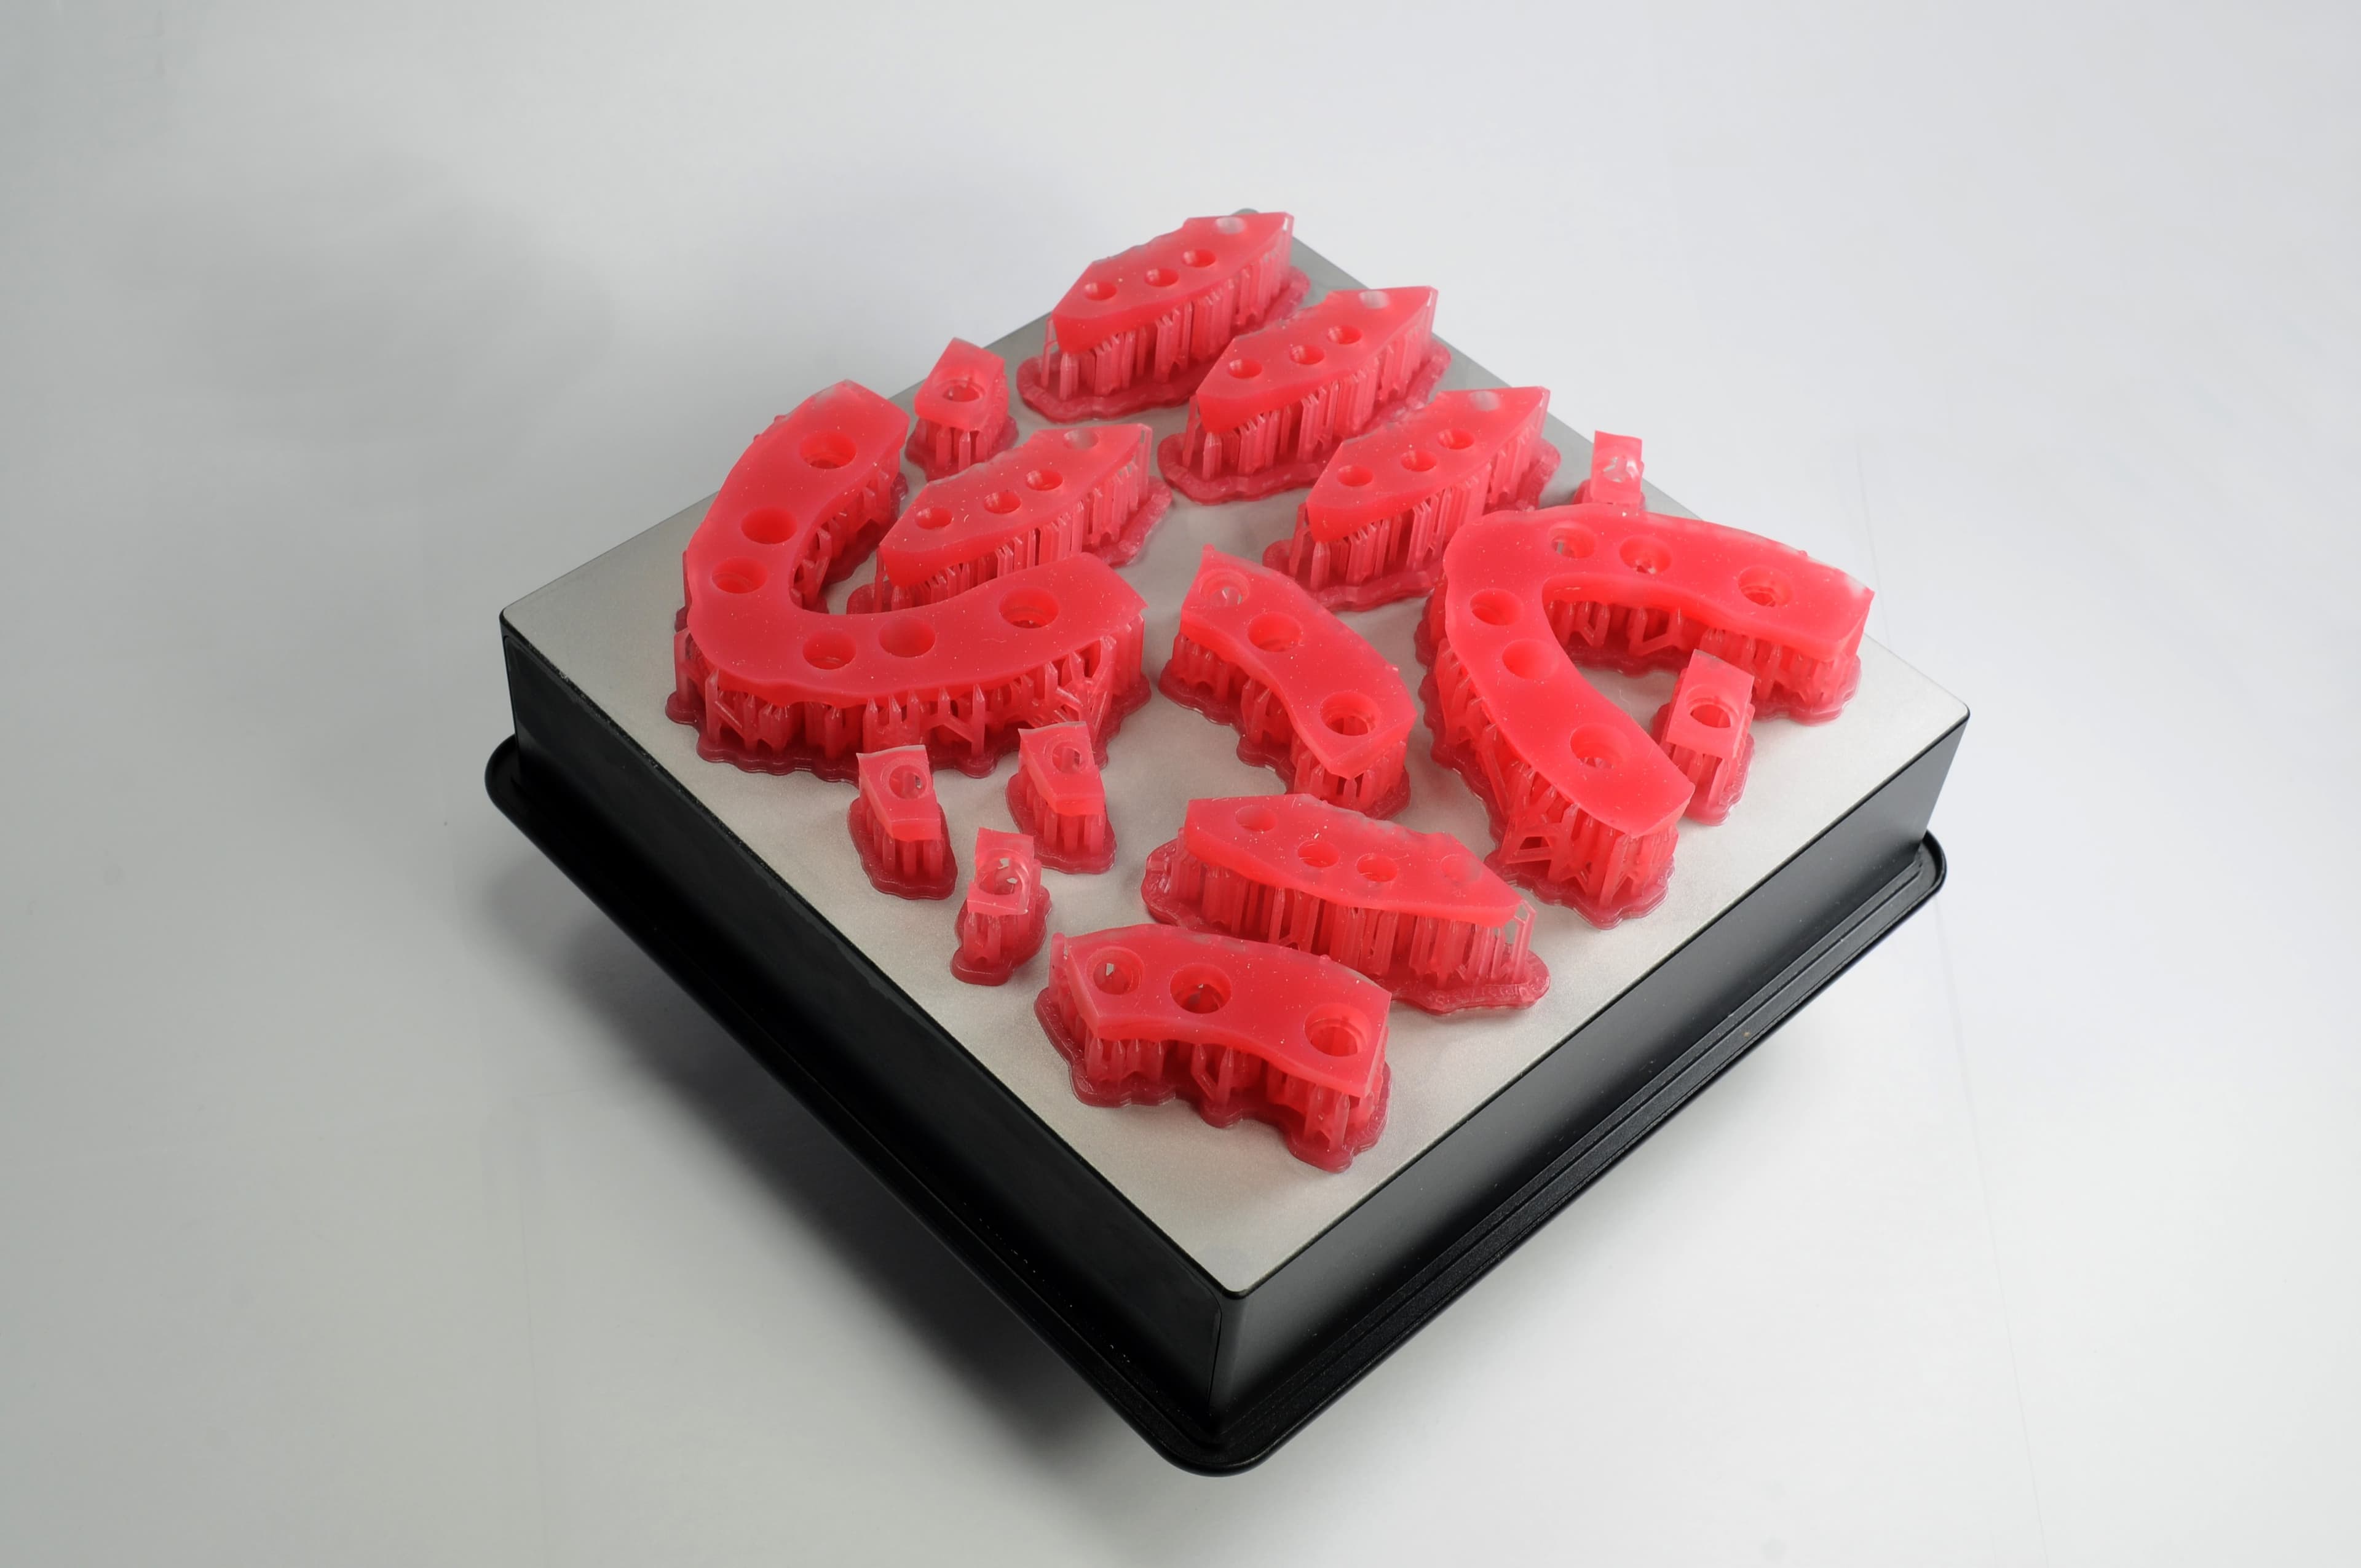
3. Print
Note:
If you are new to PreForm Dental software, please refer to this playlist on our YouTube channel.
3.1 Select Material
Select the material for printing by clicking the printer box in the Job Info menu on the right-hand side.
Flexible 80A Resin is listed under engineering materials. If you don’t see it, you might have to click on Engineering (1) in the material selection menu. Choose Flexible 80A Resin (2) with the default settings.
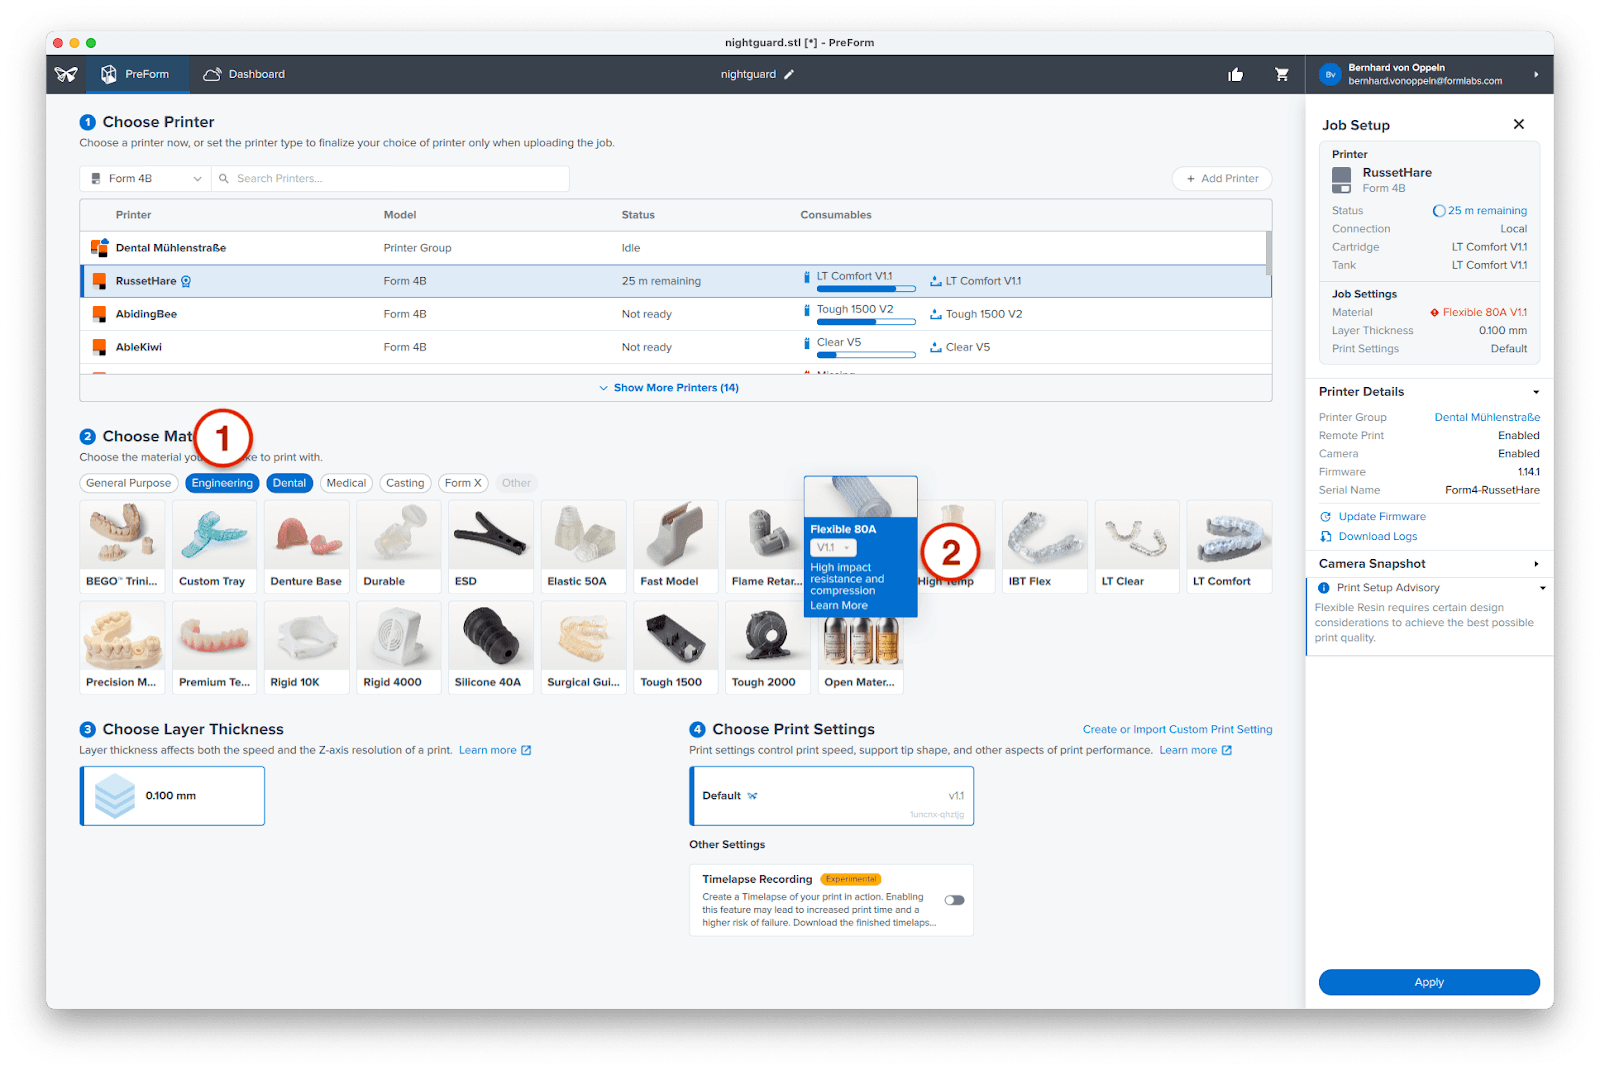
Note:
We use the print parameters of Flexible 80A Resin for printing soft tissue. Consequently, your printed parts will be displayed in light grey (the color of Flexible 80A Resin) despite the resin actually being pink. Please be aware that this discrepancy is expected.
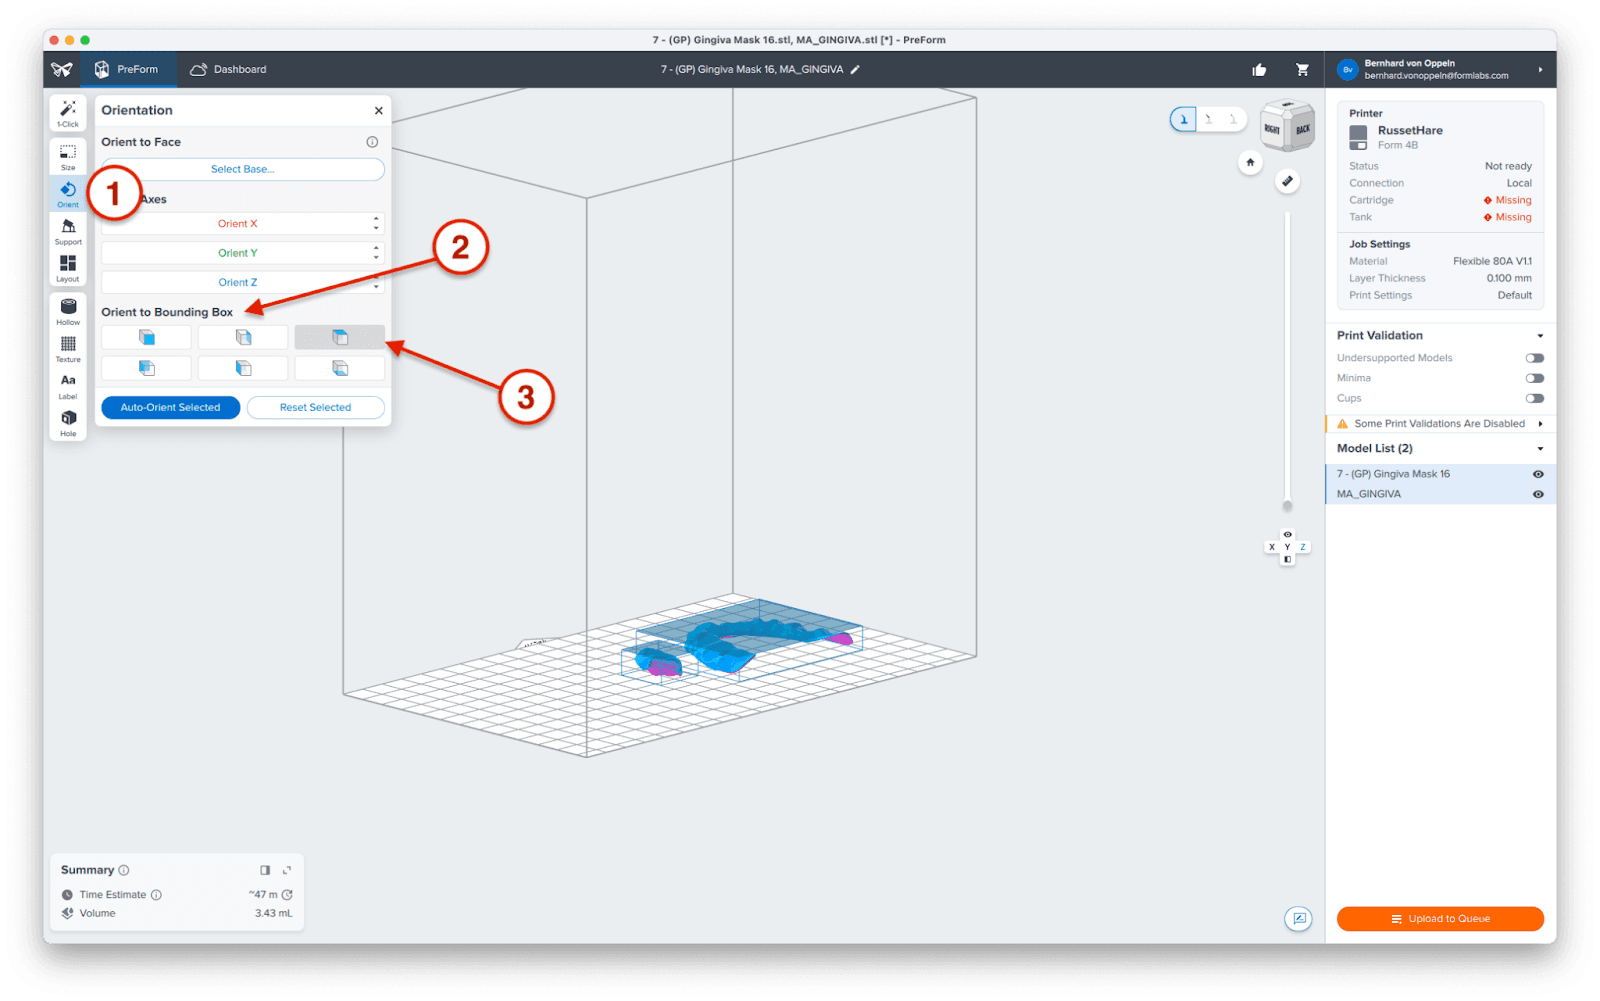
3.2 Orientation
Import your parts by clicking File > Open and selecting your parts, or by directly dragging and dropping them into the PreForm workspace.

Now, we need to correctly orient the parts for printing.
As with the example above, flip the parts so that the occlusal side faces the platform, and all fitting surfaces face away from it. This ensures that support structures will not be generated on the faces that will be against the dental model, for a better fit.
One easy way to achieve this is to use the Bounding Box (2) feature from the Orient (1) menu. Select the symbol (3) that corresponds to flipping the part upside down or manually orient your part.
3.3 Generate Supports
Open the Supports (1) tool on the left side of PreForm and click the Auto-Generate Selected (2) or Auto-Generate All button to automatically generate supports.
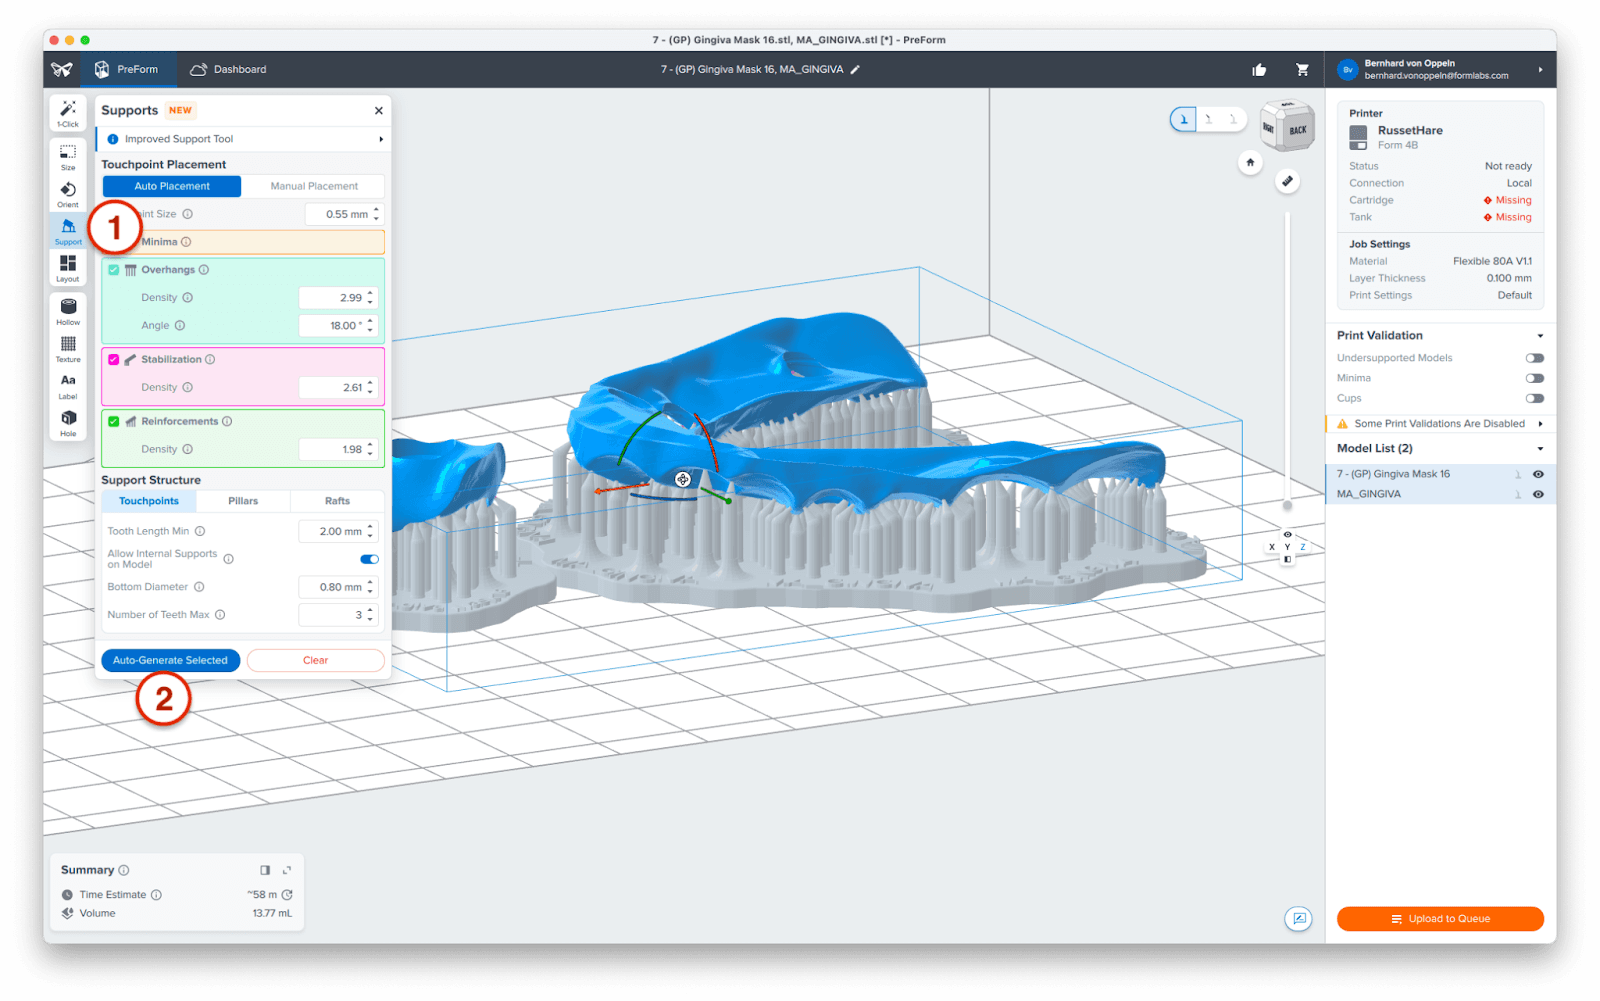
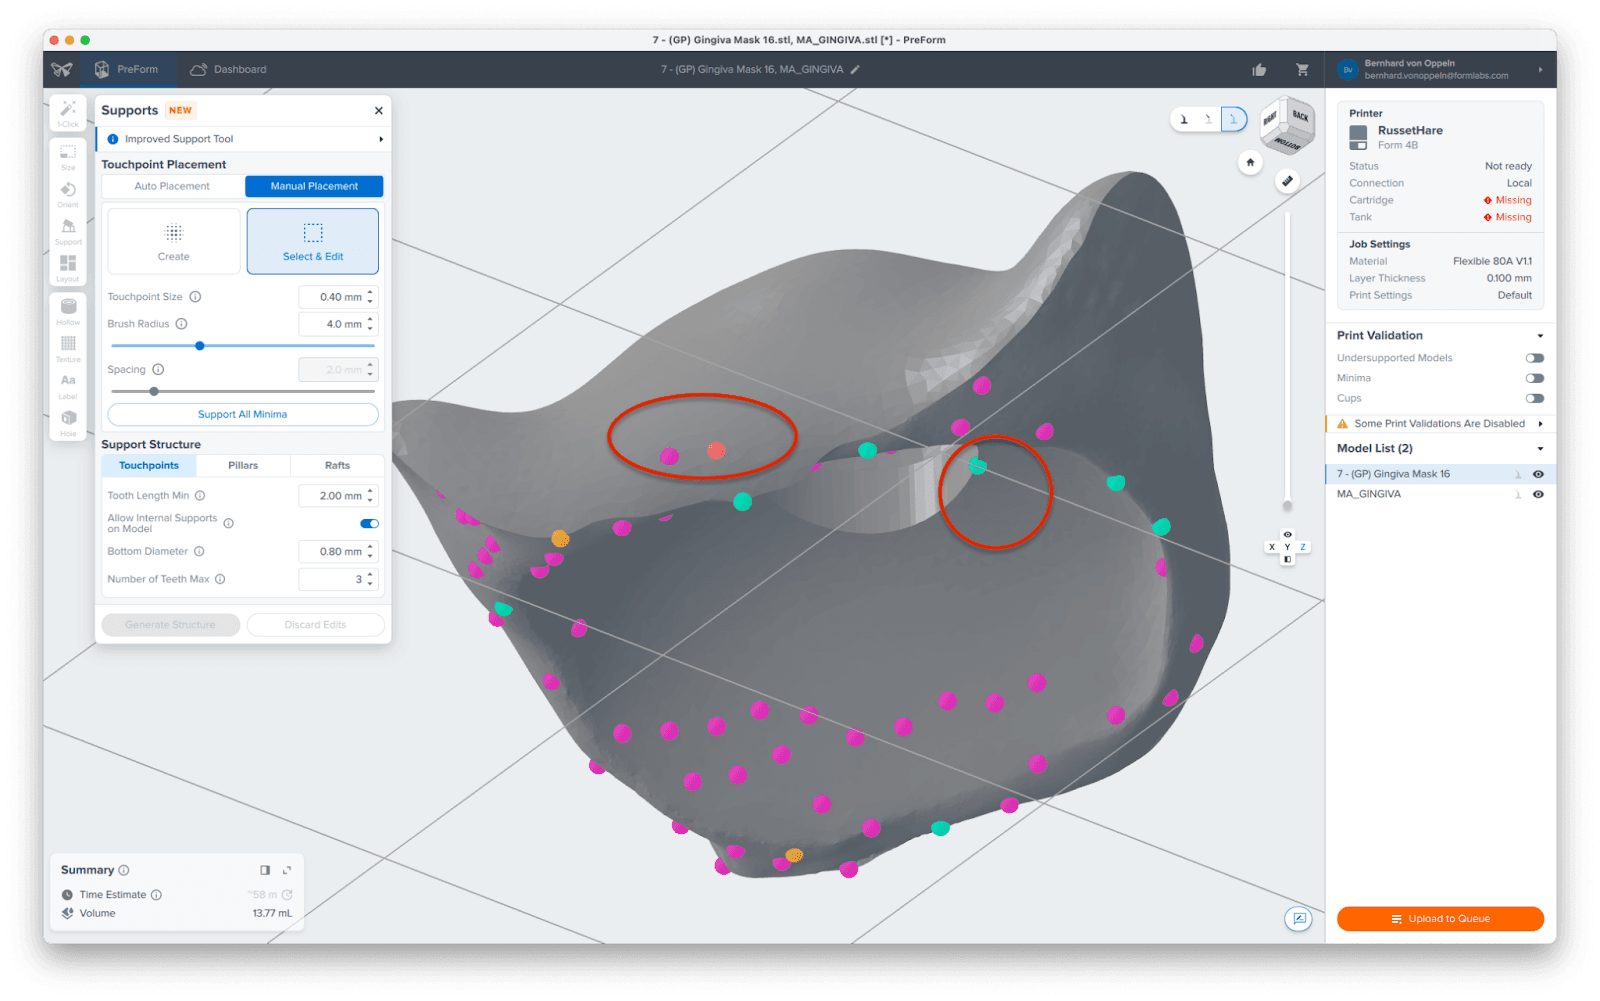
Under Touchpoint Placement, switch to Manual Placement and select Select & Edit. Inspect the support locations and change or remove any touchpoints that interfere with fitting surfaces to facilitate post-processing, while carefully watching the Print Validation checks in the right-hand bar. Don't worry about the high number of supports, they are here to make your print reliable.
Finally, click on Print Now or Upload to Queue in the lower right corner to upload the print job to your printer.
3.4 Set Up the Printer
Shake the Flexible 80A Resin cartridge, then insert the cartridge, a build platform, and a compatible resin tank into your Formlabs SLA 3D printer.
-
Begin printing by selecting the print job from the printer’s touchscreen.
-
Follow any prompts or dialogs shown on the printer screen.
-
The printer will automatically complete the print.
4. Post-Process
Always use gloves when handling uncured resin and parts.
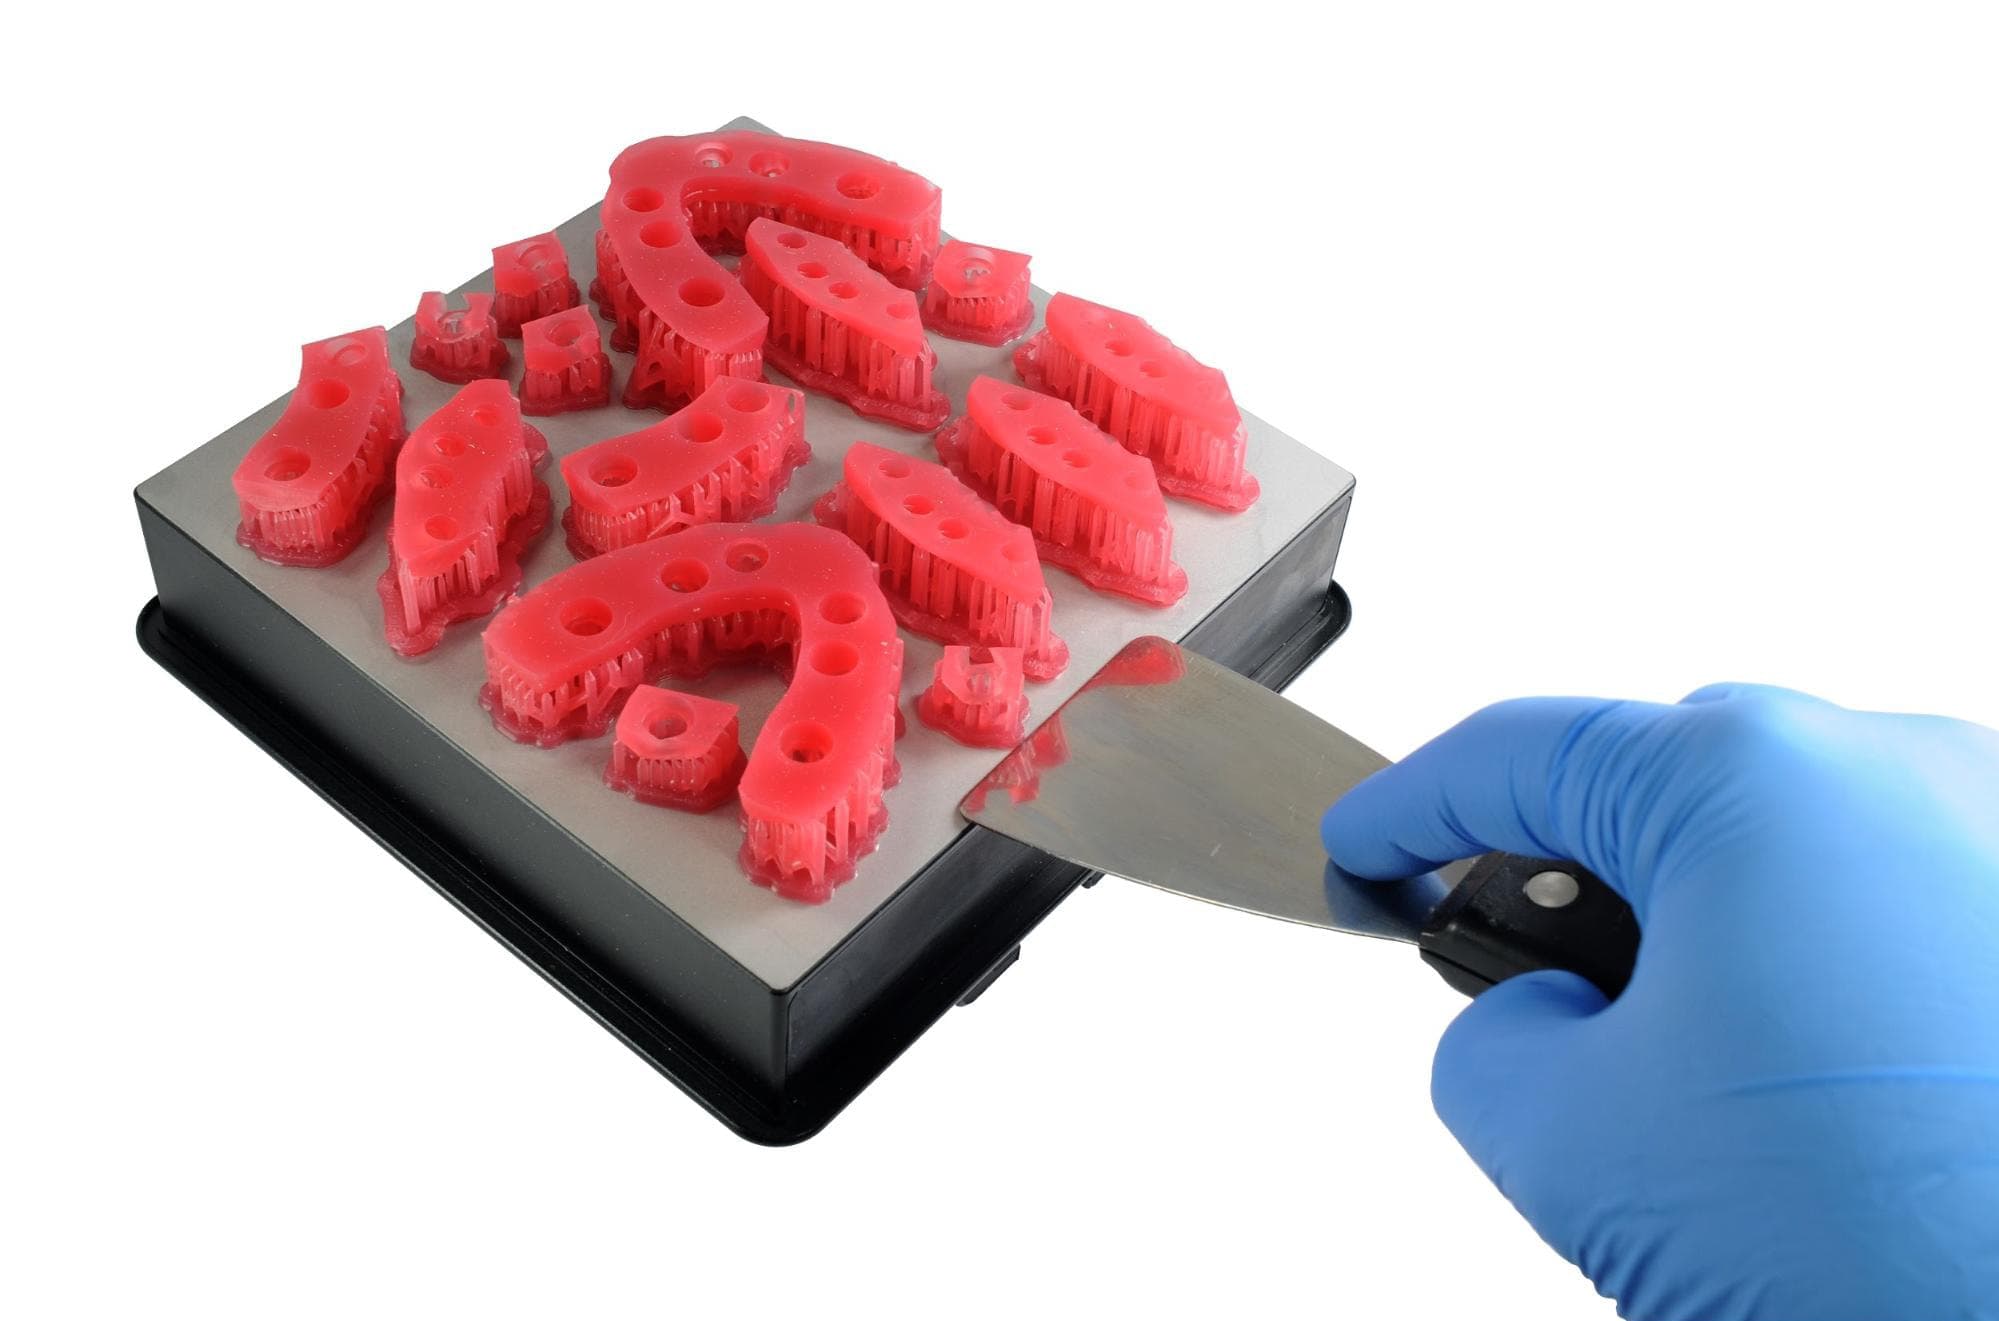
4.1 Part Removal
Remove printed parts from the build platform by wedging the part removal tool or the scraping tool under the part raft and rotating the tool.
4.2 Washing
Precautions
-
When washing the printed part with solvent, it should be in a properly ventilated environment with protective masks and gloves.
-
Expired or unused Flexible 80A Resin shall be disposed of in accordance with local regulations.
-
Isopropyl alcohol (IPA) shall be disposed of in accordance with local regulations.
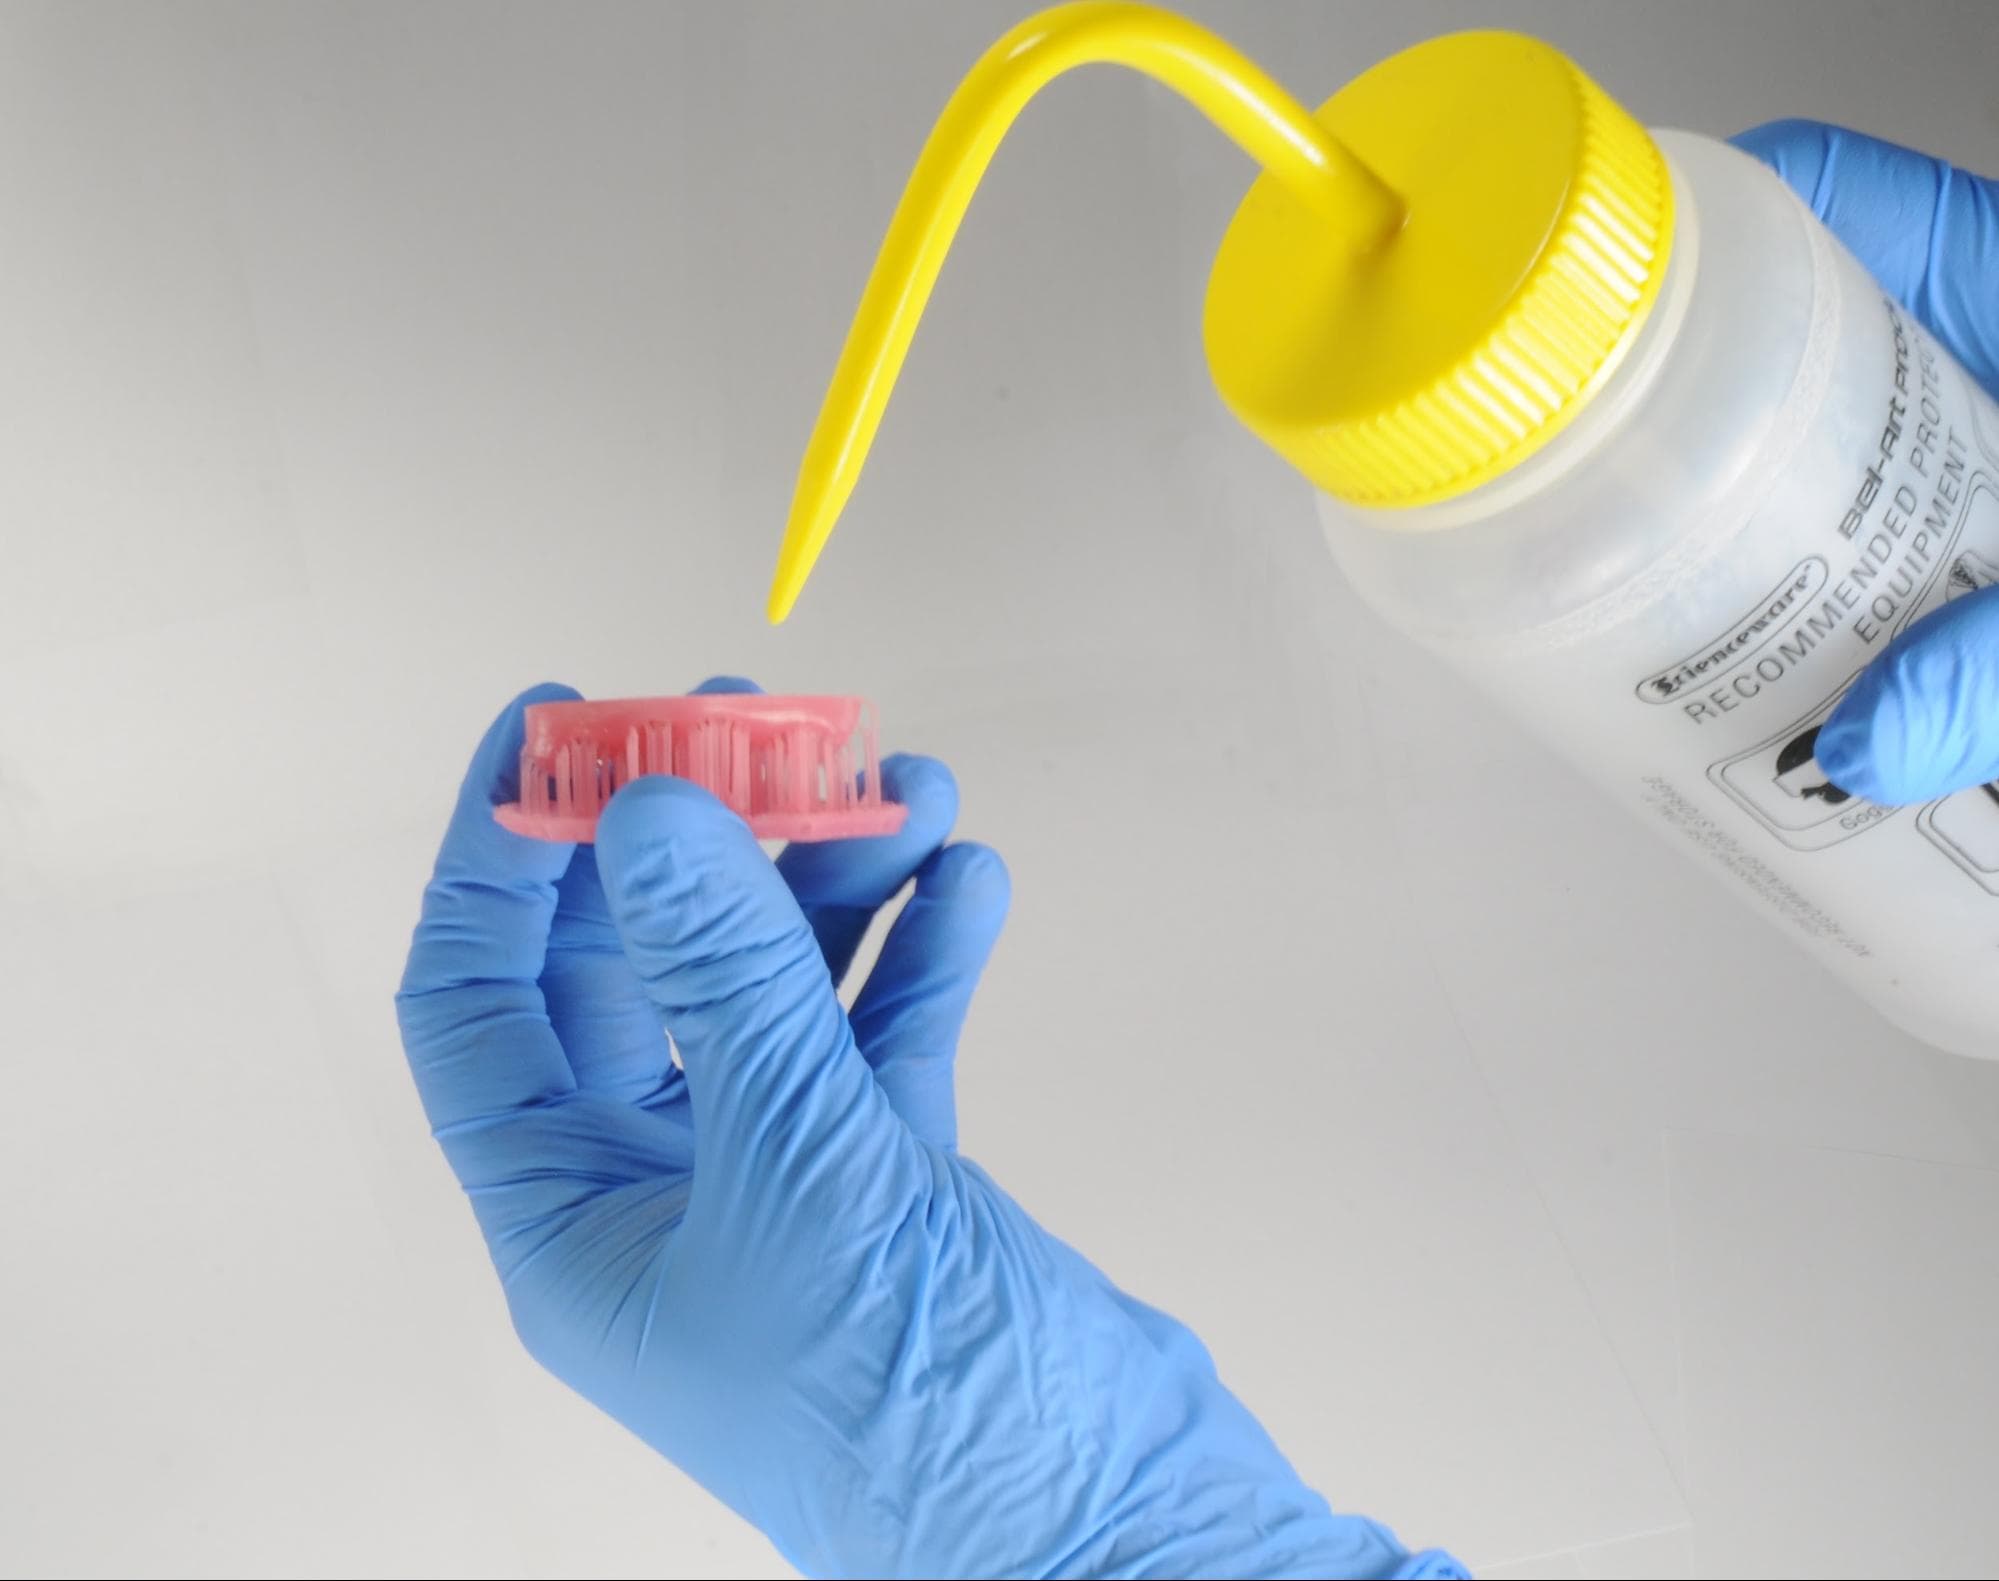
Place the printed parts in a Form Wash filled with isopropyl alcohol (IPA ≥90%) and wash them for 10 minutes.
A second 10-minute wash in fresh isopropyl alcohol (IPA ≥90%) is required. This wash can be completed manually in a Finish Kit bucket or in a second Form Wash.
Make sure the parts are fully submerged in IPA when washing.
Exceeding wash duration may affect the dimensional accuracy and performance of printed parts over time.
4.3 Drying
Remove the parts from the IPA and leave them to air dry at room temperature for at least 30 minutes.
Compressed air can also be used to dry parts followed by 15 minutes of bench drying.
Inspect printed parts to ensure that parts are clean and dry.
Before proceeding to subsequent steps, ensure no residual alcohol, excess liquid resin, or residue remain on the surface.
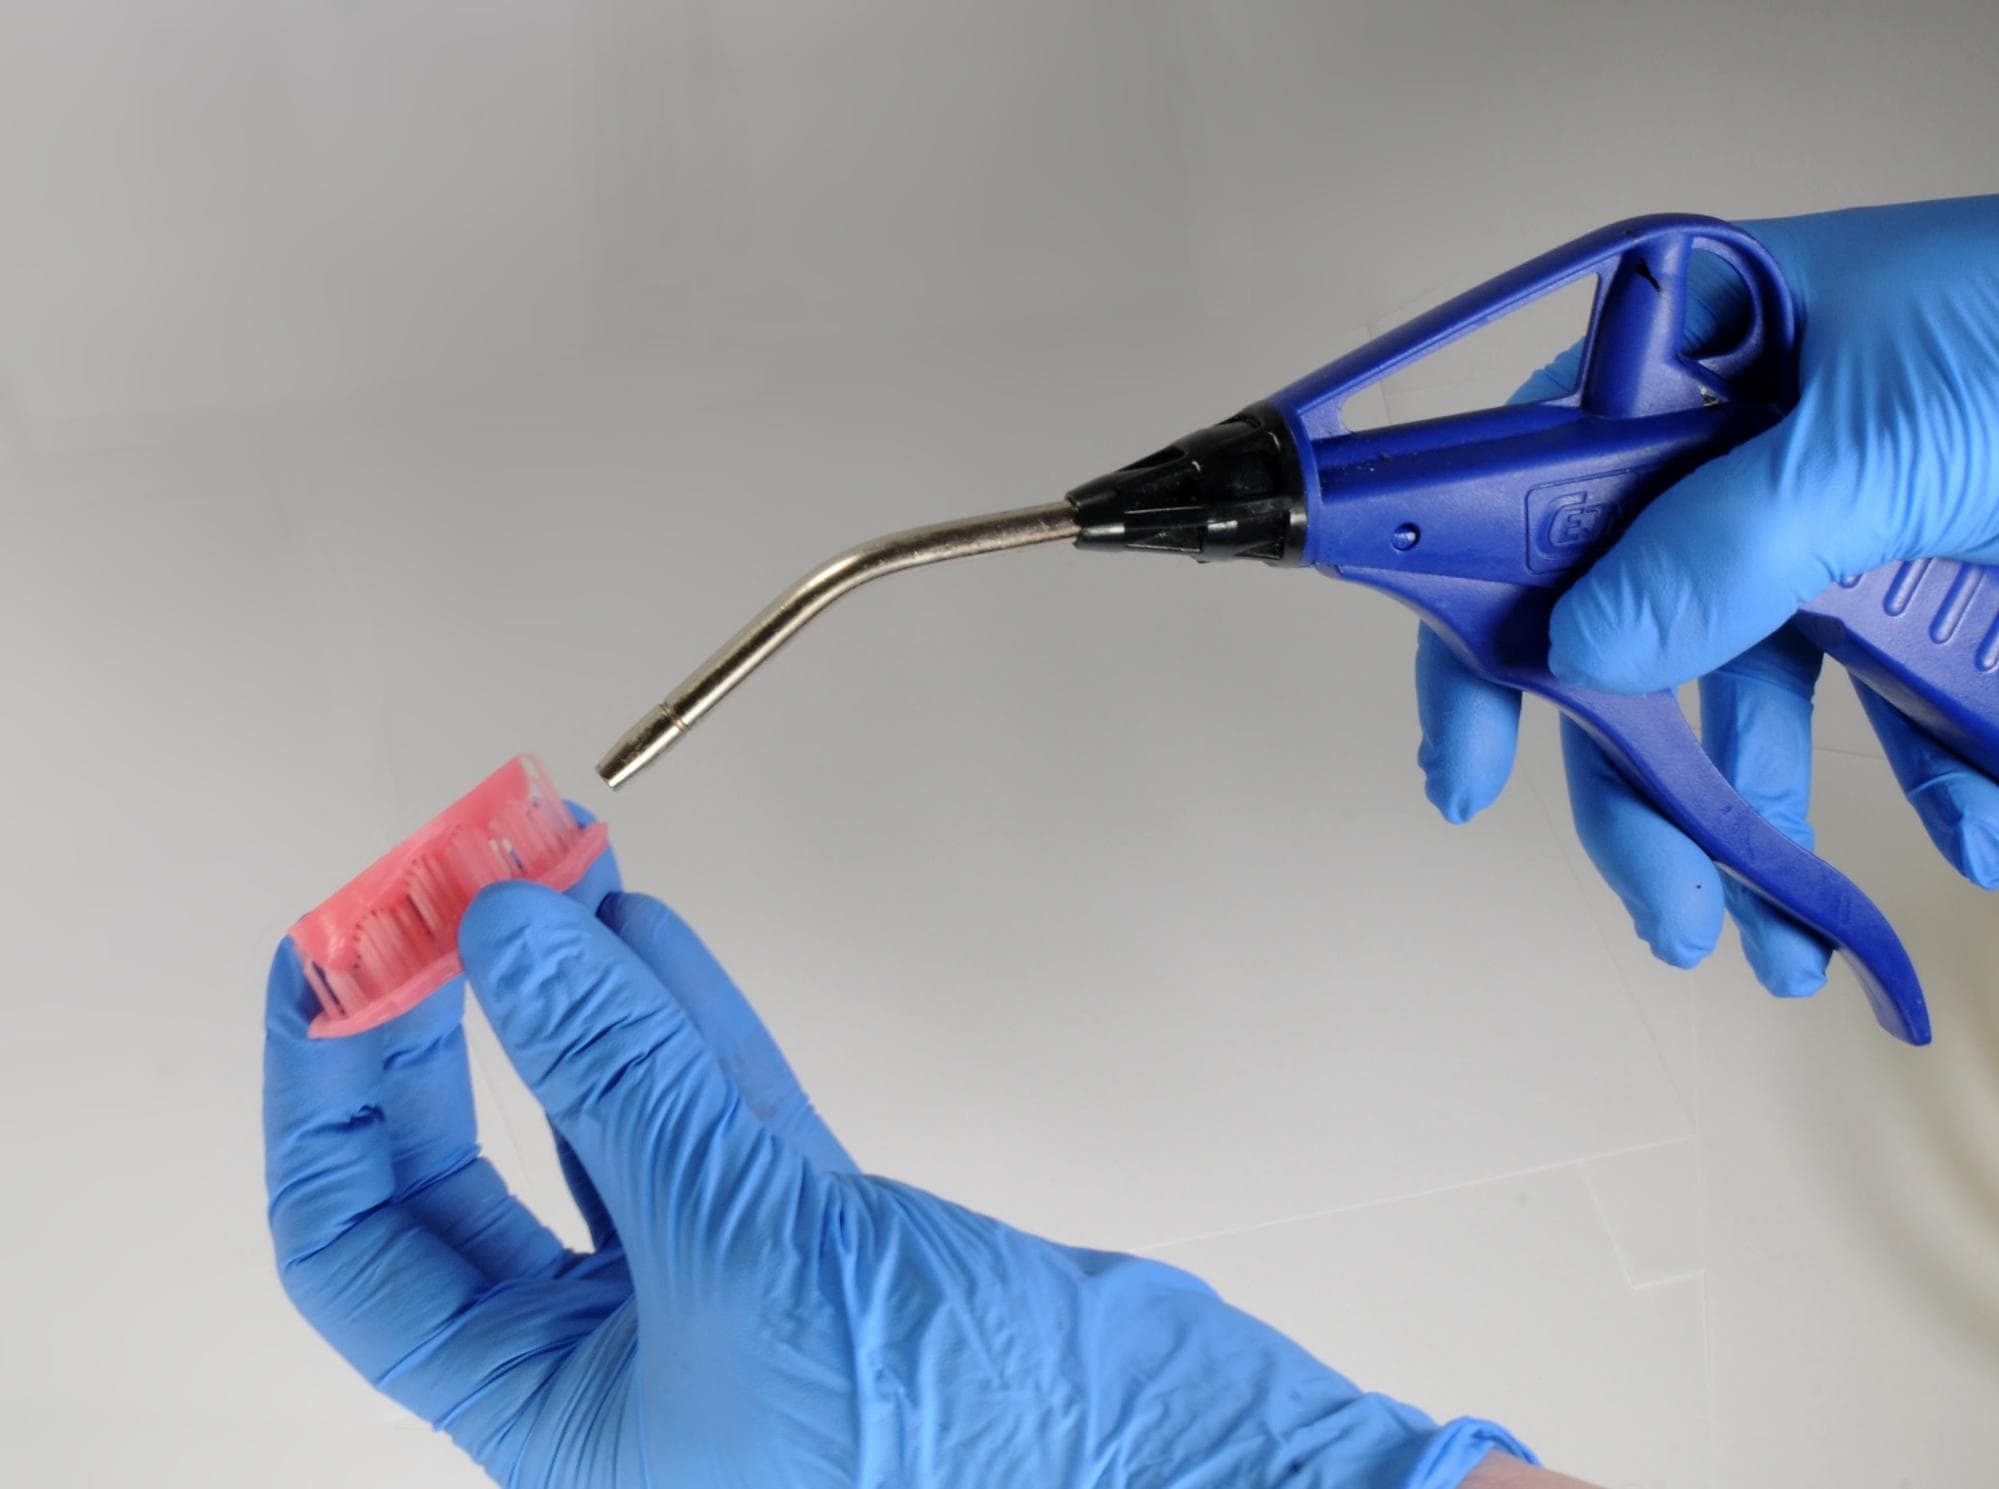
If any wet, uncured resin is still present after drying, use a squeeze bottle with fresh IPA to remove uncured resin and then air-dry the parts again.
4.4 Post-Curing
Follow the curing instructions described in the Flexible 80A Resin instructions for use.
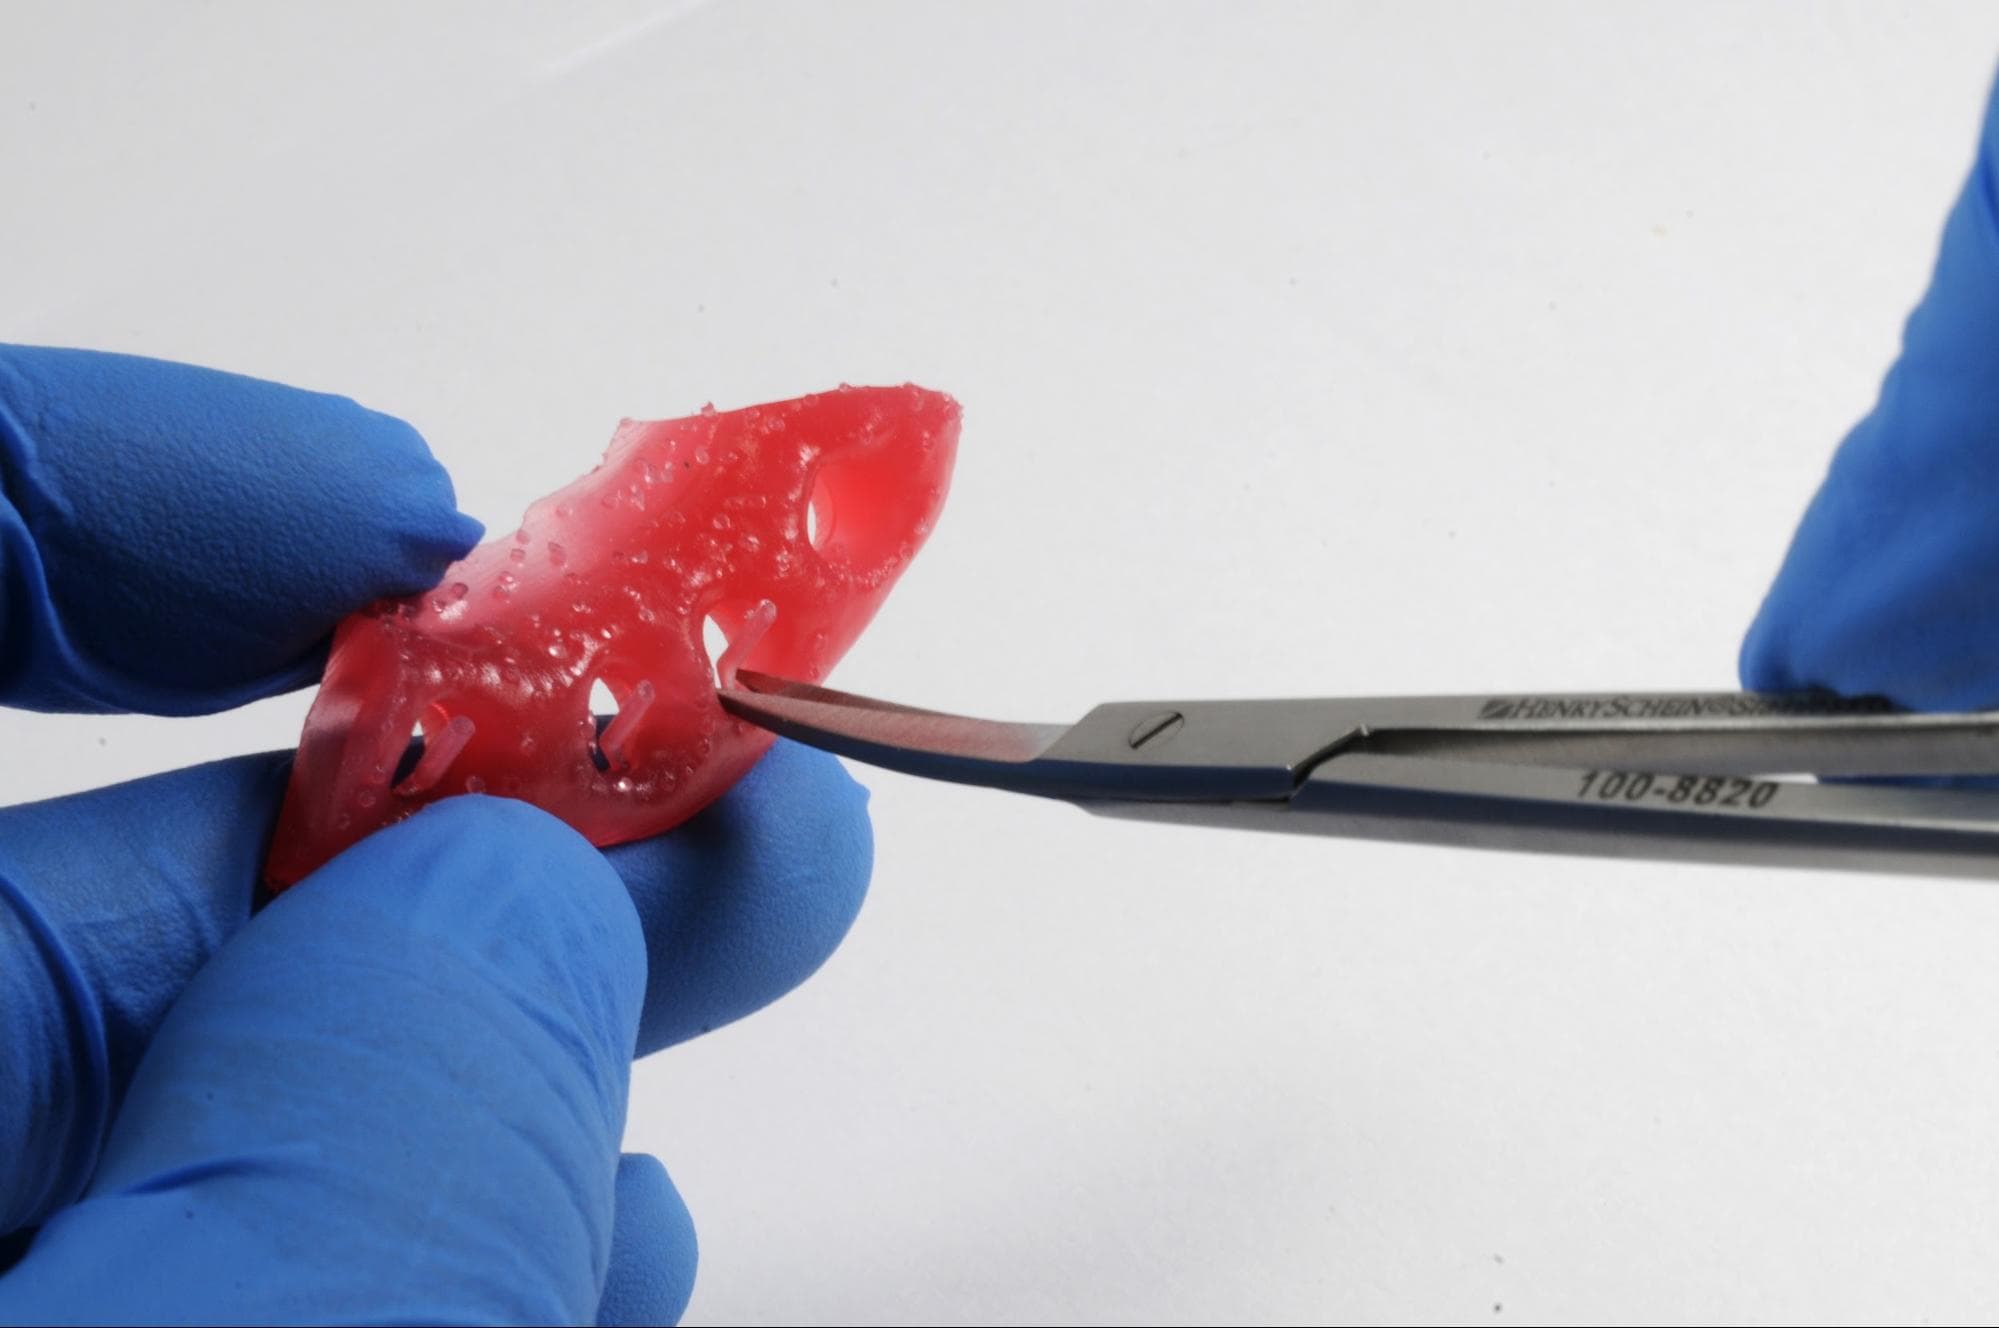
4.5 Remove Supports
Remove supports using the clippers provided in the Formlabs Finish Kit or scissors.
Note:
While ripping the supports from the part might be quicker, this can leave divots in the part. We recommend cutting the supports off individually.
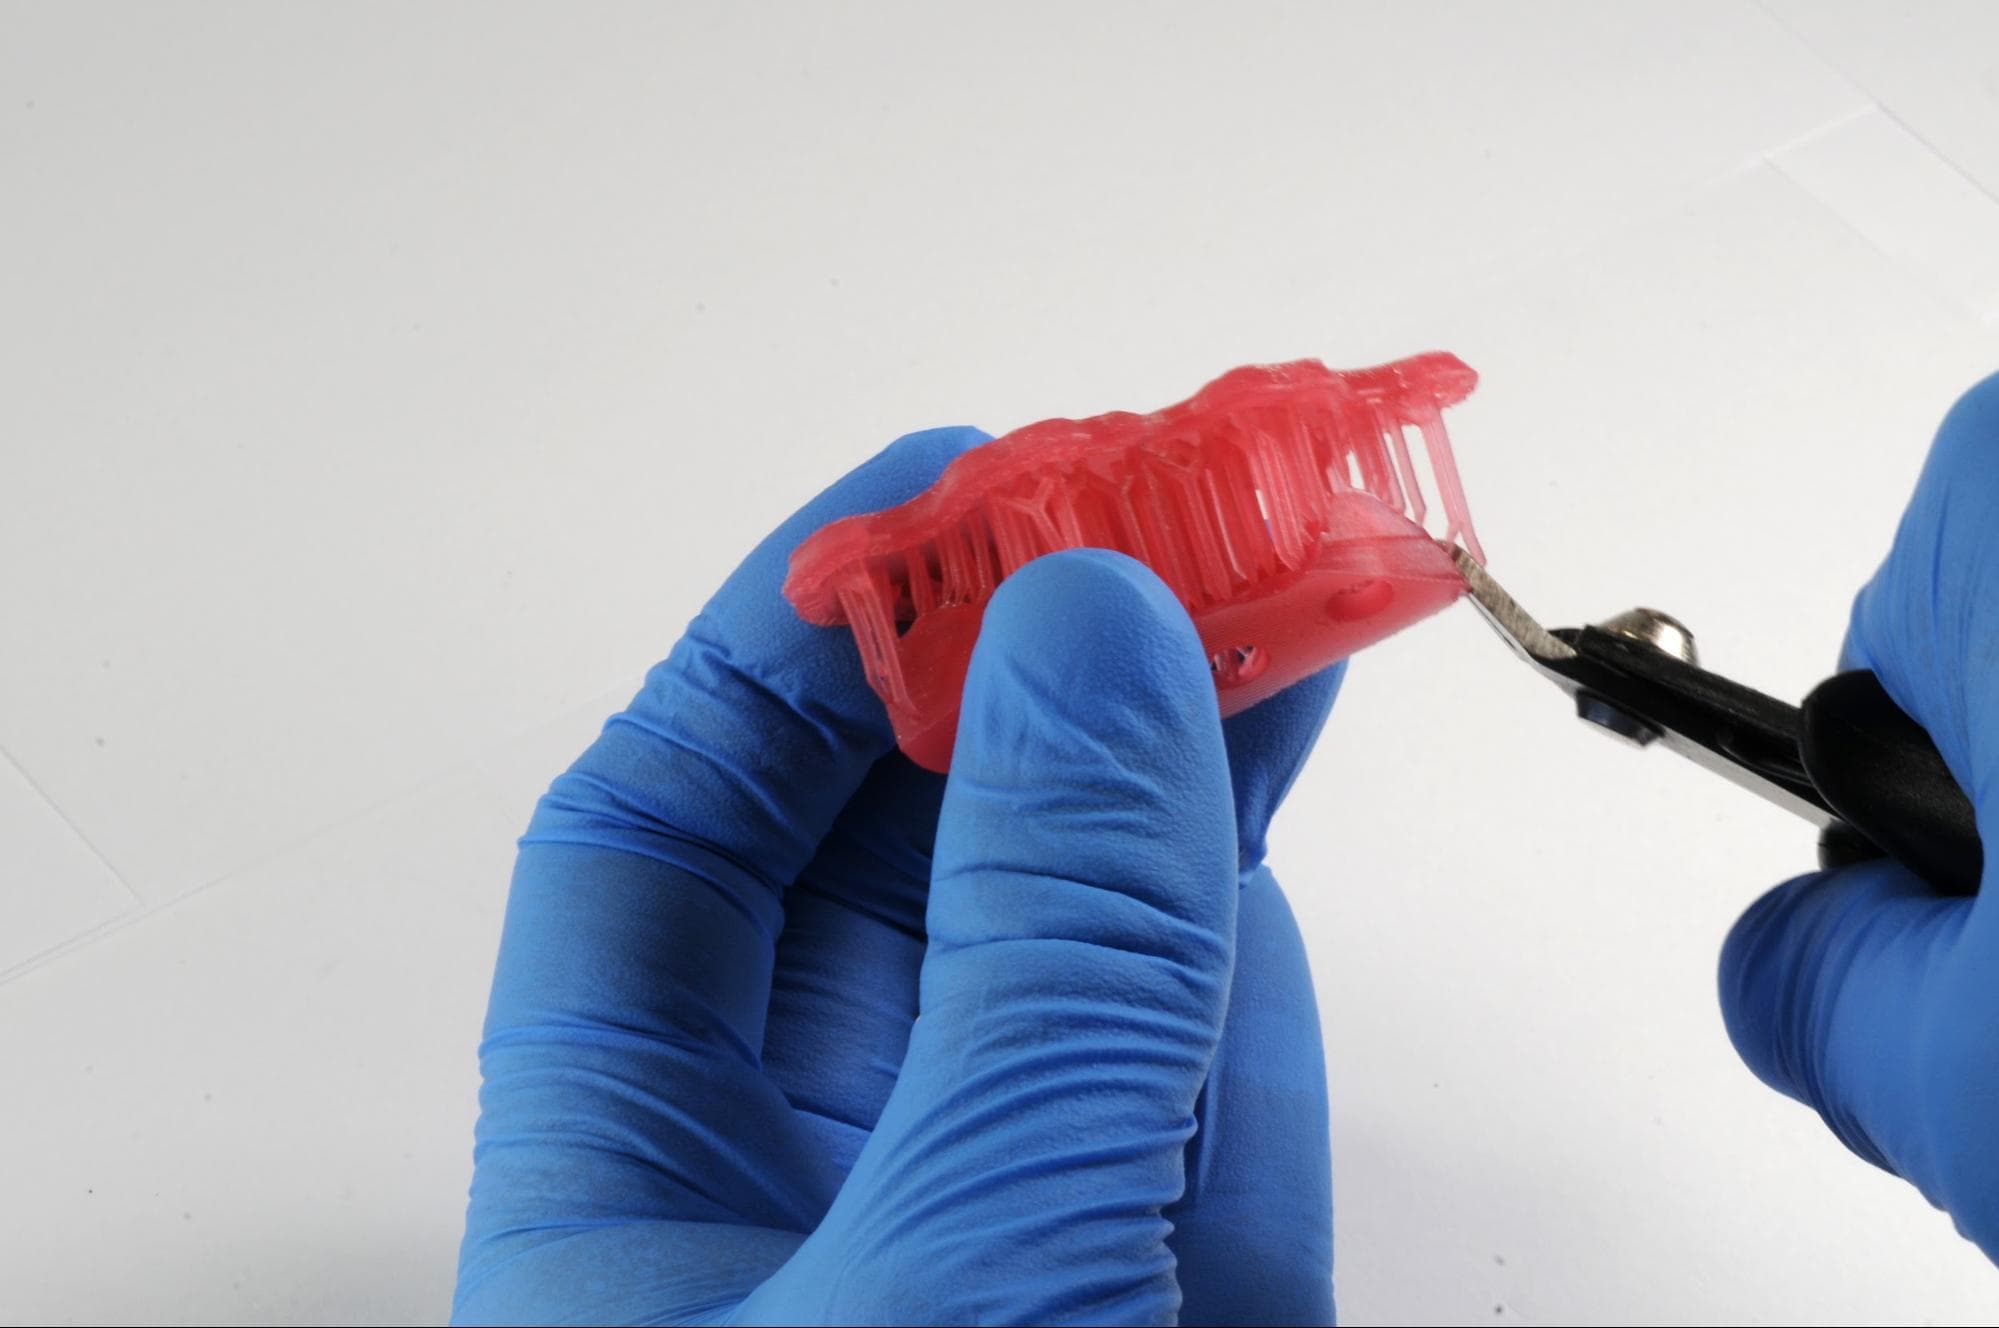
Small, sharp scissors can be used to cut the supports closer to the part as a second step. To remove supports on internal areas, we highly recommend using curved Iris scissors.
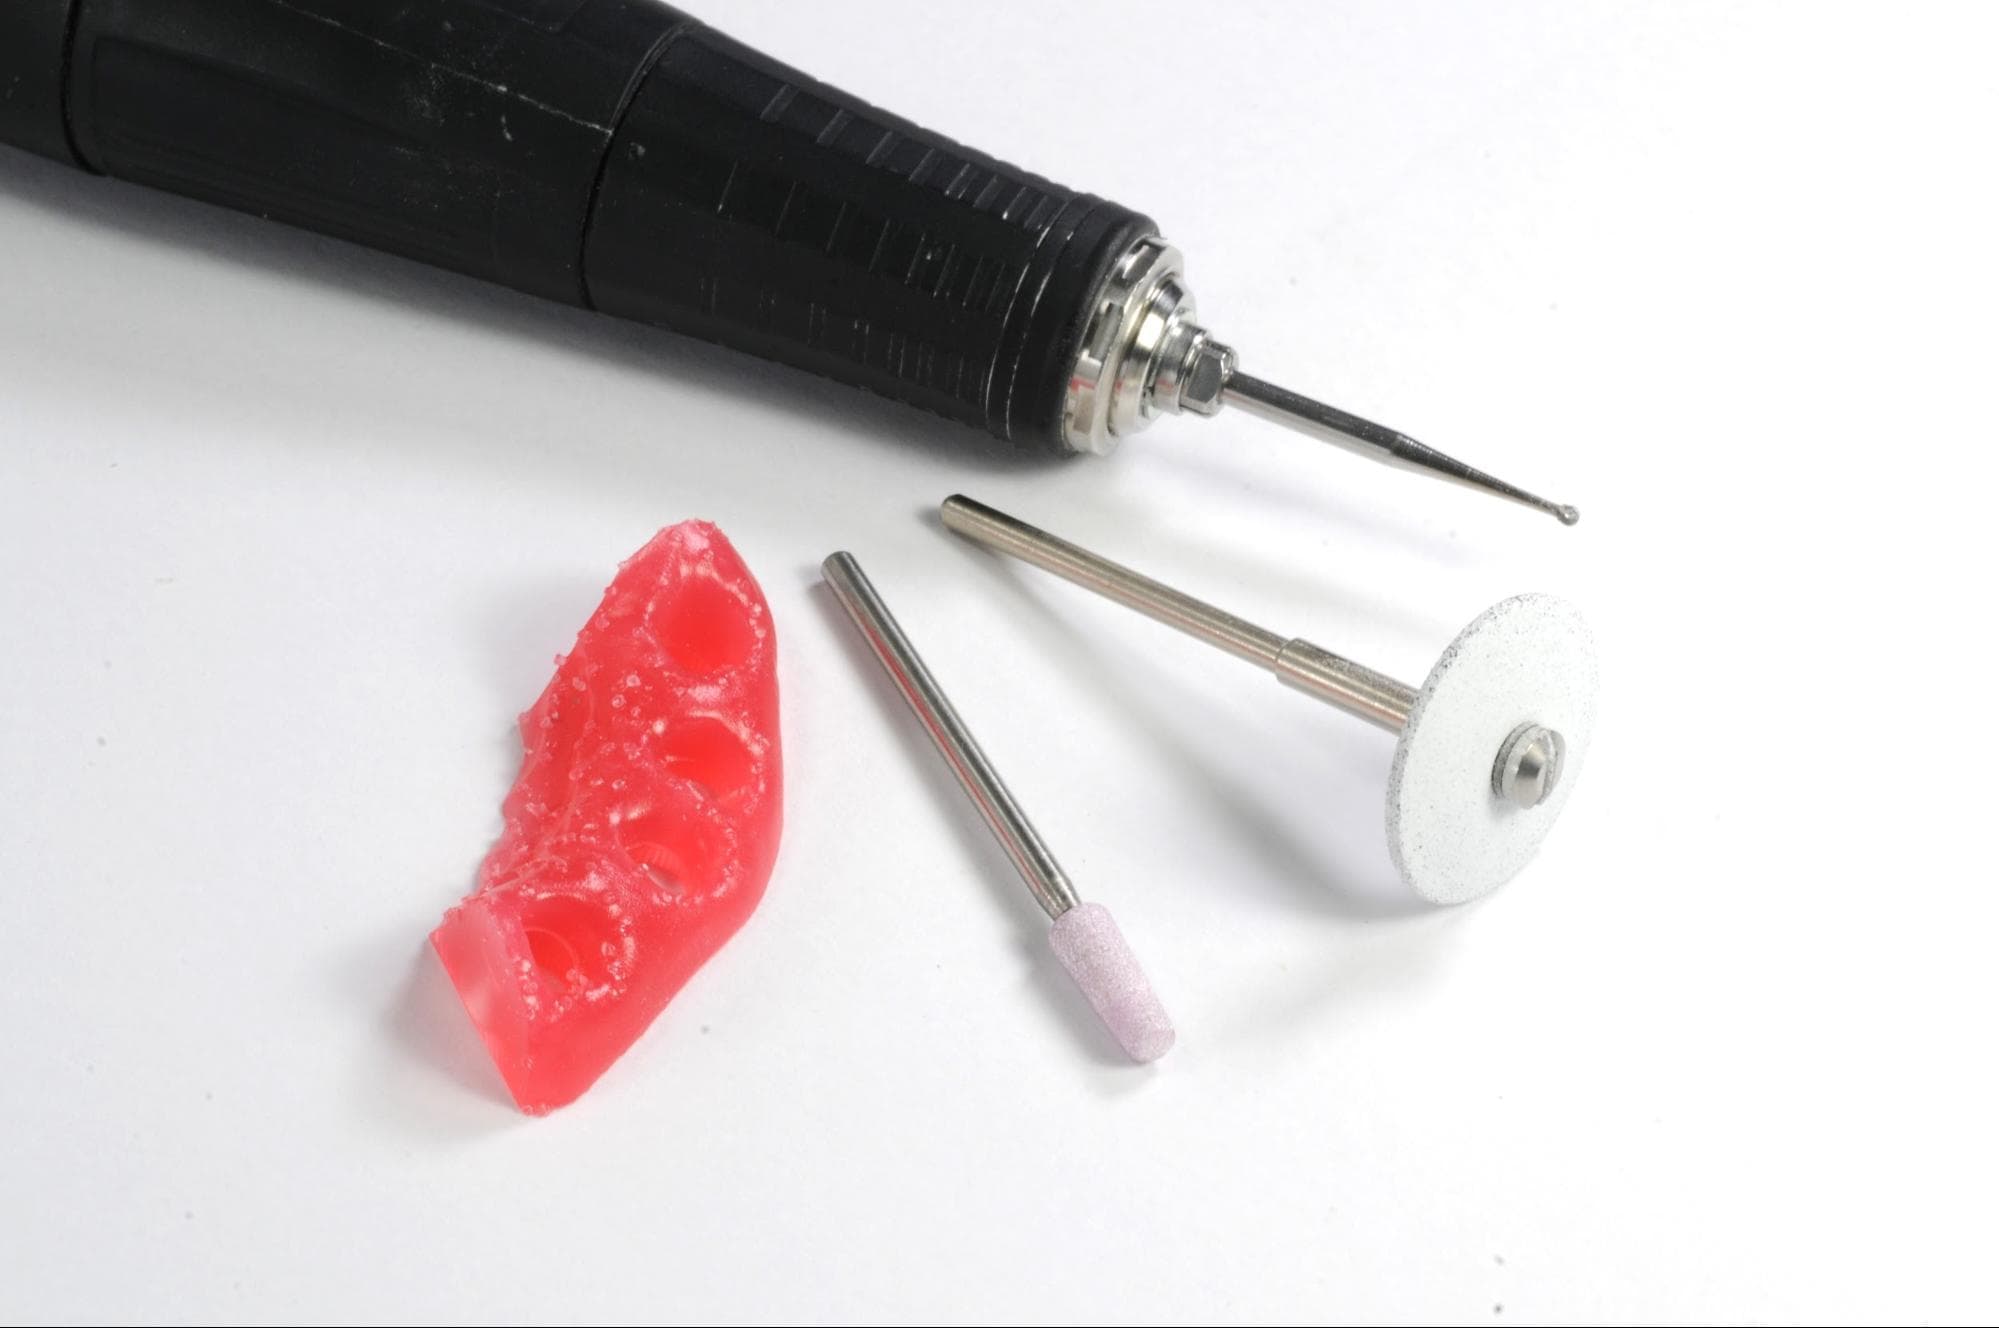
4.6 Finish
The printed soft tissue gingiva mask, with a Shore A hardness of 80, is quite firm. This firmness is intentional, as it facilitates easier grinding and cutting, which may be necessary to smooth down the rough marks left after support removal or to shape the emergence profile for aesthetic implant restorations. Use a universal silicone wheel or a carbide cutter designed for soft materials to smooth down any rough support surfaces.
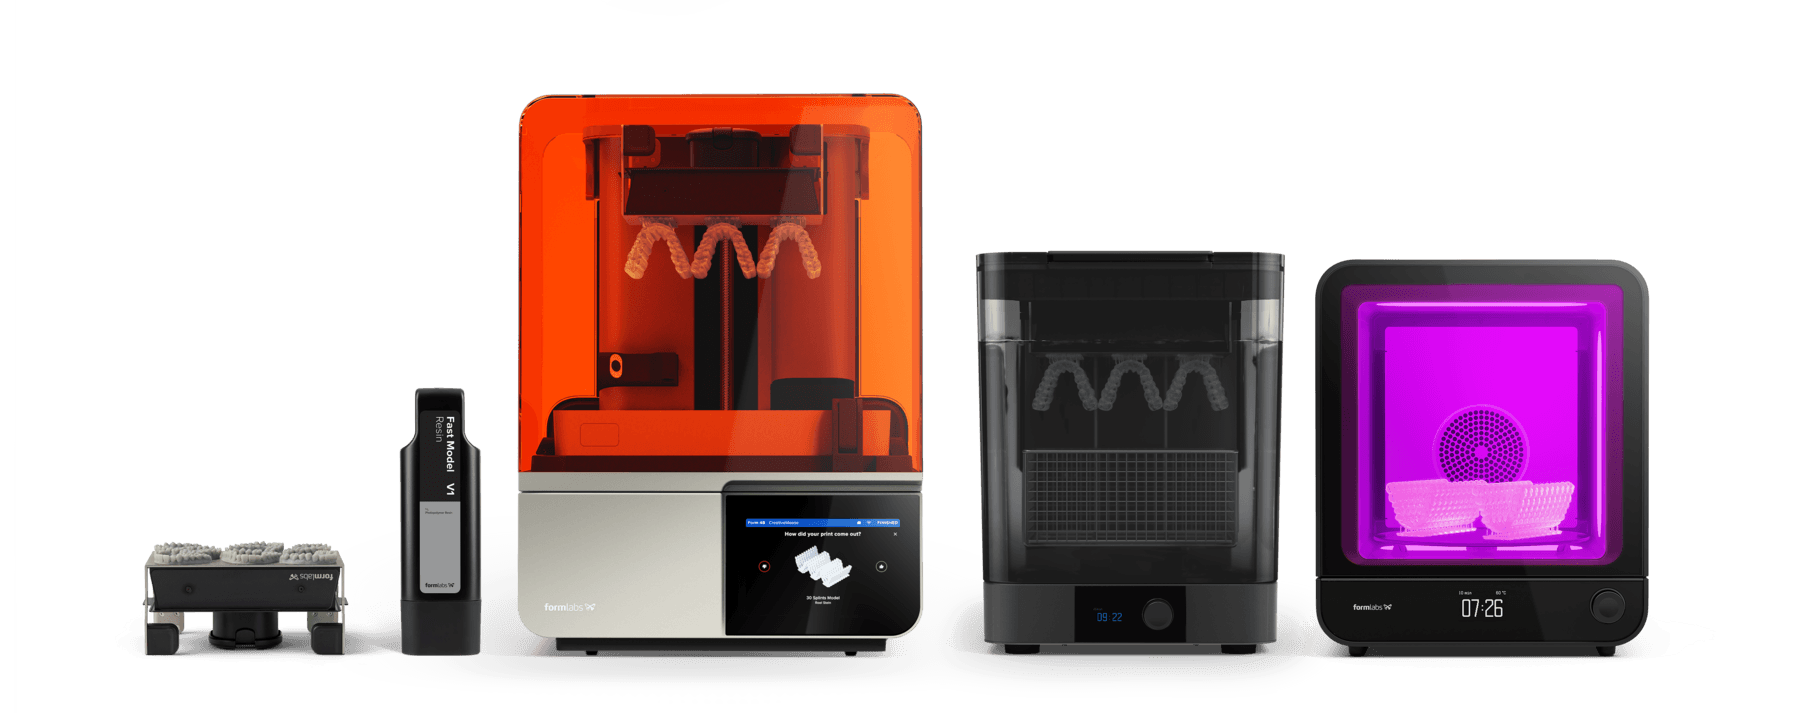
5. Formlabs Printer Compatibility for Flexible 80A Resin
6. Additional Resources
-
Flexible 80A Resin instructions for use
-
Flexible 80A Resin technical datasheet
-
Flexible 80A Resin safety datasheet
Explore Formlabs dental resources for in-depth guides. step-by-step tutorials, white papers, webinars, and more.
Dentistry Made Easier
Form 4B is a blazing fast dental 3D printer that offers the most diverse materials library for dentistry and orthodontics. Create high-quality dental models and biocompatible appliances fast, with easy workflows, leading reliability, and stunning part quality using the Form 4B ecosystem.