ATTENTION:
For full compliance and biocompatibility, Custom Tray Resin requires a dedicated Build Platform, and a dedicated Finish Kit or Form Wash, which should not be used with other Formlabs resins.

Formlabs Custom Tray Resin is a Class I biocompatible material for the direct and fast printing of custom impression trays.
This application guide demonstrates each step for making 3D printed custom trays on Formlabs SLA 3D printers. Use the following workflow to ensure precise results.
Formlabs Custom Tray Resin is a Class I biocompatible material for the direct and fast printing of custom impression trays.
This application guide demonstrates each step for making 3D printed custom trays on Formlabs SLA 3D printers. Use the following workflow to ensure precise results.
Essentials
Made by Third Parties:
Intraoral or desktop 3D scanner
Dental design software (CAD) or outsourcing to a design service or lab
Low-speed dental handpiece with cutting and finishing wheels
Polishing equipment and materials (optional)
Isopropyl alcohol (IPA) ≥ 99%
1. Scan
Dental design software requires a digital impression of the patient’s anatomy in order to design a custom tray. To acquire this data, scan the patient directly with a 3D intraoral scanner or scan a physical impression or a poured model with a desktop 3D scanner.

2. Design
2.1 Design the Custom Impression Tray
There are several dental software options for digitally designing custom impression trays. In this application guide, we will be outlining parameters for 3Shape Dental System and ZirkonZahn.Tray.
ZirkonZahn.Tray is a free dental CAD software for designing custom trays that is integrated with PreForm. Download it here for free.
You can also send a digitized impression to a dental CAD provider.


|
General construction requirements |
Recommended values |
|---|---|
|
Minimum wall thickness |
2 mm |
|
Minimum handle thickness |
3 mm (3Shape and ZirkonZahn.Tray handles meet these requirements) |
|
Retention holes |
3 mm in diameter for heavy body impression materials like 3M™ Impregum™ or similar |
2.2 Export the STL File
Once the case has been designed to specification, manufacturing can begin. You need an STL or OBJ file, which is the standard for most dental CAD software. Locate the file and open it in PreForm.
3. Print
Note:
Use PreForm version 3.6.1 or higher and firmware 1.7.3 or higher.
3.1 Import the File(s)
Use the File menu to locate your file(s), then click Open. Alternatively, you can drag and drop files into PreForm.
Note:
If you are new to PreForm, please refer to this playlist on our YouTube channel.
3.2 Material Selection
Select Custom Tray (1) in the job settings.

3.3 Orientation
Always position the intaglio surface away from the build plate.
To rotate a tray, click on the part and click and drag the sphere.
Trays can be positioned horizontally or nearly vertical to the build plate, depending on the quantity of parts being printed.
Tip: Orient parts so that the intaglio surface needs as few support structures as possible.

3.4 Generate Supports
3.4.1 Automatic Support Generation
Click the Support (1) button on the left side of PreForm and click the Auto Generate Selected (2) or Auto Generate All button.

If a support point is not in an ideal location, it can be moved after automatic generation by clicking the Manual Placement button in the Supports menu.
PreForm will indicate in red which areas might require additional support.
Confirm in the right menu of PreForm that Print Validation components all have green check marks.

3.5 Transfer the Job to the Printer
Send the job to the printer by clicking the orange bar on the bottom right, Upload to Queue (3) or Print Now.

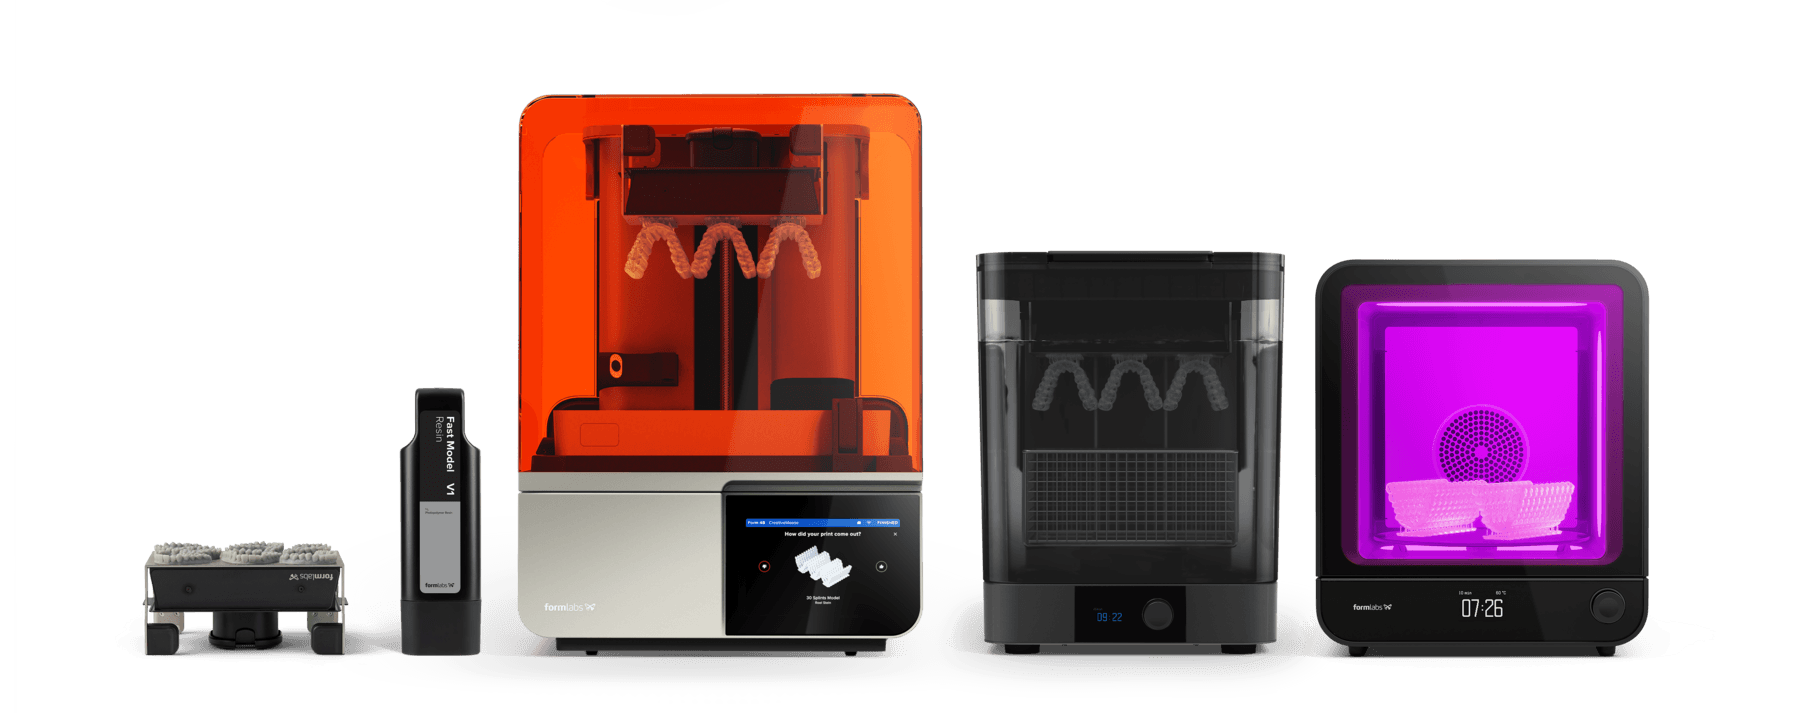
3.6 Set up the Printer
Insert the appropriate resin tank, Custom Tray Resin cartridge, and a build platform into the printer.
ATTENTION:
For full compliance and biocompatibility, Custom Tray Resin requires a dedicated Build Platform, and a dedicated Finish Kit or Form Wash, which should not be used with other Formlabs resins.
3.7 Print
Begin printing by selecting the print job from the printer's print menu. Follow any prompts or dialogs shown on the printer screen. The printer will automatically complete the print.
4. Post-Processing
Always use gloves when handling uncured resin and parts.
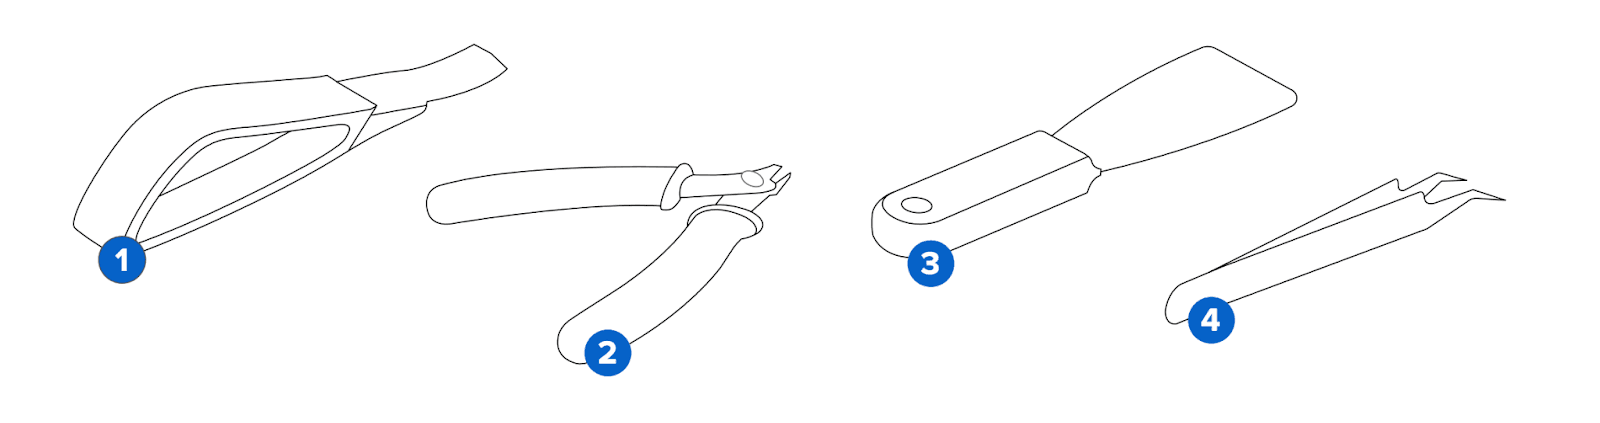
4.1 Part Removal
Printed parts can be removed from the build platform prior to or after washing. If using the Flex Build Platform, you can easily pop off the parts with no extra tools. When using a standard build platform, use an appropriate tool like a spatula to detach the parts (1)(3)
4.2 Washing
Precautions:
When washing the printed part with solvent, it should be in a properly ventilated environment with protective masks and gloves.
Expired or unused Custom Tray Resin shall be disposed of in accordance with local regulations.
IPA shall be disposed of in accordance with local regulations.
Place printed parts in a Form Wash or Form Wash L filled with isopropyl alcohol (IPA, ≥99%) and wash for the time established in the Manufacturing Guide.
Make sure the parts are fully submerged in IPA when washing.
Exceeding wash duration may affect dimensional accuracy, biocompatibility, and performance of printed parts over time.

4.3 Drying
Leave parts to air dry completely (at least 30 minutes). You can use compressed air to blow IPA away from the custom tray surfaces. Inspect parts closely to ensure all custom trays are fully washed with no particles or uncured resin present on the surfaces before proceeding to subsequent steps. If needed, repeat wash with fresh ≥99% IPA until clean.
If printed parts are still on the build platform, remove the parts using the removal tool as instructed in Section 4.1 Part Removal.

4.4 Post Curing
Post-cure the parts in a Form Cure, Form Cure L, or Fast Cure using settings established in the Manufacturing Guide.

4.5 Support Removal
Remove supports using a cutting disk and handpiece, or other part removal tool.
Though ripping supports from a part may be quicker, it can damage the tray or leave divots. Therefore, we recommend individually cutting supports.

Inspect the custom tray. Discard and reprint the part if any cracks are detected.

4.6 Finishing and Polishing
If any rough marks are left on the surface of the 3D printed tray after support removal, smooth down the support surfaces with a wheel or carbide rotary and handpiece to improve patient comfort.


Example of a finished part.
Optional: Once the surface is finished to satisfaction, you can polish and smooth the outside of the tray.

5. Cleaning and Disinfecting
5.1 Cleaning the Parts
Fully post-processed parts can be cleaned using a dedicated soft toothbrush with neutral soap and room temperature water.
After cleaning, always inspect parts for any cracks.
Discard the part if any damage or cracks are detected.

5.2 Disinfection
The finished custom tray may be cleaned and disinfected according to facility protocols.
A tested method of disinfection includes soaking the finished part in fresh, 70% IPA for five minutes.
After disinfection, inspect the part for cracks to ensure the integrity of the impression tray.
Note:
Do not leave the part in the alcohol solution for longer than five minutes.
CAUTION:
IPA disinfection is not compatible with polyether impression materials. Secondary disinfection methods must be verified for use by the manufacturer.


6. Formlabs Printer Compatibility for Custom Tray Resin
7. Supporting Documents
Additional Resources
Explore Formlabs dental resources for in-depth guides. step-by-step tutorials, white papers, webinars, and more.
Dentistry Made Easier
Form 4B is a blazing fast dental 3D printer that offers the most diverse materials library for dentistry and orthodontics. Create high-quality dental models and biocompatible appliances fast, with easy workflows, leading reliability, and stunning part quality using the Form 4B ecosystem.